195 | Pinning and Depinning Common Connectors
Summary
There are an awful lot of connectors you deal with in the automotive world. In this webinar we'll go through some of the most common types you'll find in the aftermarket, and a couple from the OEM world as well to show the common points to look for when working with them.
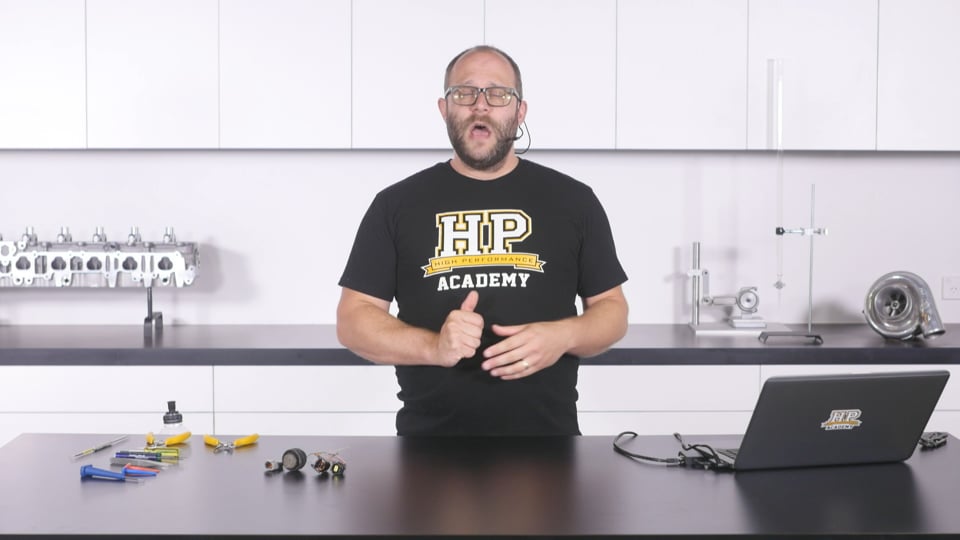
| 00:00 | - Hey it's Zac from High Performance Academy here, welcome along to today's member's webinar where we're gonna be going through pinning and depinning some common connector applications. |
| 00:10 | So it's really really common when you're dealing with automotive wiring, particularly in the modified street car realm that you're going to be depinning connectors especially. |
| 00:19 | You might be wanting to reuse those connector bodies if they're still nice and serviceable or even just to make a quick repair, it can make things a lot easier if you can depin a connector, get a bit of heat shrink down that bit of wire and then repin it into place. |
| 00:34 | Got a couple of applications we'll go through here today. |
| 00:36 | First OEM application we're gonna look at will be an econoseal connector which is pretty commonly found on a lot of your Japanese vehicles from the mid '90s. |
| 00:46 | Got a Bosch junior timer or mini timer connector, really commonly used on actually probably the oldest style of injector now but you do still see them on a lot of cars. |
| 00:58 | I've chosen those two because they're a little bit different to one another in their retention method so we'll go through each of those. |
| 01:03 | The ubiquitous Deutsch DTM connector, couldn't do pinning and depinning without doing one of these because they are just such a fantastic connector, so we'll go through those as well. |
| 01:15 | And a Deutsch Autosport connector as well so this is getting towards the upper end of the connector range. |
| 01:23 | These are pretty pricey and there are some particular things you need to be aware of when you are working with them to make sure that you don't damage them. |
| 01:31 | So we'll go through those as well. |
| 01:35 | First thing I want to talk about are the tools that we're going to use for pinning and depinning. |
| 01:40 | I've got probably not even a fifth of my selection out here on the bench. |
| 01:45 | Just yeah you can get a manufacturer specified pinning and depinning tool, most likely for any connector that you're going to be dealing with. |
| 01:56 | Sometimes it is a real help to have that particular manufacturer specified tool. |
| 02:01 | Most of the time however it's not really any help whatsoever and there is one tool here that I find myself reaching for 99% of the time and it's just absolutely fantastic for getting the job done. |
| 02:15 | We will have a quick look at them though so starting off I've got three tools here that we'll just have a quick look at under the overhead shot. |
| 02:22 | So these are for use with your Deutsch DT and DTM range. |
| 02:28 | So the tool, this tool here has a very specific shaped end here, it's actually just a wee hook and that is for hooking out the insert locks in those Deutsch DT connectors in particular. |
| 02:40 | They can be a little bit tricky to get out and this tool makes it really easy. |
| 02:43 | There is another version of this tool as well, I believe its part number is a DT1. |
| 02:48 | And that has a hook on one end and actually a pry or it looks more like a flat blade screwdriver end on the other end, that is really useful for depinning those connectors which we will go through when we're actually looking at that connector body. |
| 03:05 | The other two tools I have here are insertion and removal tools. |
| 03:09 | These are somewhat of a help if you're dealing with a particularly stubborn connector. |
| 03:16 | The way these work is that we're going to insert this over the wire, down into the connector body and it's gonna help us release that locking tab. |
| 03:23 | I would probably say though that these are absolutely not necessary. |
| 03:27 | They sit in my tool box 99% of the time and don't get pulled out. |
| 03:32 | Really it's just that one in a couple of 100 connector that's being a bit stubborn that you might need them for. |
| 03:38 | We'll be using my general purpose tool most of the time. |
| 03:42 | Other good tools I've got here to go through are a couple of general purpose Delphi depinning tools so I'll get those on there so you can have a quick look at the part numbers. |
| 03:53 | They're basically the same except the blue one here has a bit of a broader tip and the green on here is a wee bit finer. |
| 03:59 | These are a really good tool for getting down and releasing the locking tabs on connectors that are holding the terminals in place. |
| 04:06 | Them being flat means you don't typically end up damaging those locking tabs at all. |
| 04:12 | However once again, I will more often than not be pulling out my general purpose tool as opposed to these. |
| 04:22 | There are a couple of OEM applications where these can be a real help and the Delphi Metri-Pack connectors they're actually made for can be really helpful to use those as well. |
| 04:34 | Other tools that you might want, so this here is, looks like a screwdriver, I'll try and show the end there, it's actually a hollow tube and for any of you that have dealt with a Metri-Pack connector that has the round contacts in it, there's a lot of Molex connectors in this style as well, so this is a connector pin that actually has metal tabs that flick out that grab onto the connector body, this is, in that case, pretty much an essential tool because you can fit this over the pin of that connector, push those locking tabs back in and withdraw the pin from the back of the connector. |
| 05:12 | So this is a good one to get, unfortunately there's not a part number on it, I sourced this from milspecwiring.com but there probably are many other resellers or in fact any small piece of tube around about that size is gonna do the job for you. |
| 05:27 | Also a good set of nice sharp fine point tweezers. |
| 05:31 | Don't lend them to anybody 'cause they are guaranteed to come back with the tips bent. |
| 05:36 | So those are just for you. |
| 05:39 | And a good pair of offset tip flat jaw needle nose pliers. |
| 05:45 | So these are electronics assembly pliers, I purchased them from a Jaycar outlet here in New Zealand. |
| 05:52 | Not sure what the equivalent to that would be for anyone else watching in America or the UK but any electronics hobbyist supplier should have a kit that's got a few different styles of pliers like these. |
| 06:01 | Actually even your Ally Express or Ali Baba are going to have kits that you can buy as well and they're almost guaranteed to be exactly the same product we've got here. |
| 06:12 | The flat jaws are really important, you don't want serrated jaws although they can give you a little bit more purchase, they do tend to damage anything that you're holding onto a little bit more easily. |
| 06:23 | And that offset tip is really really useful for keeping your hand and the plier bodies out of the way while you're manipulating things. |
| 06:32 | It seems like it'd be a really small detail that isn't actually important but absolutely I would recommend getting a set of those offset tip pliers, really really useful. |
| 06:41 | In fact for any of you that have watched the wiring course, you're probably seen those an awful lot because I do use them all over the show. |
| 06:49 | Right we'll get into our first connector body here which is a AMP Econoseal connector. |
| 06:57 | In particular this one is from an FDRX7, it connects to the boost and wastegate control solenoids. |
| 07:05 | It is a really really common connector though used on a lot of Japanese vehicles from the '90s and 2000s and it's a good demonstration of the pretty common things you're looking for if you're dealing with a new OEM connector body style that you haven't seen before. |
| 07:21 | So this is a style of connector that has a wire seal that is crimped onto the wire with the terminal pin and it is pinned from the back. |
| 07:32 | On the front here what you're looking for when you're dealing with a new connector is often you're looking for two different colours of plastic. |
| 07:40 | If it is a connector body that has no extra locking devices, it's probably only going to be made out of the one piece of plastic and there won't be any changes of colour. |
| 07:52 | That's not a hard and fast rule and we will talk about a couple of connector applications after we've gone through this one where that's not going to be the case. |
| 07:58 | But if you see two different coloured pieces of plastic like this it's a really good indication that this is a two piece connector and that piece in the middle there is going to be a locking tab that you're never going to be able to depin the connector with that in place. |
| 08:16 | A little bit of an inspection on the front here and we can see that we've got our points where the connector pins actually make contact in this connector body. |
| 08:28 | And there's a couple of other holes down here, not really too sure at initial glance on what they would be for, they could just be where it's been ejected from the plastic mould or they might have an actual purpose. |
| 08:40 | Often it's not until you've actually taken a connector apart that the purpose of any of those holes is actually going to be completely apparent. |
| 08:48 | Now it has just occurred to me that when I was talking about my depinning tools, I mentioned my general purpose tool a lot and then I never actually showed it so I'll just pop back and I'll show you what that tool is. |
| 08:59 | It is simply a seal pick. |
| 09:02 | The things you're looking for here on a really good seal pick, nice sharp point, good and cheap and you want it to have a straight point on one end, you don't want that to be bent or curved around and on the other end here a bit of a hook as that can be really useful for getting those DT locking flanges out or in fact a whole lot of usages. |
| 09:24 | So with my entire range of depinning and pinning tools that I have, I find I reach for this one 99% of the time, it's always in my hand when I'm undertaking that task. |
| 09:36 | And you'll see why when we're going through these connector bodies. |
| 09:41 | So back to our Econoseal connector body here, we're going to have to get this locking tab flange out of the front here. |
| 09:47 | And from initial inspection it's not going to be completely certain how you're going to do that. |
| 09:54 | I can tell you that in this instance, and in fact is the instance with the majority of connector body styles like this, it is a case of simply prying on the side of it there and you can, it will release quite easily and pop out of place just like that. |
| 10:10 | A wee bit of experimentation and poking around with your seal pick like this will let you get those locking flanges out of there but it's going to be completely critical that you get that out before you head any further down the depinning path as you're really not gonna be able to get anything done with that in place. |
| 10:29 | What can quite often happen is the first one you're depinning, you might actually break. |
| 10:34 | And in that breakage you will be, you'll figure out how they actually come apart and then you'll be able to have that bit of knowledge and not break them in the future. |
| 10:44 | Once that is out of place, this is a connector body style that uses a clip that's integrated into the connector body, a sprung loaded tab that's actually pushing down on a part of our pin and keeping it in place there. |
| 11:01 | So we're going to have to pry that locking flange up and that is going to release our pin which we're then going to be able to withdraw from the back of the connector. |
| 11:09 | Now unfortunately on the black connector body here it's probably a little bit tricky to show you. |
| 11:15 | You might be able to see in the non populated spot here, the actual tab that I'm talking about, it is just down here and it's sprung loaded there, and what it's going to be doing is actually interfacing on the back of this pin and keeping it in place. |
| 11:29 | So we're gonna have to pull that up to get it out of the way. |
| 11:33 | General purpose tool, really great for this, nice sharp point on it, so I'm gonna be able to get that down in there and of course this is always gonna work first time on camera, pry that locking tab up out of the way. |
| 11:47 | You're probably not going to be able to see when you're doing this, down in there so it is going to be going more by feel. |
| 11:53 | And we can pry that up and get that released and withdraw it from the back of the connector. |
| 12:04 | So having another quick look at that connector body, might be easier to see now down in there are those locking tab flanges. |
| 12:11 | So all we did was get in there on top of the pin, pry that out of the way, and we could pull the pin out of the back. |
| 12:19 | Often having a small bench vice on hand could be really handy for this task, 'cause if you can mount the connector body in there securely, you can actually put a bit of tension on the back of the pin while you're prying that and get everything to release. |
| 12:37 | I say tension, I actually mean pressure. |
| 12:39 | What you want to be doing when you are prying that tab is actually pushing the pin as far forward into the connector body as you can. |
| 12:46 | Then you pry that tab back and withdraw it from the back of the connector body there. |
| 12:52 | For repinning any connector body like this it is exactly the same as the reverse of the process. |
| 12:59 | We've got our nicely crimped terminal here with our integrated wire seal and the wire's just going to just pop in the back of the connector and we're gonna hear it click into place. |
| 13:10 | Looking at this pin here, this is the actual area that that locking tab flange in that connector body was interfacing with. |
| 13:19 | So if you were repinning this it would pay to give that a little bit of a look, make sure it hasn't been bent down when you were prying anything in there. |
| 13:27 | So for repinning this, it is very much the same as any other pinning task, we're going to get that into place and it is just going to insert into the back of that and we're gonna hear that nice click, hopefully that picked up on the microphone and really nice and securely held in there. |
| 13:45 | We'd probably be pinning both sides and then installing our locking flange in the front here which simply pops in there and then gets clicked into place. |
| 13:55 | And that is going to be a completed connector assembly there, that's going to be nice and reliable. |
| 14:04 | Really common connector body to reuse like this. |
| 14:07 | If you are reusing them, the things you're looking for is that the plastic's still nice and pliable, it hasn't gone brittle or hard at all. |
| 14:14 | The actual connector body locking flange has still got a bit of spring to it, and if you're wanting to clean these, a really good way is with a jewellery ultrasonic cleaner, a 50/50 mix of boiling water and Simple Green concentrate and about half an hour in there normally brings them up really nice, gets rid of all the grit and grime from right down in the recesses in there as well in behind the seals and does a really nice job. |
| 14:42 | Next connector body we're going to have a look at here, is your Bosch mini timer 2.0 Really common connector body, once again from the '90s to 2000s. |
| 14:53 | Probably been a little bit phased out now by the introduction of the US car connector that's probably more prevalent on your EV style Bosch injectors or your Injector Dynamics injectors as well. |
| 15:07 | However a lot of the information that we're going through here today actually applies to those connector bodies too so you won't be missing out there. |
| 15:14 | So the way these connector bodies work, it's a crimped pin and seal assembly, once again much like the one we've just gone through. |
| 15:22 | But instead of there being a locking tab that's part of the connector body, it's actually part of the connector pin itself. |
| 15:31 | The connector pin has two sprung loaded metal tabs that are out at an angle and as you insert that pin into the connector, they squeeze up, and then once they get past a certain point, they spring out again, and that's what actually holds the connector pin in place. |
| 15:47 | That does make this connector body style actually a wee bit trickier to depin as you need to bend those tabs back to actually release that pin. |
| 15:57 | And it can be a bit tricky to do. |
| 16:00 | I want to show you that it is possible to do with a general purpose tool like this. |
| 16:05 | So for our Bosch style connector here, it's actually going to be these holes down here we're going to insert our tool into and that's going to bend those pins back in and let us withdraw the pin from the back of the connector. |
| 16:20 | For something more like a Metri-Pack or a Molex that has a round pin but still uses locking tabs that are part of the pin body, we did go through our depinning tool there that you can insert over the length of that pin to pull those back in. |
| 16:36 | There is also a specific tool you can get for these Bosch connectors that actually pops down both of these release holes at once and I do understand they make the job a wee bit easier. |
| 16:48 | I actually don't own one, I have been meaning to buy one but I just haven't quite gotten around to it so I'm still getting by with my old general purpose pick here. |
| 16:59 | But it is totally possible to still do the job and sometimes you do just need to work with the tools that you've got on hand, it is the nature of the beast. |
| 17:07 | So we're going to get this pick inserted down here and I'm just going to give a bit of a tweak and just release that locking tab and gonna just pop down the other side there as well, and can sort of hear that click into place and I've got a wee bit of tension on the back of this that's helping me pull that, just gonna do the other side again and I think that has actually released now. |
| 17:31 | So with that released, sometimes it does just release from the pressure of you popping down on the front there, we can simply pull that out the back and have a quick look at the pin actually and I'll show you those locking flanges that we were talking about. |
| 17:45 | So they're gonna be pretty tricky to see at the moment because I've bent them back down to release them from our connector body. |
| 17:52 | When we're repinning this we are gonna have to do the reverse of that process, so we're actually gonna have to bend them back up. |
| 17:58 | I wouldn't recommend doing this procedure too many times as it is totally possible that you will actually weaken these and you don't want them to fracture and give you a possible dodgy connection in the future. |
| 18:10 | But absolutely a couple of times is not gonna cause you any issues. |
| 18:14 | So we can bend that one back up on that side and hopefully it's gonna show there against the black background of our bench that we've got that flange there. |
| 18:23 | And that is what is going to ping out once we've inserted it into our connector body and hold it in place. |
| 18:28 | I'm just gonna do the other side quickly and get this ready for reinsertion. |
| 18:35 | Once again pin body is an open barrel crimp style with our integrated wire seal, something pretty common you're going to see on OEM electronic connectors. |
| 18:48 | Installation is absolutely the reverse of the procedure. |
| 18:51 | So we've gone through and bent those tabs out and then we are just going to pin this in from the back here. |
| 18:57 | You need to be a little bit conscious of the orientation, particular with these mini timer connectors as if you look at the front of them, it might actually seem logical at first glance to have our wiring around this way, hopefully that's showing on the overhead shot there because you've got this vertical line here and it might seem like our pin would also want to be around that way however that's not the case, it is going to want to be around the other way. |
| 19:30 | So when I'm pinning these I have a bit of a standard that I follow which is just keeping the crimped portion here towards the inside of the connector body. |
| 19:39 | Often it can make the whole wiring job a little bit tidier as these wires are then gonna be closer together when they head off down the wiring harness. |
| 19:47 | So we'll get that pinned in the back of our connector body there and hopefully you'll hear that nice click again, like so. |
| 19:54 | So those tabs have popped out, locking that in place, we've got our wire seal on the back there. |
| 20:00 | And that's gonna be a really good nice reliable connector body. |
| 20:04 | Common job that you see a lot, particularly with these connector styles is actually replacing them on vehicles where they've been in service for a really long time. |
| 20:16 | This was sort of the default injector connector style for many, many years, and particularly all through the '80s, '90s and 2000s almost. |
| 20:26 | So often a lot of these connector bodies are actually now really brittle. |
| 20:30 | The Skyline GT-R is an example you see this an awful lot and it's really common to have to cut the original connector bodies off and move to a new connector body that's still got a little bit of flex to it and a wee bit of integrity. |
| 20:45 | You can buy different styles of these connector bodies. |
| 20:47 | When you're searching for them I really would recommend going for one that's got the spring loaded integrated clip. |
| 20:54 | A lot of them have a clip that you actually install, it's a separate piece and you have to remove that completely from the connector when you're getting it out of the way. |
| 21:03 | These are a lot easier as you can just push down on that with your thumb and pull the connector body off and you're not in danger of losing that clip before you reinstall it onto the connector body when you're reinstalling that into the car. |
| 21:15 | So these are pretty easily available from any of your motorsport connector suppliers. |
| 21:20 | Next connector we'll go onto is probably my favourite series of connector, that is the Deutsch DTM. |
| 21:29 | I really can't say enough good things about them. |
| 21:32 | I've used them in all realms of motorsport right from your absolute weekend warrior, your drift missile hack, all the way up to some really high level professional single seater applications. |
| 21:47 | They do an amazing job, I've seen them factory installed in factory modified race cars by Aston Martin, Lamborghini, and Ferrari. |
| 21:56 | So if they're using them you know they're onto a pretty good thing. |
| 22:00 | Really good connector, super easy to work with, nice and reliable, lots of mating cycles, and a reasonably small form factor in the DTM series as well while still being able to transmit at least five amps of current per pin which is typically more than you're requiring. |
| 22:19 | So this is the first of the sort of aftermarket style of connectors. |
| 22:23 | As I said you are seeing them in a lot of factory applications. |
| 22:26 | They're actually derived I believe from an agricultural standard. |
| 22:30 | I think they were used by CAT and a couple of other big manufacturers of mining and agricultural equipment first, and they've now been adopted for more mainstream use. |
| 22:43 | Pretty sure that's the case with the DT range of connectors which is the next size up from our DTM or DT Mini. |
| 22:48 | But if they're fine in a high vibration extremely abusive environment like that, more than happy to be using them in our motorsport application as well. |
| 23:00 | A couple of differences from our more OEM style connectors, on the back here we've got an integrated neoprene rubber seal. |
| 23:08 | So that's actually integrated into the connector body and it's not part of our pin assembly anymore. |
| 23:13 | Our pin is crimped straight onto the wire, there's no seal involved, and when we pin it from the back, this seal is nice and tightly gripping our rubber here, stopping us from any grime ingress in this direction. |
| 23:27 | On the other end of our connector here, hopefully you're able to see that down there, I'll just try and get it in the light. |
| 23:35 | We've actually got another seal. |
| 23:37 | So that's another rubber neoprene seal that's going to seal on the mating side of this connector and stop the ingress from this side of the connection point as well. |
| 23:49 | Really good thing to be looking for when you are specifying the connector. |
| 23:52 | Any connector that's going to be in the engine bay or externally exposed in the vehicle, so this would be under the chassis, anywhere like that, you're going to be wanting to choose a sealed connector. |
| 24:04 | If you leave a spot for grime to get in there it will, and eventually you will be chasing down a bit of a dodgy connection so you really want to avoid that if possible. |
| 24:13 | Very similar to the first style of OEM connector we looked at, these connectors have a locking tab flange. |
| 24:20 | That is the orange piece down the base of the connector here that's inseted into place. |
| 24:25 | For the DT range of connectors which is the next size up, that locking tab is usually green, and for the DTP which is the next size up again, DT power, it's back to orange again. |
| 24:36 | So that's what you're looking for with those two different colours of plastic in there. |
| 24:41 | Good visual indication that there's likely to be something that you're going to have to remove. |
| 24:46 | So we are going to have to get this locking tab out of here and it's got this nice protrusion on the front here which actually serves two purposes. |
| 24:53 | The first of which is an alignment dowel for when you insert the other half of the mating connector, it'll have a spot that that slides into and that helps keep everything aligned before the pins make contact to make sure that they're going to line up with one another and you're not going to end up bending any pins. |
| 25:12 | So for that reason, you do want to make sure that you keep those locking tabs in pretty good condition. |
| 25:16 | Often if the connector has been assembled and disassembled many times, you find that actually starts getting a wee bit rough and you do want to replace it with a new one. |
| 25:27 | Any connector body like this that you are assembling and disassembling multiple times though you're probably wanting to look at the application that it's being used in, try and come up with a better solution for that. |
| 25:37 | As any of the connector bodies on the market aren't made to be assembled and disassembled over and over again. |
| 25:44 | Absolutely mated and unmated from one another. |
| 25:47 | I think the cycle rating on the DTMs here is at least 500 connections and that's the same on our Autosports. |
| 25:55 | I wouldn't know on the OEM connectors, I'd say it'd be a wee bit less than that, they're not being connected and disconnected that often. |
| 26:02 | So mated and unmated you're probably gonna be OK but if you're assembling and disassembling a connector body, say to get the wiring through a particularly small passage in a vehicle, you might want to be rethinking that application, possibly moving to a smaller connector body or enlarging that passage. |
| 26:19 | Right with that wee off topic rant out of the way we'll get this connector tab flange out of here. |
| 26:25 | So my pliers are going to be perfect for this. |
| 26:28 | Those offset tips are gonna let me get on that while still being able to see what I'm doing. |
| 26:33 | Fair bit of pressure there and we are just gonna be able to pull that out like so. |
| 26:37 | They can be a wee bit tight. |
| 26:39 | Now we mentioned earlier on that a set of flat jaw pliers here is really useful. |
| 26:44 | This is one situation where occasionally you are gonna find you're gonna have to move to a set of serrated jaws to give you a little bit more purchase on that flange to be able to get the friction on it that you need to pull it out of the front of the connector there. |
| 26:59 | If that is the case though, I'd probably end up replacing this flange as it's likely to end up with those serrations on there, might not be something you want. |
| 27:09 | With that out of place we can have a wee look down the face of the connector here so I'll just try and get that in the light so you can see that pin down in there and hopefully it's pretty visible that much like with the first connector style that we looked at, that Econoseal, there's a locking tab flange down in there that is integrated into the connector body itself. |
| 27:33 | And that's actually making a, that's pinged in place holding our pin on a flange on the pin there. |
| 27:42 | So you can't withdraw that pin at the moment because that flange is in place. |
| 27:46 | Now there's two ways to deal with this, the first that we'll go through is probably the less common way. |
| 27:53 | I did mention we were talking about our pinning and depinning tools, that it's not actually often that I'm going to reach for one of these, which is a specific pinning and depinning tool for a DTM connector. |
| 28:03 | I find I use them only in a particularly hard to get to spot or if a connector's been particularly frustrating. |
| 28:11 | The way they work is that we run our wire through the tool here, so this has got a channel you can run the wire through. |
| 28:21 | And then we're going to insert this in the back of the connector here, pushing through that rubber seal, and then as we insert it, I'm just gonna push it all the way in here to get the required amount of pressure on it and then we'll try and show you from the front there, hopefully this will still be in focus. |
| 28:37 | It's actually, I've inserted it so far, that it's pushed our locking tab flange out of the way down in there. |
| 28:45 | So that means I should now be able to withdraw our wire and our tool as one assembly. |
| 28:54 | Which does feel like it's coming quite nicely. |
| 28:57 | There we go. |
| 28:59 | So having a look at how this actually works there. |
| 29:01 | We'll have a quick look at these pins and talk about how they actually work. |
| 29:05 | I will repin this and we'll depin it the other way that's probably gonna be far more common. |
| 29:10 | I'll show you that technique as well. |
| 29:12 | So these crimped pins here are a circular contact, that's really really nice for one specific reason is that there's no particular orientation that you need to have this in when you're inserting it into your connector, just the natural orientation that's going to put the least amount of stress on the wire as it is circular and uniform so it's not gonna matter. |
| 29:32 | And it's just that locking flange in the connector body there, that's making contact with this flange here and stopping that terminal from being able to be withdrawn out the back of the connector. |
| 29:44 | And it's made in such a way that the more pressure you put on the wire to pull this pin out of there, the harder that flange actually locks into the pin, so it's going to be held in place really really nicely. |
| 29:56 | So we'll get that depinning tool out of the way. |
| 29:59 | I will say that that was actually a really good example of using that tool. |
| 30:03 | Often they are a little bit trickier to use than that. |
| 30:06 | You need to insert them and pull them out a couple of times to really get that flange out of the way and they can be a wee bit tricky to use. |
| 30:15 | Which is why I normally always end up depinning these connectors the other way. |
| 30:23 | I'll just get this pin back in here for the moment, we'll talk about depinning and then I'll talk about the repinning process. |
| 30:29 | Got that in place there. |
| 30:32 | So we've got our locking tab flange down in there and you've probably already guessed, once we've got our orange insert here out of the way, it is just a case of reaching in there with your tool, there's heaps of room to work and you can put a wee bit of pressure pushing forward on that pin, pry that out of the way, so I'll try and do this, if I need to look over it, I'll just try to make sure I don't get my head in the shot here. |
| 30:56 | Can pry that out of the way. |
| 31:01 | This is quite tricky to do on camera, and release it from that flange, and withdraw it from the back of the connector body again. |
| 31:10 | Often when you're doing this that rubber seal is going to want to come out of the back of the connector body, not a problem if it does, just pull it off your wiring, and reinsert it in there, maybe a good opportunity to give it a bit of a clean as well. |
| 31:23 | Repinning these connectors is 99% of the time a case of simply inserting the pin from the back, nice and straight, getting it through that seal there, it will push through quite nice and easily, and with everything lined up, it is just going to insert and you'll hear it click into place. |
| 31:42 | For a particularly tricky to get to spot or if you just can't get this pin lined up with the correct hole down in here, you can actually use that depinning tool to repin the connector as well. |
| 31:57 | So if we get this in place here, you can see this insertion and removal tool actually butts up to that flange on our pin there and we can then hold that as an assembly and insert it into our connector body. |
| 32:15 | Get that whole thing in place, a quick look from the front to make sure everything's where it should be, which it is, and then holding that wire in place you can withdraw your insertion tool only which is, trying to find a way to do this with my hands. |
| 32:32 | There we go. |
| 32:35 | Get that out of the way. |
| 32:39 | And that locking tab flange has popped back down and is holding that pin in place once again. |
| 32:46 | Most of the time you are simply going to be able to pin them by hand but if you find a situation where that's just really not working for you, one of these tools might be handy. |
| 32:55 | Pretty cheap, there's a bit of a part number on the back here, I'll try and read it out for you, we've got Deutsch 04, So that might help you find them, or the Deutsch DTM catalog actually has them listed in there as well, got a size there for a Deutsch DT and they do do a DTP size too. |
| 33:19 | Last part of pinning this connector body is going to be getting this orange tab back into place. |
| 33:24 | Absolutely the reverse of disassembly, thank you Haynes manuals for that saying, just enough to get you into trouble. |
| 33:34 | Get this into place and you simply push it down and it'll lock into place. |
| 33:41 | That's gonna stop that locking tab flange from being able to move and disengage from the connector pin so that's gonna be locked in there and it's really not going anywhere now. |
| 33:51 | Last connector style that we're going to have a look at is our Deutsch Autosport. |
| 33:54 | Quick talk about some of the similarities to the DTM connector actually, but some of the differences and some of the key things you need to be aware of if you are using these as they cost a pretty penny and you don't want to be breaking them. |
| 34:08 | We're gonna be having the questions and answer session at the end of today's webinar so if you've got any questions on anything we've gone through today or in fact automotive wiring in general, start firing through those now, it'd be a really good time, the guys are gonna collate them into the document that we've got and we'll start popping through those. |
| 34:27 | Actually I should probably just make sure my laptop is in fact on so I can see those when they come through. |
| 34:32 | Right Autosport connector body, a couple of things to talk about these. |
| 34:37 | We'll just have a quick talk about the actual connector bodies first. |
| 34:40 | So when you are specing in Autosport connector to be used on your harness, chances are it's a pretty high end harness. |
| 34:47 | This connector body here is a size 20 shell with a 35 deviation for the pin layout. |
| 34:55 | Which means it's got all size 22 pins here, I'm not sure of the number but I suspect it's 79 off the top of my head. |
| 35:02 | So the way these connectors work is you specify, using the information that you've got on your required number of pins to make a connection and the required amount of current that those pins need to transmit, you can specify a shell size and then a deviation within that shell size for the actual pin layout. |
| 35:21 | So in the size 20 shell exactly would look extremely exactly like this. |
| 35:26 | There'd be different configurations, you'd be able to get one that would have a fewer number of pins but they'd be a larger size, probably a couple of steps, and I believe both Deutsch and Souriau are now making connector styles like this that have mixed pins as well, so pins of different sizes. |
| 35:46 | If you only need a couple to transmit some higher power and then the rest can be your smaller, lower level sensor signals. |
| 35:52 | Should mention I've called this a Deutsch Autosport connector because in this instance this actually is one. |
| 35:57 | But I pulled it off the shelf here and it must be a pretty old one because it's got the old thin ring here and the old style of font. |
| 36:05 | They look a little bit different now but the construction is pretty much the same. |
| 36:08 | There's another company that makes a compatible connector call Souriau. |
| 36:13 | It's their 8STA range. |
| 36:15 | They're just competing with one another but they are basically intermatable for the large majority of the connector styles that they do. |
| 36:22 | It's really common to actually see both Souriau and our Deutsch Autosports used in a harness. |
| 36:29 | Normally it's, which one you get is dictated by which one your supplier could get you in the least amount of time. |
| 36:37 | So first thing we need to be aware of with a connector like this is that they are very expensive and they are very easy to damage. |
| 36:44 | You are absolutely going to have to use the specific tool for both pinning and depinning these connector bodies. |
| 36:52 | And that specific tool I have here. |
| 36:55 | So it is, they are kind of a dinky looking little thing and they are that way for a very specific reason. |
| 37:01 | You'll receive a new one of these with every connector that you buy, they come in different sizes and they are colour coded. |
| 37:08 | So our white and our green here is for a size 22 pin that's taking a size 22 gauge wire there which is correct for this application. |
| 37:17 | You've got orange and red which is for your size 20 pins. |
| 37:20 | I believe it's white and blue for your size 16 pins. |
| 37:25 | But the colour combinations that they come in do tell you which size they are and they are the same for both brands as well. |
| 37:35 | These are made out of plastic and they are reasonably, they're weak when they're used in the wrong way. |
| 37:44 | When they're used in the correct way, they're actually pretty reliable and they last a long time. |
| 37:48 | A question I see asked an awful lot on both social media and our forums, is where can I get a metal version of this pinning tool, I need something more robust. |
| 37:57 | To which the response is, they do exist, but I don't know where to get them because I've never had to and it'd be a really bad idea as well. |
| 38:06 | As soon as you move to a metal tool, you're going to actually be able to put quite a lot more force on things when you're depinning one of these connectors in particular and you're going to end up breaking the really fragile plastic tines that are down in there, so they're a very very similar purpose to a DTM connector, to that locking flange. |
| 38:27 | They're small plastic tines that lock into a flange on the pin. |
| 38:32 | They're located radially around that pin and there's more than one of them and you need them all to be intact for that connector to be, for that connection and that pin retention to be really nice and reliable. |
| 38:44 | If you move to a metal one of these tools, chances are you're going to need to get a little bit rough at some stage, you're going to break those tines, and that connector body is now junk. |
| 38:54 | You're not going to be wanting to use it at all, and in New Zealand dollars, connector body like this is around about $200 so in freedom money, that's probably USD$120 so they're really not cheap. |
| 39:08 | So you don't want to be going down that path. |
| 39:12 | When you're working with them a lot, what you do end up with is a tool box full of these because you can use them multiple times as long as you're careful about how you use them. |
| 39:23 | So we'll go through the depinning process now. |
| 39:26 | First thing to talk about is that this tool actually has two ends, as should be pretty evident, we've got our white end and our green end there. |
| 39:34 | Hopefully it shows up on the camera here that our green end actually has a cut off portion here whereas our white end there is fully enclosed, except for this one single channel, all the way to the end there. |
| 39:50 | So that fully circular end there is for your depinning as it releases all the tines from around the flange on that pin and you can then withdraw the pin. |
| 40:02 | The green end here is for inserting that pin into the connector. |
| 40:05 | It's really important to actually use these when you're inserting the pin as it gives you a good extra amount of rigidity and you can get everything nice and precisely in there. |
| 40:15 | Similar process to what we underwent with the DTM connector when I used the depinning tool there. |
| 40:21 | We insert our wire along that tool in place there and we're going to insert this from the back. |
| 40:30 | This is, a lot of the reason why when you see people using these connectors, if you're using these connectors, chances are you harness is going to be fully sheathed and booted as well. |
| 40:41 | And often before that happens you'll see a shot of the connection, the wires heading into this connector and you'll see a whole lot of little loops in the wires. |
| 40:50 | So they're known as both strain relief and service loops and they actually form both of those purposes, they give us strain relief when we've got our boot on here to our sheathing as all the strain is then passed through the outside of the harness and doesn't go through the wiring, awesome. |
| 41:08 | And they give us our service requirements as well as we can unwind that little loop, give us a wee bit extra length of wire and then it all, well should be if they were done properly, just enough to get this tool onto the wire and in place and let you depin that connection if it needs to be moved or if a repair needs to be made. |
| 41:28 | So to depin this you are simply going to insert this tool from the back of the connector here. |
| 41:34 | If things are getting a little bit tight, and you feel like a little bit of lubrication in there could be helpful, isopropyl alcohol does a really good job and it's also gonna evaporate away cleanly and not leave any residues in there. |
| 41:48 | So we simply want to insert this until we feel it bottom out and that's going to be when it has made, it's butted up to the flange on the pin and it will be releasing those locking tabs. |
| 42:02 | When you get to this point it is completely and utterly critical that you do not rotate this tool. |
| 42:10 | If you do, the split that we used to insert the wiring down there is gonna grab onto those small plastic tines and it's going to break them and once again your connector is junk. |
| 42:20 | So really key point there, do not rotate this tool when you got it inserted down in there. |
| 42:25 | What we're instead going to do is with that in place we're going to put our thumb there and as one we're going to withdraw the tool and the wire. |
| 42:32 | Which of course is just going to be a little bit of a pain. |
| 42:37 | if you find this, if it's being a wee bit tight, withdraw the tool and reinsert it from a different angle, from a different orientation, once again, definitely don't rotate it. |
| 42:49 | There we go, just needed a wee bit of manipulation there. |
| 42:52 | So we can get that pin out of there. |
| 42:54 | So having a look at that, this is what I mean by the tool was butting up to the locking flange on the back of the pin there. |
| 43:01 | As it did that it released the tines down in here and you could withdraw the entire assembly. |
| 43:07 | Really really important to be using the correct size one of these tools for the application. |
| 43:14 | Also when we're talking about correct size, really important with these connectors is that they have been pinned with the correct size and specification of wires. |
| 43:23 | These connectors are made specifically to be used with M22759 wire, as it has a very tight tolerance on its overall finished outside diameter for a given wire gauge which is then out of copper in the actual wire. |
| 43:40 | We need that clarity or clarification on the outside diameter of the wire to make sure that our tool can actually get all the way down here onto our pin and release those locking tabs. |
| 43:53 | Often what you find is that someone's gone and used one of these connectors, done a really nice job of everything but if they haven't used the right wire, if the insulation is a little bit too thick, it'll actually mean when this tool is inserted onto that wire it's expanded out more than it should be and that's going to mean that it's going to pit the flange at the very back of the connector underneath this seal here and you're not gonna be able to get it all the way down and you're not actually going to be able to get that pin out of the connector. |
| 44:22 | It's something you quite often see, I've salvaged quite a few of these connectors from wiring harnesses that have been built with incorrect wire like that and it's a bit, it can be a good way to actually pick them up cheap, if you can find them in that application as people think that they're totally useless but there is a wee bit of a trick that you can do to get yourself out of that jam. |
| 44:45 | It doesn't always work but it's definitely worth a try because if you're in that situation you can't actually make the situation any worse, the connector's useless anyway so if you stuff one of those tines down in there, you're not actually in any worse of a situation. |
| 44:57 | What I would do there is I would cut the wire, the incorrect wire, type of wire that's been used off quite, maybe half an inch, 10 cm, half an inch behind that back of the connector here. |
| 45:11 | Then I would, using my pliers, and maybe even a little bit of heat to soften it up try and withdraw the insulation coating on the wire, off the copper conductor strands and get that insulation out of the back of the connector so you've only got your copper conductor strands protruding. |
| 45:28 | Once you're at that stage, it's going to be quite likely that you will actually be able to get your depinning tool into place and you'll be able to get that assembly out of there. |
| 45:38 | So that'd be a good trick to get you out of that jam. |
| 45:41 | Repinning is very much the reverse of our disassembly, once again common theme. |
| 45:47 | However we're going to use the other side of the tool here. |
| 45:52 | So getting our wire in place, inserted all the way up to that locking tab flange at the back here and it'll probably show up quite nicely with the pin actually in place, you can see there's the wee cut out in the tool here, that's going to let at least one of those tines ping back into place, lock onto the pin and we're going to be able to get this into place and then withdraw our tool. |
| 46:17 | So I'm gonna insert this in the number one spot, this has got a radial pattern on it. |
| 46:22 | When you're working with these connectors you will see they have a lot of different styles or patterns, some of them are numbered, some are done with letters, you'll just get to know the styles. |
| 46:31 | If using these connectors is actually something you're interested in, I would recommend having a quick browse of the PDF catalog from Deutsch on their Autosport range and actually the Souriau 8STA range as well. |
| 46:42 | You'll see a whole bunch of different styles of connectors. |
| 46:45 | Deutsch also had a technical manual on using these connectors, also a really good really good read as well so if you google Deutsch Autosport PDF technical manual I'm sure it'll come up. |
| 46:57 | So we've got that assembly there and we're simply going to pin this into place. |
| 47:02 | And we're gonna hear a wee click like so, that probably didn't come up on the mic 'cause they're pretty quiet with these. |
| 47:08 | We can pull our tool out of the back and that's nice and tightly held in there. |
| 47:14 | The other benefit that these tools give you is when you're working with one of these connectors and you're undertaking your pinning operation, I always, if possible work from the inside outwards for the pinning as it makes things much much easier. |
| 47:29 | However using a tool like this can make it easier to get a pin in the correct place where it needs to be while corralling all of the other wires out of the way. |
| 47:38 | So these are gold, don't throw them away, store as many as you can, you will use them, and what you will find is that you're gonna want to be having a bit of an inspection after you've used one for a while. |
| 47:50 | Often they can fray the end here, they can crack and if you see any damage, anything like that, looking a bit suspect, throw it away and get a new one, you absolutely don't want to be taking any chances with these connectors because yeah they really are pretty pricey. |
| 48:08 | When they're assembled correctly though they are rock solid reliable and a real joy to use as well. |
| 48:14 | The quarter turn quick connect, really easy to plug and unplug. |
| 48:17 | The specific ranges for unplugging that have much harsher knurling on them so you can get them in place while you're wearing pit gloves Really really good product made specifically for our motorsport needs. |
| 48:31 | Awesome so hopefully that's given you a good broad array, a bit of knowledge there on the common connector body and pin styles that you're going to find in both the OEM world and the aftermarket world there. |
| 48:44 | Obviously we can't cover every single application because there are countless applications. |
| 48:52 | So if you had any specific questions and you really can't figure out a particular connector body, post up on the member's forum, some good pictures in there will really help and we'll jump in there and help you out on that one. |
| 49:05 | Pop over to my laptop now and have a quick look at any questions that we might have had come through. |
| 49:14 | Matt Denurt has asked, sorry if I butchered your last name there, when will you guys be coming out with a course or video on the details of concentric twist harness construction? I really enjoyed the practical assembly lesson. |
| 49:26 | Wicked question, so at the beginning of today's webinar I was talking about our professional motorsport wiring harness construction course that we're hoping to have out by the end of the year. |
| 49:36 | I have tried to put the most detailed section I possibly could on building a concentrically twisted harness in there. |
| 49:43 | We go through all of the layer design, all of the math and decisions that drive that, where you want to have your wires, when to use filler wires. |
| 49:51 | So that's the design side of it. |
| 49:54 | We've got another module in that course that then goes through the physical construction process as well. |
| 49:59 | So I'm trying to cover it in as much detail as I possibly can in that course, as we do get asked about it an awful lot. |
| 50:07 | So we're hoping to have that out by the end of the year and we're really hoping it's gonna get that knowledge out there. |
| 50:14 | Dan Jenkins has said mentioning Molex connectors a few times, what are your thoughts on reusing pins after depinning several times, fatigue on pin locks? Really good question there, I did sort of allude to that a little bit with our Bosch mini timer there. |
| 50:28 | Ah yes absolutely those tabs on those pins do fatigue, I'd say if I have depinned and repined one more than three times, I'm probably gonna be looking at replacing that. |
| 50:40 | Also when you are doing your pinning and depinning operation there, try to make it as gently as possible. |
| 50:46 | Often what you'll find is you can release the tangs, get your terminal out, and they'll spring back by themselves. |
| 50:52 | In that instance you're probably gonna be able to be a wee bit safer and undertake that a few more times. |
| 51:00 | Carl Othen has asked, are those wires seals typically on the DT connectors able to withstand the occasional blast from a jet wash at a distance? He asks as he has such connections on his motorcycle, he's found that his local bike wash using jet wash in places he's told them not to pressure wash and he's concerned he'll have to dry out the connectors. |
| 51:18 | I absolutely have used them in marine environments, not anything that's underwater obviously as they're not submersible but I have used them in marine environments where they could get splashed with water, over the bow, jet boats and such and I have found them to be rock solid reliable. |
| 51:34 | I've also used them in engine bays that I've pressure washed and I've never found water ingress in the back of our seal here to be an issue. |
| 51:42 | I suspect in the catalog for these there's probably a size range that these seals will actually work with. |
| 51:51 | What you wanna make sure is that your wire diameter is gonna be within that size range and should be making a pretty good seal in there. |
| 51:58 | Once you get, using TXL 20 gauge wire in the back of these, it is actually pretty tight to get in place, so that will be a really nice seal in there. |
| 52:07 | So I'd say no you're probably gonna be fine with those connector bodies on your bike there. |
| 52:14 | Dan Jenkins has asked, using the DT depinning tool, should the seal be replaced afterwards or does it still seal tight enough to avoid moisture and debris. |
| 52:21 | I have never replaced the seals after using one of these tools. |
| 52:25 | There's no guideline to do so as far as I'm aware in the documentation and those seals are really quite pliable. |
| 52:32 | So you can insert this through the back of the seal and withdraw it and no, it shouldn't be damaging the seal at all so you should be good to go on that one. |
| 52:44 | Fala Khaled has asked talk about crimping tools today, good opportunity, there's a bare minimum we need, talking about Sergeant tools for splices, Delphi connectors need their own crimpers and Pro Wire USA are selling a universal crimper they say would crimp many aftermarket crimps, like on a tight budget. |
| 53:00 | He also tried crimping a 22 gauge wire on a Bullet connector but the wire would easily slide out when crimped with a local crimper, not a good crimp at all. |
| 53:06 | So if you're looking for a one size fits all crimper there's not really gonna be an option, you are gonna need a couple of tools. |
| 53:12 | What we're trying to get out there is that it's not necessary for every application to purchase the complete top end manufacturer specified tool for that application. |
| 53:23 | Because they can be many hundred or even thousands of dollars. |
| 53:28 | You can do a really reliable and professional job with general purpose crimpers. |
| 53:32 | I think I know the tool that Pro Wire USA are actually selling and I do want to get one because it looks like a really good tool. |
| 53:38 | If it is the ratcheting body one that I'm thinking of that has a lot of our W crimp dies along its edge, I think it could be a really good thing so I'm looking forward to trying one of those. |
| 53:48 | My go to's are still my standard, I've actually got them here so I'll just grab them out. |
| 53:57 | Standard red handled multi purpose non cycle controlled tool that we show in the courses for using on a lot of these terminals. |
| 54:08 | Still find then really really good and particularly for crimping those wire seals on as well. |
| 54:13 | When you get to the upper echelons and you're using the dedicated motorsport connectors like this, that is not the case whatsoever, you absolutely need the correct manufacturer specified tool. |
| 54:26 | The Daniels Manufacturing AFM8 is the one to use for this application with the correct positioner in the back to make sure that you get your crimp in the correct location. |
| 54:36 | Yes, expensive but if you are building wiring harnesses to a level where they require these connectors you are going to be able to justify the cost of those tools as well. |
| 54:47 | Now there was a second part to that I just wanted to mention, tried to crimped a 22 gauge wire on a bullet connector but the wire would easily slide out when crimped with a local crimper that you had. |
| 54:56 | What you might find there is that the actual terminal you're using isn't the correct size for accepting a 22 gauge wire, it might have too large of an open barrel so when you get that open barrel into your crimp tool it just can't deform it enough to tightly grip that wire. |
| 55:10 | What you can do in that case is actually double the strip length on your wire, fold it over and that's going to give you a little bit more copper in there, to get that larger open barrel to actually crimp down onto. |
| 55:23 | If you are doing that however you need to be absolutely certain that you've got good strain relief where those copper conductor strands end and the insulation begins again as it will become a bit of a point of failure as chances are that terminal was actually set up for a slightly larger wire and you might need to be a little bit rougher with it when depinning or pinning it. |
| 55:45 | So that's a good one to watch out for there. |
| 55:47 | But absolutely a valid tactic to fold the wire over there to get you the right amount of copper in that crimp join to get it nice and reliable. |
| 55:57 | Des Rose has asked, where do I get that pin remover thingy? So we've got a few pin remover things here. |
| 56:02 | If we were talking about the Deutsch ones, I picked these up from a local auto electronics store here in New Zealand, Canterbury Auto Electrics it was. |
| 56:11 | They are pretty ubiquitously available. |
| 56:13 | Any of the wiring stores should have them, if you just do a quick google for Deutsch DT pinning or depinning tool you will find them pop up. |
| 56:24 | Fala Khaled has asked are the Deutsch connectors from Deutschland? Yes they are, they are absolutely German made. |
| 56:32 | And that's actually a good point and why you want to make sure that you are buying the genuine connectors as well. |
| 56:37 | So it's not just the name of them, the genuine ones are made to a much higher quality. |
| 56:43 | I suspect the manufacturing of them is probably still overseas however they probably go through a tighter quality control procedure probably in Germany somewhere so you do wanna make sure you're purchasing the genuine ones of those. |
| 56:56 | But yes German company and thus the name. |
| 57:01 | Matt Dernud has asked, when using main connectors and adding strain relief loops, do they need to be staggered to prevent a big bulge after the plug, or is there a specific way to do it? Yes you do stagger them. |
| 57:12 | The way I like to do it is actually stagger, work from the inside outwards as we were talking about and actually have my inside service loops further back and I'll move forwards with my service loops as I get to each new layer. |
| 57:30 | I find that's easier to do as with the service loops you normally have them facing inwards into all the intacies in between the wires and that's easier to do the larger you get moving forwards. |
| 57:44 | Also gives it the nice conical shape that's easy to wrap tape around and nicer for booting underneath as well. |
| 57:53 | What was the name of the Deutsch Motorsports website again for the connectors? So if you're looking to purchase those connectors, there's many many websites you're going to be able to get them from depending on where you are. |
| 58:04 | UK I'd be looking to IS Motorsports, in the US probably milspecwiring.com or rayspec.com In New Zealand here I deal with Motorsports Electronics New Zealand so it's msel.co.nz I haven't had to source any out of Australia so I wouldn't be aware of a supplier over there. |
| 58:23 | I would say that the Souriau equivalent of these connectors is available from RS Electronics too. |
| 58:28 | So if you're having an issue with supply I've actually found RS Electronics to be a good place to get those from. |
| 58:36 | Max Ryan has asked, best place to source harness materials in Aus? Just alluded to that, I probably can't help you out with that one sorry. |
| 58:43 | I haven't had to source any wire harness materials out of Australia yet. |
| 58:48 | I would say that I know Richard Moss up in Motorsport Electronics in Auckland here in New Zealand is a great guy to deal with and chances are shipping to Australia isn't gonna be super expensive. |
| 59:00 | So maybe hit him up, that's www.msel.co.nz And they've got a lot on their website, I find things are really nicely priced as well. |
| 59:11 | I'm not plugging them because we have any affiliate deal or kick backs or anything with them, I've actually just found a really, found them a really good shop to deal with. |
| 59:20 | They've been able to get me stuff on special order at a pretty quick clip as well so that's been really nice. |
| 59:28 | Rightio that has brought us to the end of the questions today. |
| 59:30 | Thanks heaps for joining in guys, hope it was an informative webinar about something that we do get an awful lot of questions about which is pinning and depinning your common connector bodies. |
| 59:41 | And bit of background on some of the connector bodies as well. |
| 59:44 | So hopefully that was good and informative and we didn't geek out too much once again. |
| 59:50 | So thanks heaps for watching guys, really good to see you along, and I hope to see you on the next one, cheers. |
| 59:57 | If you are joining us on Youtube or Facebook today, thanks heaps for coming along and this is just a sample of the webinar content that we put out every week for our HPA members. |
| 01:00:12 | We have a back catalog of approaching 200 webinars now. |
| 01:00:16 | All on a different topic covering engine tuning, performance engine building, and motorsport wiring as well. |
| 01:00:24 | They're all about an hour long with that question and answer session at the end and it is a goldmine of information. |
| 01:00:29 | I still find myself watching the back catalog from even before I became a member of the HPA team. |
| 01:00:36 | So if you want to pop along to the High Performance Academy website, that's www.hpacademy.com you can sign up to be a member and get access to those webinars. |
| 01:00:47 | We've got our courses on there as well, have a browse through the catalog there and there might be a particular course on an aspect of the performance automotive or motorsport realm that takes your fancy and you can take that course too. |
| 01:01:01 | Cheers guys, thanks heaps for watching, and I really hope to catch you on the next one. |


