131 | Tuning Open Loop Boost Control - Link G4+
Summary
Closed loop boost control can give excellent results when correctly tuned, however it can be tricky to get perfect results and it does require a thorough knowledge of PID tuning. Correctly set up, open loop boost control can give results that are almost as good as a well tuned closed loop system with a minimal amount of difficulty. For this webinar we will be using a Link G4+ fitted to a VW Corrado.
| 00:00 | It's Andre from High Performance Academy. |
| 00:02 | Thanks for joining us for this webinar. |
| 00:04 | Where we're going to be investigating some of the techniques we can use for boost control tuning using the Link G4+ range of ECUs. |
| 00:12 | In fact, this is really applicable to all of the Link range of ECUs. |
| 00:18 | Now the technique that we're going to be looking at is an open loop tuning technique. |
| 00:24 | And what this means is that in an open loop tuning technique the ECU is not actually looking at the output in this case, we're talking about boost control so of course the output is boost pressure. |
| 00:36 | So the ECU isn't technically looking at the boost pressure and comparing that to our desired target. |
| 00:45 | What it's doing is just out-putting a duty cycle to a boost control solenoid and essentially blindly ignoring what the current boost is. |
| 00:54 | The difference in comparison to close loop boost control in closed loop boost control the ECU is monitoring the boost pressure. |
| 01:03 | It's comparing it to our desired boost pressure and then it's applying a PID control algorithm in order to make corrections to the wastegate duty cycle in order to raise the boost if we're below our target or reduce the boost if we're above our target. |
| 01:21 | Now properly tuned, the closed loop control technique can offer very, very accurate control. |
| 01:28 | And this obviously raises the question why am I presenting here a webinar on open loop boost control tuning. |
| 01:36 | And this gets a little bit complex. |
| 01:39 | First of all, even across the board with all different ECUs the closed loop control tuning strategy can be quite complex, quite time consuming, and quite tricky to get really, really accurate and stable results. |
| 01:56 | It does require an understanding of PID control algorithms and how to adjust the individual proportional, integral, and directive gains in order to get stable and accurate control. |
| 02:11 | Now for those of you who do want to learn more about this and also more about what I'm going to talk about with our open loop tuning, this is all included and discussed in detail in our boost control tuning course which is available in the courses section of our website. |
| 02:27 | So if you do want to learn more please check out that course. |
| 02:32 | Okay, so essentially what I'm getting at here is even with a very capable ECU getting good accurate closed loop boost control still does take a little bit of work. |
| 02:44 | The problem I've found over my years in the industry is that the boost control strategy that Link are currently employing does not give us the ability to get really accurate control when we're using their closed loop strategy. |
| 02:59 | What I've found, and I've found this through both High Performance Academy here where we've been making courses and running webinars as well as in my past business where I was tuning cars for a living. |
| 03:10 | What we find is that we've got the car on the dyno and we set up the closed loop boost control we can get absolutely pinpoint accurate boost control. |
| 03:19 | You can run a ruler through the line that we get on the data logger or on the dyno. |
| 03:23 | It is absolutely perfect and it's really hard to fault. |
| 03:26 | Now a lot of tuners will call their job done there and send the car out the workshop with little regard to what goes on once it leaves. |
| 03:35 | I'm pretty fussy when it comes to tuning. |
| 03:38 | And a lot of this also came from a point in my career where I was tuning a lot of cars, I say a lot of cars, a few cars that were running in a circuit race class here in New Zealand called SS-2000, where the cars that were turbo-charged ran a strict boost limit. |
| 03:55 | So initially this was 16 PSI, it was later raised to 18 PSI. |
| 04:00 | And the cars were all fitted with a little logger module that basically tripped if you went over that boost target. |
| 04:07 | So understandably for those cars it was essential to have really accurate control. |
| 04:13 | We wanted to run as close to that boost target or boost limit as we could, but it was absolutely imperative that we never went over it. |
| 04:20 | So this was sort of my introduction to the way I developed my boost control tuning. |
| 04:27 | I'm very, very fussy about the targets that I want to achieve in particular in those sorts of situations. |
| 04:34 | We need to be able to control the boosts within perhaps within one of two KPA. |
| 04:38 | And it's really, really fine. |
| 04:40 | So what we found with the Link closed loop boost control strategy is while it did an outstanding job on the dyno once we got it out into the real world and we were driving the car hard on a racetrack or on the road things changed a little bit. |
| 04:54 | And what I found is that we'd often get boost overshoots. |
| 04:59 | Now, again, this really comes down to a personal preference. |
| 05:02 | As I've said, I'm incredibly fussy. |
| 05:03 | I'm trying to target my boost and I really don't want to see that changing by more than a couple of KPA up or down. |
| 05:11 | What I've found is that, despite hours of attempting to get the control perfect out on the road or the racetrack we're constantly seeing boost overshoots in the region of 10-20 KPA and that's really a little excessive in my opinion. |
| 05:29 | This is a situation that we've also dealt with Link. |
| 05:32 | We did some development and testing here at HPA labs on our mainline dyno using Link's own RX7 fitted with the G4+ ECU. |
| 05:41 | And we replicated the same problems that we were seeing and we have supplied data to Link. |
| 05:47 | My understanding at the moment is that Link are working on a solution for this. |
| 05:52 | But I think also it's fair to say in the mainstream, most tuners are also happy with the level of control they're getting. |
| 06:00 | So I guess really what this comes down to is how fussy you're going to be. |
| 06:04 | Whether you're happy to accept that mild over-boost. |
| 06:08 | Obviously in a road-going car we were running relatively mild boosts that may not even be a problem. |
| 06:13 | You may be absolutely fine with that. |
| 06:15 | Of course, the boost control classes that I've just discussed that's a serious issue. |
| 06:19 | Another thing I've spent a lot of time in my career doing is tuning very, very high boost turbo-charged drag cars and when we're running 45 or 50 PSI of boost or more we really don't want to have the boost exceeding our target. |
| 06:34 | So the long story short, I developed an open loop tuning strategy for the Link boost control which is what we're going to discuss here and present here in this webinar. |
| 06:46 | And it's what I tend to refer to as a passive closed loop control system. |
| 06:53 | Because we are going to also implement some means of adjusting the boost pressure, or sorry, adjusting the wastegate duty cycle, if the boost pressure is above or below our target. |
| 07:06 | But we're going to do that in a way that is not going to require a closed loop control algorithm, a PID control algorithm. |
| 07:14 | So I've coined the phrase here, passive closed loop control. |
| 07:19 | Call it what you will, but we're obviously about to find out how it's going to work. |
| 07:26 | Let's go back one step though, and we'll just talk about why we may want to use boost control in the first place. |
| 07:32 | Obviously the cars are fitted with wastegates, our turbo-charges are fitted with wastegates, which control boost and particularly if we're running an external wastegate we may have the option of swapping in different springs to control the boost pressure. |
| 07:47 | And that will get us at least in the ballpark of the boost that we may want to run. |
| 07:53 | However, it doesn't give us very much control over the boost pressure. |
| 07:57 | What we may find is that, with particularly a small, restrictive turbo at higher RPM where the exhaust back pressure increases, we may find that that starts to force the wastegate open. |
| 08:10 | So we end up with our boost pressure tapering away or dropping off at high RPM. |
| 08:16 | Likewise we may find, due to manifold design, that the boost pressure may also creep up or increase as RPM increases. |
| 08:25 | So both of those, with just a pneumatic boost control system where we've got boost pressure hooked up to a wastegate, we have no way of managing that. |
| 08:35 | The other aspect is we may want to have multiple boost setting. |
| 08:39 | So if we, for example, have a 10 PSI spring fitted to our wastegate that gives us pretty close to 10 PSI. |
| 08:47 | Then we also may want to be able to increase the boost pressure. |
| 08:51 | Maybe if the racetrack is dry and we are able to get more traction with a wastegate spring alone and we can't obviously do that from inside the car. |
| 09:01 | It requires a physical change. |
| 09:03 | So electronic control allows us to manipulate the pressure being sent to the wastegate using a solenoid that's controlled by the ECU. |
| 09:12 | The generic solenoid, it's not the only one, but the generic solenoid that seems most common in the after market is the MAC three port solenoid. |
| 09:21 | And what this does is allows us to control very accurately the pressure making it's way through to the wastegate. |
| 09:28 | I'm not gonna get too tied up in this webinar on the boost control plumbing. |
| 09:33 | We're going to assume a level of knowledge there of how the solenoids work, how the wastegate systems work, and the integration with the ECU. |
| 09:42 | So one of the real big advantages with electronic boost control be it open loop or closed loop, is it gives us as tuners the ability to very accurately tailor the torque output of the engine to suit the available traction. |
| 09:57 | So what I mean by this is particularly in a light, two-wheel drive car, that is traction limited, this VW Corrado is probably a pretty good example of that being front-wheel drive. |
| 10:07 | What we may find is that in the lower gears we have limited traction. |
| 10:13 | So what we find is that in order to prevent excessive wheel spin we're going to need to run lower boost pressure in those lower gears. |
| 10:21 | As we move through the gears and we get higher in the road speed we find that our traction does improve so we can then obviously increase the boost and the electronic boost control gives us the ability to do exactly that. |
| 10:33 | Of course we can have a switch that the driver can control for multiple boost settings. |
| 10:39 | The other aspect that we're not going to focus on solely or specifically in this webinar but is, I think, often overlooked, and is really powerful with electronic boost control is the ability to adjust the boost pressure relative to our throttle position. |
| 10:56 | So what we find with a turbo-charged car is that the torque output is very, very nonlinear relative to our throttle position. |
| 11:05 | What I mean by this is it affects the RPM if we're obviously at 100% throttle and we allow the turbo-charger to spool up this is going to give us 100% of our torque. |
| 11:15 | Now if we back off the throttle, however, what we're going to find is that as we close the throttle we need to get down to probably 50 or 60% throttle before we really see any significant drop off in the engine torque at all. |
| 11:29 | So what we find is that half throttle is very, very dramatically different to half engine torque. |
| 11:36 | And again in a light two-wheel drive car that's very traction limited this can present some problems for the driver in terms of being able to manage the torque output of the engine. |
| 11:48 | So by using electronic control to reduce the boost pressure as we reduce the throttle opening, this gives a lot more control to the driver, the torque output is much more in line with our throttle opening and this just allows the driver better control of the engine's power, delivery, and obviously the ability to get traction a little bit easier. |
| 12:15 | Okay, so we've got our boost control systems set up and on this particular car, the VW Corrado we've got an external Tial wastegate and that is fitted, as I mentioned, with the MAC three-point solenoid. |
| 12:30 | So let's just jump let's just jump into our ECU, I'll just go online and we'll just have a quick tour of the aspects that we need to understand here in the G4+. |
| 12:44 | Now, just a note here as well, that this particular car is running flex fuel and we are currently running on 80% ethanol, as you can see. |
| 12:53 | We're not really focusing here on the actual tuning aspects in terms of fuel and ignition we're really going to be focusing solely on our boost control. |
| 13:01 | So if we go into our boost setup this is the first place to start. |
| 13:08 | What we need to do is select our boost mode by default that will be set to off and we can select here our boost control mode to be open loop or closed loop. |
| 13:18 | Obviously here we are selecting open loop which you can see I've got selected. |
| 13:23 | We've got an RPM activation and a manifold absolute pressure activation there. |
| 13:29 | Basically that just prevents the wastegate solenoid from doing anything, the boost control system from doing anything, until we're actually at a point where we are trying to get some boost pressure. |
| 13:41 | So what I've done there is I've set the RPM activation at 1500, obviously pretty low. |
| 13:46 | I've set the manifold pressure activation at 110 KPA, so essentially we need to be producing 10 KPA of boost pressure before the system will actually come into play and become active. |
| 14:01 | Now an important point to note there is that if we set this too high it's going to cause all sorts of control problems. |
| 14:11 | We need to make sure that we've got an activation point so the boost control system can come into play with enough time to actually manage the boost control and prevent any overshoots. |
| 14:23 | So we don't want to set that up too close to our actual boost target. |
| 14:29 | Okay, so once we've got our boost control set up, our basic boost control set up, let's just go through our menu here instead. |
| 14:37 | We've got our boost control tables. |
| 14:40 | In this case I'm running two. |
| 14:42 | This doesn't really matter for our setup, we're just going to be going through the configuration and tuning for an individual boost control table. |
| 14:51 | Once you've done that, of course if you want multiple boost control set points you can achieve that by repeating the process for the remaining boost set points. |
| 15:00 | We'll go through to our wastegate and we've got a few setups here that we need to understand. |
| 15:05 | First of all we've got some trim tables. |
| 15:09 | So these are important to understand. |
| 15:11 | I've had a few situations where these tables had some really crazy numbers in them and if you don't have a look at these make sure that they meet your expectations, then this can really have a big influence on what the boost system's doing and can cause you to chase your tail. |
| 15:28 | So what we'll do is we'll start by just looking at these three trim tables. |
| 15:31 | So first of all we've got our intake air temperature trim. |
| 15:35 | Now I've actually got this set to zero at the moment. |
| 15:37 | It's a 2-D table, pretty straight forward. |
| 15:39 | What we can do is trim our wastegate duty cycle based on our intake air temperature. |
| 15:46 | So this can be used to a degree to help improve the control of our open loop system. |
| 15:52 | Of course we can also use it as a safety precaution, so if our intake air temperature is getting very, very high what we can do is reduce our boost pressure a little bit, reduce our wastegate duty cycle to help drop the boost, reduce the heat load on the inter-cooler and help reduced our inlet air temperature. |
| 16:11 | For our purposes though, I'm leaving that table set to zero. |
| 16:16 | Next we'll come down to our engine coolant temperature, wastegate trim table. |
| 16:20 | So this allows us to adjust, understandably, the wastegate duty cycle based on our current engine coolant temperature. |
| 16:28 | And, again, this is useful for a safety aspect. |
| 16:32 | Obviously once we're actually up and running out on the road or the racetrack we should be running over a reasonably consistent sort of engine temperature. |
| 16:40 | Maybe in the region of 80-90 degrees centigrade. |
| 16:43 | So it's important to make sure that over the range that we're expecting our engine to operate in that the trim is set to zero otherwise it's going to be influencing our control. |
| 16:52 | What we've got here is they're both at very cold temperatures when the engine is below 40 degrees, or 40 degrees centigrade, and below, as well as at high temperatures when it's above 110 degrees centigrade the wastegate duty cycle will be reduced by 100% essentially, reducing the boost control to the wastegate duty cycle, sorry, the wastegate spring pressure or the minimum boost pressure that we can achieve. |
| 17:18 | Again of course, you can do whatever you want with these tables one important aspect to note that is often overlooked is if we're operating, if we're looking at these two points here, between 100 and 110 degrees centigrade. |
| 17:32 | Now what's important to note here is that this table will interpolate. |
| 17:36 | So as soon as we go above 100 degrees centigrade the table, this table, this trim table is actually going to start having some effect. |
| 17:45 | So if we're operating at 105 degrees we're actually going to be pulling 50% duty cycle out of the wastegate. |
| 17:51 | So it may not be a problem, but just important to understand that interpolation does work on this table. |
| 17:59 | Let's move down now to our gear wastegate trim table. |
| 18:03 | Now this is an important additional table for our open loop control. |
| 18:10 | One of the downsides of open loop control is in general we're feeding a fixed duty cycle out to our wastegate solenoid, but the boost pressure that the engine achieves is going to depend on a number of factors and this is one of reasons why boost control is quite complex to set up. |
| 18:26 | In particular, what we're going to find with an open loop control strategy is in the lower gears, where the car tends to accelerate faster, we're essentially putting a little bit less load on the engine. |
| 18:37 | We tend to find that the boost will be lower. |
| 18:41 | As we move into the higher gears, the acceleration rate reduces, the engine is loaded harder. |
| 18:46 | Then we tend to find that the boost will creep up. |
| 18:49 | So what we can do is use our gear trim table to help account for that effect in the lower gears. |
| 18:57 | So generally when I'm doing my tuning here on the dyno I'm going to be using a gear that's relatively close to 1:1 in this case, I'm going to be using fourth gear for our dyno demonstration. |
| 19:08 | So we know that in the higher gears if we're using a realistic ramp rate on our dyno, we should be getting very, very good control close to what we see on the dyno when we're out on the road. |
| 19:18 | However we'll probably find that our boost will be lower in those lower gears, so we can go ahead and use this table to help correct that. |
| 19:26 | Now regardless of whether we're using open loop or closed loop control, this is still a valid tuning technique or trim table to take advantage of. |
| 19:37 | Even with closed loop, what we really want to do is get our base boost using our open loop tables as close to our target as we can. |
| 19:46 | And this will leave the ECU with less work to do in terms of the closed loop control. |
| 19:51 | And the less work it needs to do, generally, the better our control is going to be. |
| 19:56 | So again, just important to understand these tables exist, understand the impact on them, and make sure there aren't any crazy numbers in them before we get started. |
| 20:07 | Now we go through to our actual wastegate duty cycle tables. |
| 20:10 | Now you can see here that I've got two, again this Corrado is set up for two boost set points. |
| 20:18 | This is really in light of its flex fuel functionality. |
| 20:22 | We're using a lower boost on pump gas and a higher boost on E-80. |
| 20:26 | So what we're going to do here is focus solely on our wastegate duty cycle two table. |
| 20:31 | Again if you're sending multiple boost points the process is just a case of rinse and repeat what you're going to see here. |
| 20:39 | So this is our wastegate duty cycle table. |
| 20:42 | So at the moment, what we can see is this is simply a two-dimensional table relative to our engine RPM, and the values in here are simply the duty cycle that are going to be sent out to the MAC three-port solenoid. |
| 20:58 | Now an important point to note here, let's just go to our boost solenoid output. |
| 21:05 | It’s set up on auxiliary output three. |
| 21:08 | When we do set up these boost control solenoids it's really important to make sure that we set a sensible frequency. |
| 21:15 | What we'll find is that if our frequency is too low we're going to get really poor control, oscillation, and of course we may hear this as well particularly if we've got an external wastegate that's dumping to atmosphere. |
| 21:28 | If the solenoid duty cycle is quite low, we're going to hear a pulsation through that wastegate as it tends to open and close quite rapidly. |
| 21:36 | Now that may still not actually result even in something visible in our boost curve. |
| 21:42 | We may still see what looks like a fairly flat and stable boost curve. |
| 21:47 | But that audible note of the wastegate oscillating is a sign that your duty cycle, sorry, your frequency, is too low. |
| 21:56 | Generally for the MAC solenoids I find that a frequency somewhere in the region of 20 hertz is a pretty good place to be. |
| 22:05 | If we set an exceptionally high frequency we can get to a point where the solenoid simply can't operate, so we're going to get no control. |
| 22:13 | So by all means feel free to try adjusting that frequency up and down, but generally I'm gonna be within the range of about 15-30 hertz with one of these solenoids. |
| 22:26 | Okay, let's get back to our boost control wastegate duty cycle table one, table two, I'm sorry. |
| 22:34 | So the other aspect that's really important to understand with these boost control solenoids, and this is across the board for all electronic boost control solenoids, is that they have what I refer to as a dead band both at the top and the bottom of their duty cycle range. |
| 22:50 | And what I mean by this is that there is a range from zero to, in the case of the MAC solenoid, about 10-12% depending on your frequency that you're pulsing it at where it essentially does nothing. |
| 23:03 | So if we set a frequency, sorry a duty cycle, or 0% through to 12% the result is going to be exactly the same as if the solenoid was doing nothing. |
| 23:13 | Likewise at the top of the duty cycle range we have exactly the same effects. |
| 23:18 | So once we get over around about 88-90% duty cycle it's exactly the same as that solenoid being wide open at 100%. |
| 23:27 | So it's important to understand that you don't have an infinite range and this can also waste a bit of time. |
| 23:33 | If you're messing around, trying to make changes, in the zero to six or eight percent range, for your boost control solenoid, and wondering why you're really not seeing any change in the actual boost that you're getting. |
| 23:47 | So what I've got here is a table that I've pre-configured, and this should get us, hopefully, reasonably close. |
| 23:54 | Of course I've let the car cool down now. |
| 23:56 | So what I'm going to do now is I'm just going to get our Corrado up and running. |
| 24:00 | It is pretty noisy, so while I do this run I'm going to stick on a set of headphones so I won't talk during the run. |
| 24:08 | What I'm going to do is just settle the car for a few moments and allow it to come back up to temperature. |
| 24:15 | And then we're going to perform a wide open throttle ramp run. |
| 24:18 | After that I'll shut off the car so we can actually look at the results. |
| 24:21 | So let's get that going now. |
| 26:33 | okay, so I apologize for the noise there. |
| 26:35 | Definitely makes it a little bit harder to discuss what we're actually doing. |
| 26:39 | So we've got our first run complete there. |
| 26:41 | What I should have mentioned as well is, before I did that run, obviously any time we're tuning a turbo-charged car we want to start with the minimum amount of stress and load applied to the engine that we possible can. |
| 26:53 | So what we want to do is initially find out what our minimum boost pressure is. |
| 26:57 | So what I would do is initially start with our wastegate duty cycle table set to zero just to get a baseline. |
| 27:05 | Or alternatively we can physically unplug the boost control solenoid and just get run in and find out where the wastegate spring pressure sets us. |
| 27:14 | I've already gone ahead and obviously put some numbers into our boost control table there. |
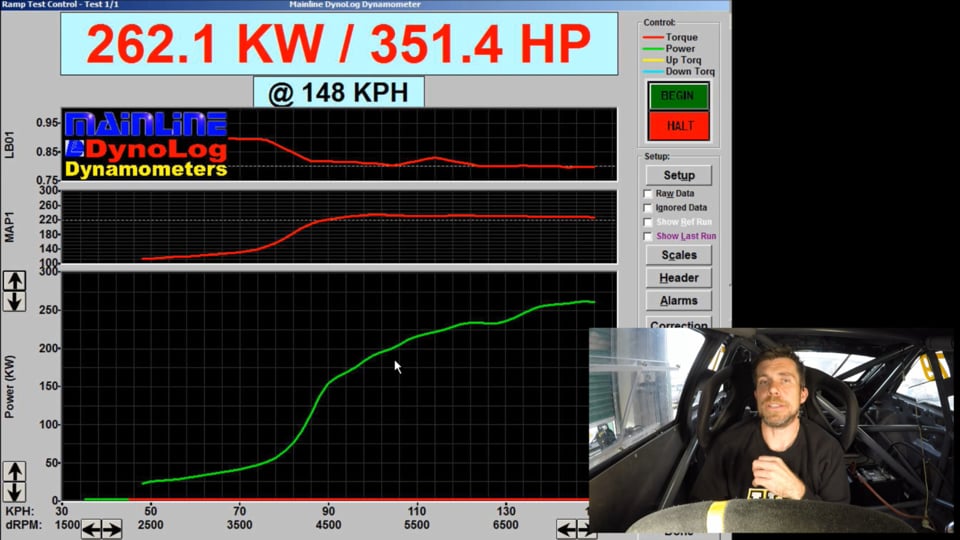
| 27:21 | So what I'm trying to do, if we jump across to the dyno, what I'm trying to do is target a boost of, let's just try and get out of there again. |
| 27:30 | Try and target a boost of 220 KPA, so we've got our boost here sitting in the middle graph and you can see that we're heading full boost at around about four and a half thousand RPM. |
| 27:43 | You can actually see that we're slightly above our boost target at the moment. |
| 27:48 | We're sitting just a little bit above that. |
| 27:50 | So what that means is that in order to get to our boost target we've got a little bit of work to do in our wastegate duty cycle table. |
| 27:59 | Let's jump into our laptop screen, and what I've got is some logging from that particular run, so let's just zoom in on that. |
| 28:08 | So we can see the area that we're interested in. |
| 28:11 | While the dyno's obviously a useful way of seeing what's going on and we can watch that live during the run, the logging in the PC Link software is really great because it allows us to link straight back to exactly where we were in any of our tables during that log file. |
| 28:28 | So we can simply click on a particular area and then we go back to the tuning tab. |
| 28:33 | We can see this little pink ghost cursor that shows us, in this case, where we were in that wastegate duty cycle table. |
| 28:41 | So I'm not going to get this absolutely perfect. |
| 28:45 | What I'm going to do is just show you the techniques and then you can apply that yourself. |
| 28:51 | What we can see here is we're obviously a little bit above our target, we've got a peak of 234 KPA and then really we sort of wander around a little bit, round about sort of 230 KPA. |
| 29:05 | So in general from around about 5,000 RPM and above, we're probably at around about 10 KPA, 12 KPA above our target. |
| 29:17 | So what I'm going to do in order to try and correct that is the first change I'm going to make is I'm going to go back into my wastegate duty cycle table and I'm going to reduce the solenoid, the duty cycle, in this table. |
| 29:32 | So when we're doing this, we find there's no fixed value that we can come up with that we can apply, for example, 2% duty cycle is going to give us five KPA. |
| 29:45 | What we really need to do is find out for ourselves by making adjustments, what sort of magnitude of change is going to result in what sort of effect on our boost control. |
| 29:54 | So in this case what I'm going to do is simply make one change here. |
| 29:57 | I'm going to remove 2% from 5,000 RPM and above. |
| 30:03 | What I'm doing here is, obviously you can see, I'm purposely targeting a slightly higher duty cycle except for three and a half, which is miraculously set to zero for some reason. |
| 30:13 | I'm targeting a slightly higher duty cycle at a lower RPM in order to help bring the boost on. |
| 30:20 | We can raise this up, you can see that it's much higher, maybe 80 or 90% to essentially keep the wastegate completely closed. |
| 30:27 | An important thing to note is if you are going to do that, you need to make sure that you only hold that wastegate closed with those high duty cycles in an area where the turbo-charger is unable to make the boost we’re targeting. |
| 30:41 | So what I mean by this is if we're tuning with the relatively fast ramp rate that's going to approximate what we might see in second or third gear, and we've got everything dialed in and we're not seeing full boost until, let's say, five and a half thousand RPM. |
| 30:54 | So we're setting our wastegate duty cycle at 100% right up to five and a half thousand, what we'll find is that out on the road or racetrack once we hook fourth or fifth gear we've got a higher gear where the acceleration rate is much slower and the engine is under high load. |
| 31:09 | What we're going to find is in those conditions the engine is able to make boost a lot earlier than in the lower gears and that high duty cycle is going to result in a massive over-boost. |
| 31:19 | So we really need to set that kind of control up in order to suit the worst case scenario at higher gears. |
| 31:26 | So just a word of warning there. |
| 31:28 | So we've made one change there. |
| 31:29 | We've reduced the duty cycle there by 2%. |
| 31:33 | I’ll just store that change. |
| 31:34 | Let's get the car running now and we'll do another run and see if that's resulted in any better control. |
| 32:46 | Okay, so that's our second run complete and straight away we can see that our boost was really, really close on our dyno screen here. |
| 32:55 | We've got a red line there that runs essentially right through our target. |
| 32:59 | So we know we did a better job just by reducing that duty cycle. |
| 33:03 | And this is what I was sort of talking about. |
| 33:05 | We need to get a bit of a feel for what kind of a percentage change we need to make to the duty cycle to affect a one or two PSI or a five or ten KPA difference to our boost. |
| 33:18 | And that just simply needs to be done by trial and error. |
| 33:20 | There's no magic bullet there. |
| 33:22 | Let's jump across to our logging and we'll see what that looks like in our logging. |
| 33:29 | So our boost you can see is pretty damn good. |
| 33:33 | We are moving around a little bit here. |
| 33:36 | So in this situation, we have got, you can see a little bit of a drop there. |
| 33:41 | We've gone from 220 KPA at 5,200 RPM to 214 KPA at 5,700 RPM. |
| 33:50 | So in this instance, if we've got a situation, this is much like tuning our air fuel ratio, our lambda target. |
| 33:56 | We've got a situation where at one break point in our table we have the correct boost, and at the next break point in our table we have the correct boost. |
| 34:05 | But in between we're either too high or too low. |
| 34:08 | What we can simply do is go back into our wastegate duty cycle table and by pressing X we can bring up the axis setup and also access this just by right clicking on the table. |
| 34:22 | And then you can simply add another zone. |
| 34:24 | So in this case I may want to add a zone at 5,750 RPM. |
| 34:30 | There is a limit to how many zones you can have in this table so at the moment if I press the plus key nothing's happening. |
| 34:36 | So what I actually need to do in this instance is go and reallocate one of the zones that I'm maybe not using. |
| 34:43 | In this case I'm not revving to 8,500, so I could simply select that and set that to 5,750 RPM. |
| 34:50 | That will then add that zone. |
| 34:53 | It'll ask us if we want to interpolate. |
| 34:55 | And the important point here is that if we press yes, it's going to add that zone in, and it's going to interpolate between the two surrounding cells which means that it will have no effect until we actually make a change to it. |
| 35:08 | So in this case, looking back, we're a little bit low in our boost at 5,700 RPM, so what we might want to do there is going into that zone and we might want to add 1% or half a percent duty cycle to that particular zone. |
| 35:22 | Again, you want to get this basic control now in open loop with our 2-D table as perfect as we possibly can. |
| 35:32 | So at this point, once we've gone through, we've gone through a few iterations, and we've got our boost control as close as we want it to be in open loop like it is now. |
| 35:43 | The next step is to set up the passive feedbacks aspect of our closed loop, open loop control. |
| 35:50 | So this is where we're going to add a little bit of a helping hand to the ECU to make changes to the wastegate duty cycle if the boost pressure, for whatever reason, doesn't happen to quite meet our target. |
| 36:02 | So you can see at the moment, we've got a two-dimensional table. |
| 36:05 | What we're going to do now is add a third-dimension. |
| 36:08 | We're going to add a load axis. |
| 36:10 | So what I'll do is I'll right click here, go down to axis set up which is the same that I was in before. |
| 36:15 | What we're going to do is enable our Y-axis. |
| 36:19 | I'm just going to do that by clicking on it and what I'm going to do is select manifold absolute pressure or MAP as the axis. |
| 36:30 | Okay, so what we're going to do here is we're going to set this axis up so that we can manipulate the wastegate duty cycle if our boost pressure is above or below our target. |
| 36:41 | So what we want to do is select our manifold pressure break points on this table quite carefully so that we can really accurately manipulate our duty cycle when we are above or below that target. |
| 36:55 | So what I'm going to do is start by selecting a few points here. |
| 37:00 | Let's start with a value at 100 KPA we'll then go to 200 KPA. |
| 37:09 | Now as I get closer to my target I'm going to start making those break points a little bit finer. |
| 37:15 | So particularly around the actual target that I want to run, which in this case is 220, I'm going to have five KPA break points. |
| 37:24 | So I'm just going above that now, I've got up to 230 KPA. |
| 37:29 | We'll go 240 and then we'll go 250. |
| 37:35 | And I'll just delete my zero point there. |
| 37:37 | So I can click okay, and at this point what we've got is the same values through our table. |
| 37:46 | Actually, what I'll do is I'll just copy that one change that I made right through our table. |
| 37:50 | So at this point regardless of what our actual boost pressure ends up being, we're going to be sending the same duty cycle out to the wastegate. |
| 37:59 | So our target though is through this row here at 220 KPA. |
| 38:06 | So what we want to do is adjust the duty cycle when we're above and below. |
| 38:11 | So let's start by looking at how we can do that. |
| 38:14 | What I'm going to do is select the 225 KPA row, I'm going to highlight that entire row. |
| 38:20 | So at this point we're at five KPA above our desired target and obviously in order to bring our boost back under control and drop it back down to our target we're going to need to remove some duty cycle there. |
| 38:34 | Because we're only talking five KPA at this point and we're still pretty close to our target, we don't want to make dramatic changes here. |
| 38:42 | If we do we're going to end up with the boost control system oscillating. |
| 38:46 | So typically I might remove 1% duty cycle at this point. |
| 38:51 | And what I'm going to do is I'm going to hold down the control key and I'm going to press the down arrow, and that's going to copy that change that I've just made down to that 230 KPA row. |
| 39:02 | So at this point we're now 10 KPA above our target, so boost is really starting to get a little bit higher than I'd like to see. |
| 39:10 | So we're going to make a further change. |
| 39:11 | So we made 1% change when we're five KPA, I'm going to make 2% further reduction when I get up to 230 KPA. |
| 39:19 | So just as we drift further away, I'm just going to be pulling that duty cycle back slightly more aggressively in order to control our boost and get back onto our set point. |
| 39:29 | We're going to again use the control and down arrow to copy that down to 240 KPA. |
| 39:34 | So at 240 KPA we're really starting to get a long way off where we want to be, so in this case what I might want to do is reduce, try highlighting the correct row. |
| 39:46 | We might want to reduce our target by a slightly larger margin. |
| 39:51 | In this case 5%. |
| 39:53 | And then as a safety backstop when we get to 250 KPA at this point something's really wrong, I'm really not happy with that boost pressure when my target is only 220. |
| 40:02 | So I'm just going to set that to zero, it's going to completely disable the wastegate solenoid. |
| 40:07 | Set that all to zero, I'm going to have no feedback. |
| 40:10 | So now we've dealt with what's happening when we are above our boost target. |
| 40:16 | I'm going to do exactly the same thing only in the opposite direction when we are below our target. |
| 40:21 | So I'll start here at 215 KPA with five KPA below. |
| 40:26 | I can add maybe a percent there. |
| 40:28 | Maybe I only want to add half a percent. |
| 40:31 | We're going to copy that up. |
| 40:33 | We're going to make a further change, 2%, and we're basically going to copy this through and what we can do as well is we can use this three dimensional table to do what I was talking about before. |
| 40:47 | Make quite large changes, hold the wastegate closed more aggressively. |
| 40:52 | And because this is relative now to our manifold boost pressure it's going to only be active in the areas that we want it to be. |
| 41:00 | So for example, what I can do here is set the region from 100 KPA maybe to 200 KPA and 4,000 RPM to 100% to completely hold that wastegate closed. |
| 41:13 | So now we've got our passive, three-dimensional, open loop boost control table set up. |
| 41:20 | Let's do a further run on the dyno, and we'll just see the effect of that three-dimensional table in action. |
| 42:46 | Okay so there's the final run complete and again if we just simply look at the dyno we can see we've got absolutely arrow straight boost control. |
| 42:54 | You could run a ruler through our boost control line. |
| 42:57 | Although that is filtered a little bit so of course we always want to check back into our PC Link logging and see what our boost control was like. |
| 43:05 | Let's just zoom in a little bit on this. |
| 43:09 | So what we can see here is our boost control is a little bit more stable than what we initially had. |
| 43:14 | We're still a little bit low here so if I'm just clicking randomly at a few places we're at about 216 KPA, lowest point here 213, 213, and then 215. |
| 43:26 | So of course once we set this table up we can then go about manipulating the control to get it really, really accurate. |
| 43:33 | So what I'd probably do from here is go and add in maybe one, or 1.5% to that entire table to bring it up. |
| 43:41 | So really what I am trying to do is get to a point where we're running really, really nicely though it exactly at 220 KPA target. |
| 43:50 | We're going to move into some questions and answers really shortly so if you do have any questions please ask those in the chat and I will get on to those shortly. |
| 44:00 | So the advantage now of having this three-dimensional table set up with our passive, closed loop effect, when we're looking at manifold pressure is that now when we're out on the road or the racetrack and our atmospheric conditions change, maybe our exhaust gas temperature changes, and this influences the boost control, the ECU now has the ability to manipulate that wastegate duty cycle in order to pull us back onto our target. |
| 44:30 | And then again, of course, coupling this with the trim table for gear can give us really, really accurate control of our boost and in most instances I have found that with a little bit of attention paid, and effort paid into getting that open loop table really, really spot on on the dyno, we're going to find that the results that we are can get are every bit as good as a closed loop control system. |
| 44:57 | And certainly, again in my own experience, it is superior to what I can achieve using Link's own closed loop boost control system. |
| 45:06 | What we will often find as well is that if the ramp rate of the dyno is not quite realistic with what we are seeing on the road, that will also effect the boost level that we'll see on the dyno versus the boost we'd see out on the road. |
| 45:23 | So particularly we're tuning here in fourth gear. |
| 45:26 | What we want to do is select a ramp rate that's realistic for what the car will actually achieve on the road in fourth gear. |
| 45:34 | If we're not matching that reasonably closely then it's ah, reasonable to expect that once the car comes off the dyno and goes out on the road or track that there will be a difference. |
| 45:44 | Now our job isn't done as well when we're finished on the dyno. |
| 45:47 | We do need to actually do a little bit of logging on the road or track and make sure that our boost is doing what we expect particularly with those gear based trims. |
| 45:58 | Getting those accurate and spot on is really what's going to make all the difference to a system that works really faultlessly and delivers exactly the boost that we want. |
| 46:09 | So it's often that we will need to manipulate that open loop table very slightly just to get us exactly to where it needs to be. |
| 46:18 | So just to reiterate the process, we need to start by setting the boost control system and the Link G4+ ECU up as an open loop system. |
| 46:29 | Remember it's important also to select a realistic solenoid duty cycle generally somewhere in the region of about 15-30 hertz works well for the MAC solenoids. |
| 46:40 | And it's also important to understand the implications of that solenoid duty cycle, sorry, solenoid frequency is either too high or too low. |
| 46:49 | Once we've got that set up, the process I'll start with is determining where my boost pressure sits on the wastegate spring alone just with no electronic control. |
| 46:59 | We're going to completely disable our wastegate duty cycle and see where our boost actually sits. |
| 47:05 | So this will give us an idea of where we actually need to go with our duty cycles. |
| 47:09 | Obviously if we're already very close to our target, we're going to need low duty cycles if we're at perhaps 10 PSI and we want 20 it's likely that we're going to need to put a larger duty cycle into that wastegate duty cycle table. |
| 47:25 | Remember before we start tuning the open loop control table it's important to check all of those trim tables and make sure that the numbers in them are reasonable and are realistic. |
| 47:35 | We don't want anything in there that's going to influence our actual tuning. |
| 47:40 | From here the process goes through simply adjusting our wastegate duty cycle table up or down until we end up as close as we can to the boost pressure targets that we want. |
| 47:53 | And again this is a trial and error method. |
| 47:55 | We need to simply make small changes, and assess what effect that's had on our boost pressure, remembering of course that at both the bottom end as well as the top end of the wastegate solenoids duty cycle range we're going to find that there's essentially no effect. |
| 48:11 | So we really need to be working in the range of about 10 or 12% up to about 88 to 90% in order to get good control. |
| 48:19 | Once we've gone through and we've got our boost pressure really where we want it to be, then we can enable that load access. |
| 48:26 | We want to set up that load access with break points that get tighter as we get closer to our boost pressure target. |
| 48:32 | And in the end as we go above the target we're going to reduce the duty cycle very slightly as we go below our boost pressure target we can increase the duty cycle very slightly. |
| 48:46 | Okay, let's just jump in and we'll have a look at some of our questions here. |
| 48:54 | Tyler's asked, "Will the 3-D open loop table still work or help if the system is switched to a closed loop system?" Yes, so generally, I'm just trying to think now because I obviously don't spend a lot of time tuning the Link G4+ in closed loop system. |
| 49:12 | With the closed loop control generally what we're going to do is set the load axis for our wastegate duty cycle table to our boost target. |
| 49:22 | So that kind of negates the ability for us to set manifold pressure as an axis. |
| 49:29 | We've only got three-dimensional of 3-D table to work with, not a four-dimensional table. |
| 49:35 | So that's, if my memory serves me correctly, our boost target is the axis that we want to use for a closed loop control system. |
| 49:46 | Carl Hunter has asked, "Thoughts on using an additional solenoid to use boost for dome pressure on a three-point solenoid for additional control at high boost levels." I actually went through this with my old drag car and I didn't have a huge amount of success with it. |
| 50:08 | I wouldn't write that off. |
| 50:09 | That was, we didn't really spend a lot of time playing around with it. |
| 50:14 | There are four-port solenoids available as well. |
| 50:17 | MAC make those, Turbosmart sell them as well as a few other manufacturers. |
| 50:22 | And the four-port solenoid essentially achieves the same aim that I think you're talking about there, where you can basically remove boost pressure completely from the bottom side of an external wastegate, and that helps extend the range. |
| 50:36 | So the problem we find is, and this is often overlooked, is that an external wastegate or any wastegate for that matter, doesn't have an infinite range of control. |
| 50:48 | So what I mean by this is if we're seeing 10 PSI as our minimum boost pressure if we're just running on the wastegate spring with no electronic intervention whatsoever then depending on the turbo, the engine, the back-pressure, et cetera, it's likely that if we pulled all of the lines off of the wastegate and just let the engine eat, that we may only be able to get up to maybe 25 or maybe 30 PSI. |
| 51:15 | And this is a problem I struck with my drag car, four-wheel drive, we were very traction limited, off the lines, so we needed to run as low as 20 PSI during the launch, but in the deep end we wanted to run somewhere in the reason of 50 plus PSI and you can't get that. |
| 51:30 | So the solution I actually used was CO2 pressure regulated control to the top of the wastegate, but the four-port solenoid is probably an easier solution, where it allows the boost pressure to be completely removed from the bottom port of the solenoid at the wastegate and you can feed boost pressure solely to the top port. |
| 51:50 | So that tends to extend the range of control that you can get with a fixed spring pressure. |
| 51:58 | Mitch has asked, "Do you find that air temperature compensation is similar between vehicles or needs to be completely tuned per set up?" Okay, so air temperature compensation for the boost control in terms of achieving boost control and achieving our target is not something that I normally configure. |
| 52:17 | So generally that intake air temperature control table that we looked at, I would consider that to be more useful in terms of the safety backstop. |
| 52:26 | And really, it's probably more on an engine-per-engine basis as to what you're comfortable with. |
| 52:33 | An aspect that we don't have the ability to control in the Link G4+ that I see affect our boost pressure probably more dramatically is exhaust gas temperature. |
| 52:43 | This is really easy to illustrate if we do a run on an engine, turbo-charged engine, that's relatively cold. |
| 52:52 | And maybe we've just left it idling. |
| 52:54 | There's a limited amount of heat in the exhaust manifold and the turbo-charger, turbine housing. |
| 52:59 | We do a run, we're going to see at least quite a slow, lethargic buildup to the boost. |
| 53:05 | Now if we straight away do another run and everything's up to temperature, there's a lot of heat in the exhaust manifold and turbo-charger, we're going to find that the turbo-charger will make boost much quicker. |
| 53:17 | So in some instances where it's possible a trim on the wastegate duty cycle based off of exhaust gas temperature can pay dividends. |
| 53:26 | I'm not saying that it's necessary, and certainly it's probably pretty rare to do so. |
| 53:31 | But boost control is one of those aspects that is incredibly difficult to really nail, because there's so many aspects to do with the engine's operation that can add up to affect the boost control. |
| 53:45 | Inlet air temperature, engine coolant temperature, ambient pressure temperature, and exhaust gas temperature are all parameters that can play a part. |
| 53:57 | Our next question is initial and max duty cycle. |
| 54:00 | "Does it matter if you use them as the same or do we need to have a lower number for initial?" No, I don't, I'm just trying to think here a way of wording this. |
| 54:13 | The max duty cycle is the max duty cycle that the solenoid will output. |
| 54:18 | The initial duty cycle is the duty cycle that will be output during the spool-up, but I think that the terms you're using there are referring to the closed loop control, not open loop. |
| 54:33 | Our next question comes from James, I've got your name right this time, which is great, I won't make a fool of myself. |
| 54:40 | James asked, "If you run twin turbos it was suggested you run duel boost control solenoids. |
| 54:44 | Can you elaborate on how you'd hook up both solenoids to the single ECU output? Do you wire them in parallel, in series, or an alternative method?" Okay, it's not strictly necessary to run twin wastegate solenoids. |
| 54:59 | And certainly in many twin turbo applications I have run a single solenoid. |
| 55:05 | What I would say is that with particularly if you're running a twin turbo engine with internal wastegates, Nissan RB-26 is a great example there. |
| 55:16 | The volume of the internal wastegates is very, very small. |
| 55:21 | So there's no problem venting and pressurizing those using one solenoid for both wastgates. |
| 55:28 | So in that application, I would use a single wastegate solenoid. |
| 55:33 | I have also done exactly the same with external wastegates, but we can get into a situation there where the volume and the external wastegate is quite a lot larger and this can in some circumstances cause an issue where the solenoid physically can't pass enough air to fill or discharge those wastegates, so duel solenoids can be an advantage in some instances there. |
| 55:58 | In terms of the wiring, I would run both of those solenoids in parallel basically both of them are wired to 12 volts on one side and then the other side of both solenoids will go to the auxiliary output that the ECU is earthing for boost control. |
| 56:14 | Really, really simple there. |
| 56:15 | They draw very, very low currents so there won't be a problem for the maximum current limitation on an auxiliary output on the Link G4+ ECU. |
| 56:27 | Alright, looks like that's taken us to the end of our questions so hopefully that's given you some insight on potentially an alternative way to set up your boost control on the Link G4+ ECU. |
| 56:38 | As usual, if you do have any more questions please ask those in the forum and I'll be happy to answer them there. |
| 56:44 | Thanks guys, and I look forward to seeing you all next week. |


