149 | Piston Ring Gap - How it Destroys Engines
Summary
Choosing the correct ring gaps for your piston rings is critical to the performance and reliability of your engine. In this webinar we’ll discuss the considerations that you need to keep in mind when it comes to selecting the correct ring gaps for your application and learn how you can test and optimise the ring gaps if you’re dealing with a single engine design.
| 00:00 | - Hey guys it's Andre from High Performance Academy here, and in this webinar we're going to be discussing the piston ring end gaps and how piston ring end gaps can potentially destroy your engine. |
| 00:13 | Now that's a purposefully slightly controversial title. |
| 00:16 | We're actually going to be discussing a number of other aspects to do with our piston ring end gaps but the reason we've chosen that title is because there is a lot of misinformation and misunderstanding out there in the community, in the wider performance industry about the piston ring end gaps and their effect on the reliability of our engine. |
| 00:37 | Most specifically what we're seeing is a lot of pictures posted up of pistons that have been damaged and generally people are jumping to the conclusion that the damage is the result of the piston ring end gap being insufficient, those piston ring end gaps butting together and then causing the damage. |
| 00:55 | So quite often we're seeing photos of a piston that might look something like this. |
| 00:59 | Actually what we'll do is we'll just go to our remote camera here and get a little bit of a close up on that piston. |
| 01:07 | So this is the sort of photo that we're seeing quite regularly show up as an indication of what could be caused by piston ring end gap butting together. |
| 01:18 | Now there's certainly no doubt as we'll talk about shortly that insufficient piston ring end gap can cause damage to the piston, but more often than not the photos that we are seeing are actually the result of either detonation damage, or preignition damage which is the case with this drag racing piston we've got in front of us. |
| 01:36 | So you can see pretty catastrophic damage there to the piston. |
| 01:40 | In this case 100% not the cause of insufficient piston ring end gap. |
| 01:46 | Alright we'll jump back to our main camera now. |
| 01:50 | So when we're building a factory motor, refreshing a factory motor with factory components, the piston rings really aren't a component that we need to give too much consideration to. |
| 02:02 | Regardless whether we are rebuilding a factory engine with a stock bore size, or we are going to an oversize bore and fitting factory oversized pistons and rings. |
| 02:13 | What we find inevitably is that in most instances the factory rings come pregapped. |
| 02:20 | So essentially they're already set for the correct bore diameter and this just means that we need to fit the rings onto the pistons, fit the pistons and rings into the bore, and that's about as much as we need to consider with a rebuild on a factory engine. |
| 02:34 | Now when it comes to building a performance engine using aftermarket forged pistons though, this is where we're normally going to be dealing with what's referred to as a file fit piston ring and this is where understanding our piston ring end gaps and how to correctly adjust and set those piston ring end gaps becomes really important. |
| 02:56 | So I guess one of the considerations here is why do we need to adjust the piston ring end gaps? Why are these file fit piston rings in existence? Why don't all of the aftermarket ring manufacturers simply supply the rings with the correct ring end gap so we just can fit them as we would with a factory piston ring? Well the idea here is to allow the engine builder to optimise or select the final ring end gaps to suit their actual application. |
| 03:30 | So we need to understand what that actually means. |
| 03:33 | Where the file fit rings come purposefully slightly oversized. |
| 03:41 | So this means that there's going to be insufficient gap between the two ends of the ring if we install the ring straight out of the pack. |
| 03:48 | In some instances they may actually be so large that they actually overlap very slightly. |
| 03:54 | The aim here is to adjust the ring end gap when we're assembling our engine at room temperature on our bench. |
| 04:02 | We want to adjust the ring end gap so that when the rings expand under operating temperature, when the engine's actually in operation and it's being used hard and that ring is exposed to combustion temperature, we want the ring end gaps under those conditions to be minimal without the risk of those ring end gaps butting together, 'cause that can end up causing damage. |
| 04:27 | Now if we can achieve this aim, if we can get our ring end gaps to be minimal in actual operation, at our maximum operating temperature or combustion temperature that the engine's going to be running at, the rings are going to be exposed to, the advantage here is that we minimise the path for combustion gases to escape past the ring and make their way into the crank case. |
| 04:51 | So there's a few upsides to doing this. |
| 04:54 | First of all it's going to improve our ring seal. |
| 04:57 | It's going to allow less leakage past the rings, so that can result in a small but noticeable improvement in power. |
| 05:05 | There's various studies by various engine builders that have been performed over the years into what exactly we can expect from optimising our piston ring end gaps. |
| 05:17 | And I'll be honest, it is relatively minor. |
| 05:19 | Going from a really large ring end gap, in the region of about 45 thousandths of an inch, down to a very tight ring gap where we're getting borderline towards butting the rings together, maybe in the range of 18 thou. |
| 05:35 | You're likely to see a difference in the engine power somewhere in the region of 1% to 2%. |
| 05:40 | So it is definitely not a deal breaker in terms of engine performance however no one's going to give away free power if it's there for the taking so that's important to understand. |
| 05:51 | The other aspect to understand though is it's not just power that we're interested in here. |
| 05:56 | If we can minimise that ring end gap, it's going to minimise that combustion pressure leakage past the rings, or in other words blow by into the crank case. |
| 06:04 | This is going to mean that our engine is not going to breathe as badly or as heavily as it would with a larger ring end gap. |
| 06:12 | The other aspect there as well is it's been proven to reduce oil consumption. |
| 06:18 | So essentially all of these things obviously are positive factors that we would like to have in our engines if we can so this is why we have the file fit rings. |
| 06:28 | Our task as the engine builder is to select the correct ring end gap for our particular application. |
| 06:36 | And then adjust those ring end gaps to suit. |
| 06:41 | Now in order to understand a little bit more about this, we also need to understand what is going to affect the ring gap or what's going to happen to the ring in operation. |
| 06:53 | And essentially the key here is the ring end gap that we need to choose at room temperature when we're assembling the engine, is going to depend on the amount of heat that the piston ring is going to be exposed to. |
| 07:06 | It's also going to depend on the material that the ring is made out of. |
| 07:11 | In other words the coefficient of thermal expansion of that material. |
| 07:15 | And it's going to depend, because of the heat factor, there's a few aspects there that will affect the heat that the ring is going to be exposed to. |
| 07:26 | One of the main ones there is the specific power level that the engine is producing. |
| 07:32 | So what I mean by this is if we take a relatively basic naturally aspirated engine and we compare that to a fairly heavily modified boosted engine, maybe a turbo charged engine running high boost, what we've got in the high boost turbo charged engine is that we are combusting a lot more fuel and air molecules inside the combustion chamber. |
| 07:51 | We are forcing a lot more air and fuel into the cylinder, we're creating a bigger combustion event, this is where we are getting the additional power and torque from with a turbo charged engine. |
| 08:03 | But the byproduct of this is that we are creating more heat than a low power naturally aspirated engine. |
| 08:10 | So this is one aspect, as the specific power level of our engine increases, we know that that is going to produce more heat, it's going to expose the rings to more heat, and we need to take that into account when we're selecting our ring end gaps. |
| 08:25 | The other aspect there is the fuel that we're running on, this will also have an effect on the combustion temperatures. |
| 08:32 | So for example if we're running an engine on a pump gasoline, this is going to create a lot more combustion temperature than perhaps an alcohol based fuel such as E85 or even methanol which is very popular in drag racing applications. |
| 08:49 | So what this means is all things being equal, if we are running an engine on an alcohol based fuel, we're going to be exposing the rings to a little bit less combustion temperature and this in turn would allow us to reduce the ring end gaps very marginally. |
| 09:04 | The last aspect here that I'll cover off is also the usage of the engine. |
| 09:09 | So this really comes down to how much high power sustained use the engine is going to be placed under. |
| 09:17 | So on the low end of that scale, we've got our everyday road cars. |
| 09:21 | So in a road car, unless you're lucky enough to live in a part of the world where you have access to an autobahn or a motorway that's non speed restricted, if you value your license it's pretty difficult to stay at wide open throttle for more than maybe six to eight seconds, maybe eight to 10 seconds without really getting to the point where you're risking getting thrown straight in jail. |
| 09:44 | So this also in turn limits the amount of heat that is going to be transferred into the rings. |
| 09:50 | So when we compare this to maybe a circuit car where the engine is going to be run hard under sustained wide open throttle operation, lap after lap for maybe 30, 40 minutes on end, maybe in an endurance application, hours on end, understandably the amount of heat that the rings are going to be exposed to is much higher. |
| 10:11 | So these are the sort of aspects that we need to take into account when we are trying to decide on the correct ring gap for our particular engine. |
| 10:22 | Now we're not left of course to our own devices here. |
| 10:25 | We don't need to just come up with the ring end gaps by guess work, we are guided here, and one of the ways we're guided is by the recommendations from the ring manufacturer. |
| 10:38 | So let's just jump across to our little remote camera again. |
| 10:42 | And this is the recommendations from JE for the ring pack that was supplied with our Subaru FA20 piston rings. |
| 10:52 | So this is pretty typical of what we'll see from most manufacturers and I just wanna talk about the information that we've got here on this sheet. |
| 10:59 | On the left hand side we have listed the applications, so for example we have high performance street and strip, below this we have street moderate turbo nitrous. |
| 11:09 | Next we've got our recommended ring gaps for our top ring and our second ring. |
| 11:13 | You'll note that these are listed as minimum gap per inch of bore. |
| 11:18 | So if we just look at these two top examples here for our top ring, for a high performance street strip, the recommendation is 0.0045 inch, or 4.5 thousandths of an inch per inch of bore. |
| 11:31 | And for a turbo or nitrous application, you can see that that increases very slightly to five thousandths of an inch per inch of bore. |
| 11:41 | Now the other aspect here, we're going to talk about this in a little bit more detail, is our second ring. |
| 11:45 | We can see that the recommendations for our second ring end gaps, are very slightly larger than for our top ring gaps. |
| 11:51 | As I say we'll talk about that in more detail. |
| 11:54 | And then finally we have a recommendation for our oil rail rings. |
| 11:59 | These though are not a clearance per inch of bore, these are just a minimum. |
| 12:05 | So all we want to do here with our oil ring rails is just make sure that the minimum end gap is at least 15 thousandths of an inch. |
| 12:13 | These don't have any affect on the compression of the engine so they're much less important. |
| 12:17 | OK so let's just talk about how exactly that works. |
| 12:22 | So we know that we need, for a high performance street strip application there, we're looking at a minimum end gap of 4.5 thousandths of an inch per inch of bore. |
| 12:35 | So what we're going to do there is simply take the bore diameter that we're using. |
| 12:39 | So let's just jump to our overhead camera here, and we'll go through a calculation, and what we're going to do is take a 3.386 inch bore and we're going to multiply that by 0.0045 and what that does is it gives us a recommended ring gap for our top ring of 0.015 of an inch. |
| 13:02 | Or in other words 15 thousandths of an inch. |
| 13:04 | In this case 15.2 thousandths if we want to be really fussy. |
| 13:08 | Generally we want to err on the side of caution here when we're talking about our ring end gaps as well. |
| 13:15 | So if we're getting quite close to maybe 15.3, 15.4 thousandths of an inch recommendation, we would probably be safest to actually increase that and go to 16 thousandths of an inch, rather than 15 thousandths of an inch. |
| 13:31 | So it's difficult to really work much more accurately than one thousandths of an inch, so that's generally a good guide there. |
| 13:39 | Now the recommendations there though from our manufacturer are generally also a little bit on the cautious side. |
| 13:48 | So in this particular instance if I saw 15.2 as my calculated end gap, I'd be quite comfortable setting that to 15 thousandths of an inch, I know that that's going to be quite safe. |
| 14:00 | The ring manufacturer clearly doesn't want any chance of the rings butting in use and causing damage to the engine, so their recommendations are always going to be a little bit on the large side there. |
| 14:13 | So if you don't know any better, these are obviously the sort of recommendations that we need to follow. |
| 14:19 | Now you'll notice there that the second ring end gap was specified to be half a thousandth of an inch per inch of bore larger than the top ring. |
| 14:32 | Now on face value that doesn't make a huge amount of sense. |
| 14:35 | Remember we're talking here about the heat the ring's being exposed to, that's going to dictate how much the ring is going to expand at the operating temperature. |
| 14:47 | And clearly the top ring is a lot closer to that combustion heat than the second ring. |
| 14:52 | So hence it doesn't make a lot of sense that the ring manufacturer is specifying a larger ring end gap for the second ring than for the top ring. |
| 15:01 | So the second ring is going to be running colder, it's not going to expand so much. |
| 15:05 | And probably a few decades ago the actual technique or the generally accepted trend was to gap the second ring tighter than the top ring for this very reason. |
| 15:18 | This has been a more recent change over and the reason for this is that study and testing found that if our second ring end gap was tighter than our top ring end gap, what we can find is that even with our top ring gap optimally set we are still inevitably going to end up with some blow by, some combustion pressure escaping past that top ring. |
| 15:44 | And if our second ring end gap is also quite tight, what that combustion pressure can do is actually build up between the top ring and the second ring. |
| 15:53 | And when this happens it can destabilise that top ring. |
| 15:57 | And this has the effect of massively reducing our ring seal. |
| 16:01 | So we end up with a really large drop off in our ring seal and that's really detrimental to our engine performance. |
| 16:08 | So this is why the second ring end gap is specified as being slightly larger than our top ring end gap. |
| 16:17 | Now we've talked about the recommendations there and we've talked about the general theory. |
| 16:23 | We obviously want to try and achieve the tightest ring end gap that we possibly can to optimise our horse power, to minimise our blow by, and reduce our oil consumption. |
| 16:34 | So that's all of the upsides of getting our ring end gap optimal and we now have talked also about the fact that the correct ring end gap is going to depend on the heat that that ring is exposed to. |
| 16:45 | Now the downside though is if we go too far, what can happen is that as the ring expands in operation, the two ends of the ring can butt together. |
| 16:56 | When that happens, there's really nowhere for that ring to continue expanding. |
| 17:00 | So this can result in some really severe damage to our engine. |
| 17:05 | First of all we essentially can have the rings seize in the bore so it's going to end up damaging the cylinder wall. |
| 17:12 | The other aspect is that it can essentially rip the crown off the piston. |
| 17:17 | So this is the sort of damage that is often mistaken for the detonation damage that we looked at. |
| 17:23 | So we're not going to see melting on our piston like this, but if we see large chunks of our ring lands broken out, maybe the actual crown ripped off the piston, and in very severe circumstances, essentially what's going to happen is that the connecting rod will pull the wrist pin out of the bottom of the piston and then obviously the conrod exits the side of the block. |
| 17:45 | That sort of damage is more in line with what we're expecting to see if our ring end gaps are too tight. |
| 17:52 | So clearly if we want to err on one side of our optimal point it's always safest to go a little bit larger in our ring end gap than too tight. |
| 18:03 | We're going to see a very minimal drop off in our power that probably most people aren't even going to be worried about a slight increase in our blow by and a very slight increase in our oil consumption. |
| 18:15 | But that's obviously by far the preferable situation compared to the area where our ring end gaps butt together and actually cause catastrophic engine damage. |
| 18:27 | OK so once we've actually selected the ring end gaps that we want to run, we need to find out what our ring end gaps are to start with and then we can make adjustments. |
| 18:37 | So we're gonna go through and have a look at that process now. |
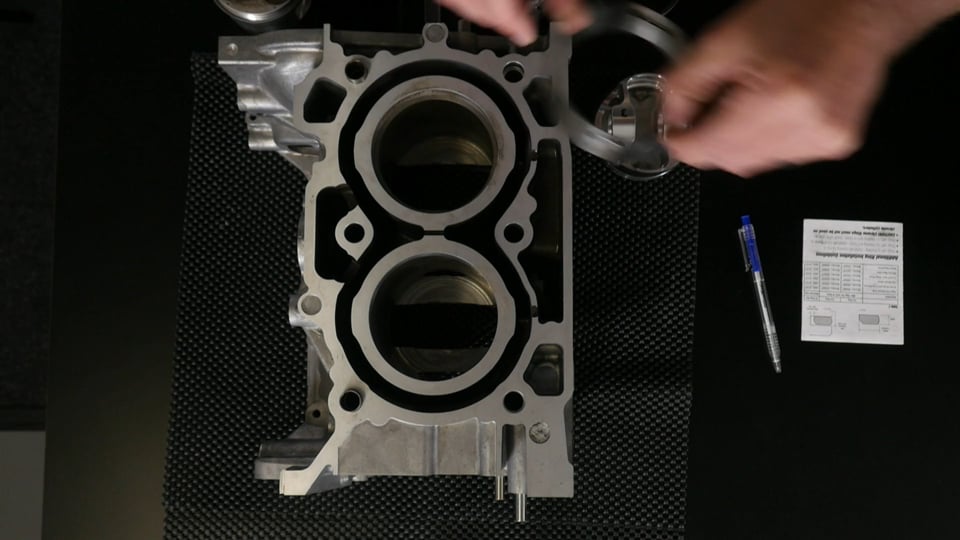
| 18:40 | So for this example here I've got half of a Subaru FA20 engine and what we're going to do is take our ring, in this case we've got one of our top rings, and we're going to place that in our bore. |
| 18:53 | So we'll just jump to our overhead camera here and have a look at this process. |
| 18:57 | Now I've just located the ring down in the bore there, but this isn't where we want to actually make our measurement. |
| 19:05 | What we want to do is make sure that our ring is square in the bore, so in other words an equal distance down from the top of the bore. |
| 19:11 | We also want to locate it a little way down the bore. |
| 19:13 | So in order to do that I'm just going to use a piston ring squaring tool. |
| 19:18 | So I'm just going to place that on the top of the ring here and just allow it to expand out gently. |
| 19:24 | I'm just gonna push that down, and it has little pockets cut into it which will locate on the top of the bore. |
| 19:30 | And that makes sure that our ring is located the correct distance down the bore. |
| 19:35 | And is square to the top of the bore. |
| 19:38 | Now when we do this, one of the really important aspects to note is the ring end gap and whether it's parallel. |
| 19:46 | So if we jump to our remote camera for a second. |
| 19:48 | In this case you can see that the ring end gap is actually pretty square. |
| 19:52 | So what we're looking for is to make sure that the ring end gap is parallel from the inside to the outside there, that's really important. |
| 19:59 | If that ring end gap is not parallel, we're going to need to correct that during the ring gapping process. |
| 20:08 | When we're actually adjusting our ring end gap we're going to need to adjust the ring end gap so that it is truely parallel. |
| 20:15 | So once we've got our ring there, we've taken note of whether or not that ring end gap is parallel, what we're going to do is take a set of feeler blades and we're going to use these to measure our existing ring gap. |
| 20:26 | Really really cheap piece of equipment that most mechanics should already have access to. |
| 20:32 | So to start with what I'll do is I'll take our 12 thou feeler blade and I'm just going to slip that down through that ring end gap. |
| 20:40 | At the moment there's absolutely no resistance so I know that our ring end gap is already larger than 12 thou. |
| 20:46 | We'll jump up and we'll go to 14 thousandths of an inch here, and we'll just check that. |
| 20:53 | So with our 14 thou, we've got just the right amount of tension. |
| 20:57 | So we know right now our ring end gap is sitting at 14 thousandths of an inch. |
| 21:02 | Now remember we wanted to set our ring end gaps to 15 thou. |
| 21:06 | So we now know that we need to remove a little bit of material. |
| 21:10 | If we want to set our ring end gap to 15 thou, we need to increase it by one thousandth of an inch. |
| 21:15 | A way we're going to do this is we're going to use a piston ring file. |
| 21:21 | Now there's a couple of options when it comes to piston ring files. |
| 21:24 | Here on our bench we have an electric ring file, this is a Total Seal Piston Rings product. |
| 21:30 | We've also got behind our desk here, we've got a much cheaper manual ring file. |
| 21:36 | So I'm going to demonstrate the process on our electric ring file but we'll also talk about how the manual ring file can be used because particularly for those of you who are maybe just getting started in engine building, maybe you're only going to build one or two engines. |
| 21:52 | It doesn't make a lot of sense spending a huge amount of money on a very elaborate piece of equipment that you're not going to get value out of. |
| 22:02 | So what we'll do now is we'll just have a look here at our piston ring file. |
| 22:08 | And I'll explain some of the aspects of the ring file. |
| 22:11 | So these are available from a range of different manufacturers. |
| 22:15 | One of the nice functions with the ring file we've got here is that it does use a dial indicator. |
| 22:20 | So this allows us to zero the dial indicator and we can be a little bit more accurate with how much material we are removing from the ring. |
| 22:28 | The other aspect here is that the bed that the ring sits on also has an adjustable stop. |
| 22:34 | Now this allows us to set essentially the bore diameter that we are going to be using for our ring file. |
| 22:40 | And this makes sure that we can keep our ring end gaps square or parallel which I was talking about earlier. |
| 22:48 | Particularly when we are gapping a lot of rings for one engine, this allows us to keep good consistency across all of our rings. |
| 22:56 | So what we can do is locate the ring in the file. |
| 22:58 | We just want the end to protrude slightly past the table there, and then what we can do is bring that ring down, and there's a thumb wheel on the end of our ring file, we just can turn that until we're just barely contacting the grinding wheel. |
| 23:15 | At this point we can zero our dial gauge. |
| 23:17 | So what I'll do now is we'll just turn our ring file on and I'm just going to remove a small amount of material. |
| 23:23 | So when we're removing material here, what we wanna do is just move that ring file down against the abrasive wheel. |
| 23:29 | Once we've got it squared away we can turn the thumb wheel and what we wanna do is just remove around about half the thou to one thou of material in each cut. |
| 23:39 | If we make a really large adjustment to our ring, that's going to have the potential to damage it. |
| 23:45 | Now even with a dial gauge on our ring file like we've got here, we always want to make small adjustments to our ring end gaps and then check our progress. |
| 23:56 | It's really easy to find that we haven't taken enough material off and we can simply increase the ring gap further by grinding a little bit more material. |
| 24:06 | But if we go too far, that can end up requiring us to buy a new set of rings, which can waste money and it can also waste time if we are ordering parts from overseas. |
| 24:16 | So it's always best to creep up on the correct ring gap slowly but surely. |
| 24:22 | Now if you are going to be using the manual ring file, this requires a little bit more care. |
| 24:28 | So in terms of price we're talking here about a product that's somewhere in the region of about $300 to $400 US dollars. |
| 24:34 | These manual ring files can be purchased for somewhere in the region of about $40 to $50 US dollars or even cheaper so as I say much more cost effective option for those who are going to only be grinding a few rings, or building a few engines. |
| 24:50 | The problem with the manual ring file is they do require a little bit more care as I've mentioned. |
| 24:54 | In particular one of the aspects that we need to be aware of is that it is possible to rotate the handle that turns the grinding wheel in either direction. |
| 25:05 | And we always want to make sure that when we are adjusting our ring end gaps, when we are grinding a ring, we want to grind from the outside of the ring to the inside. |
| 25:15 | A lot of the modern rings that we are going to be using will have an inlay on the outer surface of the ring, and if we grind it from the inside to the outside of the ring this can grab and pull that inlay out of the ring and destroy it. |
| 25:28 | So that's the first tip. |
| 25:29 | So what we want to do is locate the ring on the bed and you can see we have a couple of little locating dowels here. |
| 25:37 | Another common mistake is a lot of people think that they want to locate the ring and squeeze it together against the grinding wheel and grind both sides of the ring together. |
| 25:48 | That's definitely not the way we want to use this. |
| 25:50 | We only want to grind one side of the ring, and in fact if we do that, if we grab that ring and squeeze it together and grind both sides we're going to end up with a ring end gap that's excessive and it's also only going to be parallel when the ring end gap is the same width as our grinding wheel. |
| 26:08 | So definitely not how we want to use that. |
| 26:10 | However with a little bit of care, a little bit of patience and a little bit of time, you definitely can get good results from one of these manual ring files. |
| 26:20 | The point here is if you are considering maybe a career building engines or maybe you're thinking of building a number of engines, or you're running a shop and you want to start doing your own engine assembly, the cost of an electric ring file can quickly pay for itself because they allow you to grind the rings much more quickly, they also allow you to do a much more consistent job across the entire set of rings for an engine. |
| 26:48 | So it allows you to do a much better job. |
| 26:52 | One last aspect once we have set our ring end gaps is that depending on how much material we are removing from the ring, we're likely to end up with a small burr on the ring where we've ground it. |
| 27:07 | So we can remove that, or we want to remove that before the rings are installed on the piston. |
| 27:12 | And what we want to do here is use a very fine needle file. |
| 27:16 | Now we're only going to be filing that burr off the side of the ring that we have just ground. |
| 27:24 | And all we want to do is just gently run that needle file against the edge of the ring. |
| 27:29 | And we just want to break down that burr. |
| 27:31 | We don't want to be chamfering the edge of the ring. |
| 27:34 | It should only take a couple of attempts to remove that burr and make sure that the edge still remains nice and sharp, so that's really important as well. |
| 27:46 | Now we've talked here about the basic recommendations that we're likely to get from our piston ring manufacturer. |
| 27:54 | I've already said that these are likely to be a little bit on the conservative side because the ring manufacturer definitely doesn't want those ring end gaps butting in use. |
| 28:05 | So we're going to be absolutely safe and generally there's nothing wrong with going with the recommendations. |
| 28:11 | If we are building an engine where we really want every last possible horsepower out of that engine, then there can be some advantage to come from adjusting and optimising the rings for your absolute application. |
| 28:26 | So this is particularly important if you're running in a controlled class where the limitations on what you can do to the engine are quite drastic. |
| 28:35 | Here we really need to optimise every single aspect of the engine and getting that ring end gap optimised is one area where we can do this. |
| 28:44 | Now this is difficult to do unless you are dealing with the same engine repeatedly and you're seeing that engine come back in after it's being run hard in service and you're stripping that engine down and inspecting it to see how it's wearing. |
| 28:59 | Now if you are doing this, it gives you the opportunity to see what those ring end gaps are looking like and whether there's potential that you may be able to tighten the ring end gaps. |
| 29:09 | So this is a scenario I went through with our Mitsubishi 4G63 drag engine program. |
| 29:15 | We were building multiple engines for our own use as well as a lot of our 4G63 drag customers. |
| 29:21 | And predominantly we were running on same fuels, similar power levels and similar piston and ring designs. |
| 29:29 | And what we could do there is build the engine, send it out and when it came back in we were able to inspect the ring. |
| 29:35 | Now what we're looking for here is any sign that the ring has been butting in operation. |
| 29:41 | So obviously as we've already found out, if the ring has been severely butting in operation, you're gonna know about it straight away. |
| 29:48 | Because the engine's going to be severely damaged. |
| 29:51 | Before we get to that point though there will be some slight signs that that's what's going on. |
| 29:57 | What we're going to be doing here is inspecting the edges of our ring end gaps, and what we're looking for is a polished appearance to our ring end gap. |
| 30:08 | If we're getting that polished appearance, that's the very first indicator that our rings are starting to butt together, and that's a clear warning that we've gone too far, and in fact we'd then need to increase our ring end gap by a couple of thousandths of an inch. |
| 30:22 | If we've got no sign of that butting though, if there's no polished appearance there, and we are understanding the risks involved and prepared to take them then we can then rebuild the engine with a new ring set and reduce that ring end gap slightly. |
| 30:36 | Obviously we're not going to want to go and make massive adjustments here, we don't wanna reduce that ring end gap by four or five thousandths of an inch. |
| 30:44 | We'd be making adjustments in the order of a thousandth of an inch or thereabouts. |
| 30:49 | And over the course of several engine builds and tear downs we start to get a feel for what is optimal for our particular application. |
| 31:00 | OK we're going to move into some questions and answers really shortly so if you do have any questions on ring end gaps, anything that I've talked about today that you'd like me to go into more detail on, please ask those in the chat or in the comments and the guys will transfer those through to me and I'll answer them very shortly. |
| 31:18 | Now before we move into the questions though, this is only one factor here that we're looking at that affects our ring seal or our blow by past our rings. |
| 31:29 | So it's really important not to put too much emphasis on the ring end gaps being the be all and end all. |
| 31:37 | When it comes to ring seal by far the most important factor is to make sure that we're actually starting with a perfect bore finish. |
| 31:46 | So that's going to give the rings the best possible chance of sealing against the cylinder wall. |
| 31:52 | So this involves making sure that our cylinders are perfectly round, that they are perfectly parallel from the top to the bottom of the cylinder. |
| 32:02 | We also want the correct hone pattern and finish on the bores to give the rings the best possible chance of bedding in. |
| 32:11 | There are some other factors as well to do with the rings and how they sit on the piston. |
| 32:16 | So in particular what we're looking for here is the correct clearance between the ring and the ring groove. |
| 32:24 | So there's two clearances there to consider. |
| 32:27 | First of all we have the side clearance which is essentially the up and down clearance between the ring and the ring groove. |
| 32:34 | And also the back clearance, so it's really important to make sure that there is sufficient back clearance with our ring and the ring groove. |
| 32:42 | And when the ring is all the way back in the groove it actually should sit slightly below the surface of the piston there. |
| 32:50 | This is an area, particularly the side clearance, this is an area where there has been quite a lot of development goes into very high end race engines. |
| 32:59 | Essentially what we're seeing there is rings being produced that are getting thinner and thinner. |
| 33:05 | The advantage of a thinner ring is that it allows it to deform a little bit easier to any irregularities in the cylinder wall. |
| 33:15 | But just as importantly it also reduces the frictional loss from the actual rings scraping up and down against the bore walls in operation. |
| 33:23 | The problem with going to a thinner ring is that it will run a lot hotter and it's the contact essentially between the ring and the ring groove in the piston that will reduce the heat or transfer the heat out of the ring. |
| 33:38 | When we go to very very thin rings, what we actually find is you can get problems with micro welding between the ring and the ring groove. |
| 33:46 | So this is where a lot of piston manufacturers are now offering treatment such as hard anodising of the ring grooves to prevent that localised welding. |
| 33:58 | And this also allows the clearance between the ring and the ring groove to be tightened up as well. |
| 34:04 | All of this is aiding the potential for that ring to do it's job properly and seal. |
| 34:11 | The other aspect that can affect our ring seal is the condition of the engine. |
| 34:17 | So what I'm talking about here is engines that have maybe not had regular oil changes, what we can find is that we'll get a varnish build up or a sludge build up in behind the rings, and this can affect the ability of the rings to seal properly. |
| 34:34 | So there is a lot more to it than just ring end gap. |
| 34:38 | As with anything to do with engine building, there's a lot of things going on here inside our engine and we need to make sure for optimal performance that everything is operating correctly, all of the clearances are optimal and if we can do that we're going to get an engine that's going to offer us the best performance possible. |
| 34:58 | So I guess really to just reiterate that first point, the title of this webinar, that ring end gaps can cause failure of your engine. |
| 35:11 | Well yes as we've discussed, absolutely if your ring end gaps are too tight, then yes you're definitely risking a potential and catastrophic engine failure. |
| 35:21 | The reality though is that with 16 years in the industry, most of that spent building very high performance engines as opposed to everyday road car engines, this is a failure mode that I almost never have seen. |
| 35:38 | Short of someone really stuffing up and not understanding what they're doing and setting those ring end gaps too tight it is definitely not as common as a lot of people in the industry would like you to think. |
| 35:53 | And of course then as we've seen as well, a lot of the failures that people are touting on the internet as a result of a ring end gap that's too tight, are actually more often than not the result of either detonation or preignition damage. |
| 36:10 | The last thing I want to touch on here before we jump into questions is the break in process. |
| 36:16 | 'Cause this is really important as well when we're talking about ring seal. |
| 36:20 | This really doesn't relate specifically to our ring end gap but it is related to the aspect of ring seal. |
| 36:25 | When we are breaking in a freshly built engine, there's a lot of misunderstanding or misinformation about what we're actually trying to achieve. |
| 36:34 | And a lot of people think that we are running in the bearings against the journals of the crankshaft, of course that's not the case. |
| 36:41 | If we are getting any metal to metal contact between the crankshaft journals and the engine bearings, that's going to result in engine damage and no amount of gentle running in is going to fix that. |
| 36:52 | The journals of course should be supported by a film of oil and there should never be any direct contact with the bearing surface itself. |
| 37:01 | There's also a lot of misunderstanding about the fact that we need to heat cycle the engine. |
| 37:05 | I think this comes from the terminology heat treatment. |
| 37:09 | A lot of the components that go into the engine are heat treated but of course the heat treatment process is achieved at much higher operating temperatures or higher temperature I should say, than what our engine operates at. |
| 37:20 | So really the key aspect when we come to engine break in is what we're really trying to focus on is to bed the rings against the cylinder walls. |
| 37:31 | So we're using that fresh honed pattern that is on the cylinder walls to basically grind down against the ring and get the ring seated properly against the cylinder walls so that they can do the best job possible of sealing. |
| 37:46 | And this requires an approach that needs to be reasonably specific although we're quite lucky these days because modern honing techniques combined with the modern rings that we have access to now, we almost need to try pretty hard in order to mess up the running in process. |
| 38:05 | But still I don't like to take any chances so I always religiously go through the same process because it has never let me down. |
| 38:12 | Now the first point is we want to always start with a mineral based oil in the engine. |
| 38:17 | Some of the modern full synthetic oils are so slippery that they actually can stop the rings from bedding in correctly so that's really important. |
| 38:26 | There are specific running in oils available as well. |
| 38:30 | I've used those in the past but generally in my experience they are exceptionally thin. |
| 38:35 | And generally because I am building high performance engines, even during the running in or break in process, the engines are generally producing relatively high specific power levels. |
| 38:45 | So I like the protection from a slightly thicker good quality mineral based oil. |
| 38:51 | Then what we want to do is understand what's happening during the combustion process. |
| 38:56 | When we go through the combustion process, we actually have the combustion pressure, getting in behind that top ring and forcing it out against the cylinder wall. |
| 39:06 | And that's what we really want to have happening in order to make sure that our rings are going to bed properly. |
| 39:12 | So it's really important not to baby a freshly built engine. |
| 39:15 | What we actually want to do is apply a moderate amount of load to get those rings forced out against the cylinder wall and make sure that they bed against that fresh hone pattern. |
| 39:25 | We've actually got a relatively limited time frame with which to get our rings bed in, before that hone pattern is smoothed out. |
| 39:32 | Generally this happens within about the first 100 kilometres of use. |
| 39:36 | We get about 85% of our ring bedding is done in that first 100 kilometres. |
| 39:41 | By the time we've got to about 200 kilometres of use, really that's it, we're done, and no amount of gentle running beyond that's going to have any affect on our ring seal. |
| 39:51 | Essentially our engine is completely run in around about 200 kilometres of use. |
| 39:55 | Beyond that it's basically running out, so you may as well get some enjoyment out of it and make the most of it. |
| 40:01 | So these people who are recommending 1000 or 2000 kilometres of light running for running in their engine, it's simply not necessary and often more detrimental. |
| 40:10 | So what we want to do is use periods of light or moderate load, so part throttle, little bit of throttle, little bit of boost if we're talking about a turbo charged car to force that ring out against the wall. |
| 40:20 | And then we also want to back off and go back to light load and this allows the ring to cool down. |
| 40:26 | Because obviously there's a lot of friction there against that coarse fresh hone pattern. |
| 40:31 | So we want to cycle between sort of periods of moderate load and then backing off and allowing the engine, the rings to cool back down. |
| 40:39 | So I just do this on the dyno, I'll run between maybe 3000 and 4000 RPM, cycle slightly into the throttle, maybe 30% to 40% throttle and then back off. |
| 40:49 | And I do this over a period of perhaps an hour. |
| 40:52 | And as I progress I increase both the amount of load as well as the amount of RPM that I'm using. |
| 40:57 | So that's the process I use, I'm certainly not advocating going straight to the rev limiter and full power. |
| 41:03 | But definitely allowing the engine to idle hot for long periods of time when it's freshly built can also be just as dangerous. |
| 41:13 | I almost forgot as well, one more aspect that I just want want to talk about here, is a ring system that we used in some of our drag engines. |
| 41:23 | This is a ring from Total Seal. |
| 41:26 | So I've got it here, we'll just go to our remote camera, hopefully you'll be able to see this. |
| 41:31 | So these are called a Total Seal gapless ring. |
| 41:35 | And the gapless ring is actually a two piece ring. |
| 41:39 | So as it's name implies, when it's installed in the engine it has essentially no gap. |
| 41:45 | So we'll just remove the two parts. |
| 41:47 | So what we have is a stepped ring. |
| 41:50 | And what we want to do is once the ring is installed, so in this case we will still have a ring gap as you can see there but it's much less critical because when the ring's installed we also install this little rail which sits on the step, we locate the gap for the rail, 180 degrees opposite to our top ring gap, or the other part of the ring gap. |
| 42:14 | And this gives no direct path for combustion pressure to get past the ring. |
| 42:21 | I've used these, they do give really good results, particularly if you're doing a compression test or a leakdown test. |
| 42:29 | If you compare the results from gapless ring to a conventional gapped ring, they're always far far superior. |
| 42:36 | In reality though I don't see a significant difference in terms of the actual power that we are seeing on the dyno. |
| 42:45 | One of the reasons I did use these gapless rings in our high boost turbo charged engines, particularly if we aren't running dry sump lubrication, is it does massively reduce the blow by gases into the crank case. |
| 42:57 | And in turn in a high boost application this is going to result in the engine breathing less. |
| 43:02 | So when we're talking about engines running 40, 50, or 60 psi of boost without a dry sump system, it can be really difficult to stop the engine from essentially pumping oil out the breather and filling a catch can during a pass on the drag strip. |
| 43:17 | So these gapless rings are a benefit there. |
| 43:20 | The other aspect with the Total Seal gapless rings in my own experience is that they do tend to have fairly limited life spans. |
| 43:27 | So perfectly OK for drag applications but possibly not quite so ideal for circuit racing or a street engine. |
| 43:36 | OK we'll move into some questions and answers now. |
| 43:39 | Of course if you do have any other questions, please ask them and I will be happy to try and answer them. |
| 43:46 | Our first question comes from Falla who's asked, are rings for any type of cylinders? I've got an Audi with factory oil consumption problem, also should I just change the rings or get a fresh set of pistons with the rings? No you do need to be a little bit careful here. |
| 44:03 | The rings do need to be matched to the bore material. |
| 44:07 | So predominantly here we are dealing with, most engines run a cast iron sleeve, or a cast iron block entirely, so a lot of the rings we see are designed to work on this cast iron material. |
| 44:22 | Very very rare but there are other cylinder bore materials which won't work with our conventional rings. |
| 44:29 | Also there is a coating process such as nikasil which is applied directly on aluminium so it allows the rings to run against the aluminium without wearing them. |
| 44:38 | So for some of the special bore materials then you do need to be aware that they do need to be run with a certain ring material. |
| 44:47 | You'd need to talk to your piston and ring manufacturer about that, I cannot advise you unfortunately further than that. |
| 44:55 | Chad has asked if you turbo charge a high compression naturally aspirated engine and simply freshen it up, would you recommend running a slightly larger ring gap than the manufacturer? OK this is a question that I've actually had a few times, and in my own experience, generally we don't need to adjust the ring gaps. |
| 45:14 | Now the reason for this is generally if we're running a naturally aspirated compression ratio and we've turbo charged the engine, what we're gonna find is that while yes we are producing more power, there's a limit to how much boost we're gonna be able to run on that engine before we start getting to a position where we run into problems with detonation. |
| 45:34 | So there's a very real ceiling to essentially how much we can push a naturally aspirated piston or a naturally aspirated engine when we add a turbo charger to it. |
| 45:44 | The flipside of this is that we obviously can run on a better grade of fuel such as E85, we're doing exactly this on our Subaru FA20, and we're at approximately double the factory power level measured at the wheels on our Mainline dyno running about eight psi of boost using a Borg Warner turbo charger on E85. |
| 46:05 | We are still running the complete stock factory engine, complete with the factory ring end gaps. |
| 46:12 | Now the reason for this is there with the E85 we tend to run a little bit cooler. |
| 46:16 | So we're still within the margin of safety that the manufacturer has provided us. |
| 46:21 | Now obviously that's not a blanket solution. |
| 46:24 | There may be some situations where we're really pushing a factory engine really hard. |
| 46:30 | Some particular engines that may be up to taking a huge amount of power over and above what they're designed for. |
| 46:38 | If that's the case then yes certainly it would be worth considering adjusting those ring gaps. |
| 46:44 | TD Champs asked what's the best way to measure the back clearance? Generally this can be done essentially visually. |
| 46:51 | If we look at our ring manufacturer's specifications here, we have actually got some specifications here on both the minimum back clearance, in this case we're looking at five thou. |
| 47:07 | And in the side clearance as well. |
| 47:11 | So this is something that generally if we're purchasing new products, new pistons, new rings, these are all designed to work together, and we can at least check the back clearance here just visually. |
| 47:23 | So if we hold the piston up to the light and we drop the ring into the groove we're going to be able to see that it does sit down below the surface. |
| 47:31 | So that's about as elaborate as we're going to be able to get, short of having some really specific measurement equipment there. |
| 47:39 | Again in my experience from sort of 16 years now in the industry building performance engines, unless we are mixing and matching parts that were never designed to work together, this really is seldom an actual issue. |
| 47:54 | The side clearance between the piston ring and the ring groove can be a consideration we need to check if we are rebuilding an engine which has had a lot of use, this can loosen up and also if we've got a piston that has been exposed to detonation, we can get the reverse scenario where the ring groove is actually tightened. |
| 48:15 | So that's actually one of the aspects I always recommend checking when we disassemble an engine, just to make sure that the ring is still 100% free in the ring groove. |
| 48:25 | If there is a problem there we wanna catch that pretty early on. |
| 48:31 | Mariano has asked, I'm just getting ready to put together my Mitsubishi 6G72 performance engine, looking for 650 horsepower. |
| 48:39 | My question would be is there a happy medium ring gap that would allow me to happily run that power and yet have a reliable daily driver without having too much blow by? Look if you're sort of building a 6G72, that's relatively large capacity engine, so 650 horsepower is certainly not outside of the realms of reality for that engine, so I don't believe at that point, a compromise is really needed at all. |
| 49:07 | I would be probably looking, depending on your specific ring, obviously I can't give you specifics here because every ring is a little bit different in terms of its material so you still need to base your decision on the ring manufacturer's recommendations but in this case if we're looking at our JE pistons recommendations here, I'd be looking at somewhere in the region of about five thousandths of an inch per inch of bore for our top ring. |
| 49:32 | That's going to be pretty safe if you're running that engine on pump gasoline there. |
| 49:38 | Dylan has asked how can a ring gap become too tight? It's not going to become too tight. |
| 49:44 | It's only going to be too tight as a fact of you haven't given it enough clearance during the assembly process. |
| 49:53 | So as the rings wears, as the bore wears, essentially we're going to find that that ring end gap will marginally open up if anything. |
| 50:01 | So we're not going to end up with the ring gap being OK at one point and then becoming too tight. |
| 50:07 | So that's not a situation there that's going to be an issue. |
| 50:12 | Army's asked is the tool to square the ring in the cylinder you showed during this webinar a universal tool, or is there many size available regarding the bore of the engine you're using? OK so probably didn't really focus on that enough, so this ring squaring tool that I am using is universal. |
| 50:26 | So essentially you just compress it and you can adjust it for any bore diameter. |
| 50:31 | Now these probably are a tool that you should be considering purchasing because they're cheap as chips. |
| 50:37 | I think these are in the region of about USD$10, you can buy them on eBay, you can buy them on Summit or Jegs so really no reason not to have one. |
| 50:46 | However if you don't have one, an alternative solution here which I was going to show, we've got one of our pistons here. |
| 50:53 | This only will work if you've got a flat top piston. |
| 50:56 | And what I've done is I've installed the second ring on the piston. |
| 51:00 | So what we can do now is we can actually drop that piston into the bore upside down, press it down against the ring that we've got in the bore, and push it down until that second ring just locates on the top of the bore. |
| 51:13 | So that's going to again make sure that our ring is located down the bore the correct amount and it's squared correctly in the bore. |
| 51:20 | Again it won't work if you've got a domed piston where the dome is going to interfere with the ring though. |
| 51:29 | Wally's asked, so essentially race application of fuel will get you a gap window and then your gap will be proportional to your power, combustion force, and temperature? Yeah that's probably a pretty good way of looking at it really. |
| 51:43 | Yeah in a nutshell that's sort of sums up what we're looking at here. |
| 51:47 | Our next question comes from Lucas who's asked, high correct gaps for E85 fuel? Not quite sure there if I'm sort of deciphering that correctly, I think Lucas is asking do we need to increase our ring gaps for E85 fuel. |
| 52:03 | And generally that's not the case, but we do need to be a little bit cautious of this information as well. |
| 52:09 | So all things being equal, if we take an engine that's producing let's say 600 horsepower on pump gasoline, and we went to E85, at that same power level, we're actually going to be producing less combustion temperature, we're gonna be pulling less heat into the rings than we were on pump gasoline. |
| 52:26 | However one of the reasons, and obviously that in itself would entail that we don't need our ring end gaps to be as large. |
| 52:34 | However one of the reasons that most people will go to E85 is so that they can increase the boost and push the engine harder, and as we do that we can end up with our combustion temperatures being the same or higher than on pump gasoline. |
| 52:46 | So again it becomes a factor of your actual, all of the factors taken into account and considered. |
| 52:58 | Donald has asked how many engine hours do you reckon would complete the break in process? So for us on the engine dyno or the chassis dyno we were running the engine for approximately one hour and then we would perform an oil change. |
| 53:12 | We would get rid of the running in oil, we would also change the oil filter because during that initial break in period, we are getting a lot of the assembly lube, silicons, and bore scrapings from that running in process getting into the oil so we want to get rid of that relatively quickly. |
| 53:30 | So beyond that, beyond about 100 kilometres of use, I'd consider the engine run in well enough to continue with the tuning process and start pushing it hard. |
| 53:42 | AJ has asked what determines the ring end size and also is there a specific alignment for the rings? Meaning if they should be 180 to each other? OK so I think we've talked about the ring, I think you're talking the ring end gap there. |
| 53:57 | We've talked about some of the factors there that determine that ring end gap, and we've talked about the fact that there is a specification there from the manufacturer that we can work with. |
| 54:06 | Yes there is also a specification for where our ring end gaps should be aligned. |
| 54:11 | So let's just see if I can show this here again on our JE ring information. |
| 54:18 | So let's just jump across to our remote camera. |
| 54:22 | And this is basically looking down on the top of the piston and we can see that we've got our location for our top compression ring end gap, our second compression ring end gap, you can see that these are 180 degrees opposed. |
| 54:35 | So basically we're giving the combustion pressure the least possible chance of going straight through there. |
| 54:41 | We've also got our oil ring expander gap range and our oil ring rail gap. |
| 54:49 | So this is how we want to set up our piston, our rings on our pistons when we are installing them. |
| 54:55 | However it is also important to understand that these rings do tend to rotate in operation. |
| 55:04 | So the rings actually do move while the engine is operating so they aren't going to stay put, but we always want to align them at least to start with, give ourselves the best chance of having them in the correct location. |
| 55:16 | James has asked LS with factory rings, what would be a good ring gap for a 350 shot of nitrous? That's a pretty decent shot of nitrous. |
| 55:27 | You will quite often get quite a large window here, so what I mean by this is there's a number of people that have run turbo chargers on absolutely stock LS engines and found that there's no need to increase the ring end gap. |
| 55:48 | So there's a number of cases of people producing 800 plus horsepower at the wheels using a stock LS short block fitted with a turbo charger, and been absolutely fine. |
| 55:59 | A lot of it again comes down to the fuel that you're running on so there is a little bit more to consider than just the fact you're adding a 350 shot of nitrous. |
| 56:08 | In particular with the nitrous what we do find is the cooling nature of the nitrous helps again there. |
| 56:16 | And we've got the factory ring end gap is still going to give quite a large buffer there. |
| 56:23 | So straight out of the factory the ring end gaps aren't exactly right on the small side, not right on the limit for that factory engine. |
| 56:31 | So as soon as we're essentially adding power adders, increasing power level, we're not gonna have our rings butt together. |
| 56:37 | So what I would do there is basically have an inspection and see where the ring gaps were. |
| 56:44 | It certainly wouldn't hurt if the engine is apart to increase the ring end gap, maybe by somewhere in the region of half a thou per inch of bore if you know that you are building it with forced induction or nitrous in the pipeline. |
| 57:02 | Project D has asked, does blow by or oil consumption increase linear to the ring gap being opened up, in other words is more oil consumption a necessary by product of setting the gap looser? For example for a dedicated boosted road racing engine? I wish I actually had a study to show you, I know that I have seen some data from this and it wasn't absolutely linear so no, but I don't have anything more specific to show you there. |
| 57:29 | I remember seeing a dyno, some results from a dyno test that a very famous engine builder who's name currently escapes me, did on some small block Chevy engines and they looked at both the blow by as well as the power across a wide range of ring gaps, and it definitely wasn't linear. |
| 57:51 | What we ended up with is very small changes to both power and blow by when we were close to that optimal range of ring end gap. |
| 58:00 | And then as they increased the ring end gap, we saw an exponential increase in blow by and reduction in power. |
| 58:13 | Donald has asked is it not advisable to reuse piston rings? Well really it depends there on the condition of the rings. |
| 58:21 | If the rings are in good condition, if there's no wear showing, if there's no reason to replace them then generally it's not necessary, however generally also if we are rebuilding the engine, the piston rings are a component that does wear. |
| 58:39 | if we've got the engine apart, if we've gone to the trouble of machining the engine block, then it's a good idea to replace the rings and make sure that you are replacing a component that will wear out. |
| 58:53 | K Clem has asked, it's my first time gapping rings, I started by filing only one side. |
| 58:59 | When compressing the ring in the cylinder I noticed the gap was not parallel i.e. it was tighter on either the outside diameter or the inside diameter. |
| 59:06 | At this point I filed the other side to get the gap parallel so my feeler blade fit nicely. |
| 59:11 | I'm not sure if this was correct but have you experienced this and do you ever file a little from each side so that the feeler blade sits nicely? OK not strictly the way I normally would go about setting my ring gaps. |
| 59:25 | Generally I am filing from one side of the ring. |
| 59:28 | What we will find though is some of the rings that I've dealt with, during their manufacturing process, what they end up with is essentially almost what I'd refer to as a slight bump or imperfection on one side of the ring end gap. |
| 59:43 | So if we've got a ring like that, what we want to do is inspect the ring end gap and we want to see if we do have that sort of situation showing, if that's the case then that is the side of the ring that I'm going to be filing. |
| 59:56 | So we should be able to adjust one side of the ring end gap in order to make sure that our ring end gap ends up parallel though we shouldn't need to file both. |
| 01:00:07 | However ultimately if you've got the correct ring end gap and your rings ends are parallel, then there's really nothing detrimental to doing what you've done. |
| 01:00:22 | Rocky Boyce has asked, do the rings not spin and change locations of the gap's placement once you open the motor and the gap location still placed where they were. |
| 01:00:30 | So no I've covered that over. |
| 01:00:32 | You will find that these rings will rotate in operation. |
| 01:00:38 | If I remember correctly, the general guide is that they can rotate at something in the region of about a 10th of the engine RPM just to give you a bit of a guide. |
| 01:00:49 | So no they will rotate and of course the rings don't necessarily rotate at perfectly the same rate. |
| 01:00:55 | So it's likely that when we do disassemble the engine that we may find that sometimes the ring end gaps actually end up lining up. |
| 01:01:03 | But the general idea is that we are at least going to align those ring end gaps initially for that first start up and then obviously we've got no control over what's happening to the rings in operation. |
| 01:01:14 | Andrew Rasmussen has asked, you stated that too tight of a ring gap, can cause the ring lands to fail, why is that? OK so essentially what we end up with is the ring expanding so much that it seizes in the bore. |
| 01:01:27 | So then we've got a situation where the ring is basically holding the crown of the piston up and the conrod is trying to pull the wrist pin out from the underside of the piston. |
| 01:01:39 | So this can result in a range of failures, one of the common ones is that it will break the ring land on the top of the piston. |
| 01:01:46 | So it will actually allow the ring essentially to pull out of the top of the piston, or at least make enough room so that it can crush back down and allow the engine to continue operating. |
| 01:01:56 | The other mode of failure in a really severe circumstance is where either the entire crown of the piston is ripped off or alternatively the wrist pin is ripped out of the base of the piston. |
| 01:02:10 | OK that looks like it's taken us to the end of our questions so for those who are watching here on Facebook, we do also have a free live webinar coming up that covers all of the engine building concepts, so it goes into a little bit more detail over what you've seen today. |
| 01:02:28 | And you can claim your seat to our next webinar lesson by clicking the link in the comments. |
| 01:02:35 | For our HPA members if you do have any questions on this webinar after it's aired, please ask those in the forum and I'll be happy to answer them there. |
| 01:02:45 | Thanks everyone for joining us. |
| 01:02:47 | Now for those who have been watching on Facebook as well, this is a little bit of an insight into what we run every week for our HPA gold members. |
| 01:02:56 | You can purchase gold membership, which will give you access to these live webinars every week as well as our archive which consists of over 145 hours of existing webinar content. |
| 01:03:07 | It will also give you access to our private members only forum where you can get fast and reliable answers to your specific questions. |
| 01:03:17 | You can buy gold membership for USD$19 a month. |
| 01:03:20 | You'll also get three months of free gold membership with the purchase of any of our courses. |
| 01:03:27 | Alright guys thanks for joining us, look forward to seeing you all next week. |


