194 | How to balance Connecting Rods
Summary
Balancing the components inside your engine can add up to an engine that operates more smoothly and lasts longer. When it comes to balancing the connecting rods however it’s not just a case of matching the overall weights of the rods. In this webinar we’ll find out what you need to know and you’ll see how to correctly balance conrods.
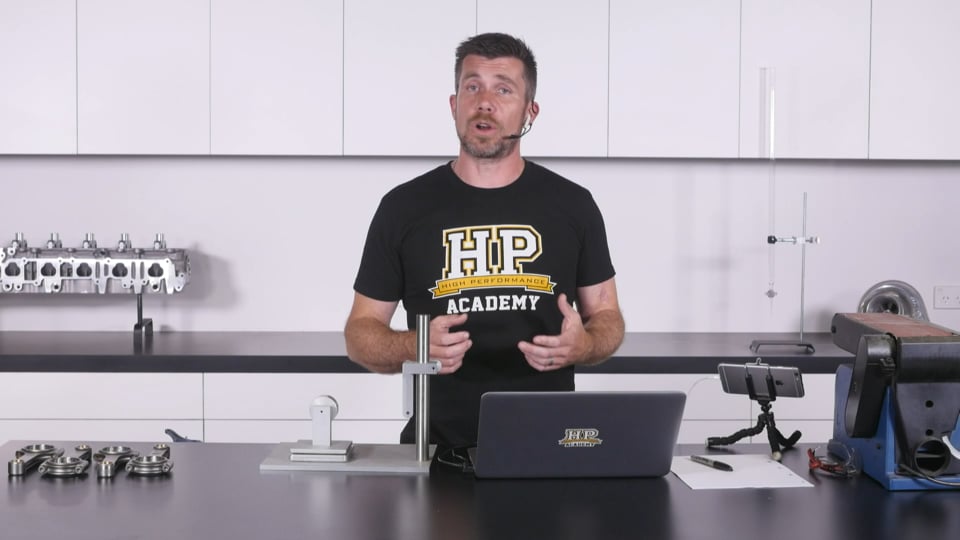
| 00:00 | - It's Andre from High Performance Academy, welcome along to another one of our webinars. |
| 00:04 | Now this time we're going to be looking at the process of balancing a set of connecting rods. |
| 00:09 | Now this is a task that a lot of engine builders both novice and pros alike will actually leave to the engine machine shop. |
| 00:17 | And there's absolutely nothing wrong with that, it's definitely not something that you need to be doing yourself. |
| 00:24 | Personally though I like to have as much control over the building process as I can and when I'm balancing the conrods myself, I know that I can get them to a specific tolerance that I'm looking for and of course if I can't then I've got no one to blame but myself. |
| 00:41 | I like to leave as little to chance as possible so by bringing all of these tasks such as balancing conrods in house, it just gives us a little bit more control over the whole process. |
| 00:53 | No as usual with this webinar we will be having questions and answers at the end of the webinar so if there's anything that I do talk about that you'd like me to jump into a bit more detail on, please feel free to ask those in the comments and we'll deal with those at the end. |
| 01:09 | Now balancing conrods, not too dissimilar in some ways to balancing a piston but there is a tricky part to the connecting rod just in the way that it operates inside the engine. |
| 01:21 | With our pistons, the whole process is really simple, all we need to do is weigh the entire set of pistons, find the lightest piston, simply remove material from any piston that's heavier, until we've got our set of pistons balanced to whatever tolerance we're personally going to be happy with. |
| 01:36 | So that's a pretty straightforward process, there's not a lot of complexity in that. |
| 01:40 | If you do want to see that in more detail, we do have another webinar in our archive that you can search for and you'll see that entire process. |
| 01:48 | However when it comes to the connecting rod, it's not just a case of the overall weight of the rod, there's a little bit more to it. |
| 01:56 | And this is because of the way the conrod operates inside of the engine. |
| 02:00 | Part of the mass of the conrod is considered to be rotating and part of the mass is considered to be reciprocating. |
| 02:07 | So when we are balancing the conrod, we need to actually separate the masses of the conrod out into the mass of the big end and then the mass of the pin end or the small end. |
| 02:19 | So it's not just a case of banging these on a set of scales, finding the lightest one, and then removing material from the heaviest. |
| 02:25 | We need to be a little bit more specific in how we do that, and that requires some specialist equipment which we've got here, we'll talk about that in a second. |
| 02:34 | We're also going to have a demonstration of exactly how we go through that process too. |
| 02:40 | Now the next topic I want to talk about though is the balancing tolerance. |
| 02:43 | This is quite important, there's a lot of controversy about this and we put this out with our piston balancing video that's been doing the rounds on Facebook for a while. |
| 02:54 | We've had a lot of people weigh in saying that the tolerance that we were using, which in that case was a tenth of a gram, and I'll admit is incredibly tight, is simply unnecessary. |
| 03:03 | And there are two schools of thought on this. |
| 03:06 | The people who argue that that's too tight will come back and say that there is going to be some mass of oil attached to the piston, that's going to affect the overall balance and I don't disagree with that. |
| 03:17 | Clearly in operation, yes there is going be some oil film on both the piston and the connecting rod, clearly that's going to affect our balance. |
| 03:25 | My argument however is when I'm building an engine I will want to control the aspects that are within my control. |
| 03:33 | I'm not able to control the oil film on those components but I can control the weight and I've never seen any downsides from having a component that is balanced too well. |
| 03:43 | So basically here what I need to say is you can choose your own level of tolerance, something that you're personally happy with. |
| 03:51 | While we chose a tenth of a gram on the pistons that we balanced for our demonstration, it's not always going to necessarily be the way. |
| 03:58 | On a much heavier piston I might choose a looser tolerance, maybe somewhere in the region of half a gram, what we're looking at really is the percentage of our tolerance versus the overall weight of the component. |
| 04:10 | With our connecting rods, again just because of the process we're going to go through and some necessary complexities in the weighing, it's not going to be something I'm looking for down to a tenth of a gram. |
| 04:21 | Generally I'm going to be looking at around about a half a gram of imbalance between our conrods and again that is quite tight. |
| 04:30 | In this case our K1 rods here have a maximum imbalance of plus or minus one gram so basically this could have a total imbalance between lightest and heaviest of two grams. |
| 04:41 | They would still be within specification. |
| 04:44 | So I'm not too comfortable with that level of imbalance and I'm going to try and get them a little closer than that. |
| 05:49 | ...conrods, we do also need to take into account one other aspect and this is what the design of our engine is. |
| 05:56 | Now I'm talking here of are we dealing with an inline four cylinder, and inline six cylinder or maybe a horizontally opposed engine? Or alternatively are we looking at a V configuration, maybe a V6 or a V8? Now the reason that's important is because for example in an inline four cylinder, the way the piston and conrod assemblies operate inside the engine, they effectively balance each other out or cancel each other out. |
| 06:22 | What I mean by this is that the piston and conrod assemblies can be balanced independently of the crankshaft. |
| 06:30 | What we're doing is balancing all of the conrods together, all of the pistons together and then the crankshaft and any other rotating components such as pulleys, flywheels, flex plates et cetera, can be balanced independent of the connecting rods and pistons. |
| 06:43 | This gives us a little bit more flexibility because we can slot the balancing process of our piston and conrod assemblies in anywhere in the build process, either before we send our components off to the engine machine shop or alternatively once we get our components back. |
| 06:59 | On the other hand, if we are dealing with a V configuration engine, maybe a V8 for example, then things are a little bit different here. |
| 07:07 | Here due to the way the engine operates, the weight of the piston, the conrod, even the bearing shells and the ring set does need to actually be taken into account. |
| 07:15 | So this goes through a calculation that forms what's known as a bob weight which is a mass that is physically attached to the crankshaft jorunals during the balancing process. |
| 07:27 | So what I mean by this or why this is important is if you are balancing components on a V configuration engine and you're sending those components out to your machine shop, you need to balance your connecting rods and your pistons before you do so. |
| 07:41 | If you get everything back from the machine shop and then balance the crankshaft, and then you go an remove mass or material from the pistons and rods, it's going to affect the overall balance of the engine, so you don't want to be doing that. |
| 07:52 | And on that note, it's also worth mentioning here that some part of this process, namely the balancing of the crankshaft itself as well as our pulleys, this is something you're going to need to leave to a specialist machine shop. |
| 08:06 | It requires a special balancing machine, this isn't something that we're going to be able to have access to as a hobbyist or home enthusiast engine builder. |
| 08:17 | Alright so what we're going to need here in order to balance our connecting rods, we've obviously talked about that fact that we need to be able to separate the mass of the conrod out into the big end and small end and in order to do this, we're going to need our conrod balancing fixture. |
| 08:36 | I've got one of these here in front of me and basically this is just a fixture that supports the connecting rod and allows one end of the rod to be weighed. |
| 08:45 | So what I'll do is just slot this connecting rod, actually got another one out here that I've set this up for so rather than change it all around, we'll slot this connecting rod into place here. |
| 08:58 | And we can see that the small end is supported by this little arm here, which is supported on roller bearings so it's low friction. |
| 09:09 | Likewise the big end is supported on a little form that is also supported on roller bearings so it's all low friction and this is quite important in order to try and get repeatable results. |
| 09:21 | We can also adjust the height of the arm, basically what we're trying to do is locate it so that the arm is falling vertically once we've got our conrod installed and we want the conrod to be sitting horizontally on our scales. |
| 09:35 | Now this particular fixture here, if I remember correctly was purchased from JEGS online parts supplier in the U.S., pretty popular. |
| 09:46 | I think these are around USD$120. |
| 09:50 | So it's not a bad option but we have found some difficulties which you're gonna see first hand shortly, in getting really good repeatability with this particular fixture. |
| 10:01 | Despite the fact that it does use small roller bearings there, there's obviously still a little bit of friction in the system, and this can bring in some inconsistencies in getting a real good repeatability from one reading to the next. |
| 10:14 | So what I wanna show you, if we can just jump across to my laptop screen for a moment. |
| 10:20 | This is a alternative option and from everyone I've talked to who has used a system like this, this is much better for repeatability. |
| 10:29 | So what we can see here is that rather than using that little arm which our particular fixture uses, we can see we've just got this hanging fixture. |
| 10:41 | So it introduces a lot less friction in the system and supposedly far superior for repeatability. |
| 10:48 | This one, before you get too excited, comes form D Worx, it is not available at the moment, this is a product that they have produced in the past, I don't know why but it is currently not in stock. |
| 11:01 | I've tried to get hold of one and I've had no replies back from guys so unfortunately that one is off the cards. |
| 11:08 | But there are other options that are on a similar principle to what you're looking at there. |
| 11:15 | Alright so that covers the balancing fixture, that's obviously the key part. |
| 11:18 | Then on top of that we are also going to need a set of quality digital scales. |
| 11:25 | Now I say quality, these are actually sourced from Ally Express in China. |
| 11:32 | And surprisingly these were about USD$20 so not quite what you would really think of when you're talking about a quaility or precision set of scales. |
| 11:43 | Now despite this we have checked this set of scales back to back with some much more expensive scales and we actually have found that they are remarkably accurate. |
| 11:55 | The important thing though when it comes to balancing our connecting rods, or actually any of our engine components here, what we're going to be doing in the home workshop, the absolute measurement that we're seeing on these scales isn't actually the important part. |
| 12:11 | What we want instead is repeatability. |
| 12:14 | What I mean by that is it's really important to be able to put the same component on the set of scales four times and get four identical readings. |
| 12:22 | And that's where these scales have proven to be pretty great. |
| 12:25 | What I'm talking about here is a little difference, just to clarify I've already mentioned that we have some problems with this particular fixture, getting repeatability, that's an aspect though of the fixture, not of our scales. |
| 12:38 | So for example if I take the fixture out of the equation and we put one connecting rod on our set of scales and we measure it three or four times we're going to get exactly the same value, so that's the important part. |
| 12:49 | So when you're looking for a set of scales, we want something that can measure up to about two kilograms, and we want it to have precision down to about a tenth of a gram. |
| 13:00 | So it's no use if you've got a set of scales that will measure up to 10 kilograms and they're only going to be accurate to maybe a gram, maybe half a gram, that's going to be no good for our purposes. |
| 13:13 | Alright so we're going to now talk about what the process is or what we're going to try and achieve approximately. |
| 13:22 | And this is to essentially measure our entire set of rods and we're going to start by measuring all of the big ends of our connecting rods on our fixture. |
| 13:32 | So what we're going to do here, and again I will show you this in a little bit more detail shortly, but we're going to measure all of our rods, we're going to get the fixture set up like this and we're going to write down all of our measurements for the big end on each connecting rod. |
| 13:46 | Once we've done this, and we're going to see, I'm gonna take multiple measurements, we'll remove the highest and lowest of these and average the rest, it's gonna give us the best possible results with this particular fixture. |
| 13:58 | We're going to then have an idea of which is our lightest rod, which is our heaviest rod. |
| 14:03 | We're then going to be removing material from the big end of the connecting rods that are heaviest until we've met whatever our tolerance is that we're aiming for. |
| 14:13 | So at this point we will have matched the masses of all of the connecting rod big ends, of course our job is not complete at that point. |
| 14:21 | We still can have some discrepancies in the small end or pin end of our rods. |
| 14:26 | The process we go through after that though, we don't need to use our conrod balancing fixture for the second part of our process. |
| 14:33 | All we need to do then is measure the overall weight of the rod. |
| 14:37 | So of course if we were measuring the overall weight of the rod and we know that all of the big ends of the rod weigh the same, any discrepancy then is coming from the small end, so we're then going to go through the same process, removing material from the small end of our rod, until we've got our balance within our tolerance. |
| 14:56 | So this is the process we're going to go through. |
| 14:58 | The other piece of equipment that I haven't mentioned yet is our linisher which we've got over here. |
| 15:05 | So this is actually a relatively cheap linisher, I think I picked this up for around about $150. |
| 15:12 | It's actually made for woodworking but by switching out the belt to a metal working belt, it's actually been perfectly capable of doing the job and has been pretty reliable. |
| 15:23 | We're not really asking much from a linisher when it comes to removing material from our connecting rods so it's not a particularly challenging task. |
| 15:31 | Now the next aspect we'll just talk about here is where to remove material from our connecting rods because obviously when we're removing material from the rods, we have the potential to weaken them, we don't want to be doing that. |
| 15:46 | Every rod is different in its design as well. |
| 15:49 | So if I can find my other rod, yeah I can. |
| 15:55 | So we've got two different designs here, this particular one I think is an Argo rod from Australia, this one here is a K1 Technologies rod. |
| 16:02 | The K1 rods are actually a little bit tricky because they don't actually have a lot surplus material on them. |
| 16:08 | This is great for keeping the weight of the rod down but it doesn't give us a lot of potential to remove further material in order to balance them. |
| 16:15 | So when it comes to removing material from the big end of the rod, let's just switch across to our iPhone camera and I'll show you what we're trying to fo here. |
| 16:25 | So a lot of engine builders, and I've seen professional machinists do this, they'll grind material off these ribs on the back of the cap. |
| 16:34 | Now you can get away with that. |
| 16:37 | I've run engines that have had material removed from this place. |
| 16:41 | But it isn't ideal, the reason that those ribs actually exist is to stiffen the cap. |
| 16:47 | So any time we're removing material from those ribs, we're potentially removing strength from the cap that's going to allow more flex, and this can end up allowing our big end bore to move around, affecting our oil clearance so not ideally what we want. |
| 17:04 | Instead, let's just jump back across to our iPhone camera again. |
| 17:09 | What we wanna do, or what I prefer to do is linish material off these edges down the side of the body of the cap where the rod bolts sit. |
| 17:19 | So we can actually see, I'll switch it around here, that this rod actually has already had some material linished off here in a demonstration that I've done. |
| 17:27 | So we wanna remove our material carefully. |
| 17:31 | We don't wanna take all of our material for example just from one location. |
| 17:34 | If we're trying to take let's say half a gram of material I'm going to be splitting this between the four edges, we've got this one here, obviously this one here, and then we've got another two edges on the other side of the cap so it's all about using a little bit of common sense and making sure that we're minimising the amount of material we're removing from one place. |
| 17:55 | In other words just retaining as much strength in our conrod as we possibly can. |
| 18:01 | So just yeah a little bit of common sense needs to be applied. |
| 18:05 | When it comes to balancing the small end, our options there are a little bit more limited. |
| 18:12 | And what we want to do here is we're going to run our linisher around the outside of the wrist pin boss. |
| 18:18 | Now again here this is a place where we can come unstuck. |
| 18:23 | We don't want to remove excess material from one particular spot. |
| 18:27 | And particularly when we are doing this, we want to remove material smoothly and evenly from the entire circumference around there. |
| 18:35 | So it's not a case of jumping on our linisher and just grinding a big flat across the end of the conrod. |
| 18:41 | That's gonna remove too much material from one place. |
| 18:44 | It's also quite possible that we're going to end up over heating the rod material and affecting the steel so we don't wanna be doing that. |
| 18:53 | So it's a case of smoothly removing it from the outside and also another really great tip here which should go without saying, is that when we are removing material from our connecting rods we want to do this gradually and we want to check our progress frequently. |
| 19:08 | It's really easy to get a little bit carried away and remove too much material, and then we're going to end up in a situation where we've gone too far, and we need to go back through our entire set of conrods and rebalance all of the ones that we've already gone through. |
| 19:23 | So not a lot of point doing that. |
| 19:26 | Alright so we'll go through the process now that we need to cover off and then once we've gone through the process, we're also going to go through a quick practical demonstration which hopefully everything's gonna go absolutely swimmingly. |
| 19:40 | So the first place to start is to thoroughly clean all of our components. |
| 19:46 | And this actually requires us to start by breaking the conrods down. |
| 19:49 | So we need to actually remove the bolts and need to remove the cap from the body of the rod. |
| 19:55 | The reason I'm going to do this is that we want to thoroughly clean all of the lubricant off the bolts. |
| 20:00 | So as delivered our rods will have the bolts installed with lubricant on them, and of course it's quite possible that the amount of lubricant from one rod to the next will affect its balance. |
| 20:12 | We want to also make sure that there is not dirt and debris trapped in there. |
| 20:16 | So we wanna make sure that everything is absolutely pristine and clean. |
| 20:20 | And at the same time this is a good place to mark our conrod and body and cap. |
| 20:26 | So again if we'll just jump across to my iPhone camera, bit dark in here, but hopefully you'll be able to see. |
| 20:33 | I've marked the cap and body here just using a vivid or sharpie marker. |
| 20:38 | So that's a permanent marker. |
| 20:40 | There is a problem if you're just going to use a marker in that during the cleaning process if you're using a brake clean or isopropyl alcohol product, that's actually going to remove those markings. |
| 20:51 | It's imperative that the body and cap stay together as a matched set, you can't mix and match caps with bodies, it's going to affect the bore diameter of the big end and it's going to affect your bearing clearance, so you need to make sure they stay together. |
| 21:05 | So a good tool for doing that if you wanna make a permanent mark, I use a Dremel engraver and I just engrave those numbers onto the caps so that they are always gonna be there. |
| 21:16 | Don't please use metal punctures to mark your rod body and cap. |
| 21:22 | That can actually distort the material and it's not a good idea. |
| 21:26 | So once we've got everything cleaned and everything marked up so we know everything is going to be consistent, we wanna set up our fixture here. |
| 21:35 | So what we wanna do again is just make sure that we've got in the location of the fixture set up so that everything is going to be horizontal and everything is going to give us the best possible result. |
| 21:48 | So let's just get our conrod onto this fixture for the moment. |
| 21:52 | And if we go onto our overhead camera, the first problem we can see is that the conrod is off to one side. |
| 21:59 | So that's not what we're trying to achieve. |
| 22:01 | We'll get that in line there. |
| 22:03 | And then the other thing. |
| 23:05 | ...phone for back up. |
| 23:07 | At the moment it is working so I will continue. |
| 23:09 | So what we're trying to do here is make sure the alignment of everything is straight so I don't know if it came through before but, whoops it just fell off, that's not a good start. |
| 23:20 | When I first put the conrod onto this fixture, I ended up with, it was quite exaggerated, something a little bit like this. |
| 23:27 | Clearly that's not gonna give us the best result so we wanna start by getting everything aligned quite straight. |
| 23:34 | And the other aspect here and this is probably gonna be a little bit tricky to see, we also want this arm hanging vertically. |
| 23:41 | Now at the moment this is offset, basically I've got the entire scales offset to one side. |
| 23:48 | And this becomes really obvious if we just carefully lift the small end of the rod, what we can see is as I lift this and the pressure comes off it, the arm moves back so this means that we haven't got that right. |
| 24:00 | And what we wanna do is just adjust our fixture until the arm essentially doesn't move when we take that pressure off it, so I'll just have another go at that. |
| 24:12 | We've got this pretty good now. |
| 24:13 | So these are the sort of steps we can go through to give us the best possible results with this style of fixture. |
| 24:19 | In fact we're going to go through this process essentially regardless of what style of fixture we're going to go through. |
| 24:26 | Alright so once we've got that operational, what we wanna do is then weigh all of our big ends of our connecting rods. |
| 24:34 | So we'll try and do this, I'm gonna show you the problems we face with this, and how we can deal with it. |
| 24:40 | So the first thing is to get our scales turned on and make sure they're zeroed, make sure they're zeroed obviously with our balancing fixture on them. |
| 24:47 | And we want to start, would be a good idea to start with our number one connecting rod. |
| 24:54 | And what I'm going to do, another really good tip here, to get repeatability, is we want to try our very best to locate the connecting rod in the same spot on both sides of the fixture each time we put it on. |
| 25:06 | So let's see if we can do this, I'm just gonna probably have to get my head into this overhead shot while I set it up. |
| 25:11 | Once we've done that we'll go back to the overhead shot so you can actually see what's going on. |
| 25:18 | Alright so on our overhead shot we can see that our first reading there is 384.8 grams. |
| 25:23 | So we'll go over to our iPhone and we're going to write that down for our first reading, 384.8 Alright so in a perfect world we're gonna get four more readings that are exactly the same, I'm gonna try taking five readings and we'll show you why that's the case. |
| 25:43 | So before we take our second reading, I'm gonna take the conrod completely off the fixture and we're going to then locate it back on the fixture, again I'll just have to get my head into the shot. |
| 25:56 | And that's a really bad one. |
| 25:58 | Alright so we'll go to our overhead and we can see there the second reading there which shows the sort of problem that we are dealing with potentially, 385.4 Now if I'm seeing that sort of variation, that's something that's definitely going to suggest that I haven't got that conrod back in exactly the same spot. |
| 26:17 | We should be seeing no more than about two to three tenths of a gram variation there, that's about what I'd see. |
| 26:24 | But let me just go through the complete process again and we'll see how bad this actually ends up coming out. |
| 26:29 | So we take our rod off. |
| 26:31 | I'll also mention that each time we take the rod off, we do want to make sure, which it actually hasn't, we wanna make sure that our scales do come back to zero. |
| 26:38 | So we're not creating any problems for ourselves. |
| 26:41 | So let's get our rod back on here. |
| 26:48 | OK so this is a bit closer to what I'd expect, so we can see that our third reading there, 384.9 grams so let's write that down. |
| 27:01 | And we'll do it two more times. |
| 27:14 | 384.6 for our fourth reading. |
| 27:18 | So this does get a little bit time consuming but it is worth it in the end. |
| 27:23 | And our last, our final reading here. |
| 27:30 | 384.9 so what we can see is we've actually got three that are grouped pretty closely together. |
| 27:38 | So what I'll do here on our iPhone camera, what I tend to do here is basically eliminate our highest reading and I'll also eliminate our lowest reading. |
| 27:48 | And then we can average the remainder, so essentially, without grabbing my calculator out there, we're sitting at about 384.9 grams for our first conrod. |
| 27:58 | So let's just write that down and we'll call that 384.9 First conrod is weighed, then we would go onto our second conrod. |
| 28:06 | Now I'm not gonna go through the entire process here because we'll be here all day. |
| 28:09 | But let's just have a quick look, I'll grab our, should have probably put these in order, we'll grab our number two conrod, and we'll just see how close these actually are. |
| 28:24 | So that's a big problem, now I'm not gonna take five weighings on this particular rod, but we can see straight away on our overhead shot that our second rod is sitting at 383 grams. |
| 28:34 | So we're a long way away from 384.9 We've basically got a two gram imbalance there between our number one and our number two big ends. |
| 28:44 | So this means that we're going to have some work to do. |
| 28:47 | So I'm gonna show you the process there of just how we go about removing some material on these rods. |
| 28:53 | And actually the reason I am using these rods is this was an imbalanced set that K1 sent to us for demonstration purposes, there's actually not enough material for us to safely remove two grams from the big end of this particular rod and get it balanced so I'm not actually gonna be able to do the job properly but I'll show you what we would do there. |
| 29:14 | So we are also going to have some questions and answers really really shortly, I'll just remind you so if you do have any please put those in the comments and we'll get into those shortly. |
| 29:27 | Alright so what I'll do, if I can find them, here they are. |
| 29:31 | We're going to get our linisher going and what I'm going to do is I'm going to, if we can go to our side camera here, I'm going to be running the conrod against the linisher and we want to just apply a small amount of pressure. |
| 29:46 | I also wanna constantly be moving the conrod against the linisher, we don't wanna sit it in one place because that's gonna end up removing excess material from just one spot. |
| 29:56 | So it's a case of a gentle rub against the linisher and we'll do a couple of rubs on one spot, we'll swap the rod over, we're gonna do the same on the other edge and then we're going to swap the rod over so basically we're removing material evenly from all four of those edges. |
| 30:13 | So let's go through and do that now. |
| 30:18 | Good tip before you start a webinar, you always wanna plug in the linisher, it doesn't go without electricity. |
| 30:27 | Right let's try that again. |
| 31:09 | Alright so that's essentially the process we're gonna go through there. |
| 31:12 | It is important as well to watch our progress as we are doing this and just make sure that we're removing material as evenly as we can. |
| 31:22 | I'll just try and show you this on the iPhone camera because I've done exactly what I shouldn't have. |
| 31:29 | If we can see on this rod here, I've removed a little bit more material at the end where the rod bolt is, than I have down near the body of the rod. |
| 31:41 | So when I see something like this, I'm going to correct it and the next time I pass this across the linisher, I'm gonna concentrate the linisher more on this end of the rod. |
| 31:51 | So we're trying again just to make sure that all of that material is removed as evenly as we possibly can. |
| 31:58 | So again once we've obviously got everything within our tolerance, it's a case of weighing the rods overall and removing material from the small end. |
| 32:07 | So again let's have a look at exactly how that goes. |
| 32:41 | Now obviously because the rods are quite tough, it does take a bit of effort to remove material so you don't necessarily need to be too worried but again, just like with the big end of our rod, we can see that after a couple of passes across the linisher here, we've removed some material but we haven't removed it particularly evenly, we've sort of got it removed from this side of the rod, but nothing on this side so again I'm going to use that information, once I've sort of seen that pattern, I can adjust how I am locating the rod against the linisher in order to get everything nice and even. |
| 33:18 | So once we've gone through and we've done all of that, again checking our work regularly, we should have all of our rods balanced within our tolerance. |
| 33:26 | I'll just mention as well, with the way I was using the rod or holding the rod on the linisher there, it's sort of a rolling action. |
| 33:34 | So we start with the edge of the rod, and again we're trying to remove material from the entire circumference of the small end of the rod, and we're going to start and then pull the rod towards us as we rotate it against the linisher. |
| 33:52 | So we're only going to be able to linish about half of that pin boss in one operation and then we obviously need to swap the rod over and do exactly the same for the other side. |
| 34:03 | So we wanna constantly be swapping that so that we do keep the material that we're removing, even from one side of the rod to the other. |
| 34:12 | Alright so what I'm gonna try and do here is show you a set of rods, these are another set of K1 rods that we have previously balanced for a GM LS1 stroker that is going in our engine building worked example library shortly. |
| 34:28 | So let me just try and get this set up, and hopefully with the magic of live webinars, this is all going to be a great demonstration of what it should look like when we've got it right. |
| 34:41 | Just get our arm hanging vertically there. |
| 34:44 | And not quite central there, alright so we've got everything zeroed there, zero our scales and let's just get our rod here onto our fixture. |
| 35:00 | Just have to get my head in the shot again. |
| 35:07 | OK so that particular big end again, I'm not gonna go through five readings, 463.9 grams so let's see how our second rod works out there. |
| 35:27 | OK hasn't made a liar out of me, 464.2 grams, so we can see that the big end of those two rods there is well within my tolerance of half a gram. |
| 35:36 | It is a time consuming job but it isn't difficult, all it requires is a little bit of patience, an eye for detail, obviously that equipment that we've covered off, and you're going to be capable of doing that job in the home workshop. |
| 35:51 | Alright we'll jump into our questions now and we'll see what we've got. |
| 36:02 | Our first question comes from James, who's asked, can you cut the false firewall out? So this is in reference to our 350z upgrade so probably a little bit outside of the scope of our actual webinar. |
| 36:16 | Definitely something that we will look at, we're in negotiations or chats with our fabrication guy at the moment so we haven't got a clear path forward for that, but we'll keep you up to date with our future webinars on exactly what we do there. |
| 36:31 | Next question comes from Frederick who's asked could a piston and rod already assembled, can it be balanced with an OK result? No you're not going to be able to balance the connecting rod and piston assembly, it is going to need to be disassembled for the balancing process unfortunately. |
| 36:49 | But that's not particularly difficult so there's not a lot of work required to split the piston and conrod assembly apart for the balancing operation. |
| 36:58 | Bruce has asked, can we have a list of tools and equipment used for this job? So I have covered that, hopefully that was a question that might have been asked a little bit earlier. |
| 37:07 | So the jig that we're using there is from JEGS, about $120, I think it is a proform unit. |
| 37:13 | The digital scales that I mentioned, these came from Ally Express so essentially they're not a name brand set of scales but if you jump on Ally Express there are literally hundreds of different examples. |
| 37:25 | What you need to do is make sure that you've got them the right weight limit as well as the correct accuracy so in this case the ones we're using will measure up to two kilograms or 2000 grams and down to a tenth of a gram in terms of precision and then the linisher, again these come from a wide range of different suppliers so I'd probably check with your metal working or wood working supply store, they'll be able to come up with something to suit. |
| 37:53 | Kevin has asked, do you have to go with the direction of the belt? So I actually tend to work against the direction of the belt. |
| 38:01 | I just find that this gives me the best result. |
| 38:04 | If you go with the direction of the belt, you can end up getting the rod essentially bouncing against the linisher and it makes it a little bit hard to do a good job. |
| 38:14 | What you sort of find is when you are doing this work because for most of us, the linisher isn't a tool that we're going to be using in our day to day work, it does take a little bit to build up a system of how you're using it to get the best results. |
| 38:29 | So you find that after you've removed material from your first rod, you'll have sort of got a feel for the best way for your particular rod to actually use it against the linisher that you're using. |
| 38:40 | Ardy's asked, with an odd number of cylinders, e.g. three or five cylinder, would you still want to aim for a complete or near balanced weight between the rods? So regardless of the number of cylinders, I'm still going for a balance of the rods across the entire set. |
| 38:56 | So for an odd number of cylinders like this, this is again a situation where the mass of the piston and conrod assembly is actually factored into the balance of the crankshaft. |
| 39:09 | Essentially some of the balance is done via the counterweights of the crankshaft, so that needs to be taken into account there. |
| 39:15 | Jonathan has asked, should always balance everything no matter how many cylinders you have? Similar sort of question there, yeah absolutely. |
| 39:23 | Now what I need to make apparent here is I've just said yeah absolutely. |
| 39:29 | There's plenty of engine builders out there who will take components straight out of the box, fit them to the engine and never give a second though to it. |
| 39:37 | So I say absolutely but yeah of course you can get away without balancing them. |
| 39:41 | It really comes down to what you're trying to achieve. |
| 39:43 | And by balancing the components you're going to reduce the level of vibration in the engine, this improves the smoothness of the engine operation. |
| 39:52 | Not necessarily going to convert this into more power, that's probably something that is important to mention. |
| 39:58 | But in general you're going to have an engine that is smoother in operation, and it's going to also last longer and lead a longer healthier life. |
| 40:06 | So plenty of upsides which is why I'm a firm believer in balancing all of the components for every engine I deal with. |
| 40:13 | Of course I am also dealing with performance and race engines. |
| 40:17 | If we're talking about an engine that's going to make 150 horsepower and power your daily driver it's maybe much less of a consideration, horses for courses really there. |
| 40:32 | Darian has asked, does the balancing of the piston on a straight six engine cancel each other out or does the entire rotating assembly including the crank need to be balanced together? No if you take into account the operation of a six cylinder inline, maybe a Toyota 2JZ just to give you one example, the location of the piston and rod assemblies, basically what we're going to do and find is that they will cancel each other out so again like an inline four cylinder engine, the piston and rod assemblies can be balanced independently of the crankshaft, there's no need to create a bob weight on that crankshaft when it is balanced. |
| 41:10 | Dan has asked, thoughts on needing to rebalance rotating assembly after changing to a lightweight flywheel and clutch assembly? This assembly was balanced within a few tenths of a gram independently from the rotating assembly. |
| 41:22 | OK so this is a good question and it does come up from time to time. |
| 41:25 | So the way that we deal with balancing components in the aftermarket is that the entire rotating assembly isn't balanced in one go. |
| 41:34 | So what I mean by this is that the engine machinist is going to start with the bare crankshaft, so that'll be spun up in the balancing machine and weight will be removed from the crankshaft until it's balanced to within specification. |
| 41:46 | From here then the front pulley assemblies are mounted up on the crankshaft, those are spun up and any further material that needs to be removed will then be removed from the pulley, so essentially we've got the crankshaft balanced to zero, we've got the pulley assembly balanced to zero. |
| 42:02 | Finally our flywheel and clutch cover will be bolted up and those will be balanced to zero. |
| 42:08 | So when you're dealing with a situation like that, clearly it should be pretty obvious, we can then remove our flywheel and clutch assembly and we can then take a new lightweight assembly as you've mentioned there, have that balanced independently to zero that can then be added to our crankshaft and we're good to go. |
| 42:25 | We don't need to strip the whole engine down and start from scratch. |
| 42:30 | Liam has asked, what timeframe of use would you expect from the rods before you'd start to consider rebalancing or replacing? OK so two very different things there. |
| 42:39 | First of all unless something is going really wrong inside your engine, the balance of the rod is not going to change, we shouldn't be removing material from the rods in operation so their balance is set, once we've balanced them, they're good to go. |
| 42:53 | In terms of replacing them, this is a little bit harder to answer. |
| 42:57 | Generally it's going to come down to how much you're pushing the engine and how close to the limit of the connecting rod's strength you're operating. |
| 43:06 | So for an average road car engine where you're taking maybe a 300 horsepower turbocharged engine and maybe we're going to 500 or even 600 horsepower, you'll probably find that the majority of off the shelf rods from all of the manufacturers out there for road going applications like that, so I'm thinking here, K1 Technologies, maybe Eagle BC et cetera, there's dozens obviously, they'll probably be absolutely fine almost indefinitely. |
| 43:36 | One thing we do want to watch is the condition of the rod bolts, those are the most stressed component of the conrod and when we are stripping the rods or stripping the engine and disassembling them, if you are worried about these you can actually basically keep a log of the rod bolt length and if any of the rod bolts are permanently stretched then they should be replaced. |
| 44:00 | But probably the opposite end of the spectrum if you are using aluminium rods, common in drag applications, these will suffer from fatigue failure over time so unlike a steel rod where you can almost get indefinite use out of them depending on how far you're pushing them, the aluminium rods will fatigue over time and do need to be replaced, again comes down to the power and the RPM but a lot of teams will be replacing the rods in their engines after maybe 40 to 60 passes just to give you some ideas. |
| 44:37 | Neridan has asked, I'm planning to build a 4G64 2.4 litre for an Evo 8. |
| 44:42 | Since balance shaft is deleted, would I need to balance the crankshaft? So yes even with the balance shafts, if you are removing the balance shafts or you're leaving them alone, still doesn't really change the fact that I would be balancing the crankshaft, the pistons, and the conrods. |
| 44:58 | You do find that the stock 4G63 and 4G64 with the balance shafts intact, still inside the engine, they are a very very smooth engine which is obviously exactly what those balance shafts are there for. |
| 45:11 | They're designed to reduce the noise, vibration and harshness inside of the engine. |
| 45:16 | Common obviously in 4G63 tuning world to remove those balance shafts. |
| 45:20 | Two less components that can fail and cause us reliability problems, but also does free up a small but noticeable amount of horsepower. |
| 45:29 | But regardless whether I'm keeping those balance shafts or removing them, I would still be rebalancing the crankshaft. |
| 45:36 | Revolutions has asked, do you think there would be a problem with suspending the pin end by insert an eye through the wrist pin oiling hole? I think you would struggle to support the rod adequately by inserting anything through the oiling hole, I don't think that's gonna be a viable solution there, you really need to support it through the pin boss unfortunately. |
| 46:02 | Alright guys that has brought us to the end of our questions there. |
| 46:05 | So some great questions there. |
| 46:07 | Hopefully everyone's learned a little bit more about balancing connecting rods, hopefully made it sound a little bit less scary. |
| 46:13 | It's definitely something that can be quite enjoyable to do. |
| 46:17 | So if any of our members do have further questions, please ask those in the forum and I'll be happy to answer them there. |
| 46:26 | Thanks for joining us guys, I look forward to seeing everyone again next week. |
| 46:30 | Now for those who are watching on Facebook today, this is some insight into what we put on every week for our HPA gold members. |
| 46:37 | Now our gold members have access to these webinars at any time in our archive. |
| 46:43 | We've got over 190 hours of existing webinar content covering a wide range of topics ranging from engine building to engine tuning and even performance wiring. |
| 46:53 | So this is one of the fastest ways to expand your knowledge on a wide range of topics, making sure you stay up to date with the latest techniques and tools out there in the industry as well. |
| 47:05 | On top of that our gold members also get access to our private member's only forum, which is a great place to get specific answers to your engine building, tuning, or wiring questions. |
| 47:15 | If you are interested in learning a little bit more about HPA and gold membership you can purchase gold membership for USD$19 a month but we also provide three month's free gold membership with the purchase of any of our courses, you can check everything out at hpacademy.com/courses Alright thanks a lot guys, I hope to see you online again soon. |


