Wiring Fundamentals: Documentation
Documentation
04.14
Connection Document, save a local copy to be able to view.

| 00:00 | - As much as it can be a dry process to go through, documenting our wiring harness construction is one of the most critical steps. |
| 00:07 | The construction process can be quite a long one and is often split over shorter periods and many days. |
| 00:12 | Meaning it's very easy to lose track of where we're up to. |
| 00:15 | By initially documenting our design and then modifying the documentation as our construction progresses, we can make sure that no wires or connections are forgotten. |
| 00:24 | As finding and fixing problems once the construction process is further along, can become a very large job in and of itself. |
| 00:30 | One that we are best to avoid. |
| 00:33 | The other reason detailed documentation is necessary is to ensure that we have the supplies required on hand. |
| 00:38 | It can be a real inconvenience to get part of the way through the construction process and realise a crucial pin or connector is missing. |
| 00:45 | If the lead time on ordering the part is large, the whole construction process can be stalled for an unacceptable length of time. |
| 00:52 | If you're building a wiring harness for someone else, providing detailed documentation on the construction and connections is also necessary. |
| 00:59 | Once the wiring harness is installed and leaves your hands, you don't know who may end up owning the vehicle in the future or how it might be modified. |
| 01:06 | Access to the wiring harness documentation will save a future modifier hours of trouble toning out the harness to determine its construction. |
| 01:14 | Detailed and logical documentation should become a point of pride, and surprisingly often can lead to future business. |
| 01:21 | The documentation I prepare consists of two primary documents. |
| 01:24 | The first is a wiring connection document that specifies every connector and pin used, where it connects to, and what type of wire is used to make the connections. |
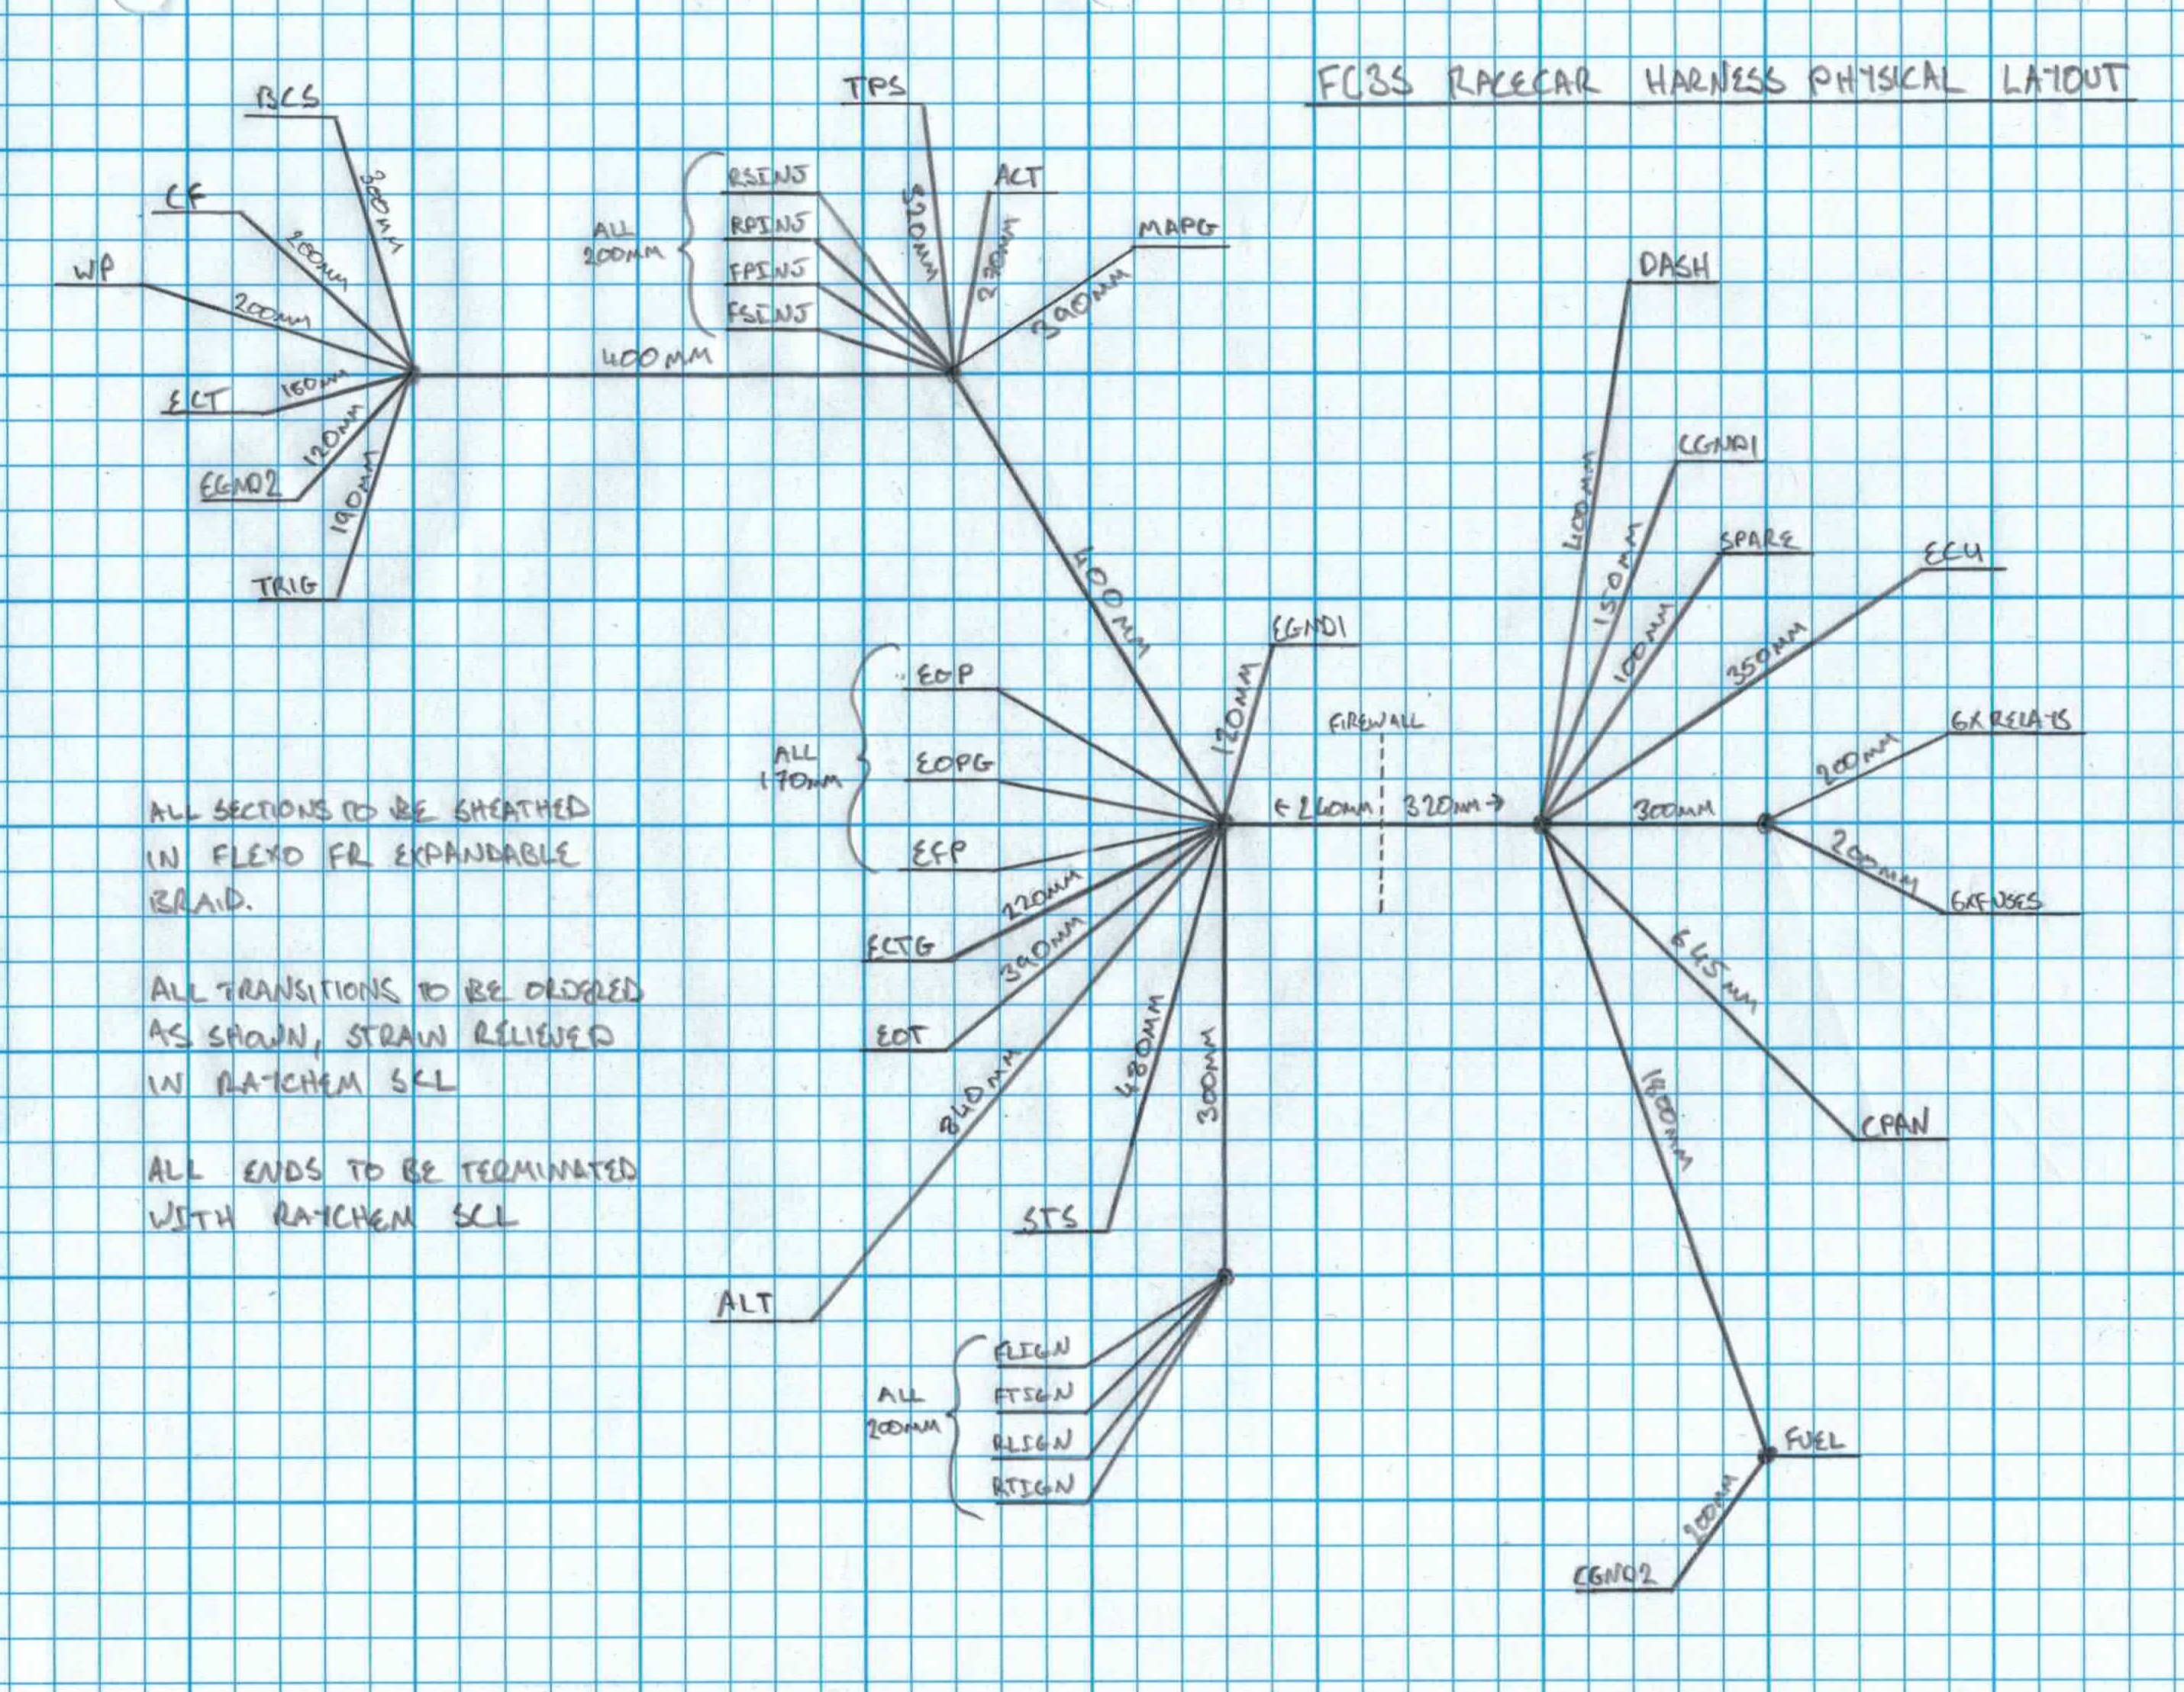
| 01:33 | The second is a physical harness layout diagram that shows the harness branch points, connector locations, and the length of every harness section between them. |
| 01:44 | This document also specifies the sheathing used for each harness section and the material used to seal and support the branch points. |
| 01:51 | While there are bespoke software packages used for wiring harness design, in my experience they're typically very expensive and require a large time investment to set up and configure. |
| 02:00 | At the top tiers of motorsport where easily searchable and distributable documentation is a must, these packages are the only option. |
| 02:07 | But their use is outside the scope of this course and will be covered in our advanced motorsports wiring course. |
| 02:13 | For the modified street car and club day track car, I find a Google documents spreadsheet for the wiring connection document and a tidily hand drawn physical layout document to be more than sufficient. |
| 02:23 | Included below this section is an example of documentation prepared for a Mazda RX-7 race car wiring harness. |
| 02:30 | We'll have a look at this in detail now. |
| 02:32 | The document is loosely divided into sections that reflect our wiring harness design steps. |
| 02:37 | Power supply and grounding, sensors, actuators and network communicatons, including other interface connections. |
| 02:43 | Each page lists the connectors relevant to that section, specifying the connector part number and material we will use to seal or strain relieve the harness sheathing at the connector termination. |
| 02:54 | Each connector pin is then listed with a part number of the pin if available and the wire type used. |
| 03:00 | The far most right column, lists the destination connector and pin for each wire. |
| 03:05 | If more than one destination is listed for a particular pin, this means the wire is spliced shortly after the connector to multiple destinations. |
| 03:14 | The connectors are named with meaningful abbreviations as opposed to numbers, as this often means we can quickly determine a wire's function without having to cross reference a connector number to its location. |
| 03:25 | It also means additional connectors can be easily added to the document without having to modify any other connector designations. |
| 03:31 | These connector names double as our harness connector labels, to ensure the documentation and physical harness construction match. |
| 03:38 | The physical layout document is reasonably straightforward. |
| 03:41 | It lists the branch point and connector locations with the final distances required between them. |
| 03:47 | Also listed is the sheathing material used on any harness sections, including any additional heat protection. |
| 03:53 | Notes are added about any special requirements such as the harness needing to meet a connector at a particular angle in a position where clearance might be tight. |
| 04:01 | You should have a look at this sample documentation and become very familiar with it, as it will give you a good idea as to the level of detail required when you design your first wiring harness. |


