Sale ends todayGet 30% off any course (excluding packages)
Ends in --- --- ---
Keep everyone up to date with how your project is coming along.
Its about time I put up a build diary of my car, the Yeti Sled. You will have to excuse me if its too long, there is soo much to cover. Simpy look at the pictures if TLDR. The car is a 2004 MY05 Subaru Forester SG9 XT. Ive had the car for nearly a decade now and have been steadily modifing it throughout. The car started as a bit of a street car / weekend camping SUV. And has now gone in a totoally different direction and become a un-registered track hack used for tarmac rally, circuit sprints and occaisional drag racing.
It got the monika of 'Yeti Sled' as that was the license plates it used to run. I wanted 'Boost WGN' but my partner talked me out of that, saying it would attract police. And I settled on Yeti Sled because i look like a bit of a yeti myself with big dreadlocks and big build. So Yeti Sled it was, and it has stuck, even after the plates were handed in.
The car is extensively modified. I have a bit of an addiction to tinkering with it. So it has basically every bolt-on. And now I have started going a bit more outrageous and custom with the modifications. I wont go through every mod, but will discuss a few of the better ones.
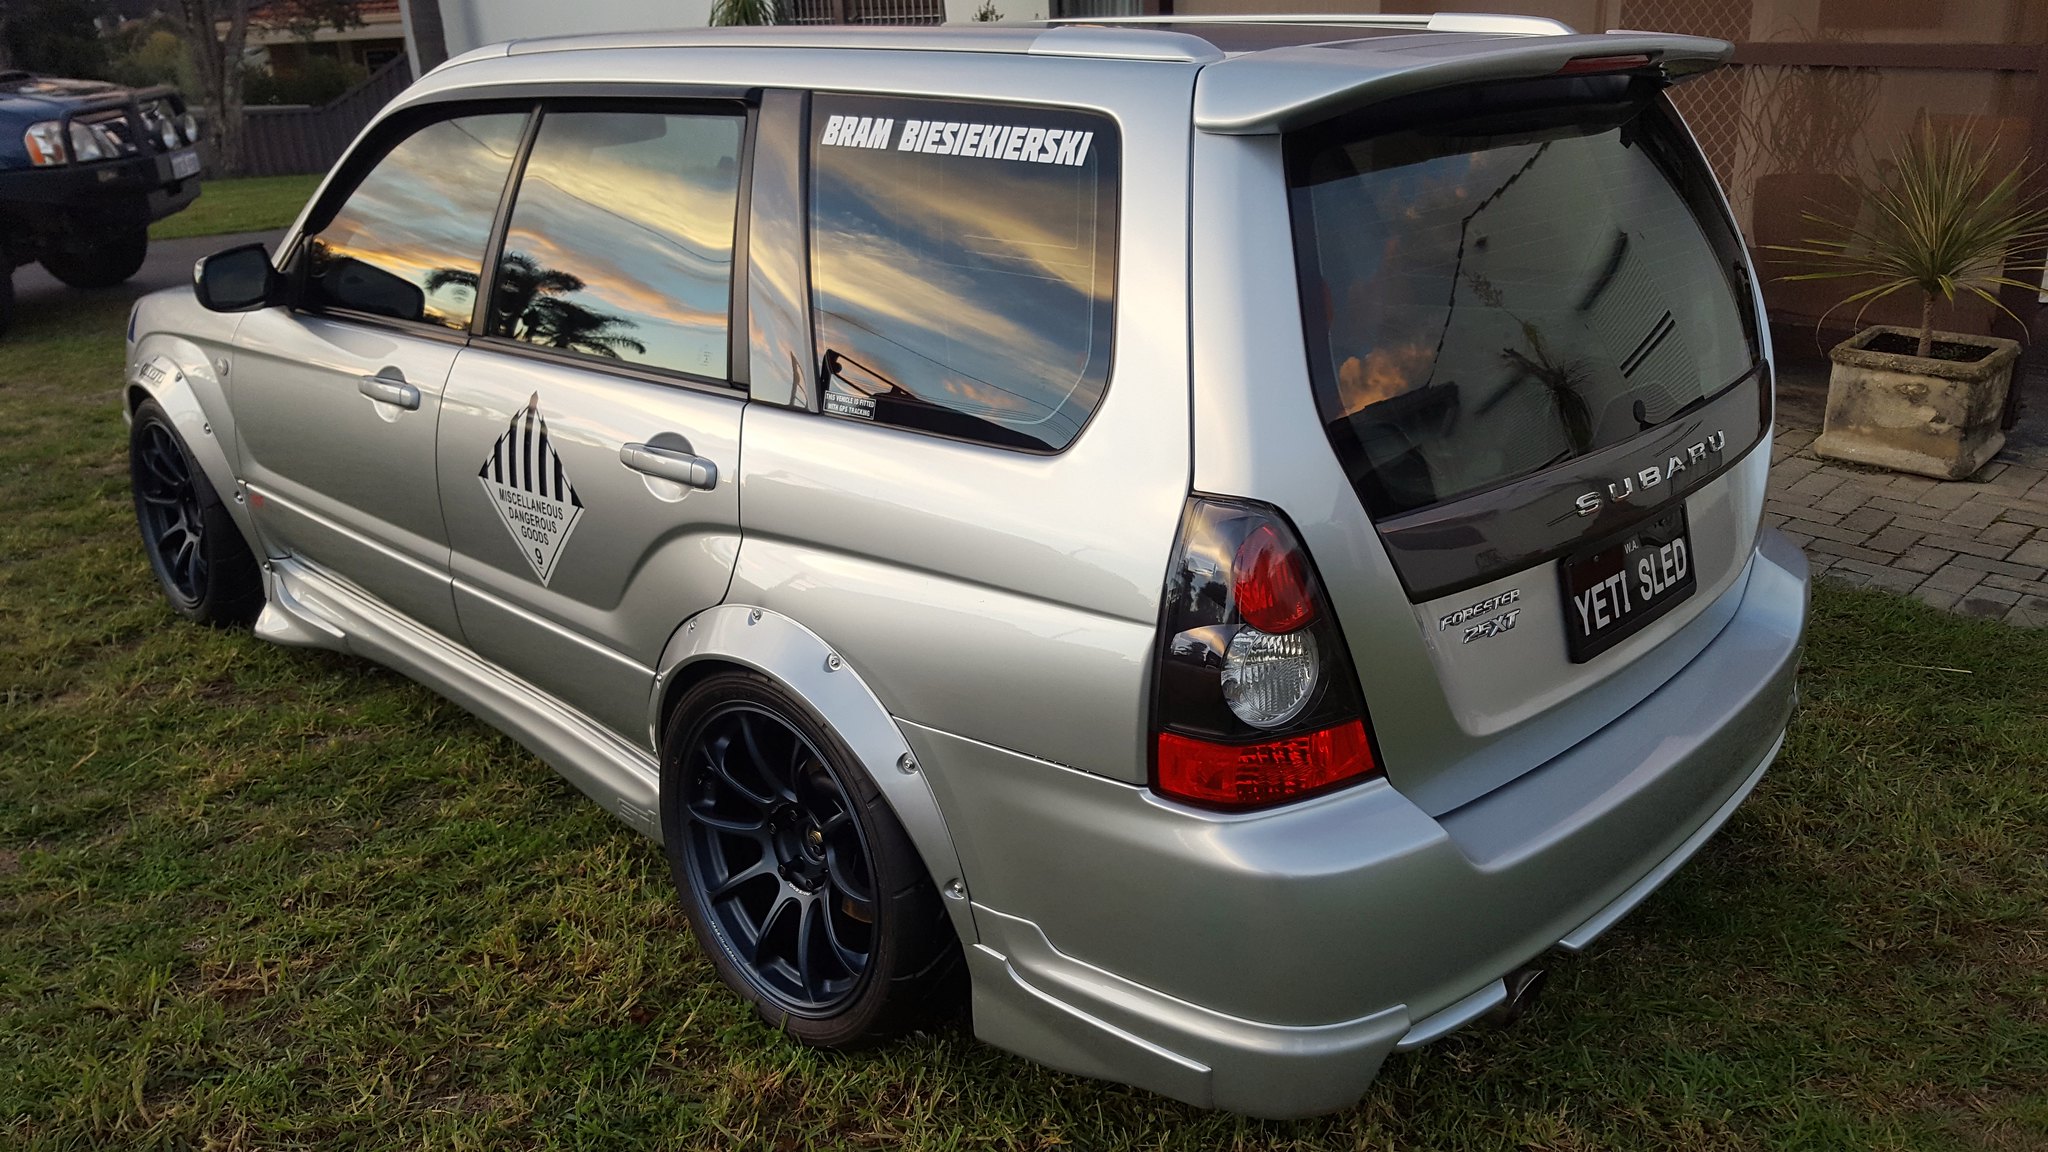
The exterior has the full JDM STi Forester kit on it. This shape Forester was pretty rare in the STi variant. I have read there was only about 2000 of this shape produced. So it took me a fair while to piece together the kit. As well as the STi kit, the car has most of the rare / optional body parts. Some of which are very very rare like the carbon foglight surrounds and big skirts and pods.
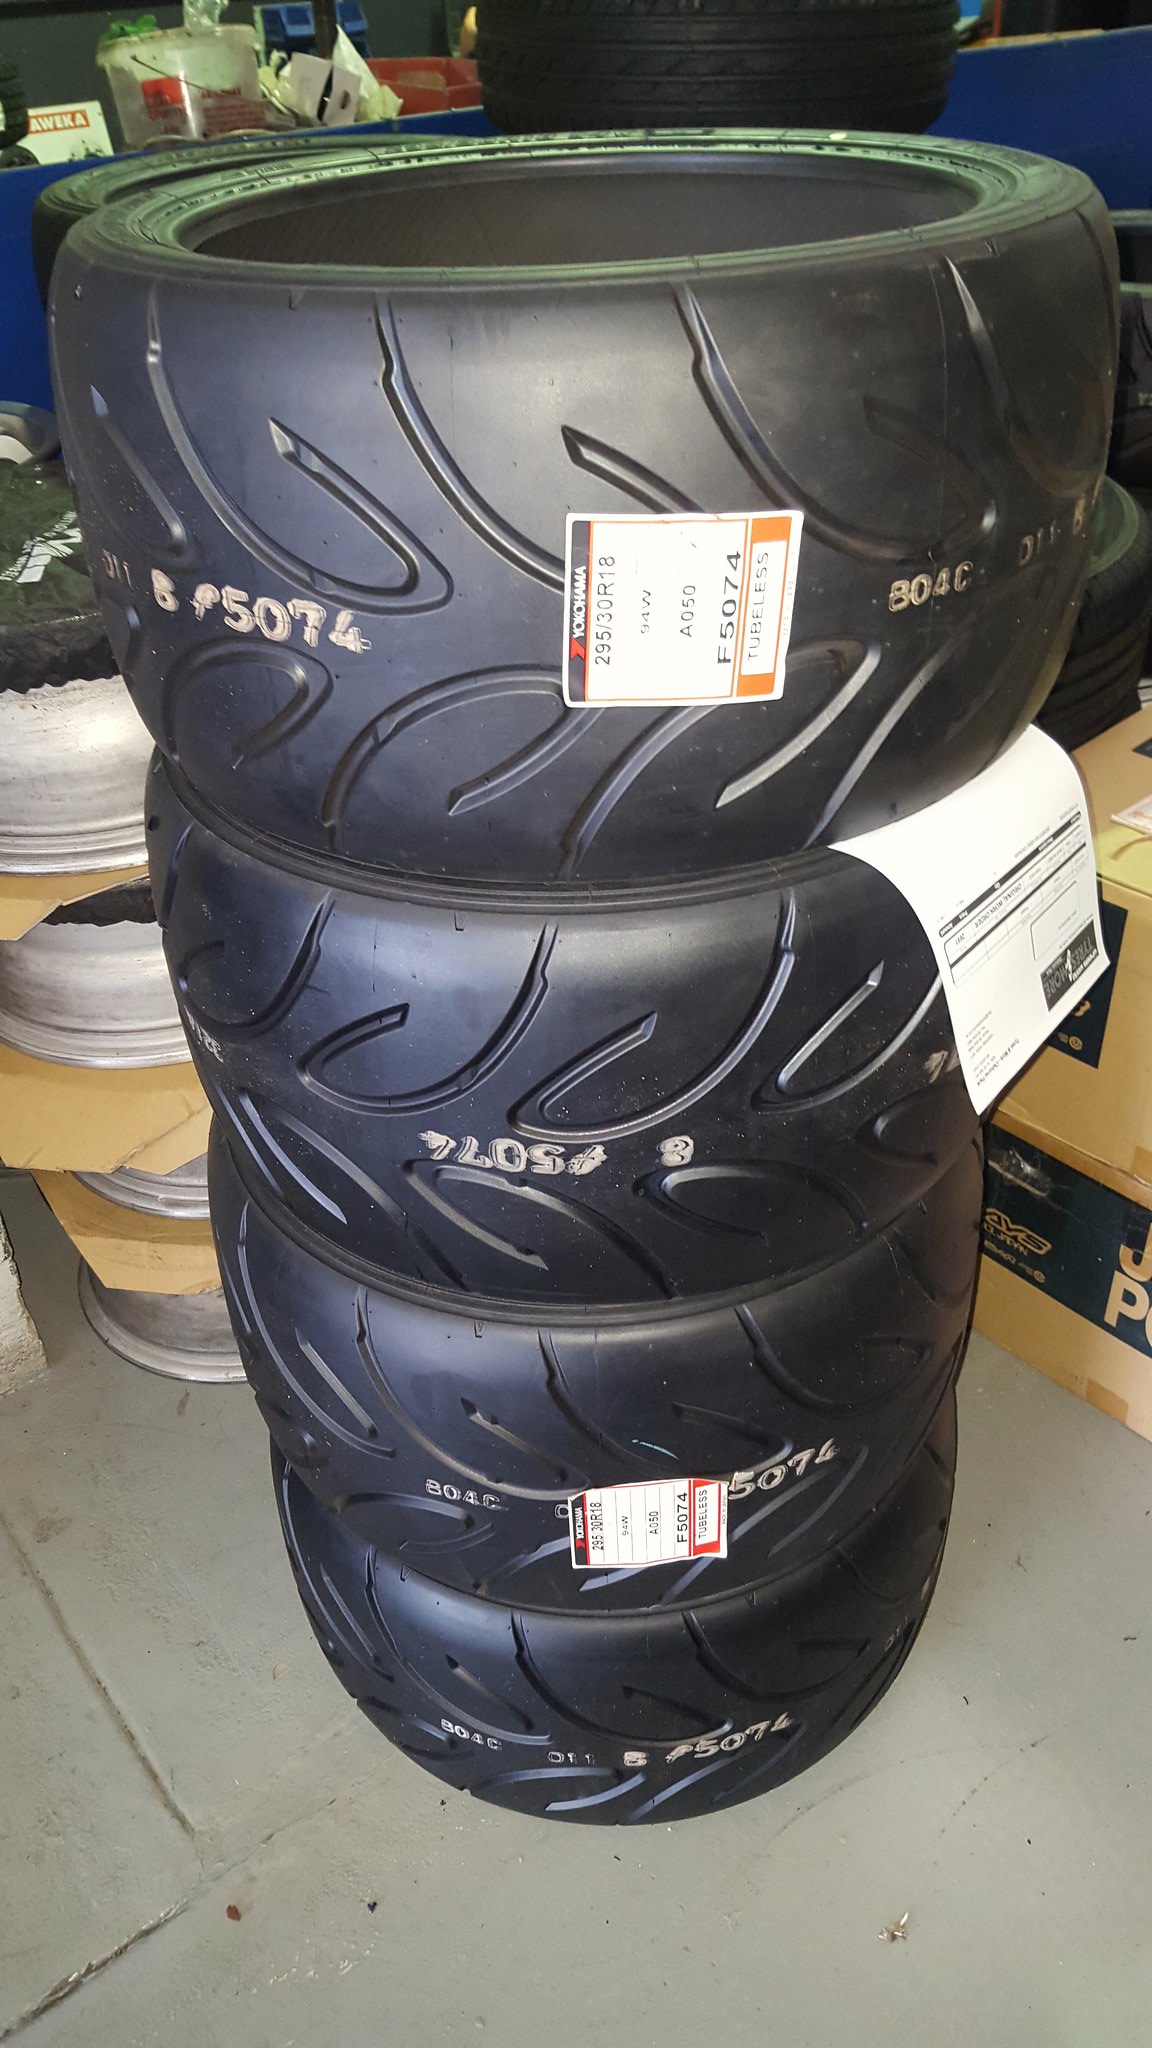
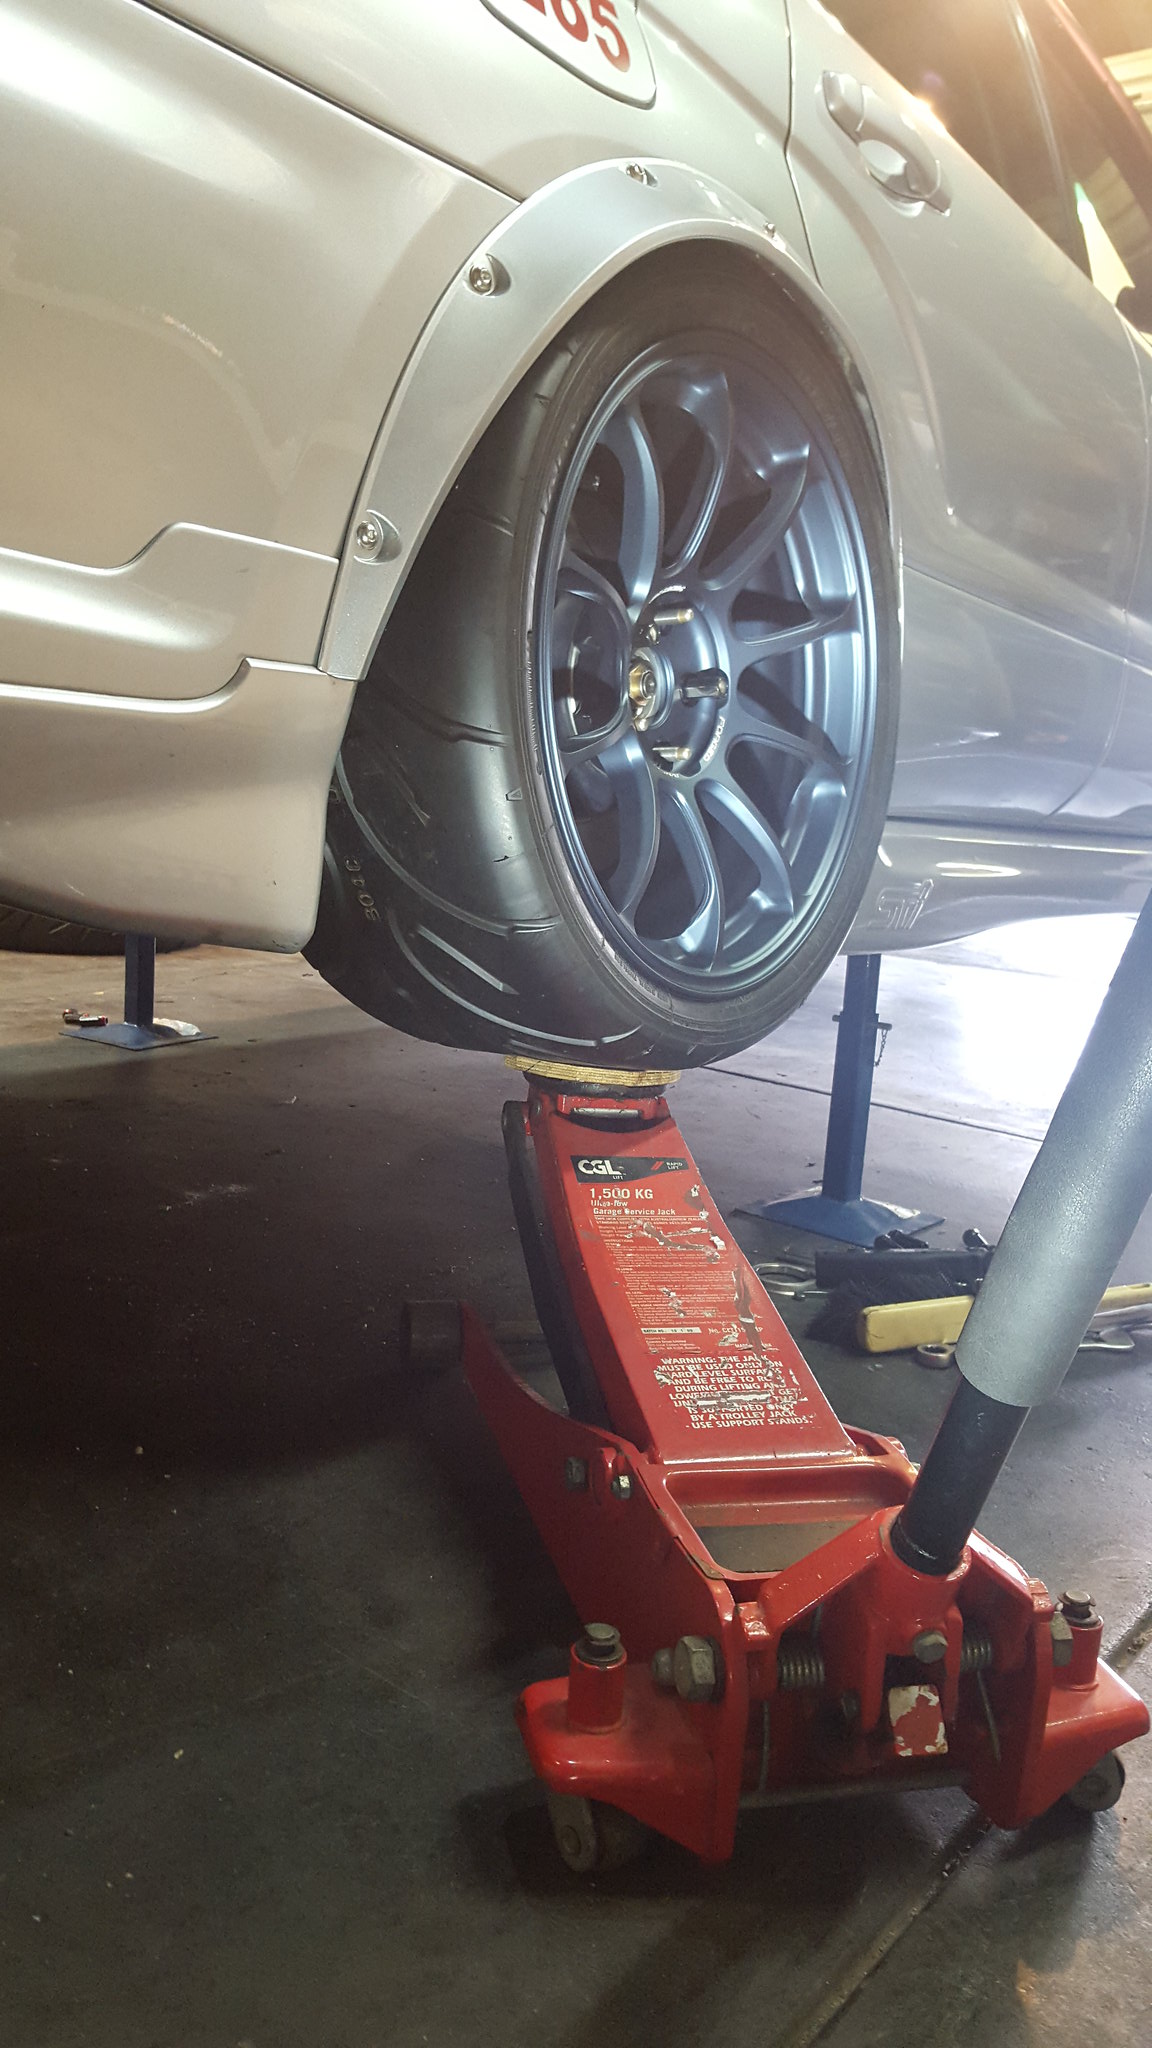
Ontop of the body kit, I have put large flares on, to fit the big wheels. I have actually cut alot of fender/arch out of front and rear to allow such massive fitment on the car. But its not just looks. The wheels/tyres are for function. They are Rays Volk Racing ZE40 in 18x10.5 Mat Gunmetal-Blue, with Yokohama Advan A050 R-comps in 295/30R18. I saw saw these wheels and tyres were used on some of the WTAC cars (maybe one of Andres videos even?) and thought if its good enough for them, then it good enough for me.

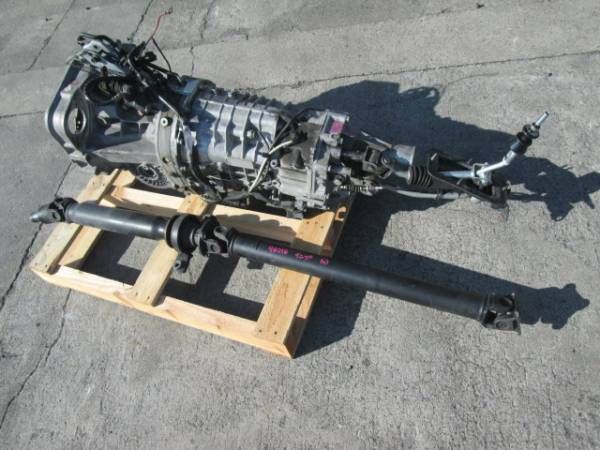
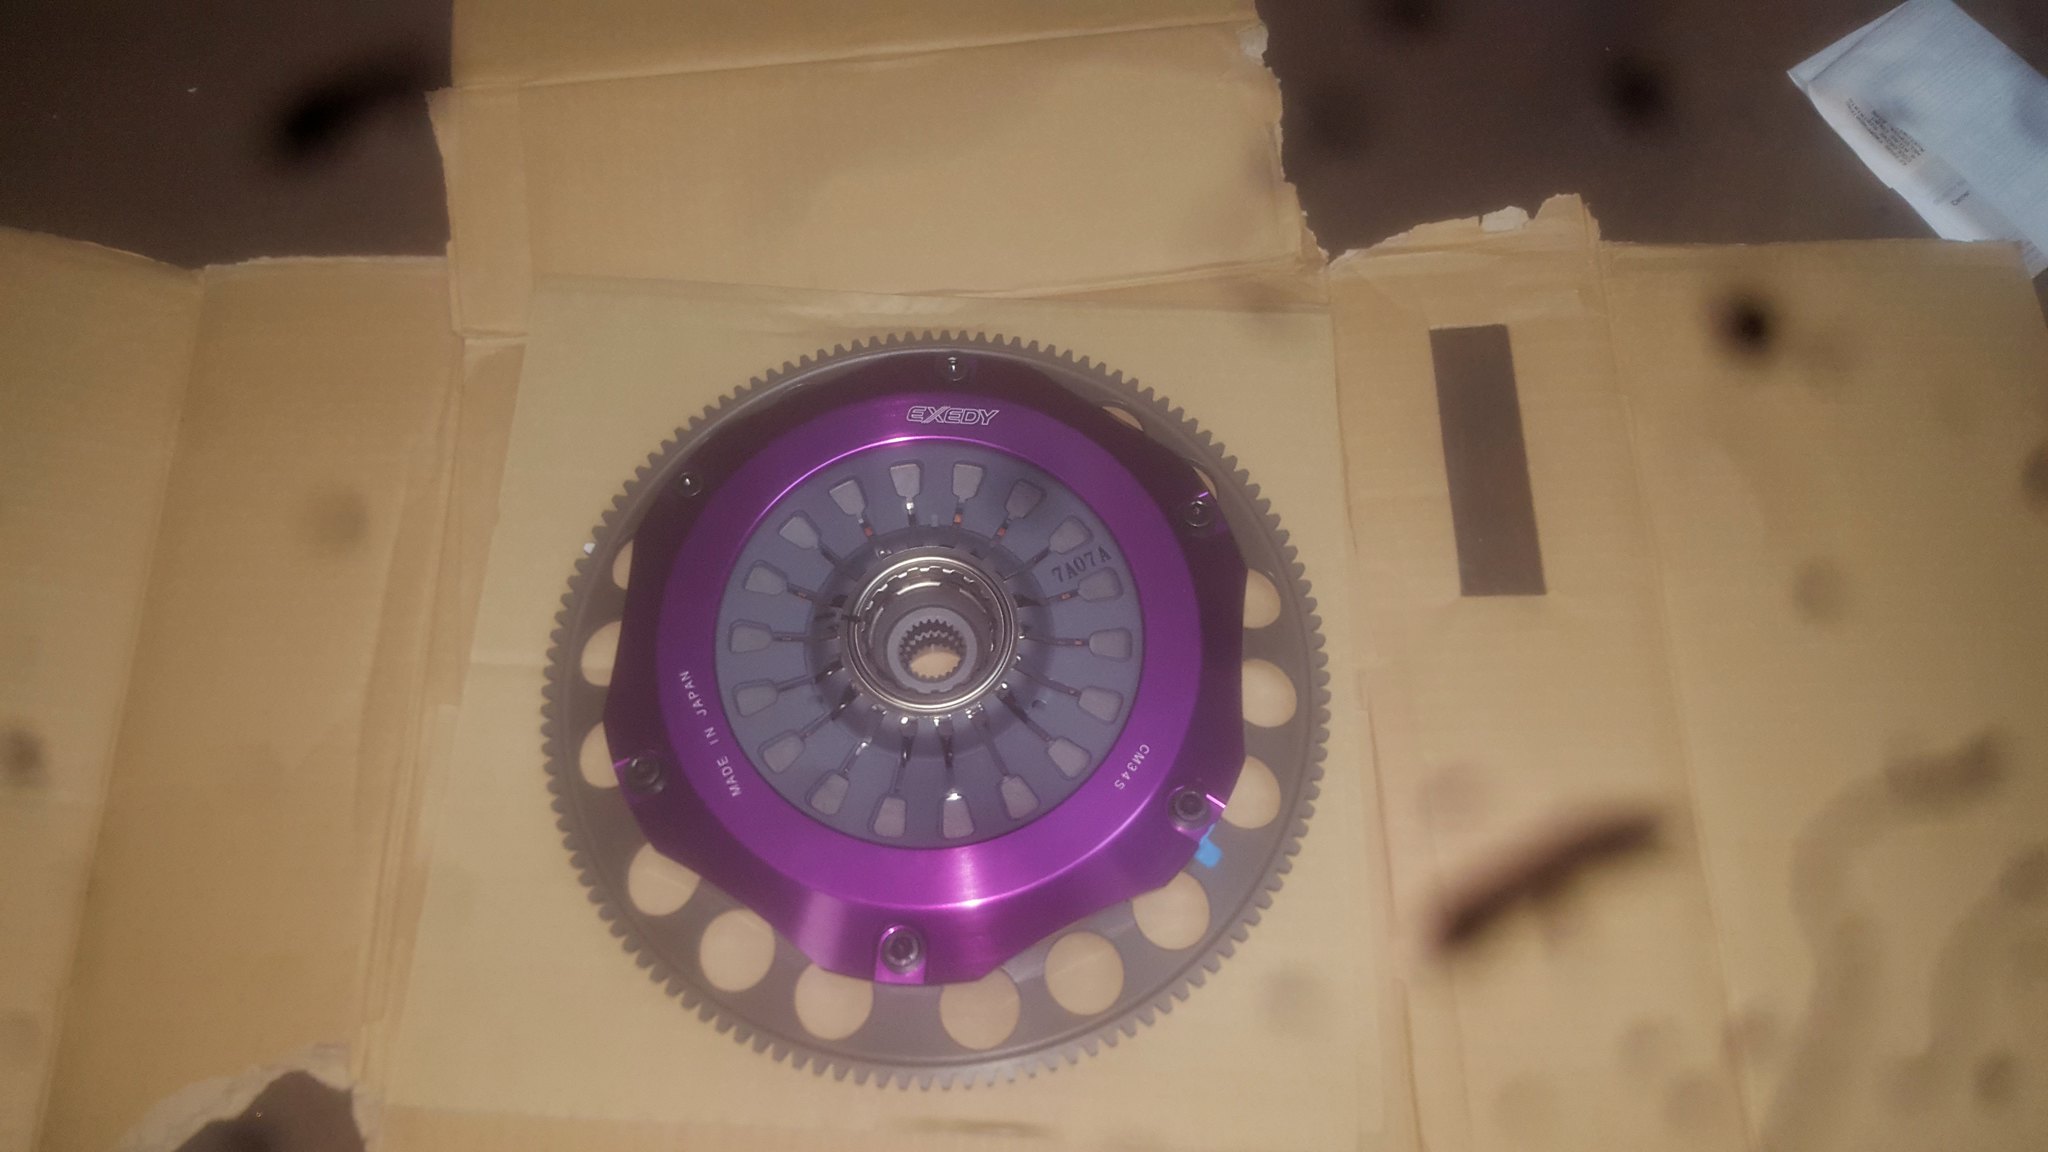
The driveline is a 2007 JDM STi 6spd/R180 swap. It has a Cusco rear LSD, DSS 800hp Axles, DSS carbon driveshaft. Full 5x4.5" (5x114.3) hub swap. I used to run an Exedy Carbon D twin clutch. But have since moved to a Exedy Compe D twin.
Aswell as the driveline swap, I also did a complete Forester body spacer delete, and STi crossmember swap. Most people may not know this, but the Forester under body is basically a lifted version of the GD Impreza platform. So, the suspension, crossmembers and driveline are basically the same, except because the Forester is an SUV, Subaru have added some spacer blocks and modified the spacing/geometry of some of the crossmembers and mounting components. Basically making the Forester a body-lifted Impreza with a wagon body shape. So when I did the conversion on the car. I swapped all the crossmembers and mounts to late model GDB STi components. This keeps things in check when you really lower a Forester.
[img="http://imagizer.imageshack.com/img907/133/BXkJjL.jpghttp://i292.photobucket.com/albums/mm27/im_lunch_box/20131018_170544_zps2a79332f.jpg" alt=""]
Suspension is Tein Monoflex coils, with Ikeya Formula rear arm kit and Spec C front arms. Swaybars are 25 front, and 22 rear. Virtually ever suspension joint is a spherical bearing, I even built my own spherical joint swaybar links as none of the ones on the market were tough enough. And I have done extensive work with reinforcing and bracing everything down there. Aswell as a few creative tricks to play with the suspension geometry. Steering is a Spec C quick steering rack which is amazing to drive with, and something I would easily recommend for any Subaru owner.
[img="http://imagizer.imageshack.com/img537/656/nnMTCp.jpghttp://imagizer.imageshack.com/img912/6511/ZgcBiB.jpg" alt=""]
[img="http://imagizer.imageshack.com/img911/764/6h4sXJ.jpg [url=http://imagizer.imageshack.com/img674/7710/WJZG7V.jpg"]http://imagizer.imageshack.com/img674/7710/WJZG7V.jpg"[/url] alt=""]
[img="http://imagizer.imageshack.com/img674/5839/EyUTl2.jpg [url=http://imagizer.imageshack.com/img908/7749/VVkCxy.jpg"]http://imagizer.imageshack.com/img908/7749/VVkCxy.jpg"[/url] alt=""]
[img="http://imagizer.imageshack.com/img537/7987/4VDI0n.jpghttp://imagizer.imageshack.com/img633/935/FdAfS8.jpg" alt=""]
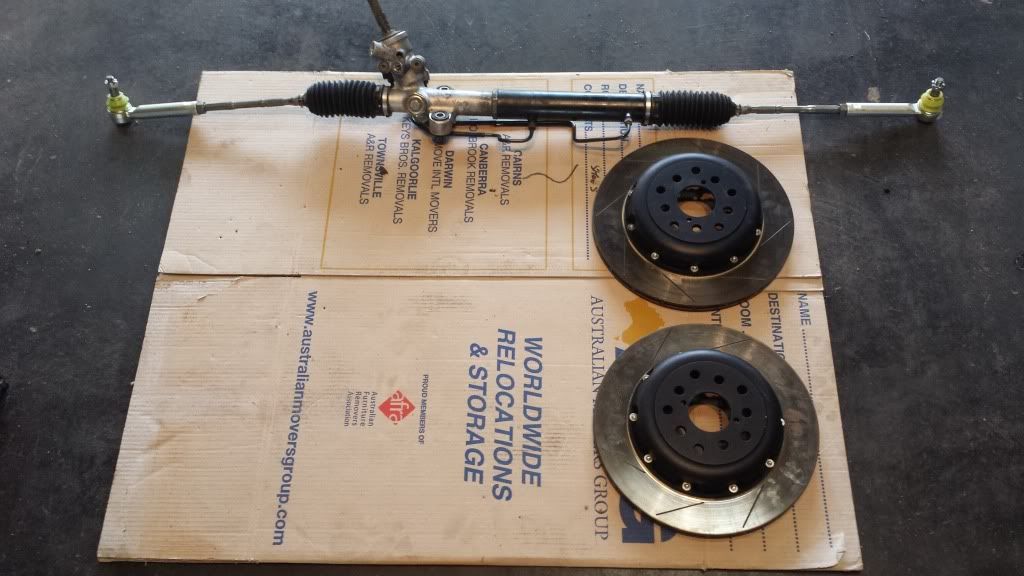
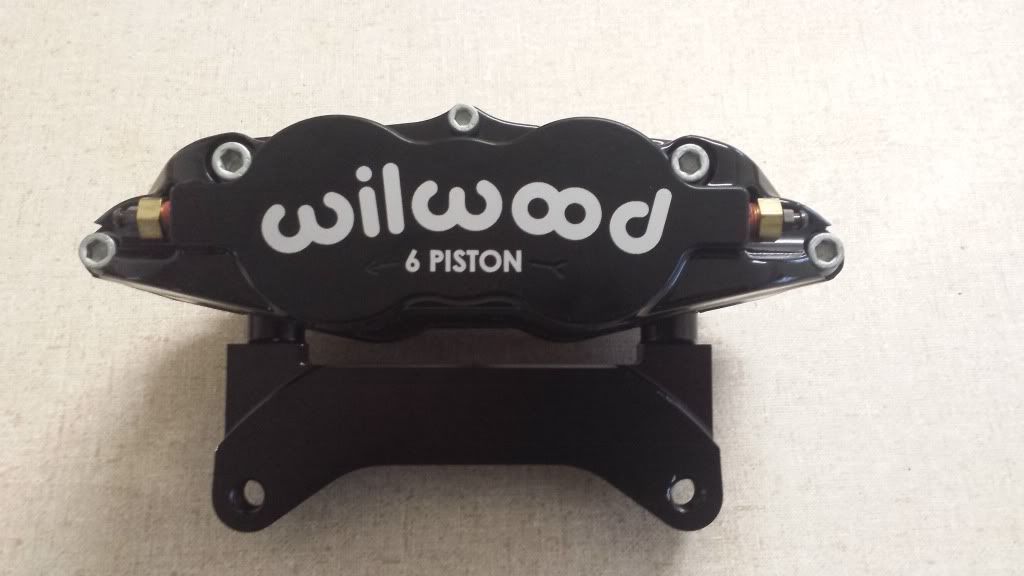
Braking is handled by a set of Wilwood 6 piston FNSLR6 calipers and 2 piece 355mm rotors upfront. Rears are a set of the STi Brembo 2 pistons rear, with Biot 3 piece rotors. Pads currently are EBC Yellows front and Ferodo DS300 rear. I originally had the front 6pots set up with 330mm rotors but was having trouble with heat. Cooking pads and boiling fluid. So I had to move up to the larger rotors and move to Motul 660 brake fluid. With large rotors, premium fluid, and current pads. It seams to be a preety good setup now.
I built a hydro handbrake setup for the car. Its using a STi/AP GrpN cylinder, with custom lever mechanism. For the cherry on top, I commisioned a friend with access to a CNC to design and make me a Ken Block "Hoonigan" handle for the hydro. Its big and shiny and wieghs heaps. But I love it.

Seats are OMP fixed backs. They offer far better support than the STi limited seats I had prior. And 6 point harness aswell with a custom harness bar.
The engine management is handled by a wire in Link G4+ Thunder ECU. I dont know how to tune the car myself, but would like to learn.
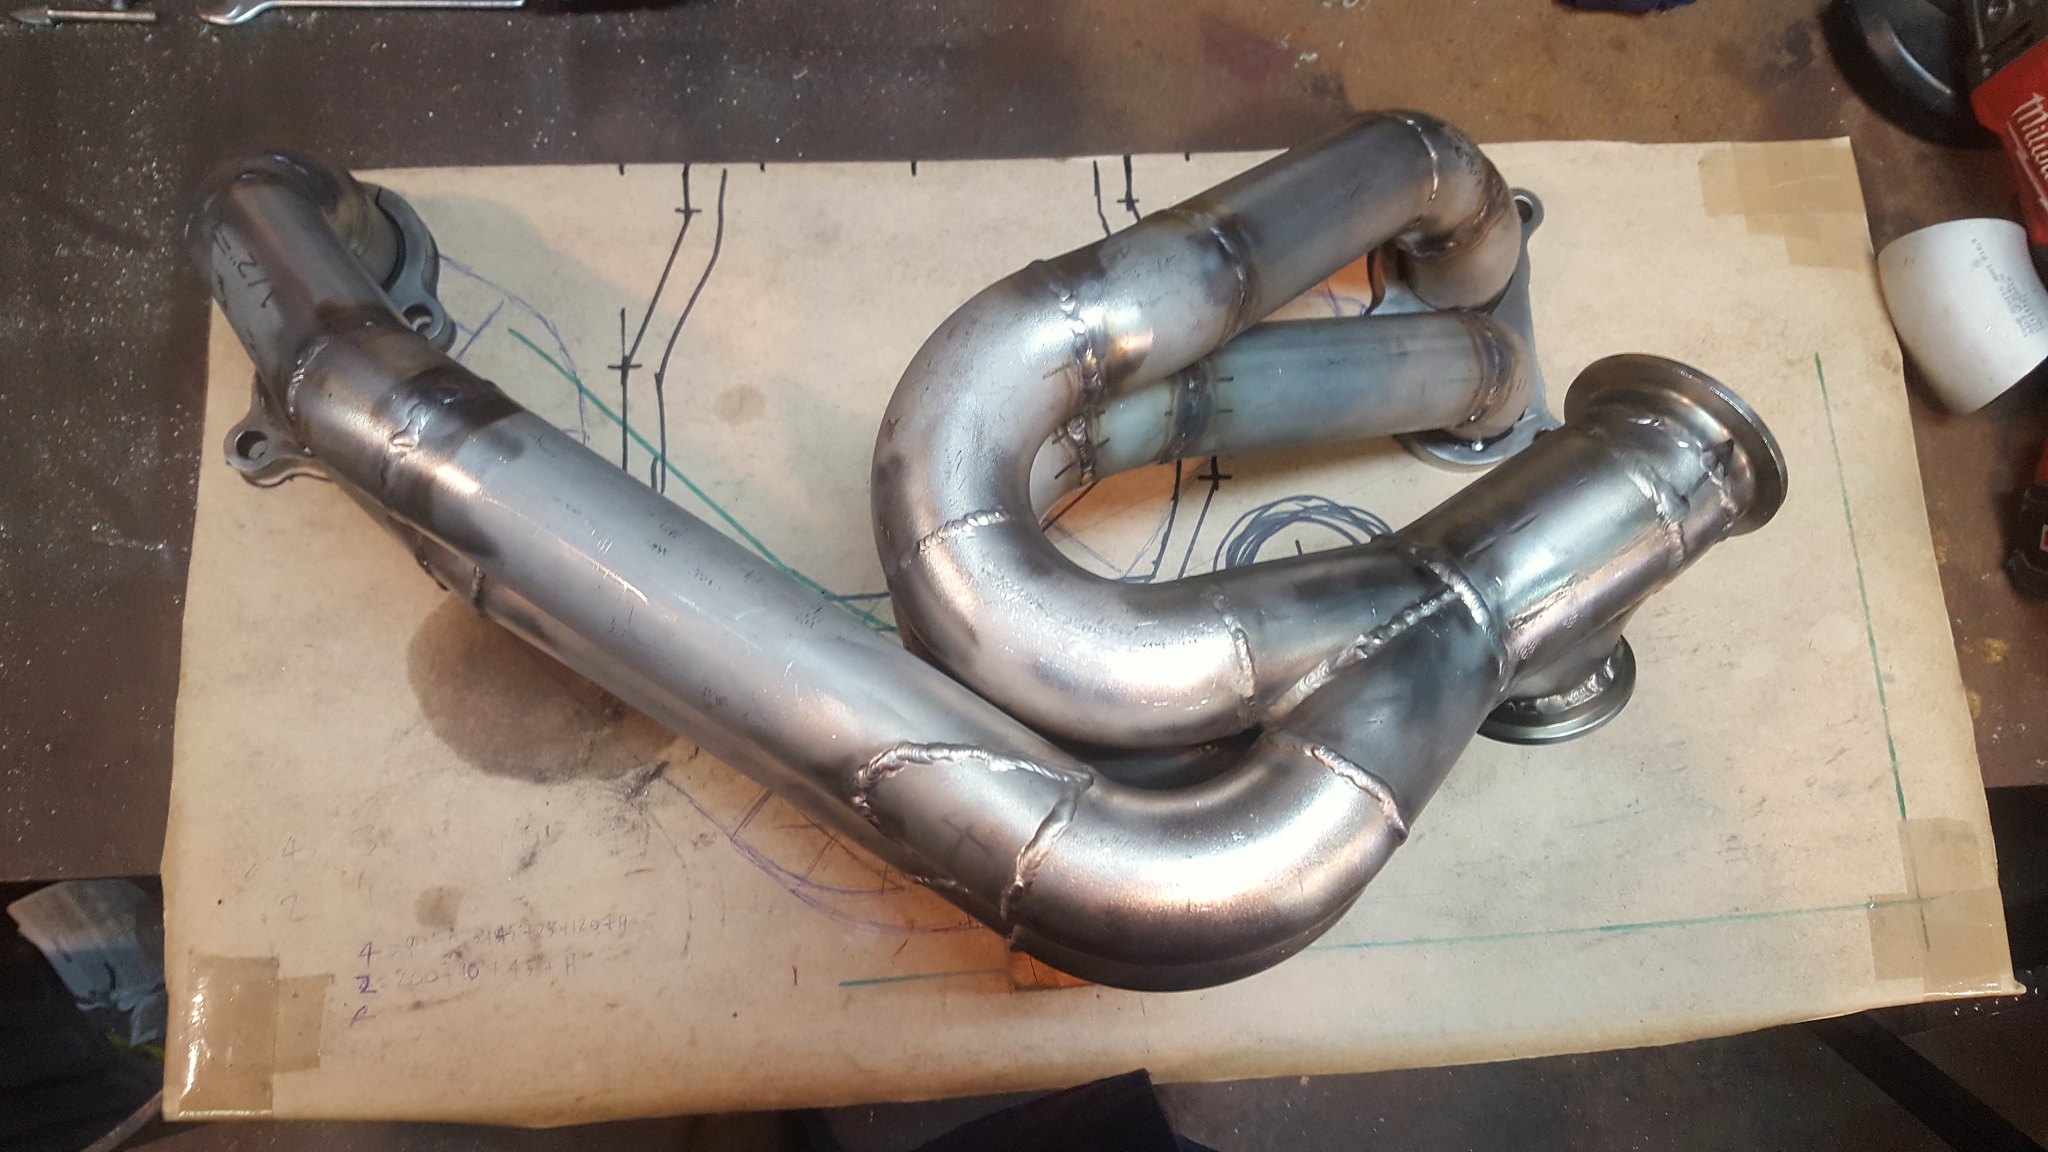
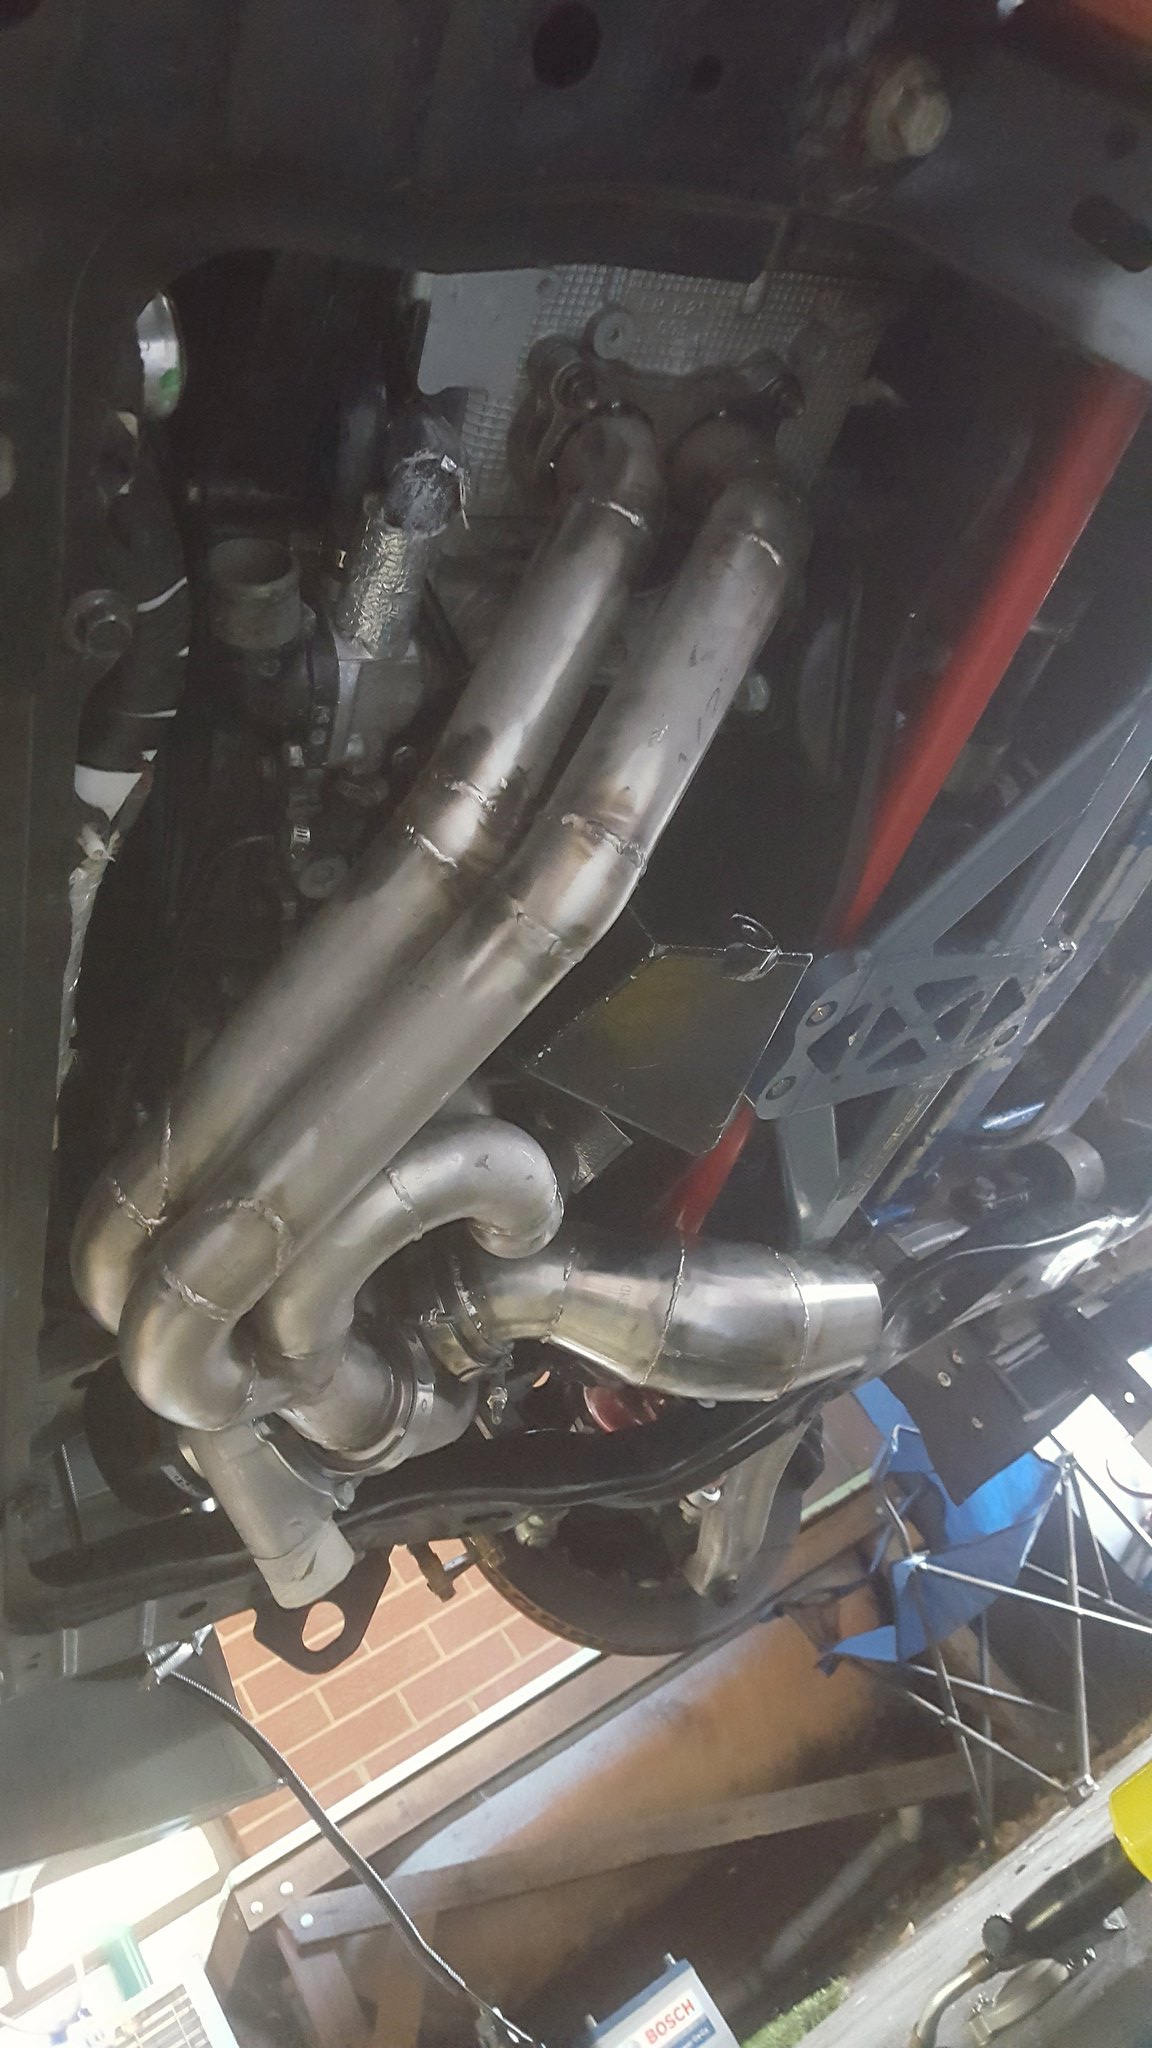
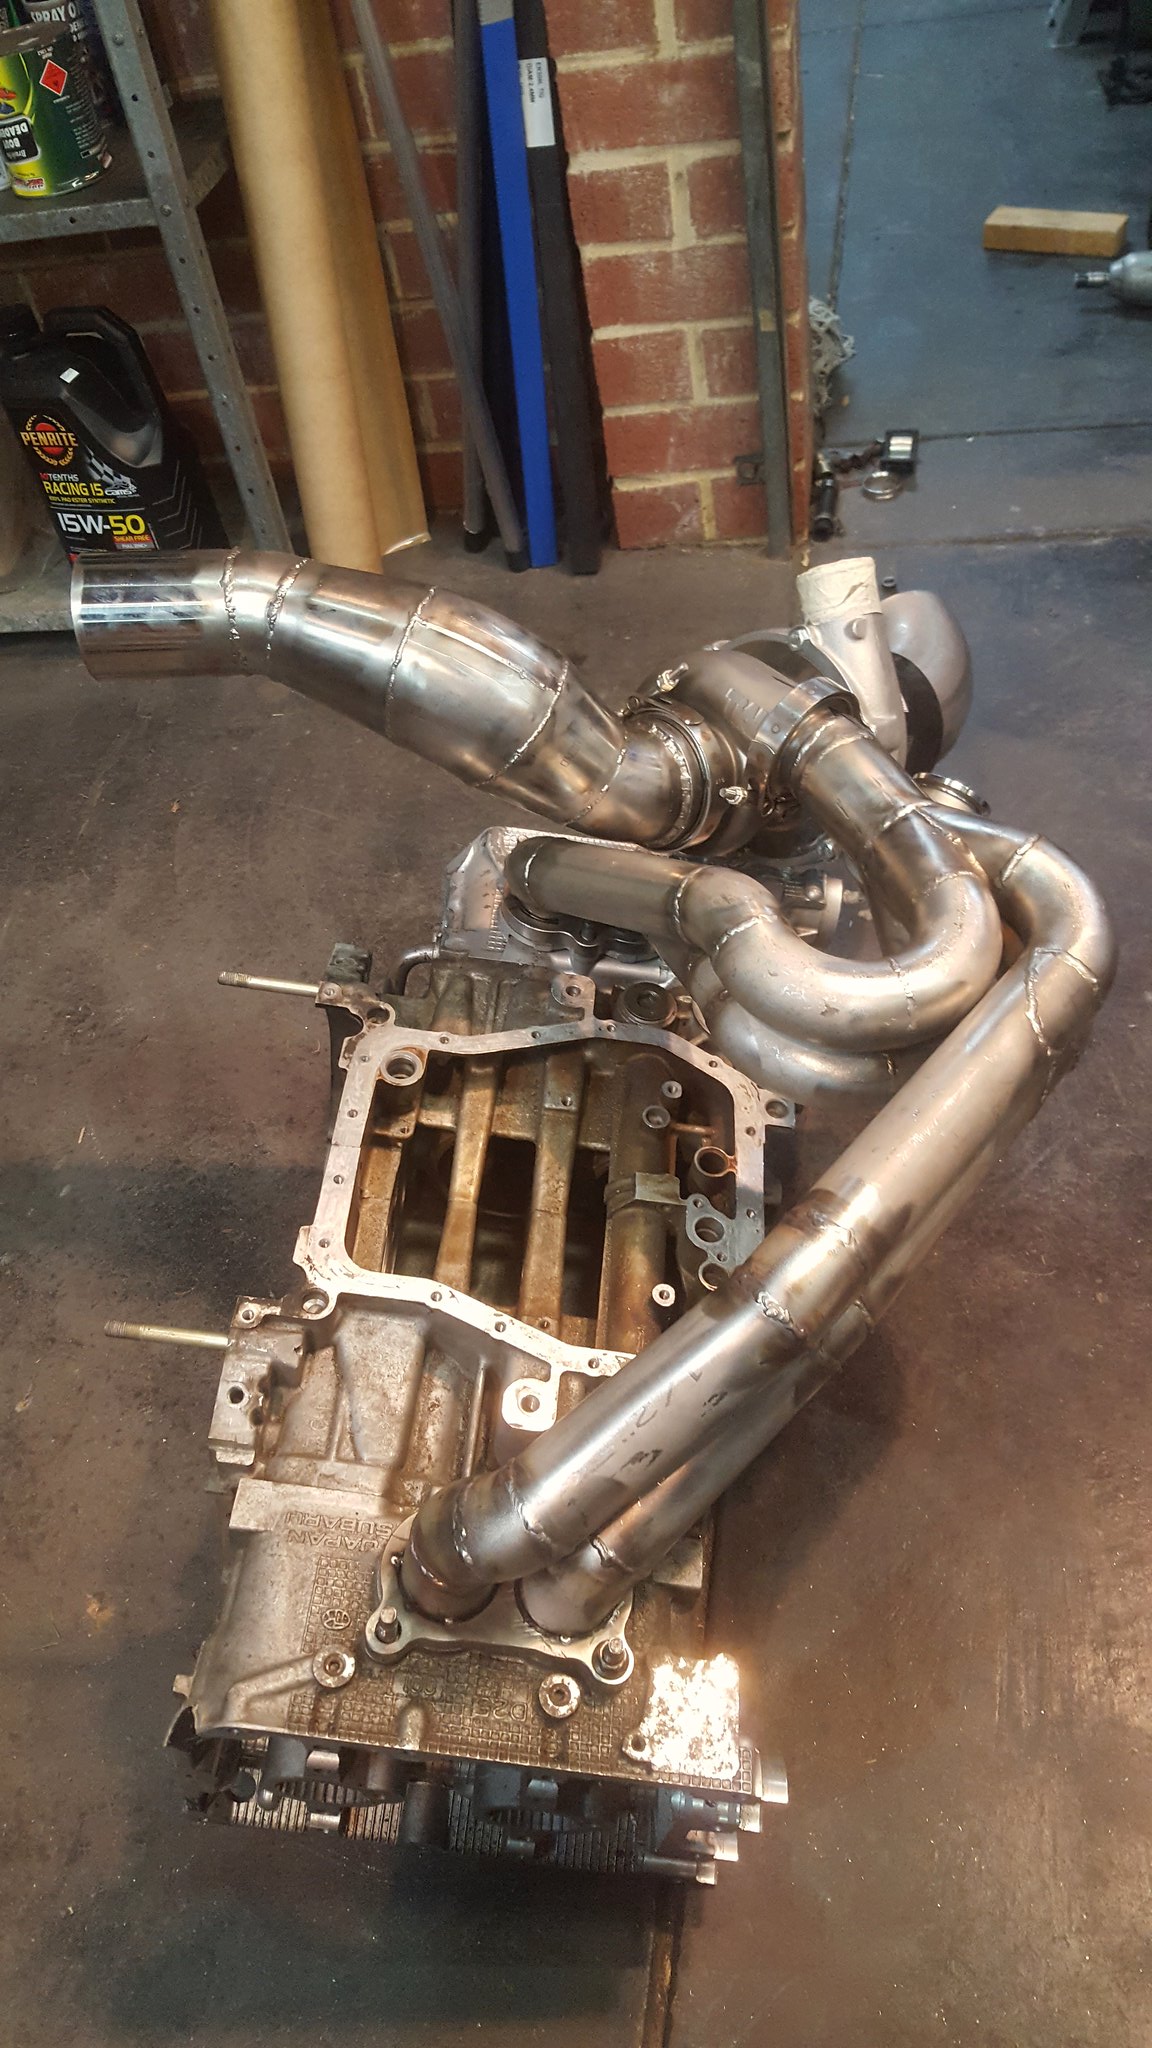
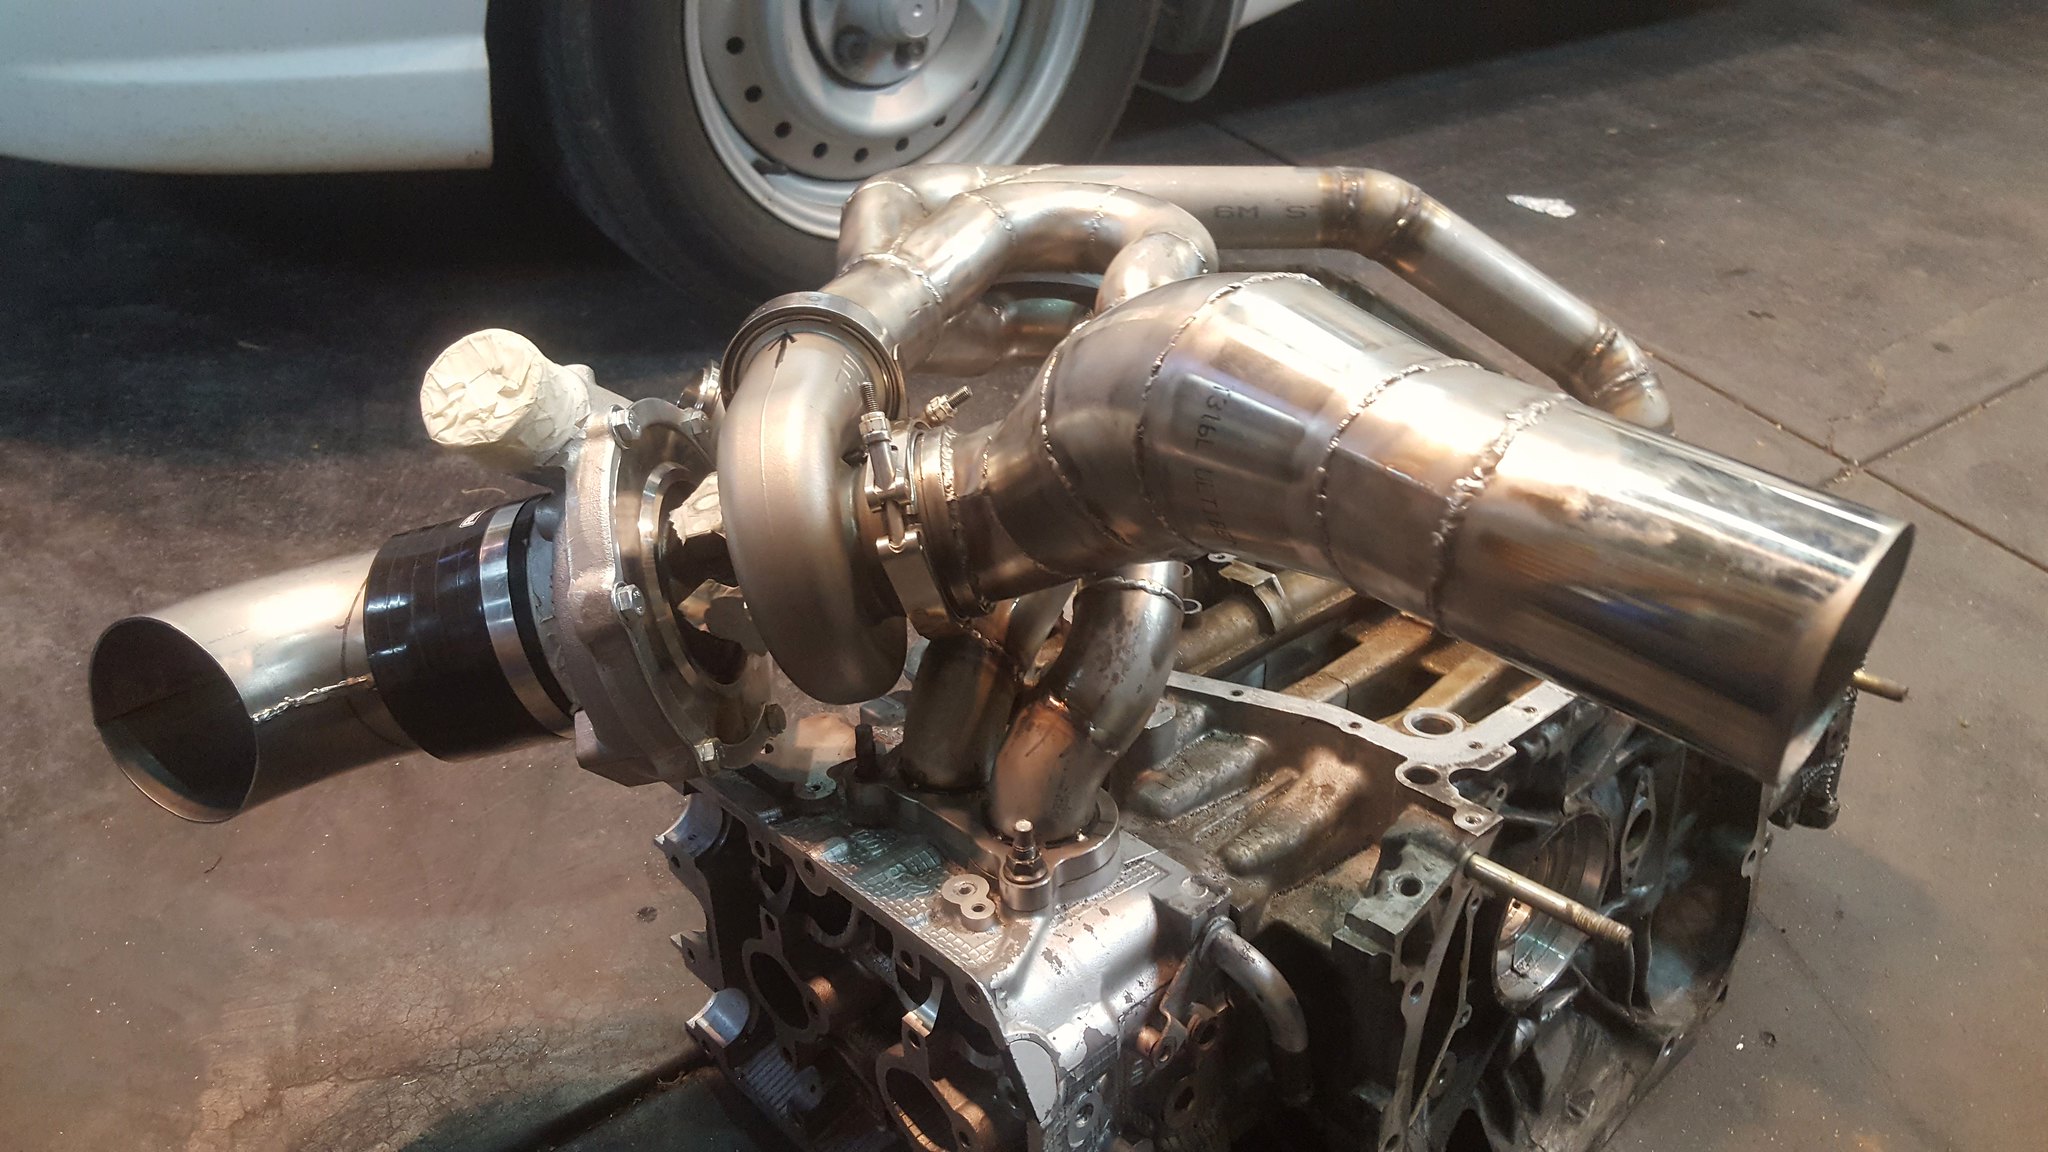
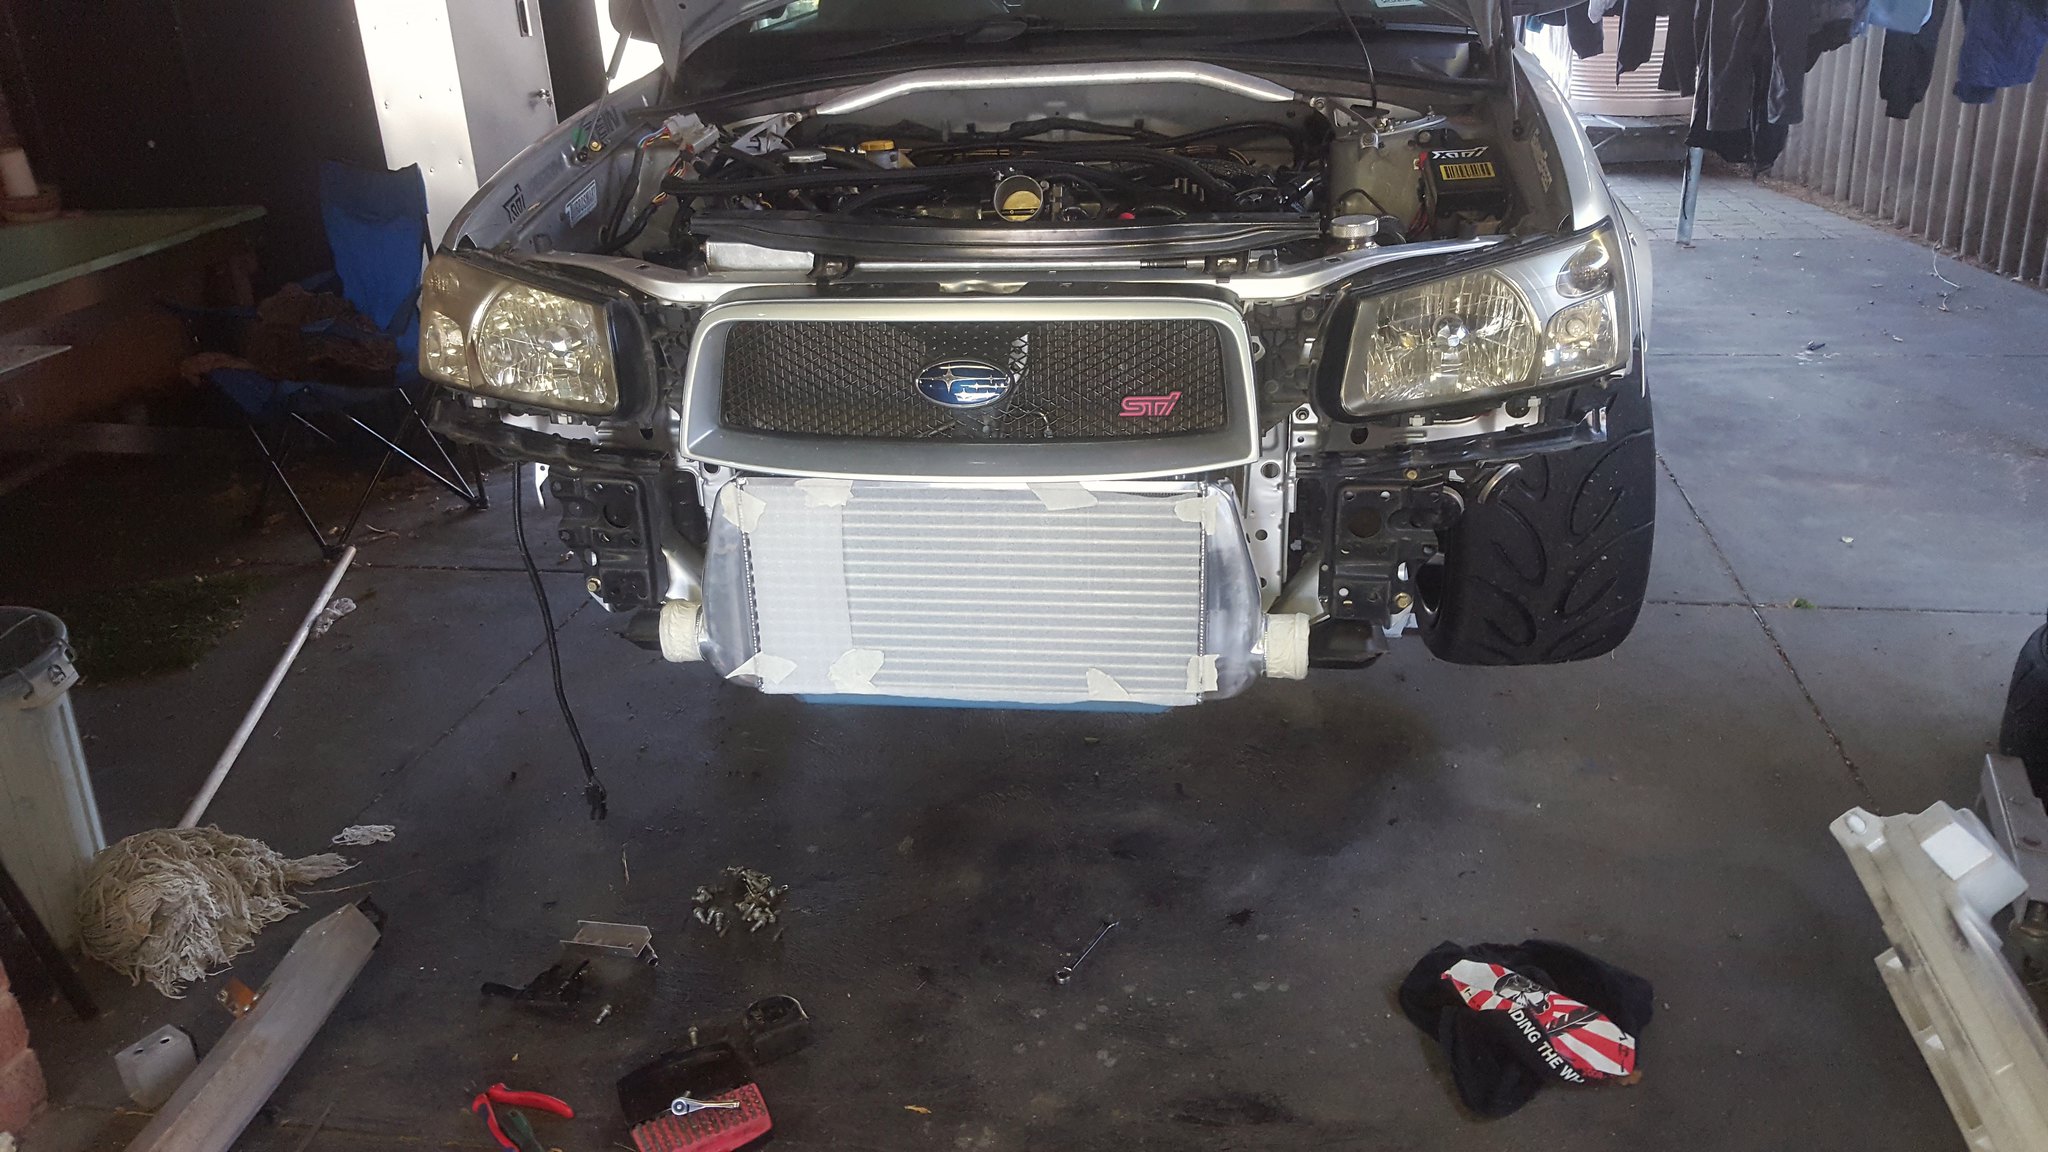
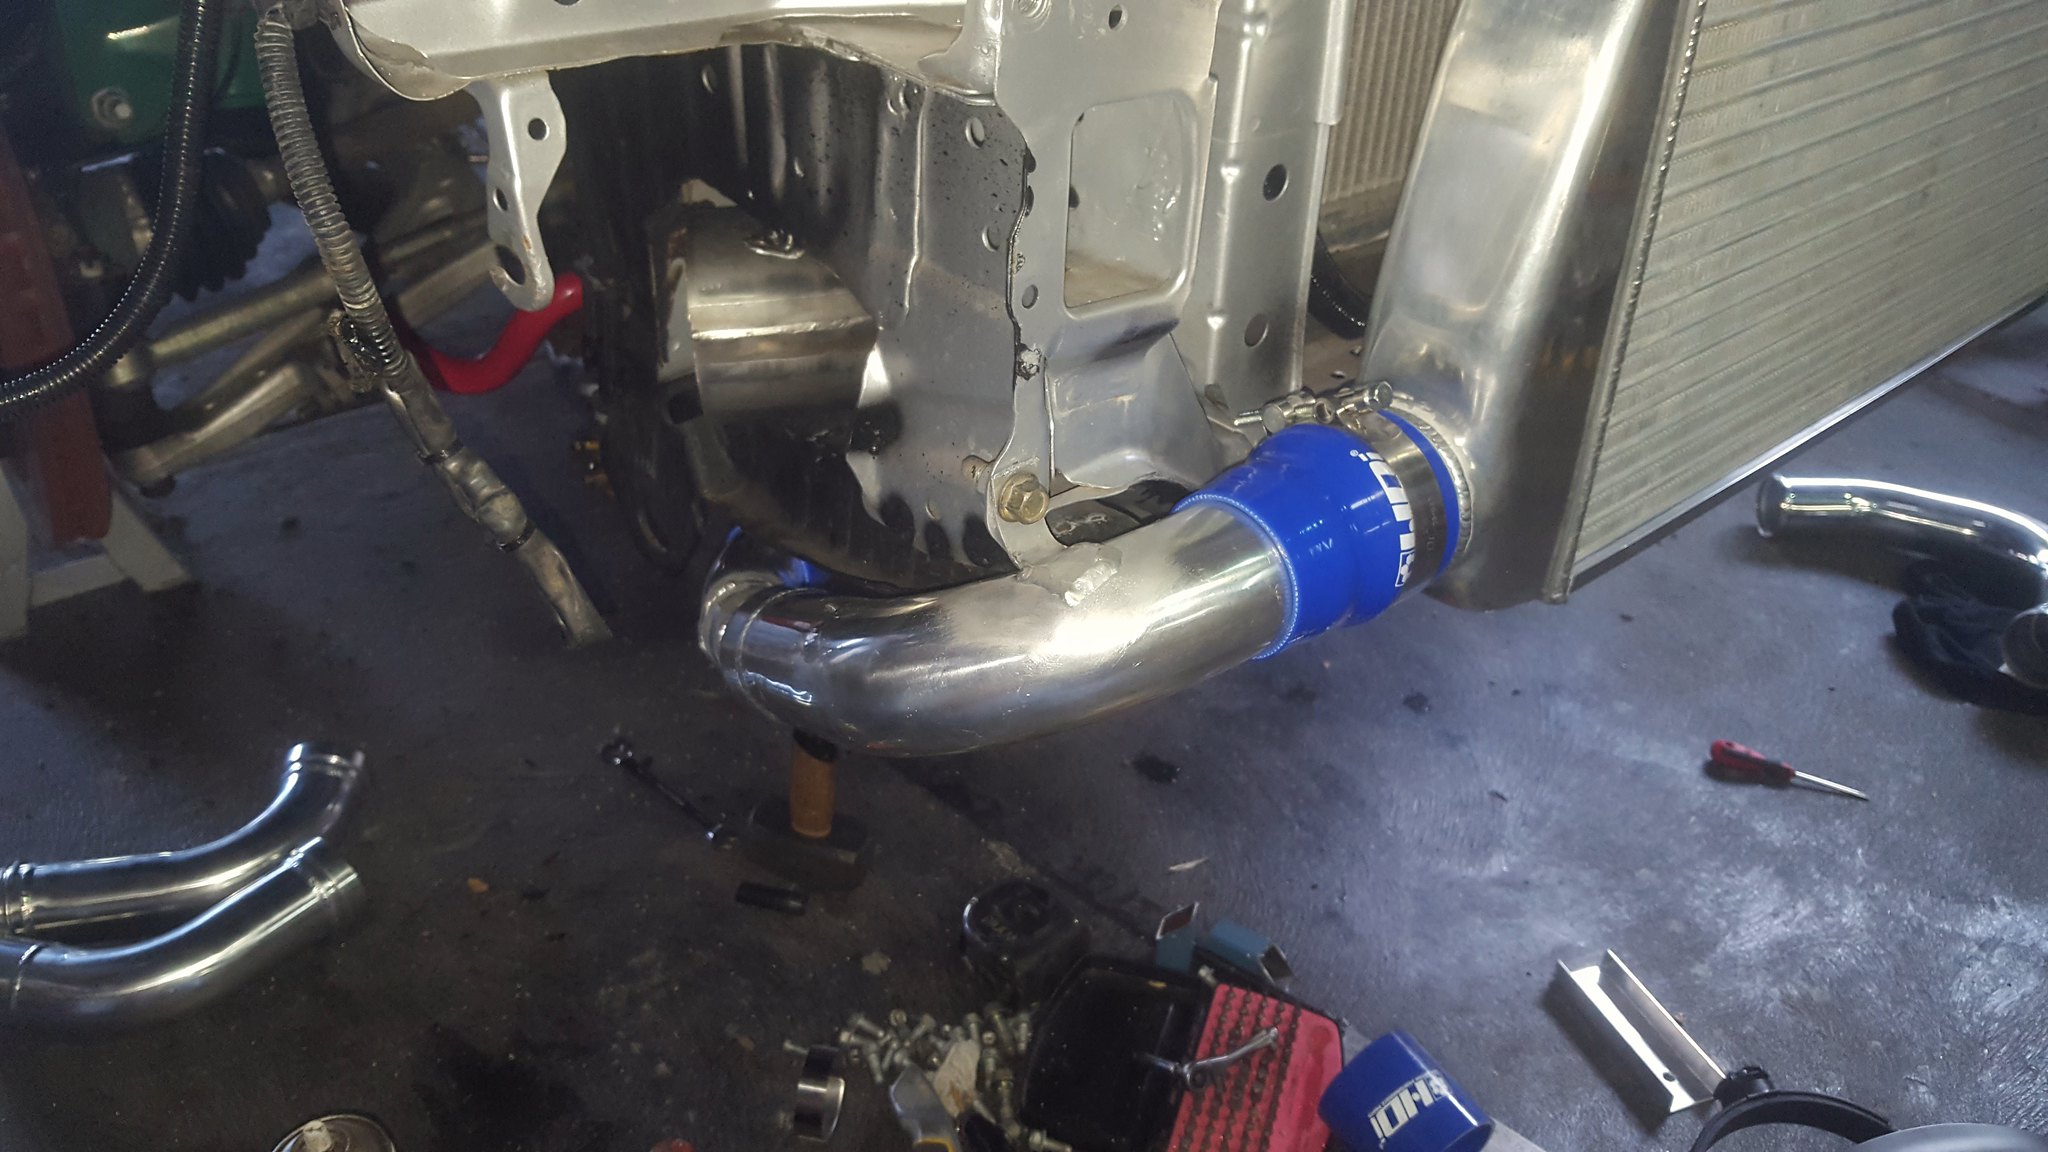
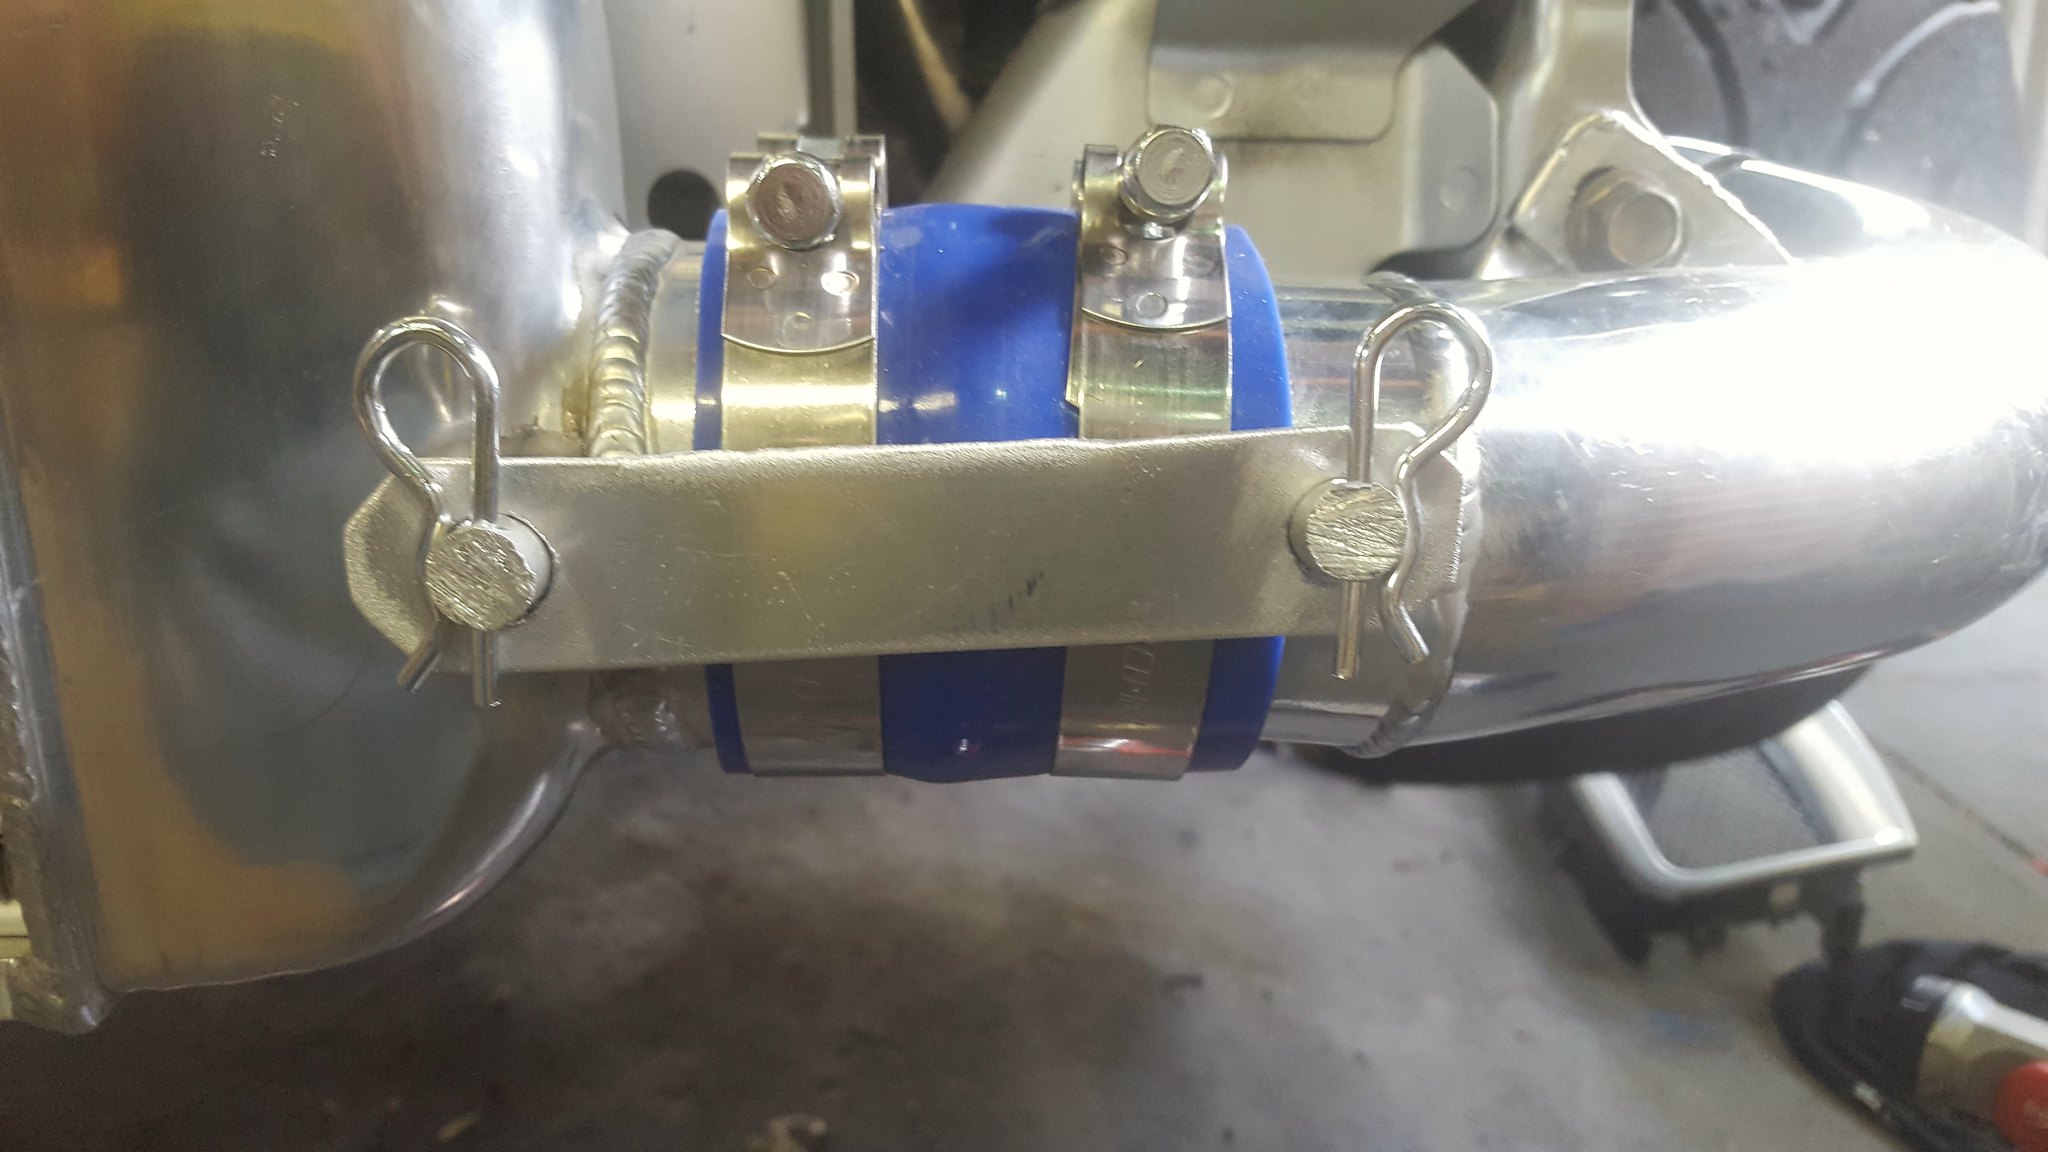
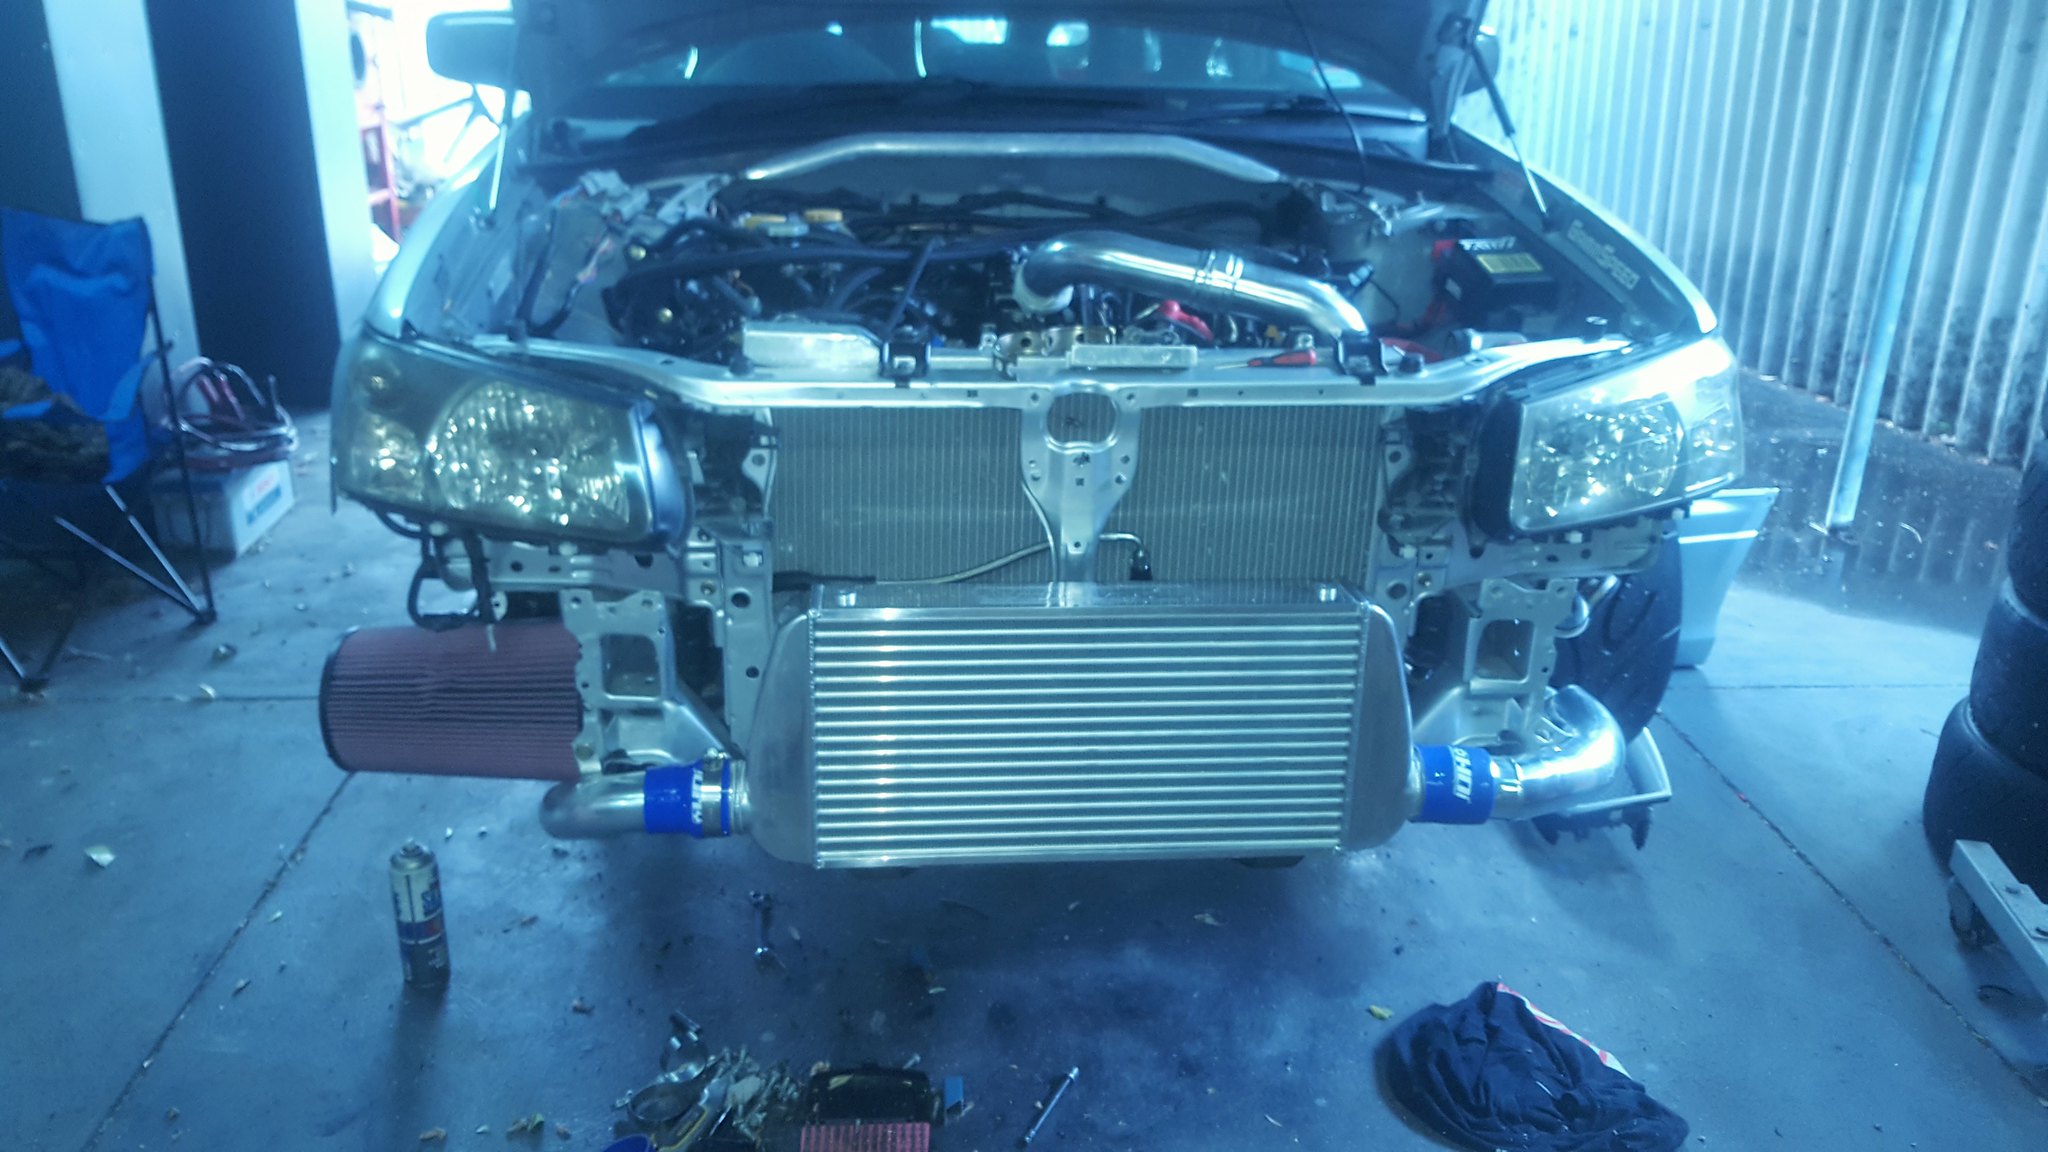
The engine has had many performance revisions and different turbos over the years. (Maybe 4 different turbos?) It is currently out of action getting a massive engine upgrade. But prior, I built my own low mount turbo system for it. I did it because I wanted something different, something custom built by myself, and I wanted to learn how to TIG weld. I figured the low mount would be a great project to learn on. As it needs heaps of fabrication. I also wanted to experiment and see if any increase in response could be gotten via the low mount turbo, front mount intercooler and reverse intake manifold compared to a more common Subaru twisted setup. This last turbo was a GTX3076R with Tial V-band housing.
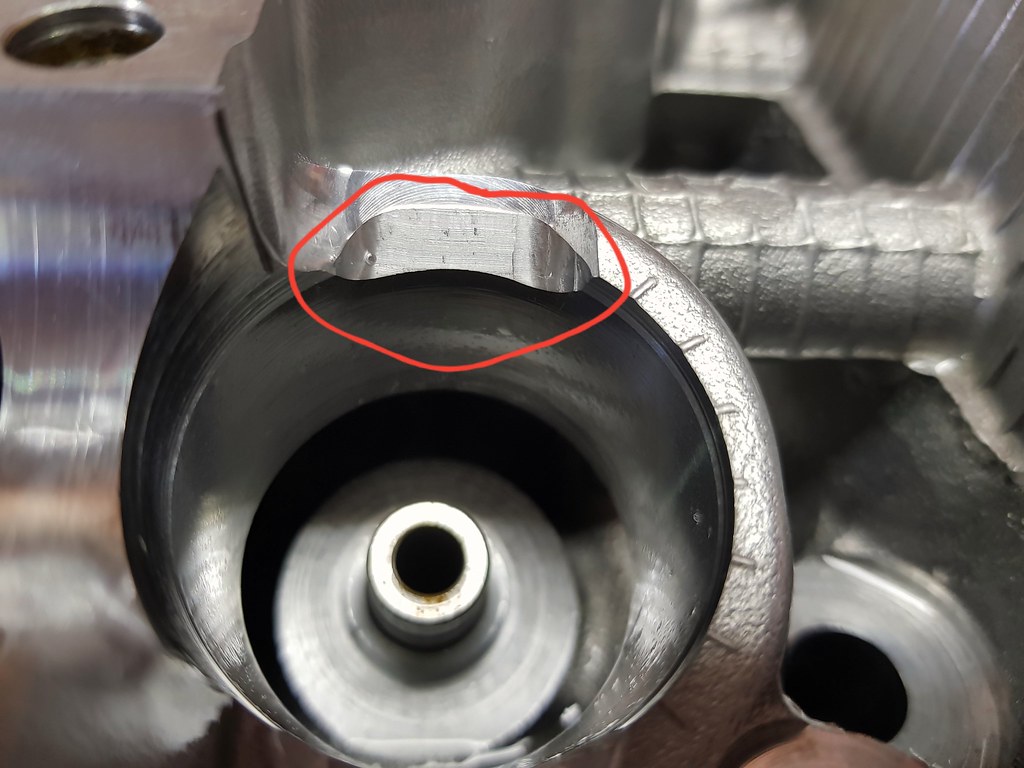
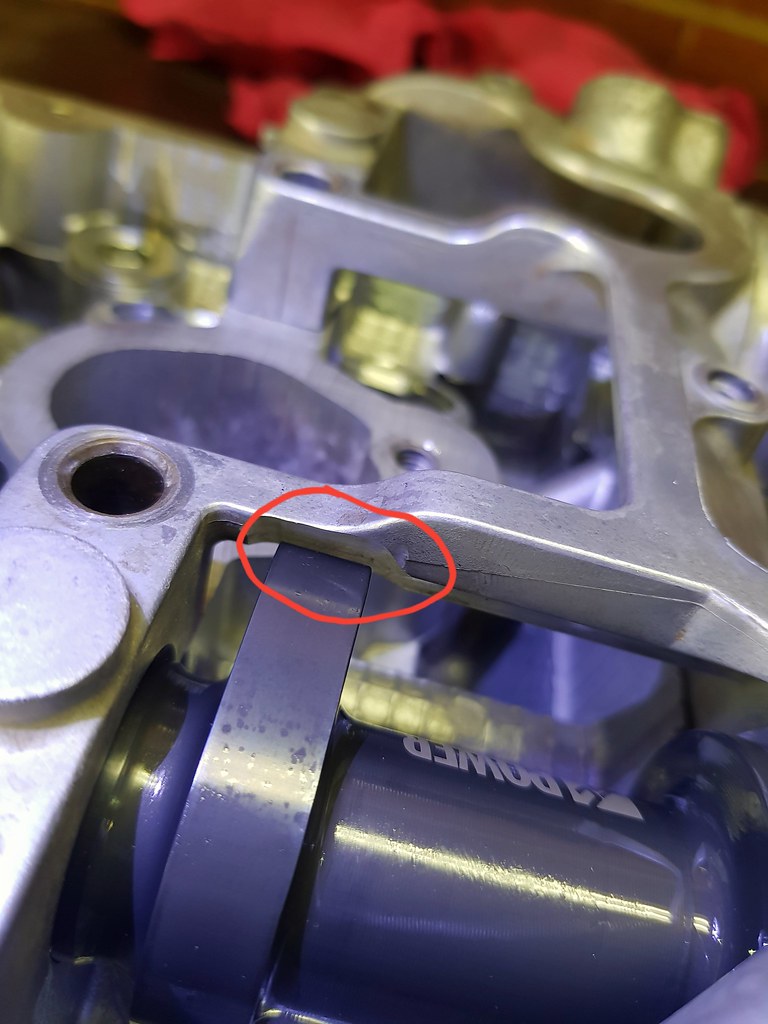
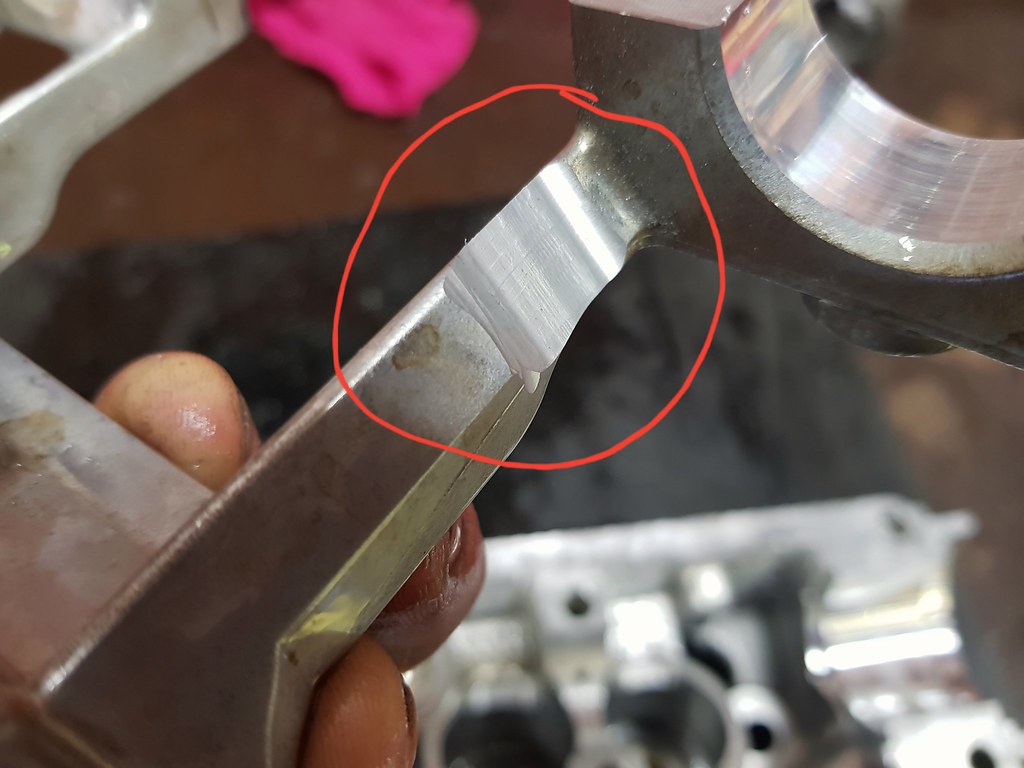
The engine is currently getting a massive rebuild. It suffered a rod bearing failure last year. And i went a little crazy with the spec out this time, so it is getting the full monty thrown at it. It is a EJ257 with a CNC close deck insert. Dowelled main bearing tunnel. And 14mm RCM head studs. I have choosen to do a de-stroke EJ25. So it has a billet Manley EJ20 75mm crankshaft and +2mm Manley Turbo Tuff rods. Also using Manley pistons with 10cc dish volume. It is right now getting a line hone to take full advantage of the ARP case bolts.
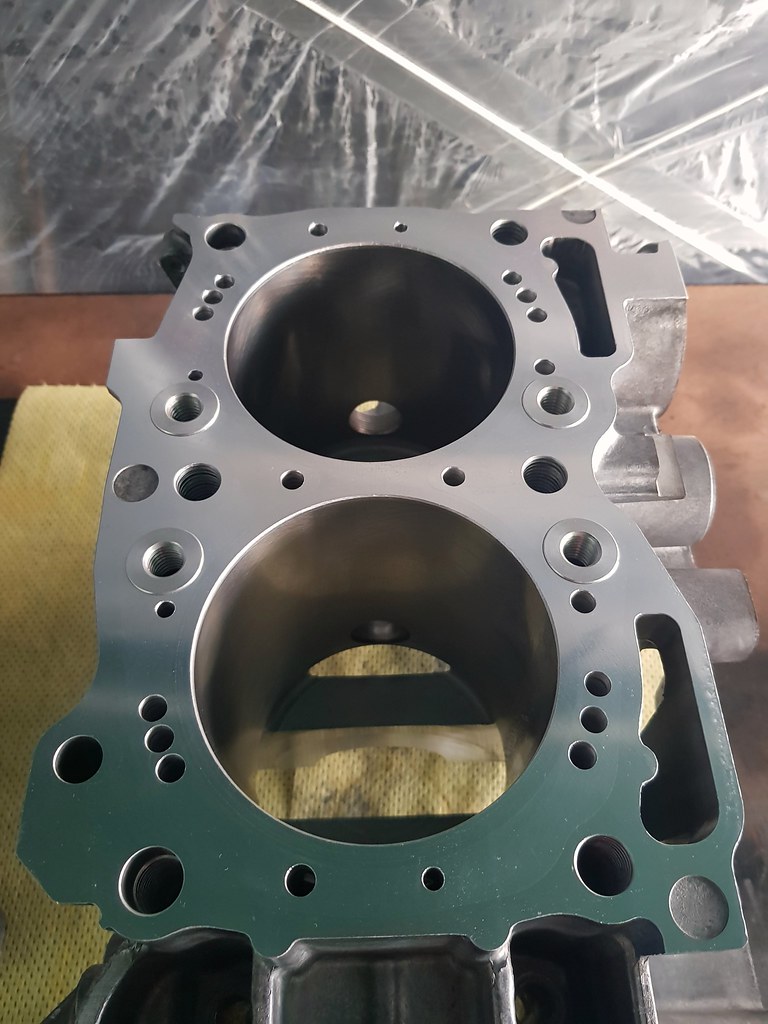 2018-09-12_07-33-06 by bram biesiekierski, on Flickr
A little pic with the RCM 14mm studs.
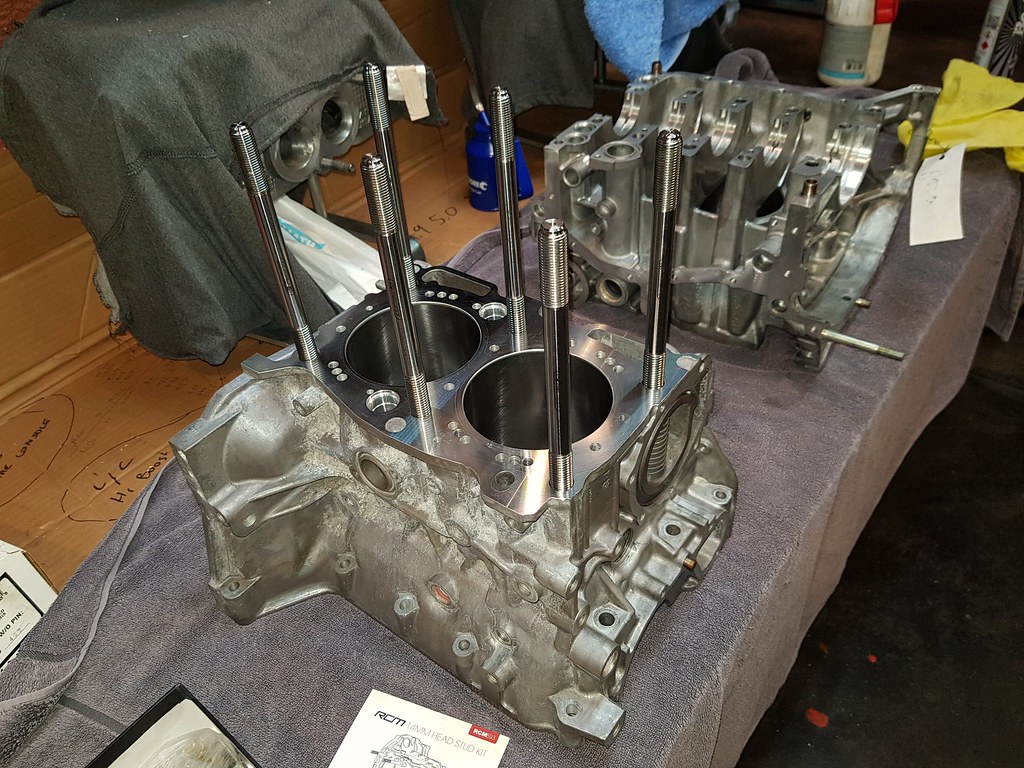 2018-08-21_07-43-26 by bram biesiekierski, on Flickr
Here you can see the 6 x 6mm dowel pins along the mains. (They arent pushed all the way in yet.)
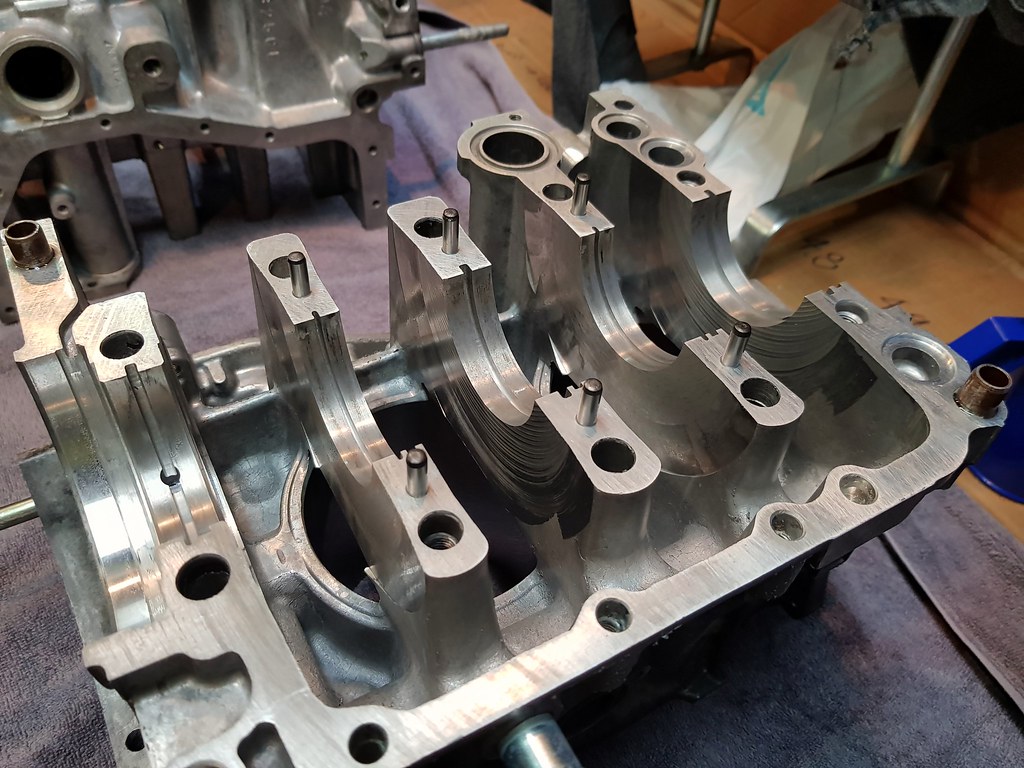 2018-08-21_07-43-38 by bram biesiekierski, on Flickr
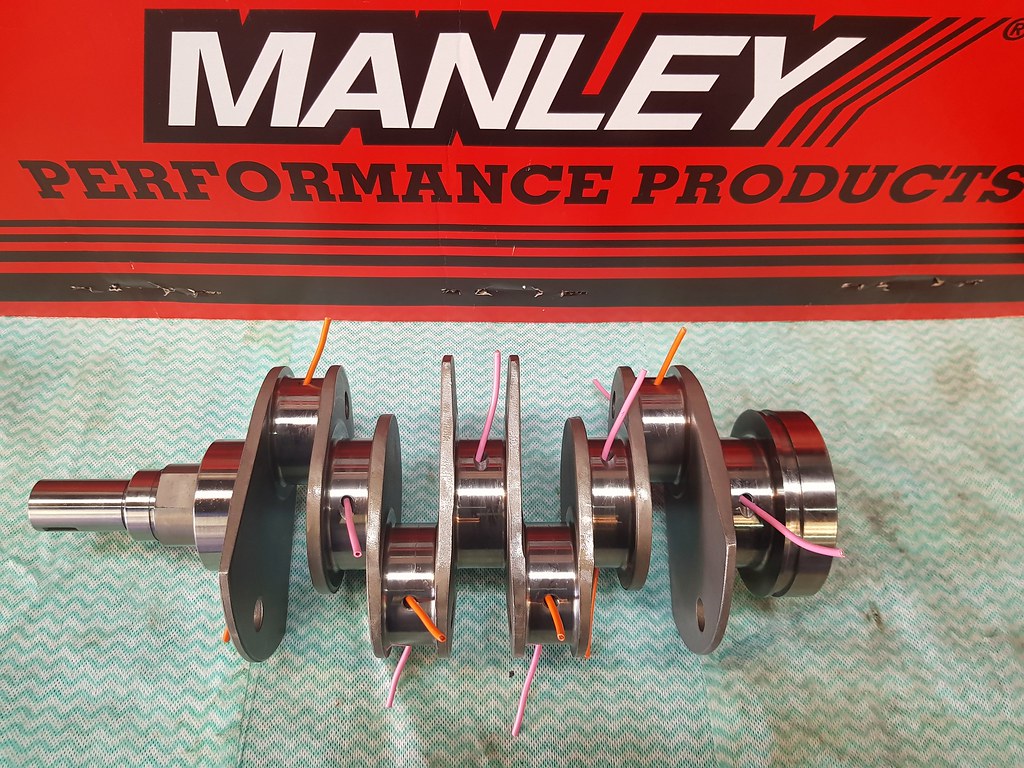 Manley EJ20 75mm crank. by bram biesiekierski, on Flickr
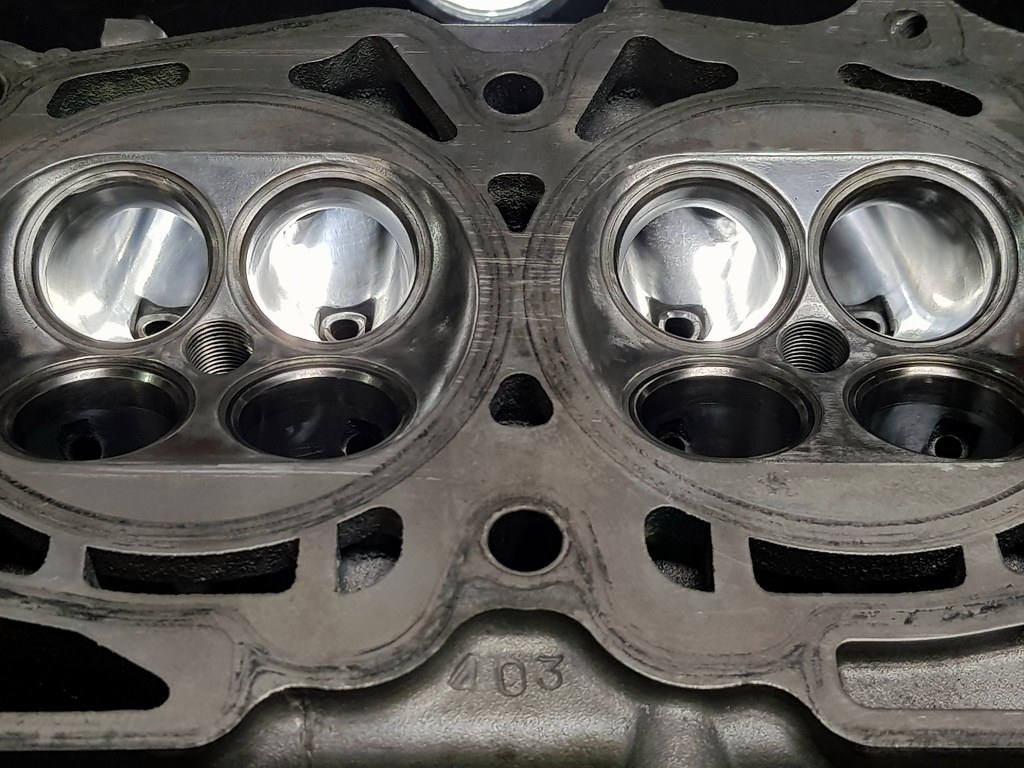
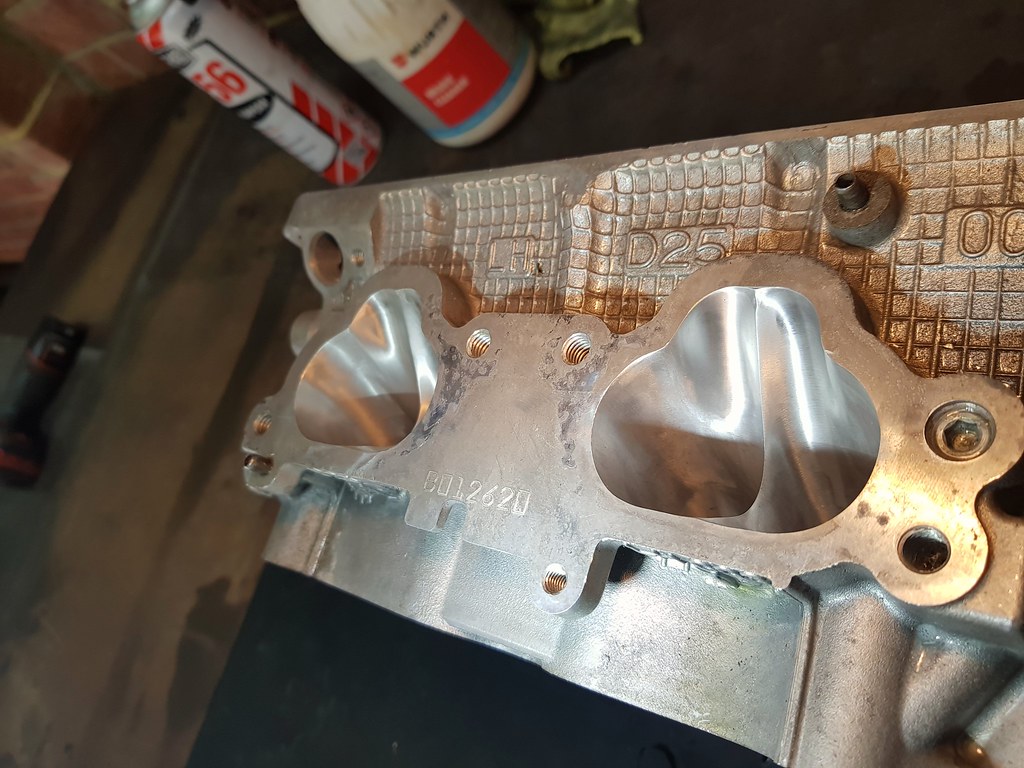
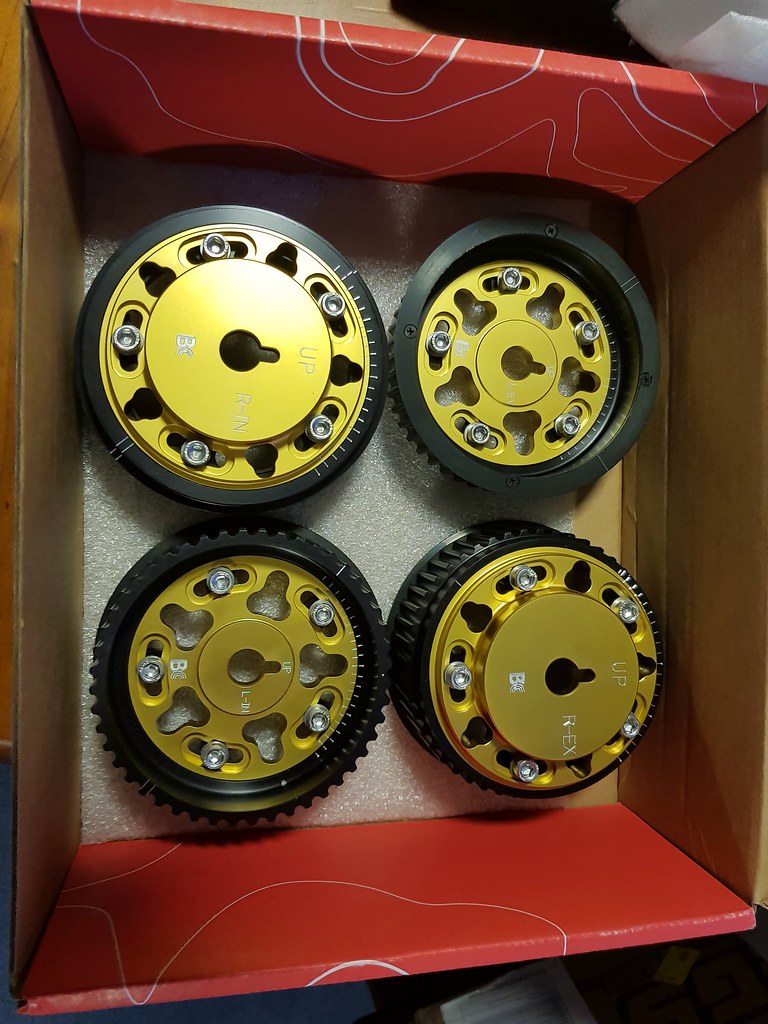
The cylinder heads are also pretty crazy. They are Subaru D25s which I have hand ported. They have had beryllium valve seats cut in, with oversize Ferrea competition valves fitted. The ID of the ports have been enlarged to take full advantage of the larger valves. I am going to be running some very large cams. They are GSC S3s. Which have 282 degree duration and very large lift. So much lift that I had to clearance the inside of the heads to allow them to rotate. AVCS is being fully disabled. And all the cam wheels are vernier adjustable.
 2017-12-17_05-14-34 by bram biesiekierski, on Flickr
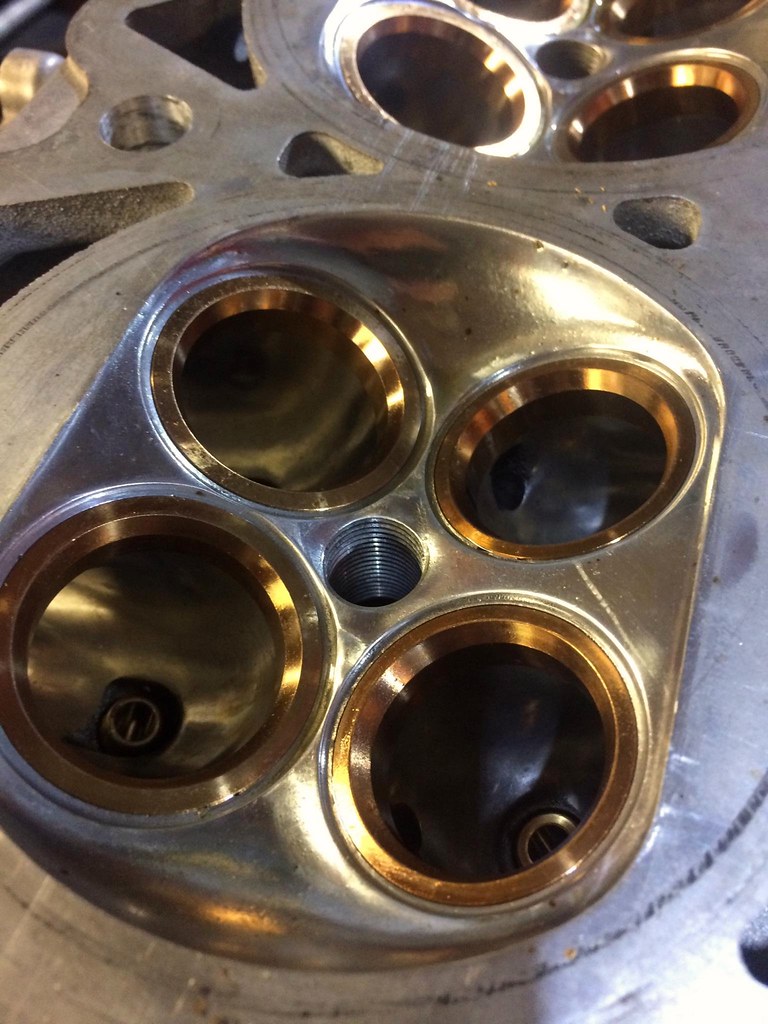 Beryllium valve seats. Subaru EJ25 D25 by bram biesiekierski, on Flickr
 2017-12-23_08-43-17 by bram biesiekierski, on Flickr
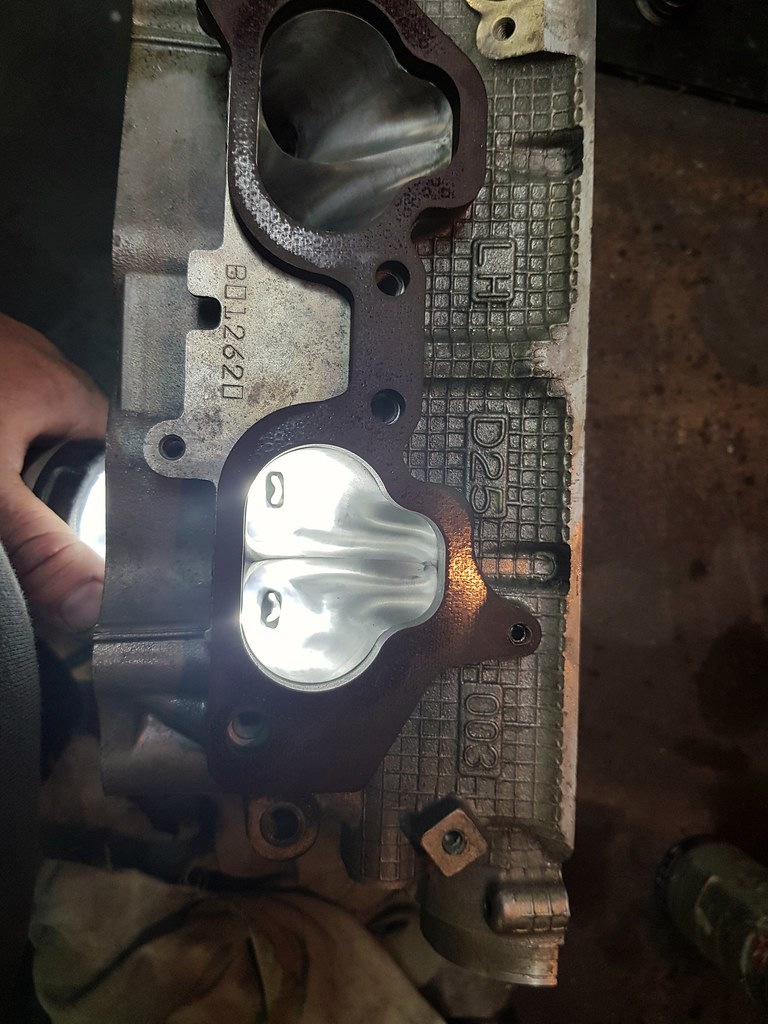 Intake porting with phenolic spacer by bram biesiekierski, on Flickr
 2017-12-10_06-48-42 by bram biesiekierski, on Flickr
 2017-12-10_06-48-53 by bram biesiekierski, on Flickr
 2017-12-10_07-16-47 by bram biesiekierski, on Flickr
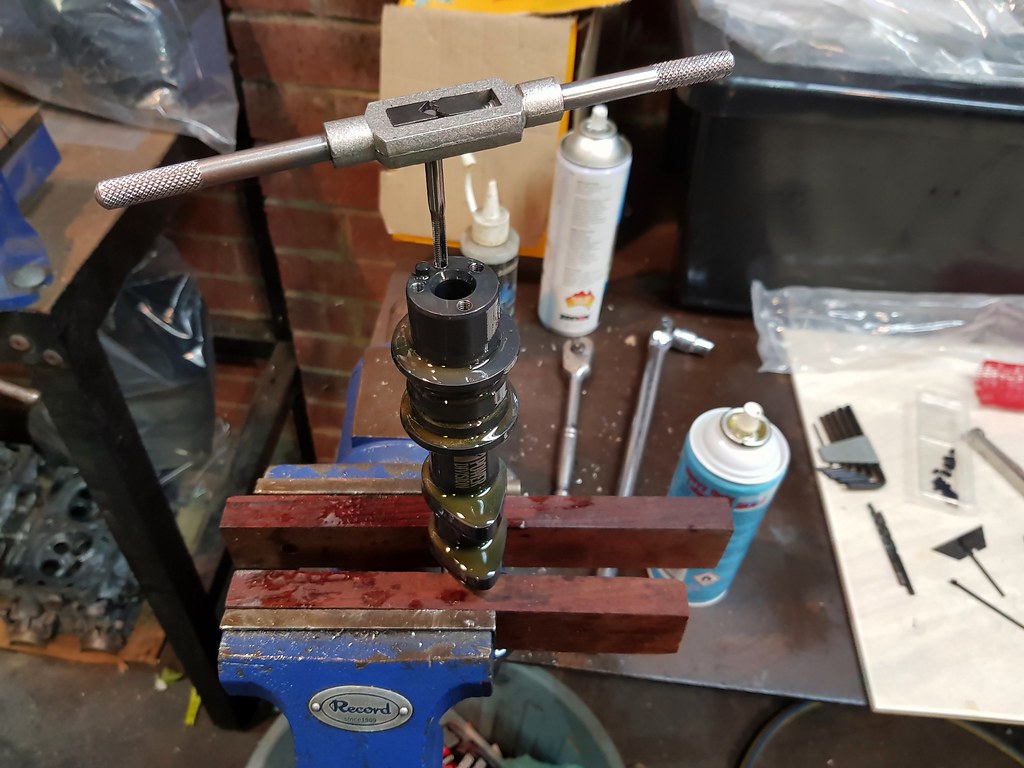 Tapping camshaft AVCS delete plug holes. by bram biesiekierski, on Flickr
 Sexy time! by bram biesiekierski, on Flickr
And to top things off. I asked RCM to build me a custom 5 stage drysump system. It was based off thier 3 stage system. This will probably interfere with my existing low mount turbo system. Which I will re-make if nessisary. I kinda want to re-make it anyways as I learnt alot while building it the first time. And i think I could do a better job of it if doing so again. I did teach my self to TIG while building it. So there is alot of rookie welds in there. My welding has come along way since then. And I will also be upgrading the turbo (again) to something a little larger to really take advantage of the new motor spec.
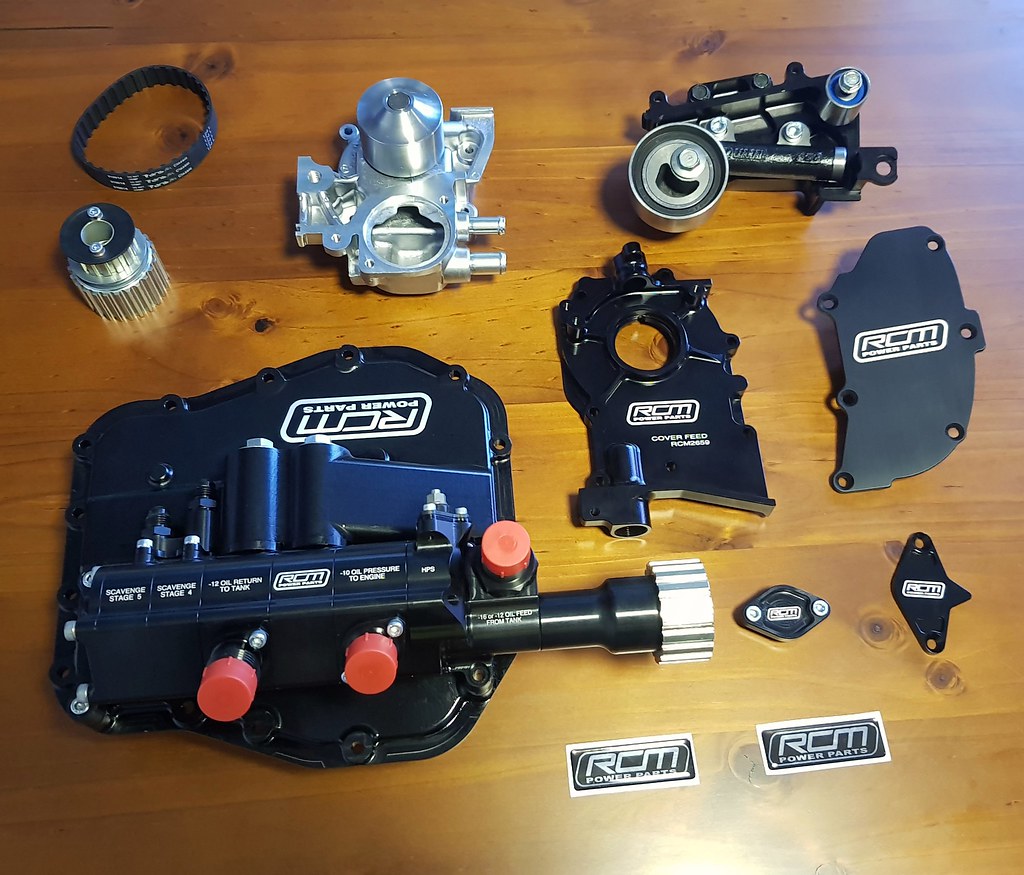 RCM Drysump and extras. by bram biesiekierski, on Flickr
Super excited to see pics (hopefully build pics too?!?!) of this engine - great looking setup!
Thanks Matt.
The engine is ready to be picked up after having the line hone performed. So the rest of the build can progress again.
Very sweet! Very very sweet!
Great drawings too!
Only tiny question is about the rear lower links - looks like it has a forward link and, if so, and if the forward chassis point isn't in line with the wishbone mounts, there is a very high probablility of interference/binding and both compromised suspension movement and stress on the chassis and suspension.
Gord. I dont know exactly what you mean? Ive been running this suspension for a few years now. And there is no interference of arms physically hitting each other.
But i think there is some 'stiffness' in the arms as they travel due to the pulling/pushing of the trailing arms. Ill try and explain it as best I can. I think its to do with the length of the trailing arm, vs the the OEM toe and Ikeya toe adjustments. I think these all need to be in sync, so they arms arent being pulled or pushed excessively forward or rearwards by the trailing arm, as the suspension goes through its travel. Obviously, the arms travel in an arc, so there will be a point where they are ideal, and as they travel away from that, the arcs will diverge, and cause issues. The rear travel is not big, i think its only around 100mm from memory with these coils. So there isnt a massive change in the swing of the arms.
Before I recieved the arms, I actually deleted the OEM toe adjustemnt, assuming the toe adjustment would then be in the new arms. And also because I wanted to use the extra blue bracing on the crossmember, which wont work well with the OEM adjustment design. The OEM toe adjustment is a cammed/eccentric mount thing on the rear crossmeber, which i welded up. The Ikeya arms have thier own turn-buckle type adjustment to affect toe (and track). But it also affects the whole arm geometry aswell. I think i should have kept OEM toe adjustment, and used a combination of OEM toe, turnbuckle length for the laterals, and adjusting the length of the trailing arms, and together they could be all dialed in to work in harmony. But with the OEM toe locked out, it kinda makes it a bit more difficult.
The suspension does really need a pro to set it up i think, as I have played around with it a lot over the years, changed out heavier and lighter springs, and all kinds of stuff and its never been 100% right. The arms kit are fully adjustable with pretty much every aspect of them, even having multiple pick up points on the mounts and stuff. I just dont really know how to get the most out of them. The instructions were in Japanese too, I did get a little bit of it translated by an importer, but not the whole manual.
In the racing i was doing previous, which was relatively tight and lower speed tarmac events, this wasnt really a massive issue, as it just made the car have a bit of a tendancy to oversteer. (Which i enjoyed.) The A050s, and Z221s before them were pretty predictable, and easy to manage when they step out, so even though the rear suspension was a bit loose and unpredictable, the tyres always gave great feedback and let you know exactly how far you could let it go. Its not the fastest way through a corner, but probably the funnest.
When the car is back up and running, i want to drive more of Barbagallo, which is a lot higher speed than enything I have done previous, and also has elevation changes and stuff which can unsettle the car if the suspension isnt doing everything it should be doing. With the power i want out of this new engine, the speed the car will be capable of will be alot higher aswell, tland things can get messy very quickly if you get a bit out of your line.
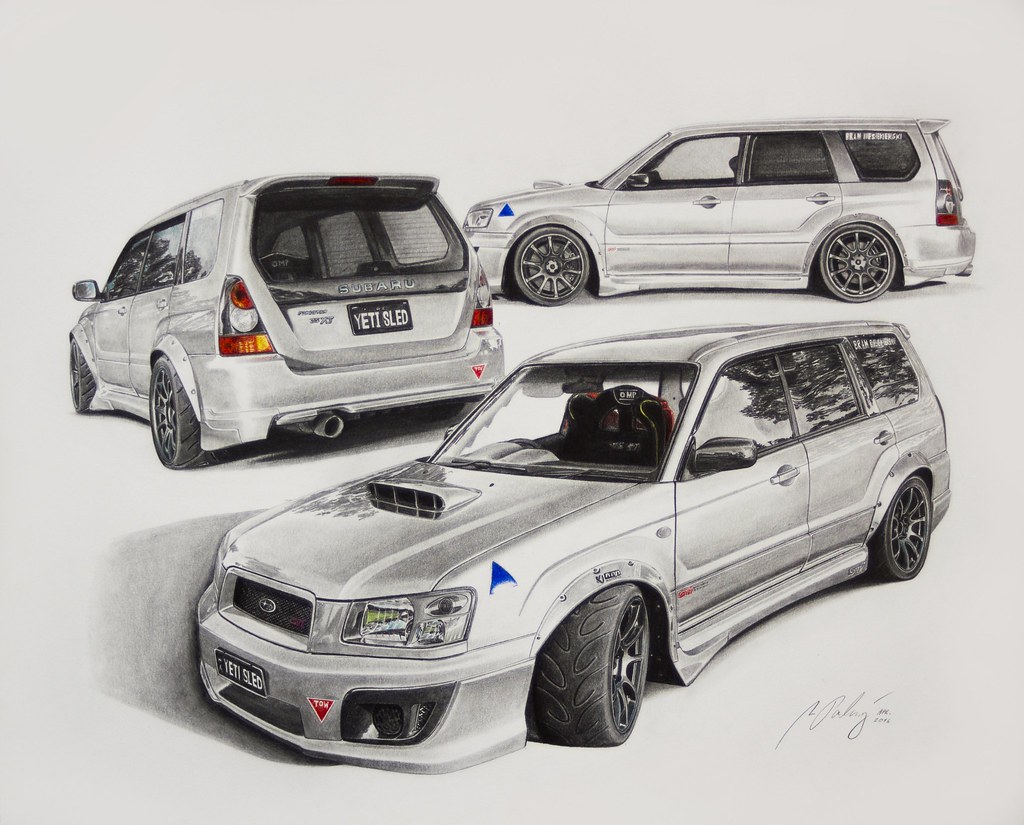
The drawing is a "Mipo Design" by Miro Porochnavy. He does amazing car drawings. Very realistic graphite pencil drawings. And very reasonably priced to commision custom artwork.
Bram, I think you have in mind exactly my concern. It isn't anything to do with them hitting each other but the traverse (wishbone) link moves in an arc across the chassis, if you see what I mean, but the additional longitudinal link moves in an arc along the line of the chassis - so, if you look from the side the 'wishbone' doesn't move forwards or backwards but the additional longitudinal one moves in an arc - forwards and backwards.
This means the point where they are attached to each other is in a bind condition where it is being forced in two different arcs, in two different planes. If you remove the strut and try moving the wishbone and link assembly you will feel it, then remove the additional link and it will be free to move. If there is a very small amount of travel, you may get away with it.
With high load applications, one may wish to use that extra link BUT it should be fitted so the inner end is in line with the mounting points of the wishbone to avoid any binding.
[edit]
You do see a similar looking setup with some open wheel race cars, for example some old Indy race cars, but there is a critical difference in that the paired traverse links are completely separate, which allows them to move in both planes (technically, pin rather than hinge attachments) - TBH, I suspect there is an element of 'monkey see, monkey do' on the part of some of these manufacturers. Heidts have this same, IMO, design flaw.


