103 | Setting up Plex Knock Monitor
Summary
Plex’s Knock Monitor is an exceptionally versatile and powerful tool when it comes to listening for knock. In this webinar we’ll look at how to correctly install and configure the Plex Knock Monitor and how to use it for your day to day tuning. We will also look at how to use the individual cylinder knock detection and the real time knock graph to help visualise when knock is occurring.
| 00:00 | - It's Andre from the High Performance Academy. |
| 00:02 | Welcome to this webinar where we're going to be looking in detail at the Plex knock monitor. |
| 00:08 | Now this is a webinar that we have been requested by a few of our members, and I wanted to produce a webinar where we looked in detail at the Plex knock monitor, how it functions and probably more importantly, how to go about setting it up for a particular vehicle. |
| 00:26 | The Plex knock monitor is probably one of the more sophisticated audio knock detection systems that I've had the chance to use. |
| 00:35 | And of course when you've got a product that is relatively complex, with it comes some concerns about how exactly you should go about setting it up to get the most out of the product. |
| 00:48 | It's one of those fine balancing acts that a manufacturer has to make between providing enough flexibility and functionality in the product for it to be really truely exceptional, while also allowing it to be user friendly enough and easy enough to understand and set up by an average user. |
| 01:06 | In general I think the Plex knock monitor does do a pretty good job of that, particularly when you're using the basic set up. |
| 01:14 | However in the more advanced set up, there are some aspects that can be overlooked and it's important to have a really good understanding of how exaclty it does all work. |
| 01:23 | So that's the aim of today's webinar. |
| 01:25 | Now as usual if you do have any questions that you'd like me to cover on this webinar, during this webinar, or anything that I talk about that you'd like me to expand on, or clarify, please ask those in the chat box, Ben will transfer those through to me and I'll address those at the end. |
| 01:44 | Now while I would assume that most of you watching this webinar would have a reasonable understanding of knock, I do want to just take a moment right at the start of this webinar, just to address what exactly knock is and why it's important for us to monitor. |
| 02:01 | So knock is an abnormal type of combustion that can be incredibly damaging and incredibly dangerous to our engines. |
| 02:09 | So briefly under normal combustion situation what we end up with is a flame front that propagates out from the spark. |
| 02:20 | So it originates from the spark plug and it moves out through the combustion chamber and as it moves through the combustion chamber it ignites the unburnt fuel and air ahead of it. |
| 02:29 | Now under normal combustion we would typically expect to see a flame front speed somewhere in the vicinity of perhaps five to 10 metres per second. |
| 02:38 | So in relative terms it's quite a slow process and the result of this is a gradual increase in both pressure as well as temperature inside the cylinder. |
| 02:48 | So that's what we really want happening. |
| 02:51 | Now under some circumstances, while normal combustion is occurring, the heat inside the cylinder, inside the combustion chamber, that's increasing as the pressure inside the cylinder is also increasing. |
| 03:02 | And at some point that temperature, that combustion temperature can get so great that pockets of unburnt fuel and air around the outside of the combustion chamber can spontaneously combust. |
| 03:15 | And this is what's known as knock or also referred to as detonation. |
| 03:20 | Two terms that are really the same, they're interchangeable. |
| 03:25 | And when we get these pockets of unburnt fuel and air exploding, it's no longer a nice smooth controlled release of energy, it's very sudden. |
| 03:35 | Kind of like a stick of dynamite exploding. |
| 03:38 | And under these situations we can end up with a flame front speed in excess of 1000 metres per second. |
| 03:45 | So huge flame front speed, large pressure spikes and this is what can be damaging to our engine. |
| 03:52 | And again just briefly so that we all understand, there's two main ways that knock can do damage. |
| 04:00 | First of all the pressure spikes can strip away the thin boundary layer of gases that protect both the crown of the piston as well as our combustion chamber from seeing the full heat of combustion. |
| 04:12 | Now considering our pistons and a lot of our cylinder heads are made from aluminium, that's essential because aluminium, depending on its particular alloy's going to melt somewhere around about perhaps 700 to 800 degrees centigrade, which is well below the full heat of combustion. |
| 04:29 | So that's the first problem, those spikes strip away that boundary layer, allowing the full heat of combustion to reach the piston and this in turn can lead to the piston being damaged or melted. |
| 04:39 | In very minor circumstances you're going to see a sand blasted appearance to the top of the piston but in extreme cases of detonation where the engine's making a lot of power, it's possible for the whole side to be melted out of the piston in near seconds. |
| 04:54 | So definitely something we need to stay away from. |
| 04:57 | The other reason that knock can be damaging is that the pressure spikes are kind of like, we could like them to someone smacking down on the top of the piston with a hammer. |
| 05:07 | And this can result in broken ring lands, particularly in cast pistons. |
| 05:12 | It can result in damaged big end bearings, damaged connecting rods, damaged crank shafts. |
| 05:18 | So all around, something we really need to make sure that we stay away from. |
| 05:23 | One more term that I want to just discuss before we move on, pre ignition and knock. |
| 05:30 | These are two terms that are often confused but very very different. |
| 05:35 | And knock, the definition of knock is it's an abnormal type of combustion that occurs after the spark event has already initialised combustion. |
| 05:47 | So knock occurs after the spark event occurs. |
| 05:51 | Pre ignition on the other hand is another type of abnormal combustion but as its name implies, this pre ignition occurs prior to our spark event. |
| 06:02 | So very very different types of abnormal combustion, we're only focusing on knock during this webinar. |
| 06:10 | So now that we've got a bit of an understanding of what knock is, how can we detect it, how can we tell if knock is occurring? Well that't he purpose of today's webinar. |
| 06:22 | Primarily we're going to be using electronic audio knock detection equipment, and that's what the Plex knock monitor is. |
| 06:31 | So what it does is it takes the signal from a conventional Bosch donut style knock sensor, most of you should by now have probably seen one of these. |
| 06:41 | Just a simple two wire piezoelectric sensor that converts vibration in the block that occurs when knock is happening, it converts it into an electrical signal and then the audio knock detection equipment runs that signal through a digital signal processor so that it can help strip away the background noise, all of the stuff that we're not interested in, just general mechanical noise from the engine operating, and then finally it can focus on the frequency where knock occurs, then sends that out through an amplifier to an audio headset where we can actually listen to that signal. |
| 07:22 | Now the purpose of this particular webinar, we're going to be looking at the setup of the knock monitor itself, we're not going to actually be playing audio today. |
| 07:33 | We're going to be focusing on how to use the laptop software to set the Plex knock monitor up and we're going to be talking about all of the different functionality. |
| 07:44 | I will however be addressing how you can adjust the audio filtering to get the clearest sample of knock while you're using the Plex knock monitor. |
| 07:56 | OK so the first step of using any audio knock detection equipment is to get a knock sensor physically fitted up onto your engine somehow. |
| 08:05 | And while there is some information in the Plex instruction manual about how to go about this or what Plex recommend, I just wanted to give you some tips from my own experience. |
| 08:17 | And what we want to do, we want to take our Bosch donut style knock sensor and we want to physically bolt it somewhere on the block. |
| 08:25 | Now particularly with late model engines, that can actually be much more difficult than it sounds. |
| 08:32 | Particularly in later model engine bays, there's not a lot of room to work. |
| 08:35 | And you may struggle to find a spare threaded boss on the engine block that you can physically bolt the sensor to. |
| 08:44 | What we're going to do is talk about the perfect scenario and then we're going to talk about the real world and what we may have to face. |
| 08:53 | So in the perfect scenario if we had the option, what we want to be able to do is mount the knock sensor or two knock sensors if we've got the dual channel model, high up directly to the engine block. |
| 09:06 | So really what we want to be doing is mounting it somewhere close to the deck surface height of the block and physically onto the engine block itself, so somewhere on the side of the engine block. |
| 09:18 | If you look at any factory engine block, particularly late model engine blocks, you're already going to see that they have factory knock sensors on them. |
| 09:27 | If you take some note of how and where the factory knock sensors are generally located, this is going to give you a pretty good guide of where the ideal location is. |
| 09:37 | Now that's going to give you a really good ability for the knock sensor to pick up that vibration associated with knock, if it's mounted on the engine block and relatively high up on the engine block. |
| 09:52 | If we're using a dual channel knock detection system, then what we're generally going to do on an in line six cylinder engine for example, we would mount one knock sensor near the front of the block and one near the back. |
| 10:06 | More valuable in my own opinion in a V configuration engine or a horizontally opposed engine where we can fit one sensor to each bank of cylinders. |
| 10:17 | And this is just going to give the sensor a better chance, or the system a better chance to get an even knock or vibration signal from all of the cylinders and it's going to allow the system to do a better job. |
| 10:31 | OK so one thing I'm just going to point out here is these Bosch donut style knock sensors come with an eight millimetre hole through the centre of them. |
| 10:40 | This is obviously going to be ideal if you need to bolt it to a boss on the block that is threaded for perhaps M6 or M8 or even 5/16th, that's going to work alright, you'll be able to pass your bolt through the centre of the knock sensor and bolt it down to the block and everything's going to be nice and easy. |
| 11:04 | Unfortunately I would say probably greater than 50% of the engines I work on don't tend to have M8 or M6 threaded bosses so the most common size I tend to find is M10 or perhaps 3/8th if you're working with an imperial engine. |
| 11:22 | And that can be problematic. |
| 11:26 | Now there's a few ways around this, I know a lot of our members are already making up adapter studs so that you can go from M8 to M10 or whatever size you need to. |
| 11:38 | I've done that myself however a much simpler technique is actually to take the sensor and very carefully in a drill press, drill the centre of the sensor out to 10 millimetres. |
| 11:51 | Now it's relatively easy to do, it's just a soft brass that you'll be drilling through. |
| 11:54 | It might sound dramatic but in my own experience throughout my career, I've done this on numerous knock sensors and I've tested it back to back with an adaptor stud with an unmodified knock sensor and I've never seen any degradation of the signal so you can do that with no problems. |
| 12:15 | So there's a little tip for you. |
| 12:17 | OK so what happens if you can't fit your sensor in the ideal spot and you're going to really face this probably more often than not unfortunately. |
| 12:27 | Well then you're going to start looking at alternatives. |
| 12:30 | And my own preferences basically in order, if I can't mount the sensor high up on the engine block, I'll be trying to mount it lower down on the engine block, perhaps down nearer to the sump rail. |
| 12:43 | I have also with cast aluminium sumps, mounted to the sump with relatively good results also. |
| 12:51 | Beyond that I have mounted to a front timing cover again if that's a cast timing cover or the front of the block. |
| 12:59 | You do need to be a little careful there, particularly with engines that use timing chains, you tend to get a little bit more noise transmitted in that location from the timing chain itself and the chain guides. |
| 13:11 | Beyond that, so we've exhausted our possibilities on the engine block, next we can move onto the cylinder head itself and particularly with Honda B series engines, there's a nice location on the intake cam side of the cylinder head just above the intake manifold that I've used with pretty good results there. |
| 13:34 | Beyond the cylinder head you can mount the sensor also on a cast aluminium intake manifold. |
| 13:44 | You do have to be a little bit careful here because what you're doing is reducing the magnitude of those vibrations that are going to make it to the sensor. |
| 13:54 | So sometimes you do need to choose a location based on what's practical rather than what is the ultimate. |
| 14:03 | The other option that's worth considering as well is quite often on particular engines, I'll actually remove a factory bracket or a factory component off the block temporarily while I'm going through the tuning process. |
| 14:16 | So I can mount my sensor in an ideal location and then after I've finished tuning I'll replace the factory bracket. |
| 14:23 | Obviously common sense dictates we're not going to try removing the engine mount or something mission critical in order to mount up our knock sensor. |
| 14:33 | And once last point on that as well is a lot of people have asked me, can we remove the factory knock sensor and use this as a location? Obviously it's technically ideal but if you're tuning using a factory ECU, those ECUs do rely on the input from the factory knock sensors so if you remove one, it's likely to cause a trouble code, it's going to affect the running of the engine. |
| 14:56 | And one of the most common ways I'm using audio knock detection as well is to configure and validate the knock detection strategy of either a factory ECU or an aftermarket ECU. |
| 15:08 | And on that basis we obviously need those stock knock sensors in place so that we can properly validate them. |
| 15:16 | So we can't really easily remove them. |
| 15:19 | OK so now we've got our knock sensor fitted, we're going to go into the ways that we can use the Plex knock monitor. |
| 15:27 | And really because it is a relatively complex device, with a lot of functionality and a lot of optional features on it, Plex have broken it down into a basic and an advanced setup and I'm just going to briefly touch on the basic setup because as its name implies it is relatively basic. |
| 15:46 | And then we'll look at what most of you are probably more interested in, which is the advanced setup. |
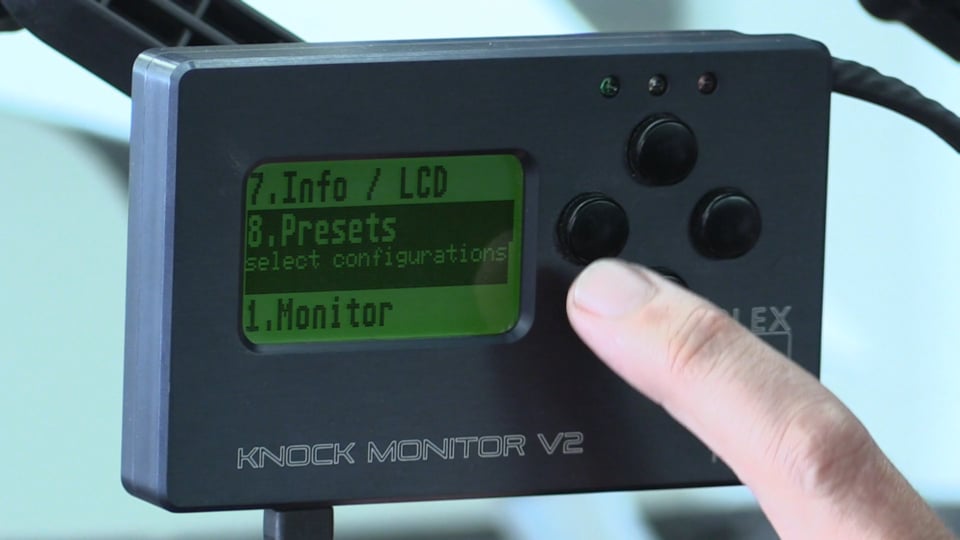
| 15:52 | Now if Ben can just show the camera on our Plex knock monitor and I'm hoping that this camera is going to do a pretty good job. |
| 15:59 | I'm just going to talk through the settings here. |
| 16:02 | And we've gone through our, we'll go to our presets for a start and what I'm going to do is just move up. |
| 16:10 | Now we can see that here we've got settings one and two and they're showing the little padlock icon right beside them. |
| 16:19 | So these are presets that we cannot adjust and you can see that we have one called no RPM and we have one called RPM trigger. |
| 16:29 | So in its absolute basic setup we would be using preset one which is no RPM. |
| 16:36 | And what we're going to do here is we're not going to connect the knock monitor to our ECU or anything on the engine to get an RPM pulse. |
| 16:48 | We're just going to simply be focusing on getting audio out of the knock detection unit so we can physically listen for engine knock. |
| 16:59 | So that's as simply as it's going to be. |
| 17:01 | Now let's go through that process, so if we are going to use our no RPM setup, let's just go back and we'll go to this camera on the knock monitor again. |
| 17:11 | OK so what we have with the no RPM setup is very basic. |
| 17:15 | We press the right arrow, that's going to show us the setup for our knock frequencies. |
| 17:22 | So this is one of the two key aspects that we need to adjust if we're using the basic no RPM trigger setup. |
| 17:30 | So what we want to do here is set the cylinder bore diameter for our engine. |
| 17:36 | And you can see at the moment we have a bore diameter of 85 millimetres selected. |
| 17:41 | And above you can see that this is displaying a knock frequency of 6940 Hz. |
| 17:50 | And if I use the up and down arrows we can see that I can adjust the bore diameter and as I do this, it also adjusts the knock frequency. |
| 17:59 | Now I just want to talk about that knock frequency because this is really one of the key aspects of a proper sophisticated audio knock detection system. |
| 18:08 | What we really want to be able to do is focus solely on the frequency that knock occurs at so that we can strip away all of the background noise that's inevitably going to happen in the engine, let's be honest, it's a very mechanically noisy place to be. |
| 18:25 | And if we study what happens with the knock frequency, we find that the frequency that knock occurs at is very closely tied into the bore diameter of the engine. |
| 18:38 | There are other aspects that will affect it but we tend to find that it is very very closely tied into the bore diameter. |
| 18:45 | So this is why the Plex gives us the ability to select the bore diameter and then it sets up a frequency based on this. |
| 18:56 | Now there's also the ability to work with what's known as the first order harmonic of our knock frequency or the second order. |
| 19:05 | Now let's just jump back to our video, our camera on the knock monitor again. |
| 19:10 | And we can see at the moment down the bottom it says knock mode zero. |
| 19:15 | And we can see that we're displaying a frequency of 6940 Hz at 85 millimetre bore. |
| 19:22 | This is the first harmonic knock frequency. |
| 19:26 | So this is the actual frequency that knock is going to be occurring at. |
| 19:31 | In some instances though we may find that there's a lot of other mechanical noise occurring close to that same frequency and this can affect what's known as the signal to noise ratio. |
| 19:43 | So essentially it makes it harder for us to pick out a clear knock signal based on all the background noise. |
| 19:49 | So in some instances we can do a better job if we go to the second harmonic which is essentially double our frequencies so at the moment we're close to 7000, we'd be looking at close to 14000 for our second frequency, second harmonic. |
| 20:03 | And I'm just going to go through that now, and I'm just stepping up through the bore sizes. |
| 20:09 | Oh gone the wrong way, I'll go down through the bore sizes. |
| 20:12 | And OK now we can see that it's showing knock mode two so now we're on our second harmonic frequency. |
| 20:21 | And if I cycle back down through until we get to 85 millimetre, we can see that now the knock frequency is sitting at 13720 Hz or 13.7 KHz is probably how that's more frequently going to be expressed. |
| 20:37 | So it's important to understand the first and second order and quite often we're going to find that we'll actually be able to get a better signal to noise ratio if we work on the second harmonic frequency. |
| 20:53 | The knock sensors that come with the Plex knock monitor are a wideband sensor, that as the name implies means that they are able to work across a wide range of knock frequencies. |
| 21:07 | So that's why we can work on either the first or second harmonic order. |
| 21:11 | OK so we're still working on our basic setup, we've now selected our knock frequency. |
| 21:17 | Now I've talked about the first and second harmonic there. |
| 21:19 | There's no strict answer for which is going to be correct. |
| 21:23 | What you need to do there is simply try both on your particular engine and see which gives you the clearest distinction between knock. |
| 21:32 | Now particularly on this basic mode, as we adjust our knock frequency or our bore diameter, this will also adjust the audio filtering that's going to be applied when we're listening to knock through the headset. |
| 21:46 | OK so if we press the right arrow key again on our knock monitor we come through to the second part of our setup which is our knock signal gain. |
| 21:57 | Now this is a gain factor that essentially gives us some resolution in the levels that come out of our knock sensor. |
| 22:10 | And in general terms, probably the default values are going to be pretty close here. |
| 22:16 | All we need to do is set these up by testing and what we want to do is particularly note here we have our signal level. |
| 22:24 | At the moment it's saying six. |
| 22:26 | The engine isn't actually running right now. |
| 22:28 | And we have our signal peak which is also understandably saying six. |
| 22:31 | Let me just start our engine up. |
| 22:36 | And we can see that if I just reset this, we ended up with a spike as the engine started, probably to do with the starter motor engaging. |
| 22:43 | You do need to understand that a lot of noise gets transmitted through from mechanical aspects of the engine operation but now we've got it operating, we can see that as I increase the engine RPM, our peak signal increases and just with a free rev there, we've brought that up to 16. |
| 23:02 | And what we want to do is adjust our knock gain so that we're seeing a peak value somewhere around about 100. |
| 23:11 | And that needs to be done with testing. |
| 23:14 | So now that we've got that set up we can audibly listen for knock and we will be able to have a really good and clear indication through our headset of when knock's occurring. |
| 23:28 | The is really only touching on the functionality of the knock monitor though and we're going to go into detail with the more advanced settings. |
| 23:38 | So let me just go back here on our knock monitor and we see how our second setting is also locked down, it's also one of our basic settings. |
| 23:48 | And this also now includes an RPM trigger and with our RPM trigger setup, this allows us to do a little bit more because we can start looking at how the knock levels change as our engine RPM increases. |
| 24:03 | And this is really an important fundamental principle to understand with any knock monitoring system is that as the engine RPM increases and also as the amount of power the engine produces increases, the actual noise level or vibration occurring in the engine will also naturally increase. |
| 24:25 | So we need to understand that because we can't work with one fixed threshold that's going to work at all ranges of RPM and all ranges of engine power. |
| 24:37 | I'm going to skip ahead though and we're going to start looking at some of our advanced functionality and the reason I'm going to do this is because we're going to talk about the RPM trigger input during our advanced setup so I don't want to double up. |
| 24:53 | Let's just jump across to our knock monitor again. |
| 24:57 | And as I move down from the two padlock settings, we move into, you can see at the top it's now saying we're in an advanced preset and what I'm going to do is move down to this one here labelled Toyota 86. |
| 25:12 | And understandably this is set up for our Toyota 86. |
| 25:15 | I can now press the left arrow and this is going to take us back into the main menu. |
| 25:20 | We now have a lot more adjustability to go through. |
| 25:26 | What we're going to do is start by talking about the knock frequency setup. |
| 25:33 | And we've already gone through this again, we've already touched on this, we're just going to briefly go through it again. |
| 25:40 | So we move down to our knock setup and if we press the right button, we've got our same functionality here. |
| 25:46 | Now just while I'm talking about this as well, there is, if you're wondering how the knock frequency gets calculated from our bore diameter, there is a really easy calculation that's always a good one to have in the back of your mind so that you can work out a really approximate frequency range where you're expecting knock to occur. |
| 26:08 | And that calculation is 1800 divided by pi times our bore diameter in millimetres. |
| 26:16 | So let's just jump to my laptop screen right now, don't save that, and what I'll do is I'll bring up our calculator and in this instance our bore diameter is 86 millimetres. |
| 26:31 | You'll have noticed that on the Plex, it doesn't give us millimetre increments, it's jumping in five millimetre increments because that's close enough, given the filtering of the knock frequency. |
| 26:43 | But what I'm going to do is just work that out for you, so let's go with our value for pi which is 3.142 I'll just get rid of a couple more things so there's a little bit less clutter on our screen. |
| 26:56 | 3.142 multiplied by, in this case our FA20 has a bore diameter of 86 millimetres. |
| 27:03 | So that gives us a value of 270. |
| 27:06 | Now the calculation is actually 1800 divided by that value so 1800 divided by 270 and that gives us a value of 6.66 so let's call that 6.7 and this is KHz. |
| 27:22 | So what that means is our base or first harmonic knock frequency should be occurring at 6.7 KHz. |
| 27:30 | Now I've shown you so far the setup that we can do through the actual key pad on the Plex knock monitor. |
| 27:41 | Obviously you can do that and you've got complete control over the functionality through a relatively simple menu structure but now we're going to, well we'll just come back to my laptop screen, we're going to look at the Plex knock monitor software becuase this gives us the ability to do everything via our laptop and it just makes it a little bit easy, we're not working through that menu structure and working with just four buttons so right now we're on our Toyota 86 preset and I can go through and edit all of the settings. |
| 28:14 | So we've already talked about our knock frequency. |
| 28:18 | Now you'll notice that I am on that second harmonic frequency, 13.7 KHz. |
| 28:23 | I've already done some testing here and found that on our Toyota 86, this tends to give me better signal to noise ratio. |
| 28:33 | As I've said, there's no fixed way of going about this, I simply suggest that you try the first harmonic frequency and then compare that to the second harmonic frequency and see which gives you better results. |
| 28:47 | In particular when we went through the RPM versus noise threshold which we'll look at shortly, I find that if I'm working on the first harmonic frequency with our knock monitor on our 86, we end up with quite a lot of mechanical noise being transferred through which isn't desirable. |
| 29:07 | Secondly we have our knock sensor gain here which I've set to 50. |
| 29:11 | Again all we're doing here is using this value, this raw value to achieve a decent resolution which again we're going to look at shortly. |
| 29:20 | We want our maximum values under a no knock condition to be sitting somewhere around about 50%. |
| 29:28 | Now you can see we've got settings for sensor one and sensor two. |
| 29:31 | This is the dual channel model. |
| 29:33 | And despite the fact that I'm obviously tuning here a horizontally opposed engine, I actually do have one sensor only fitted to the engine. |
| 29:41 | This is a great way of showing you how well this system works even when it is only using one sensor on a horizontally opposed engine. |
| 29:50 | So we'll see the results shortly. |
| 29:53 | OK we want to talk now about our trigger mode, so this is where we finished off with our basic setup. |
| 29:58 | So we can see here we've got some settings for our trigger. |
| 30:02 | Now the trigger mode is really important if we want to get the most out of our Plex knock monitor but it does require a little bit more setup and a little bit more time from us as tuners to get the system physically installed on the car. |
| 30:17 | Now there are a variety of ways that we can get trigger information. |
| 30:23 | All of them obviously detailed in the Plex knock monitor manual. |
| 30:28 | My preference is to connect the trigger input up to the ignition one channel straight from our ECU. |
| 30:38 | So what this is going to do is give a pulse into the knock monitor every time cylinder one is fired. |
| 30:47 | Now this is going to do two things, first of all it's going to allow the knock monitor to get an RPM signal. |
| 30:54 | And that's essential for giving an RPM versus knock profile, or knock threshold, which we'll be setting up shortly. |
| 31:02 | The other thing that's important though is that if we're using ignition one output then we can now function the individual cylinder knock detection strategy in the Plex knock monitor. |
| 31:15 | So this is pretty advanced territory for a standalone audio knock detection system. |
| 31:21 | If we provide the knock monitor with an input that tells it when cylinder one is being fired, then it can actually, based on the firing order, it can actually work out which cylinder is knocking at any particular time. |
| 31:39 | So that's what I've chosen to do here. |
| 31:41 | Now obviously as I've said, it does require a little bit more work on the part of the tuner and I'm just going to, if we can just jump to my laptop screen here. |
| 31:52 | I'm just going to show you how I deal with this. |
| 31:54 | So what we've got here is a really simple quick and easy adapter harness. |
| 31:58 | Hardly call it a harness really, adapter that we can use in our ECU. |
| 32:04 | So right here at this end we have a standard AMP crimp terminal. |
| 32:10 | So these are pretty common in a huge range of aftermarket ECUs now, including the Motec M150 we have in our Toyota 86. |
| 32:20 | So what I've done here is I've just siamesed two wires into this. |
| 32:24 | The yellow wire that you can see disappearing off to the top of the screen. |
| 32:28 | This is going straight up to the Plex knock monitor. |
| 32:32 | And at the other end here, this short piece of 22 gauge white Tefzel wire, I've just terminated this in a male DTM pin. |
| 32:42 | So what I've done here, basically we can jumper the ignition one wire, so we simply remove that out of the AMP connector on the ECU. |
| 32:52 | In turn we fit this little wire here, this little terminal back into the ECU header plug and then we can simply connect our dangling wire that goes to our ignition one channel straight up onto our DTM pin. |
| 33:08 | So this is a really quick way of getting access to that ignition one coil information. |
| 33:16 | We do wanna be a little bit careful once we've installed this, a little bit of insulation around this pin is preferable just to make sure it's not going to short out or touch anything else in the car. |
| 33:28 | So provided you've got relatively easy access to your ECU, that's probably no more than about 30 seconds work to install this so it really doesn't necessarily have to take very long. |
| 33:41 | The other input that the Plex knock monitor also needs is a signal ground level that can come from your ECU plug in exactly the same way. |
| 33:49 | Or we can simply ground that wire to an ECU ground point on the chassis in some place. |
| 33:56 | Now Plex do give you the ability or offer the ability to take the RPM signal from a range of sources including an injector or also a tacho feed. |
| 34:06 | Those will give you an RPM signal but they're not going to allow you to do the individual cylinder knock detection strategy. |
| 34:14 | So that's the important distinction there. |
| 34:16 | Personally I feel if you're going to go to the trouble of fitting the system, take the extra effort and do this so you've got that individual cylinder knock detection system functioning. |
| 34:28 | Right let's jump back to our laptop software. |
| 34:30 | We've got our trigger edge, I won't dwell too much on this, essentially this is really just if we're dealing with an output from the ECU that's going into an ignitor module or into an internal ignitor coil. |
| 34:44 | Or we're dealing with the output from an ignitor module so that'll depend on whether you're going to be falling or rising edge. |
| 34:54 | A word of caution there if you're dealing with an engine that's running a capacitive discharge ignition system, you need to be taking this input from the ECU side of your CDI. |
| 35:07 | Everything on the output side is incredibly high voltage which will damage your Plex knock monitor. |
| 35:13 | Next we have our pulses per cycle. |
| 35:16 | So this is really more to do with if we've got an engine that we're taking the signal from a tacho feed or something like this. |
| 35:26 | In the case of our ignition output, we should have one pulse per cycle. |
| 35:32 | And it's pretty easy to set this up or test as well, we want to simply make sure that the RPM being recorded into the Plex matches what our ECU is showing. |
| 35:43 | Next we have our firing order which is essential if we want to correctly identify individual cylinder knock. |
| 35:50 | So in the case of our FA20 we've set that to 1324. |
| 35:54 | And then also our cylinder sensor setups so if we're using dual sensors we can set the proximity of the sensor to an individual cylinder. |
| 36:04 | In this case all of our cylinders are being picked up off one single sensor. |
| 36:09 | We only have one sensor fitted. |
| 36:11 | And next we can choose our RPM range, so really here what we're doing is selecting a suitable RPM range to suit whatever our engine is, in this case 2000 to 9000 RPM. |
| 36:26 | OK so that takes care of our trigger input setup and if we were to go back to our knock monitor, all of those functionalities that we've just gone through here are found under the trigger setup. |
| 36:41 | So all of the information is there. |
| 36:43 | While we're on this particular screen here, I'll just start the engine again. |
| 36:50 | And again we just wanna make sure, this is what I was talking about, we wanna make sure that our engine RPM is sensible and is matching whatever our ECU is displaying. |
| 37:02 | OK let's jump back to my laptop software. |
| 37:04 | Now we can see that the next function that we've got here is some output functionality. |
| 37:11 | And I'm not actually going to address the output functionality on the Plex knock monitor in this webinar and there's two resaons for this. |
| 37:18 | One is I'm demonstrating the product in the same way that I use it. |
| 37:23 | And I feel that this is probably a representative indication of how others will also use it and generally I'm using it for audio or a visual warning, I'm not using it to communicate with an ECU or data logger. |
| 37:37 | It does however have the ability to communicate with a dyno. |
| 37:41 | So this is something we'll address in a further webinar. |
| 37:44 | Let's move on and our next set of functions are to do with our audio filter. |
| 37:49 | So when we're using the basic setup, the audio filter will be adjusted based on the bore diameter that we select, again just keeping things really nice and easy. |
| 38:00 | Here we have the ability to select the audio filter that we want to use. |
| 38:06 | Now if we just click on our drop down menu, we have the option of unfiltered, band pass filters for 3.5, five, six, seven, eight and nine KHz, and then high pass filters for five and 10 KHz. |
| 38:21 | Now the way to start dealing with this, obviously audio here we're talking about this is the output to our audio headset. |
| 38:31 | So this is going to affect what we actually hear when we listen to the engine. |
| 38:34 | I always tend to start by using the band pass filter closest to the calculated first harmonic frequency that we've just gone through for our engine. |
| 38:46 | So whatever the first harmonic frequency is calculated at. |
| 38:50 | In this case we were around about 6.7 KHz, I would select the closest option there, so I'd probably be looking at band pass filters around six and seven KHz. |
| 39:02 | It's also advisable though to try other frequencies and just see what gives us the clearest indication of knock. |
| 39:12 | In particular I've found really good results on some engines with the high pass five KHz and a high pass 10 KHz filters. |
| 39:20 | And what these tend to do as well is if they are going to work well or be compatible with your engine, they remove all of the background noise and you really just get a low grade hum in the headset and then a really crisp click when detonation occurs. |
| 39:37 | The problem with this, and this is why we can't apply it to all engines broadly and expect great results, I also have had the occasional engine where in particular the 10 KHz high pass filter will actually falsely detect or signal knock based on other background engine noise. |
| 39:56 | So again the process here is to try the various filters and see simply which one gives you the best distinction between engine noise and knock. |
| 40:06 | Starting obviously with our calculated frequency. |
| 40:11 | I'll just set that back up to seven KHz so we can move on. |
| 40:14 | Next is our audio mix here. |
| 40:17 | So this selects whether if we're using two sensors we can have the input to both the left and right headphone mixed, so you're getting a little bit of the audio from both knock sensors. |
| 40:28 | Or we can also split them, so the left headset will be knock sensor one and the right will be knock sensor two. |
| 40:35 | Never really had too much success being able to distinguish in that way, so my own personal preference is the mixed mode. |
| 40:42 | And next we also have the ability to have an audio warning. |
| 40:46 | Now this needs to be used with a little bit of care. |
| 40:49 | The audio warning will give us a beep that'll be audible through the headset when knock is detected. |
| 40:55 | But this is only going to function when we've set up and correctly tuned the knock thresholds. |
| 41:02 | So if you're using that prior to setting up the knock threshold, it's not going to be useful. |
| 41:07 | And lastly we have our audio pre amp so we can actually adjust the signal level before it goes to the amplifier. |
| 41:17 | On the actual unit itself on the side, we have a volume knob. |
| 41:21 | This will give us an overall volume out of the amplifier but we can also adjust this up or down as need be depending on whether our noise signal is incredibly high or incredibly low. |
| 41:34 | Now lastly we have this section down here where we can set up our warning lights on the knock monitor itself. |
| 41:44 | And this to my mind is of relatively limited use so it needs to be understood and it needs to be used with a little bit of caution. |
| 41:53 | Now there's two ways we can set up each of these warnings. |
| 41:56 | We can either set them up off a knock level. |
| 41:59 | Now as I've already said, the knock level or the knock threshold will vary with RPM so what is effective at 7000 RPM indicating a no knock condition, will never get anywhere near that at perhaps 2000 or 3000 RPM. |
| 42:17 | So using just a single fixed knock level is of relatively limited use in my own opinion. |
| 42:27 | The other way we can set this warning up is off a knock count. |
| 42:31 | So this way in my example here if we get 10 counts of knock we're going to end up bringing the yellow warning light on. |
| 42:42 | So this can work quite well as long as we don't want a situation with any knock at all. |
| 42:48 | Obviously we have to have 10 knock counts before this warning will come on. |
| 42:52 | We also have exactly the same functionality for our red LED. |
| 42:56 | Probably not much use the way I've got this set up at the moment because the yellow and red would come on at the same time. |
| 43:03 | OK so we've gone through our basic settings, now I'm just going to, while I'm talking about our next section, just going to get our engine back up and running. |
| 43:12 | And I'll just close our window so you guys will be able to hopefully hear me while we've got our engine running on the dyno. |
| 43:18 | OK so back on our laptop screen here, we've gone through our configuration, and you can see we've got our configuration tab up the top. |
| 43:25 | What I'm going to do now is click on our real time tab and this gives us exactly the same view that we can get on the LCD display on our knock monitor. |
| 43:38 | But we've got a lot more detail here, it's much easier to manipulate and see exactly what's going on. |
| 43:43 | I'll just hopefully be able to connect to that. |
| 43:45 | Right OK so right now we are online and you can see the little green bar here says receiving. |
| 43:52 | This means it's connected and it's receiving information from the knock monitor. |
| 43:58 | So what we've got here basically is a graph, on our vertical axis we have our knock level. |
| 44:03 | So this is just the raw level of noise essentially coming through from our knock sensor. |
| 44:11 | On the horizontal axis we have our engine RPM. |
| 44:15 | Remember we'd previously selected 2000 to 9000 RPM as our RPM range. |
| 44:22 | On the right hand side we've got some raw data here. |
| 44:25 | So we've got our actual engine RPM, I'll just rev that up so you can see it move and we've also got our sensor one level. |
| 44:32 | Now on the right hand side here we've also got the data relating to our individual cylinder knock levels. |
| 44:41 | So on the right hand side here we have the maximum level that's been recorded, that was just as a result of that quick free rev that I gave it. |
| 44:50 | You can see it's jumped up. |
| 44:52 | And then essentially if any of the individual levels go above this orange threshold line which we've got here, if any of those go above that particular threshold, we're going to start seeing these counts increment. |
| 45:07 | And essentially if we've got this set up correctly, this is what we're going to be looking for. |
| 45:12 | We want to be basically running with zeros here, that indicates no knock is being detected. |
| 45:19 | Any time an individual cylinder noise level exceeds our threshold, we're going to start seeing that count increment. |
| 45:26 | OK so the important part here is for this to function, this to be useful, we need to set this orange noise threshold bar, which I've just really poorly drawn in there freehand, excuse my poor drawing skills with a mouse pad. |
| 45:42 | We need to set this to be accurate and define the noise level above which the engine is actually suffering from knock. |
| 45:51 | Now this needs to be done on the dyno or on the road under real world conditions, real world loaded conditions. |
| 45:58 | We can see, while I've been free revving here, we can see that we've had a bunch of little dots added to our data, and I'll just rev the engine up further. |
| 46:07 | But of course we're not going to get any useful data if we're just free revving. |
| 46:12 | So what we need to do is actually run our engine on the dyno. |
| 46:17 | And we want to run it under no knock conditions. |
| 46:21 | So we want to make sure that audibly the engine isn't suffering from knock while we're running it. |
| 46:29 | And we're going to use the data from that run to help us set our threshold. |
| 46:34 | We're just going to do that now. |
| 46:39 | And what we'll do is we'll just get our engine running here, I'll just clear our data, fairly shortly, and you can watch this graph populate while I do my run here. |
| 46:53 | So what I'm going to do, we're just getting into fourth gear here, we'll just get our engine set up and ready to run. |
| 47:03 | And we're going to do a run from about 2000 RPM all the way through to about 7400 RPM. |
| 47:09 | And while I do this I just want your to watch, you're going to see the data fill out here below this knock threshold. |
| 47:17 | Alright let's go to full throttle and we'll start our run. |
| 47:36 | OK so that was actually a pretty good example there. |
| 47:39 | We got pretty good data and we also got a couple of outliers and I just wanna talk about those. |
| 47:45 | So if you were watching during the ramp run, hopefully what you'd have seen is predominantly all of this data here was what we collected. |
| 47:55 | OK and for the most part, all of that data was also below our knock threshold. |
| 48:02 | We can see hopefully, you might be able to see, just hiding right on the knock threshold line there we've had one knock count on our red data. |
| 48:13 | We can see that on the right hand side, our data is colour coded so we can see that red in this case indicates that, that data is associated with cylinder one. |
| 48:23 | And of course because it's gone above that, you can see we now have a knock count of one from cylinder one. |
| 48:31 | What we can also see though is we have these little outliers and hopefully if you'd actually noticed while I was doing that run, this data actually came when I backed off the throttle. |
| 48:41 | So this wasn't actually collected during the acceleration test of that ramp run and on that basis it could be related to noise being transferred back through the drive train into the engine or any manner of other abnormalities based on backing off of that run. |
| 49:00 | I ignore this data, this doesn't mean anything to me, this didn't happen while I was actually under load, under full throttle. |
| 49:07 | It happened while then engine was in overrun and slowing back down. |
| 49:11 | So essentially what we want to do here is adjust our knock threshold so that our knock threshold is always just slightly above our no knock operating condition. |
| 49:25 | And we can just drag these points around. |
| 49:28 | Again you can do this straight on the knock monitor or you can do it here on the laptop software. |
| 49:33 | We've got the ability to use the laptop software so I see no good reason not to do it this way, it makes it easier, it makes it more accurate and obviously that's what we want. |
| 49:43 | So ideally what we want to do here is get our threshold as close as we can feasibly to the background noise level with no knock occurring. |
| 49:53 | We do need to leave a little bit of room because obviously from one run to another or one gear to another, our noise level can move around a little bit and we should if this is set up correctly, get quite a clear distinction between knock and no knock. |
| 50:10 | So we don't need to have this set up right on the absolute brink of these points that we're seeing in here, we can leave a little bit of room. |
| 50:19 | It's a process of, we can make adjustments to our threshold, then update our threshold, we can see we've got a button here called update threshold. |
| 50:30 | We can send this data through to the Plex knock monitor and perform another run and see if we've got better results. |
| 50:37 | But in essence what I just got there was pretty damn good anyway. |
| 50:40 | The only real data we had problems with was these outliers when I backed off the throttle. |
| 50:48 | OK so just talking about also how to get this data because I've talked about making sure that the engine is running with no knock occurring while we're gathering this data. |
| 51:00 | And I know that a lot of people would automatically think OK well easy way of doing that, I'm going to pull a whole big chunk of timing out of the ignition table under wide open throttle, it's gonna ensure the engine isn't knocking, let's run it through with let's say five or six degrees of ignition advance, we can guarantee that no knock is occurring. |
| 51:18 | On the face of it that might sound like a great idea. |
| 51:20 | Unfortunately though what we find is as the engine's making more power, physically the noise profile increases. |
| 51:28 | And I mean really you can hear that for yourself when an engine's really retarded and not making much power it sounds flat and horrible on the dyno. |
| 51:37 | When you start getting the timing dialled in accurately and optimised, you hear that the engine sounds a lot crisper and obviously it's physically making more power, there's more cylinder pressure going on, and this all affects that noise profile. |
| 51:52 | So we do need to actually set this background noise threshold under a situation where we're actually reasonably close to our optimal ignition timing anyway. |
| 52:05 | We can't just blindly pull all of our timing out and hope that that's going to be good enough, so we do need to be relying on the other aspect of the knock monitor which is the audio output in order to clarify this. |
| 52:19 | OK now I'm going to be moving into some questions and answers shortly, I know we've had a little bit of trouble with the latency with our webinars and getting these questions through to me so this is a perfect time for you to ask any questions. |
| 52:32 | I'm gonna go through one more demonstration here which is our individual cylinder knock detection strategy. |
| 52:40 | OK so in order to do this, what I'm going to do is a steady state test here on our Mainline dyno. |
| 52:47 | I'm just going to have to set this up. |
| 52:50 | We're going to clear our data, if we can just go to my laptop screen, I'll just clear our data for a start. |
| 52:56 | And what I'm going to do is bring up our M1 tune software. |
| 53:01 | We'll just connect to our ECU first and foremost. |
| 53:05 | What I'm going to do is use the Motec to allow me to make changes to the ignition timing on individual cylinders, and then we're going to see how accurately the Plex actually picks up which cylinder is knocking and hopefully if my previous test works just as well as it did, we're going to see that that works incredibly well. |
| 53:27 | Let's go through to our ignition trim screen and while I'm doing this I'll just get our engine running in fourth gear again. |
| 53:34 | OK so what we've got here is four individual cylinder trim tables. |
| 53:42 | And we can apply a trim to each of our individual cylinders. |
| 53:47 | What I'm just gonna do is bring our engine RPM up to a touch over 3000, so we're at a point where the engine's well and truely loaded. |
| 53:56 | And let's just bring our Plex knock monitor software up for a start. |
| 54:01 | And I'll just move this over. |
| 54:04 | OK so you can see that we're sitting at about 3200 RPM. |
| 54:08 | What I'll do is I'll just clear our data so we've only really got data occurring around this area that we're testing. |
| 54:14 | What I'm going to do is just go through briefly to full throttle. |
| 54:20 | OK and I'll back off the throttle. |
| 54:22 | OK so the important takeaways here are we can see that our max levels sit at around about 30 to 32 and you can see that none of those values went above our threshold so our individual cylinder knock counts are sitting at zero. |
| 54:39 | OK no knock occurred. |
| 54:41 | Now what we're going to do is go to cylinder three. |
| 54:46 | And I already know that on this particular engine, cylinder three is a little bit more knock prone, so you can see that even under normal conditions, I'm already pulling a degree of timing out of cylinder three above 130 kPa. |
| 54:59 | So what I'm going to do is, don't try this at home kids, I'm going to add 10 degrees to that. |
| 55:06 | So this now gives us a positive nine degree trim. |
| 55:10 | I'll do two tests here. |
| 55:11 | First of all what I'm going to do is go to the M1 knock control page, our worksheet, and go to full throttle, and hopefully, alright. |
| 55:25 | I'll just pause that in a second so we can see what's going on. |
| 55:30 | What we can see here on our knock level time graph, if I just full screen that, we can see that when I went to full throttle, we had a big spike which is our green signal which is cylinder three's knock level. |
| 55:46 | You can see green indicates cylinder three, remember that's the one I trimmed, and at exactly the same time below you can see that the knock control strategy pulls timing out of cylinder three, in this case it pulled, I think, about five degrees of ignition timing out to prevent or remove that knock. |
| 56:04 | OK so that's what the Motec ECU is detecting. |
| 56:08 | Let's bring up our Plex knock monitor. |
| 56:11 | And we can see, we've got some data there, I'll just clear it and we'll do that test again. |
| 56:17 | So let's go back up to full throttle now. |
| 56:21 | We'll just come back to idle so we can talk about this with a little bit less noise going on. |
| 56:30 | And what I'll do is I'll also pause our time graph. |
| 56:34 | Alright first of all let's look at the data on our Plex. |
| 56:36 | So what we've got here, we can see we've got this outlier here, this yellow, which if we look over here we can see that yellow is cylinder three. |
| 56:47 | So this is detecting our knock, this is where I was at full throttle. |
| 56:52 | And this indicates two things. |
| 56:54 | First of all clearly the individual cylinder knock detection does a great job, it works very well, it has correctly identified the cylinder that knock was occurring on the same way that the Motec did. |
| 57:06 | The other thing, remember I was talking about our threshold versus the background noise level. |
| 57:12 | You can see that while that was a relatively dramatic knock event, I had added 10 degrees, you can see that we're a long way above our threshold now. |
| 57:19 | So when we've got this set up correctly, when our frequency is correctly set, and everything's been configured correctly, we have a really clear distinction between what is background noise and nothing to worry about and what is knock. |
| 57:34 | And there's generally always quite a clear distinction if we've done our job correctly. |
| 57:39 | We shouldn't be getting into a situation where we've got a large scatter on our data and we really can't tell if it's background noise or if it's knock. |
| 57:47 | We should be either well down below our knock threshold or alternatively we're going to be well up above our knock threshold. |
| 57:57 | Alright so I think we'll just stop now and we'll move into some questions and answers. |
| 58:03 | Just before I do, just while I'm still on my laptop screen here, we can see for that second test we did, we have again our knock levels coming from the Motec ECU and what we can see is we actually, on the Motec ECU we had two spikes that were indicating above my background knock threshold so in essence what that's saying is that the Motec picked up two knock events on cylinder three and that's exactly what we had being picked up by the Plex knock monitor. |
| 58:35 | So it's doing a really good job. |
| 58:37 | So really to sum up here, if we understand how the system works and we understand what it's looking at, we go through the process of correctly setting our frequency, then the knock monitor's going to be able to do an exceptionally good job of detecting knock. |
| 58:54 | So in order to get the best out of the product though, we do want to at least take the time to set up a trigger input so it has that RPM threshold. |
| 59:03 | We do also have the ability, again I'm not gonna deal with this any further, we do have the ability to also input a load value into the Plex. |
| 59:11 | So we can start doing some three dimensional mapping of knock levels versus load, versus RPM. |
| 59:19 | But again I'm dealing with this and presenting it in the same way that I personally use the knock monitor. |
| 59:25 | This is kind of balancing getting the best value out of a sophisticated piece of equipment, while balancing our time constraints and obviously we don't have the ability to spend extra hours on a customer car in particular without being able to charge that onto the customer. |
| 59:42 | Alright we'll stop there and we'll have a look at our questions. |
| 59:47 | Of course if you do have any more questions, please ask them and Ben will transfer those through to me. |
| 59:53 | Alright we've got a few here which is great. |
| 59:55 | TDE Champs asked can you use longer bolts and go against brackets or do you lose too much noise going through the bracket with the sensor? No actually that's a really good point. |
| 01:00:03 | That's totally feasible, yes you can bolt up to a bracket. |
| 01:00:08 | We do need to be a little bit careful here though because what we want to be doing is getting the whole of the flat back surface of the knock sensor physically hard up against some immovable object. |
| 01:00:22 | So a lot of the brackets that we're going to be dealing with may not have a flat surface surrounding the actual boss or hole that the bolt's going through, so we need to be careful there. |
| 01:00:33 | We don't wanna end up having our sensor skewed or cocked over as we do it up. |
| 01:00:38 | So that's just one thing to be aware of there but yes if you've got a bracket, and I know that I've bolted them to alternator brackets, I've bolted them to also to air conditioning brackets as well. |
| 01:00:53 | So really, yeah again get a little bit creative, as to where you can actually connect or attach the sensor to. |
| 01:01:01 | Matt has asked, my Plex has a CAN connection, I'm not exactly sure how or what this is used for and the manual doesn't seem to be clear on that. |
| 01:01:10 | From a practical point of view, what is the Plex knock monitor CAN connector used for? Now from my understanding this is actually a function that was added in after the initial release of the knock monitor version two. |
| 01:01:24 | So there's two ways that the CAN connection can be used. |
| 01:01:28 | So particularly if you're dealing with a factory ECU, you can, the knock monitor will put out a request for engine RPM and load data from the factory ECU. |
| 01:01:41 | So just really makes it nice and easy to get that data straight into the Plex knock monitor with a much simpler configuration, we can get that via the OBD2 plug where the CAN high and CAN low wires are located. |
| 01:01:55 | So that's on the input side. |
| 01:01:57 | The other option is that the Plex knock monitor can output data via CAN. |
| 01:02:03 | There's a couple of configurations there that are available and essentially what it will do is, off the top of my head, it will output knock level and knock counts per cylinder. |
| 01:02:17 | It is detailed in the manual, I was refreshing myself on this earlier today, so I know it is detailed there, although I do understand what you're saying. |
| 01:02:25 | Possibly not as clearly as some may like it to be. |
| 01:02:31 | Matt's also asked, also in some situations the ECU might have its own knock sensor, as well as adding the Plex. |
| 01:02:38 | How do you recommend installing two knock sensors? So really here if we've got an ECU, particularly an aftermarket one, where we've configured closed loop knock control for example, like our Toyota 86 on the M150. |
| 01:02:53 | Those are really our primary concern because once we've tuned on the dyno or on the road using the knock monitor, we're going to be removing that system, so we want the ECU to get the cleanest and best signal that it possibly can. |
| 01:03:09 | So really what it comes down to here is we're not going to be able to remove those sensors and we can't physically piggy back the factory sensor. |
| 01:03:16 | So what we're going to be doing with our Plex knock monitor sensor location is choosing the best second option I guess if you like, where we can physically mount the sensor and that really goes back over our options that I was talking about at the start of the webinar. |
| 01:03:35 | Tommy has asked, how do you integrate this into the Mainline? This is a great question Tommy and I was actually expecting you to ask that. |
| 01:03:43 | And the answer is currently, I don't. |
| 01:03:45 | The reason that I don't do this is because we're in a situation right now where we're probably a little bit unique in that we primarily have two vehicles that we're tuning. |
| 01:03:57 | And both of these vehicles are set up with ECUs where the monitoring or logging facilities inside the ECU are very very extensive . |
| 01:04:07 | So both of them for want of a better word are using close loop onboard knock control and really monitoring and logging what's going on there. |
| 01:04:16 | So I haven't seen the need currently to log the Plex knock monitor straight into the Mainline although yes it is possible, it can be input via CAN and there is a predefined CAN template in the Mainline dyno for that. |
| 01:04:32 | Now really this also comes down to my own personal usage of audio knock detection systems. |
| 01:04:40 | The audio knock detection system primarily I am using, as its name implies, on an audio basis. |
| 01:04:47 | So I'm not necessarily watching the knock monitor while I'm doing my dyno runs, and certainly on the Mainline dyno itself, I'll be watching boost or lambda, thos are my two key metrics that I want to monitor while I'm running a car on the dyno. |
| 01:05:02 | And I'm concentrating, or allowing my ears to audibly listen for knock and that's my feedback there on whether knock's occurring or whether I need to back off the throttle. |
| 01:05:11 | Beyond that I've obviously got the logging after the dyno run on the laptop of the knock control strategy in the ECU. |
| 01:05:21 | Now where I'm using the knock monitor is after that run, we can then review the individual cylinder knock data and see what's gone on there. |
| 01:05:30 | We can review the graph of RPM versus knock threshold and see if there's a particular RPM where we're having trouble with knock occurring and focus on that. |
| 01:05:42 | So I'm using that as a feedback post dyno run as opposed to what I'm actually looking at during the dyno run. |
| 01:05:48 | Now try not to make this story too long, the other issue I have with the output data is what I've sort of touched on there with the LED set up. |
| 01:05:57 | Personally I find knock level and knock count a little bit, perhaps irrelevant to my own requirements. |
| 01:06:06 | So as I've said, the knock level, we can't use one single value there, the knock level is going to depend on RPM. |
| 01:06:12 | So if I'm triggering a warning on the dyno based on knock level, it's only going to be really truely useful to me over a relatively narrow RPM range. |
| 01:06:20 | Knock count, yes we could set it very tight with perhaps one or two knock counts to trigger an error. |
| 01:06:28 | But then what happens once we're beyond there, we've already got our warning active, so again, I'm personally relying on my ears. |
| 01:06:36 | But of course that's not to say it's the way everyone should use it. |
| 01:06:40 | And as I sort of touched on at the start of this webinar, we will be doing another webinar where we look at the output functionality of the Plex knock monitor. |
| 01:06:49 | And just for you Tommy, I'll make sure that it's hooked up to our Mainline at that point. |
| 01:06:53 | Matt has asked, is the knock count a count of each individual engine cycle that saw a knock event triggered, or does it indicate something else? Essentially yes it is. |
| 01:07:05 | Any individual knock events, so any time an individual combustion event results in knock, that will be logged as a knock count. |
| 01:07:16 | Janu's asked, can you rely on the graph data only and not use the earphone? Not really because you still need to set up that threshold initially, that's one of the really key points. |
| 01:07:28 | You need to set up that threshold under no knock operating conditions. |
| 01:07:32 | Now while, yes, technically you could set the system up based on the data you're receiving and then create some knock or remove some timing to set that threshold. |
| 01:07:46 | Remember I have mentioned that you will see a distinct difference between the data under no knock conditions and the data when knock occurs. |
| 01:07:58 | Personally I'm not happy to take that risk, I always want to be listening for knock, and I mean why wouldn't you. |
| 01:08:04 | That's an earphone jack straight there on the knock monitor, it's as simple as plugging in a set of iPhone earbuds or something like that and listening. |
| 01:08:13 | Actually I'll stop right there as well and just mention, I don't have them with me. |
| 01:08:18 | A lot of people ask what they should be using for audio, to actually listen audibly for knock on one of these units and the way I've always done it is to use something simple like the Apple iPhone earbuds and then with a set of grade five plus ear defenders over the top. |
| 01:08:37 | I've tried noise cancelling headphones in the past and I've found that they were problematic particularly with very very loud cars, drag cars with open exhaust, they tended to clip the noise signal. |
| 01:08:50 | So I've always ended up going back to the earbuds along with the ear defenders over the top. |
| 01:08:57 | You also find that that's actually a much cheaper option most times, than a quality pair of noise cancelling headphones. |
| 01:09:06 | TDE Champs ask what's the advantage of using the graphing since setting it up seems to require having most of the tune already complete. |
| 01:09:15 | OK well the graphing really is useful for indicating when we're logging if we've gone above and beyond that knock threshold. |
| 01:09:25 | So this isn't a process that we would set up after we've already tuned the car, it is something that is an ongoing process as we're beginning our tuning. |
| 01:09:35 | And it's an iterative process as well I guess you could also say. |
| 01:09:39 | Particularly if we're dealing with a car we've never tuned before. |
| 01:09:42 | We'd be starting with very conservative ignition timing. |
| 01:09:44 | Obviously we would be optimising our threshold initially based on that data. |
| 01:09:50 | And then as we start advancing the ignition timing, we may find that as the combustion pressure increases as the noise profile increases, we then need to go and make slight adjustments to our knock threshold. |
| 01:10:04 | The key point here is though if we're using this system on the same car repeatedly, all of these presets can be saved and stored so that next time we place that on the same vehicle, we can simply choose that preset, we don't need to go through that procedure again. |
| 01:10:22 | So there's a little bit of time set them up initially but it does save you a lot of time if you're repeatedly using the product on the same car. |
| 01:10:33 | Janu has asked, when properly set up harmonic frequency are you supposed to hear nothing at idle and only noise when knock's occurring? No unfortunately while that would be the absolute perfect scenario, you are always going to hear some level of background noise coming through. |
| 01:10:52 | I kind of touched on it a little bit during the webinar but in some instances I have found that that 10 KHz high pass filter does come very very close to that condition. |
| 01:11:05 | It actually works particularly well on the Toyota 86, the FA20 engine, and on some of these engines I've found that really it is almost no background noise at all and then just a crisp clear tick when knock does occur. |
| 01:11:20 | Chris has asked, where have you placed the Plex knock sensor on the Mitsubishi 4B11 engine from the Evo 10? Right now I have mine on the cylinder head due to lack of space on the engine block, I'm using the 10 KHz high pass filter and when I see a knock event on versus the noise graph I cannot decipher it. |
| 01:11:38 | Yeah it's a real problem on the 4B11 and I'm gonna guess that the position that I'm fitting the sensors on those engines is the same as yours. |
| 01:11:47 | Yeah the head is definitely the easiest place to get access to. |
| 01:11:53 | I haven't really delved into it too much further beyond that. |
| 01:11:57 | The other thing is I also haven't seen any Evo 10s down here since we've moved to Queenstown so we haven't had the opportunity of doing any more testing, particularly with our version two knock monitor. |
| 01:12:10 | When I was based in Wellington and we did see the occasional Evo 10, I was using the earlier system. |
| 01:12:17 | I would say that if you're having trouble on the 10 KHz high pass filter, I would probably try dropping that down and using the six and seven KHz band pass filters and you're probably going to have better results with those. |
| 01:12:32 | That's certainly what I've found in my own experience as well. |
| 01:12:38 | All Pro Tuning has said, have you seen knock before seeing MBT on the Mainline? Absolutely. |
| 01:12:46 | What I find, this is an area where there's a huge amount of conflicting information and a huge amount of debate. |
| 01:12:54 | So the theory that a lot of tuners hold to is that really we don't need audio knock detection equipment or any knock detection equipment at all. |
| 01:13:04 | Because when knock occurs, what we find is that the torque will naturally drop away. |
| 01:13:09 | So if we're tuning using the torque feedback on any load bearing dyno, we can simply advance the timing until we reach peak torque. |
| 01:13:18 | And if knock occurs we'll find that the torque actually drops away. |
| 01:13:22 | Now that's great in theory however my own experience is that most engines will begin knocking on perhaps one or two cylinders earlier on before all cylinders begin knocking. |
| 01:13:34 | So what we can see, and this is really common, is if we're listening for knock we'll find the engine will begin suffering from light detonation while still showing a really nice improvement in engine torque as we advance the timing. |
| 01:13:49 | So in my personal opinion, and I know there's a lot that wouldn't agree with me, I believe audio knock detection equipment is 100% essential to any tuning job, and I won't jump on the dyno, particularly on any engine using pump fuel, which is still a relatively low octane, I won't jump on the dyno without it. |
| 01:14:08 | Our next question comes from Chris, who says, if you have an advanced preset set up from a previous time but currently you do not have the RPM input connected, can you still switch to the advanced preset and get the advantage of selecting the different filters for the audio? Yeah absolutely I should've actually mentioned that Chris. |
| 01:14:28 | Yeah you don't necessarily have to have an RPM trigger input. |
| 01:14:31 | If you're using the advance mode it still does give you the ability to adjust the audio filter, whereas if you're using the basic preset the audio filter will be preset based on your selection of the bore diameter. |
| 01:14:49 | Our last question comes from TDE Champ who's asked, where did you install the sensors on the 86? I've got a friend with a BRZ so it would be nice to know what works. |
| 01:14:57 | Yeah sure there's a boss on the top of the engine block basically right up near the bell housing on what is in our part of the world, the passenger side of the engine. |
| 01:15:12 | If you're obviously in a left hand drive, it's the driver's side. |
| 01:15:14 | And that's already threaded with an M8 boss so that's perfect. |
| 01:15:18 | And it's kind of maybe about six inches behind and a little above where the factory knock sensor is bolted on the left hand side of the block. |
| 01:15:26 | And to be honest this is actually a location that seems pretty common across all of the Subaru engines, the earlier EJs, they also had a boss in a similar location so that's always where I've gone on these engines. |
| 01:15:39 | Alright guys great questions there, hopefully that's given you some insight into the operation of the Plex knock monitor, it is a sophisticated product. |
| 01:15:49 | But really when you break it down, and you understand it is incredibly easy to set up and use, and it's always an advantage to take up the advantage of those sophisticated functions and get the best results possible out of it, rather than just simple relying on the basic audio output that I know a lot of Plex knock monitor users are doing. |
| 01:16:10 | As usual, if you have any further questions, please ask those in the forum, and I'll be happy to answer them there. |
| 01:16:16 | Thanks for joining us and we'll see you all next week. |


