176 | Setting Base Ignition Timing
Summary
Setting the base ignition timing is one of the most important steps in the configuration of an ECU prior to commencing the tuning process. In this webinar we’ll discuss how to go about it and demonstrate the technique on our Nissan 350Z running the Haltech Elite 2500 ECU. We’ll also discuss techniques for making your own TDC marker if your engine doesn’t have one.
Timestamps
0:00 - Why is it important?
2:05 - What happens if it isn't correct
3:16 - Why it might not be correct
5:25 - Finding true TDC
6:20 - Timing light options
9:24 - Getting a signal for the timing light
12:02 - What do your pulley marks mean?
15:48 - Parallax error
17:45 - Demo with freshly installed engine and ECU
22:32 - What if your engine doesn't fire
23:50 - How to adjust incorrect timing
27:26 - Checking timing drift at high RPM
30:40 - Questions
| 00:00 | - Hey guys it's Andre from High Performance Academy, welcome along to another webinar. |
| 00:04 | Now today we're going to be looking at the topic of setting our base ignition timing. |
| 00:10 | And today we're going to be using our Nissan 350z with our VQ35, and we've got our Haltech Elite 2500 ECU fitted. |
| 00:17 | So obviously going to be perfect for anyone who is running an Elite series Haltech ECU, but a lot of the principles will also cross over to any brand of aftermarket ECU, so there's going to be a lot to learn for just about anyone. |
| 00:31 | Now setting the base ignition timing, really, the concept here is that we are aligning the ignition timing that we're seeing on our laptop screen, with the actual ignition timing that the engine is receiving. |
| 00:45 | And this is a really critical step if we want our ignition timing to be reliable and we want of course our engine to also be reliable. |
| 00:54 | It's also a step that I know a lot of tuners just don't understand properly or overlook. |
| 01:00 | And of course when you're dealing with a car that you're building from the ground up and you've freshly installed the ECU, then setting the base ignition timing would be a relatively standard step. |
| 01:11 | It's one of the steps in our 10 step tuning process that we discuss in our practical standalone engine management tuning course. |
| 01:22 | But it is a step that a lot of people will overlook if they have a car that's been brought to them that's already up and running, maybe it's already been tuned previously by another workshop. |
| 01:33 | It's often quite easy to make the assumption that whoever tuned it last has done their job properly and the base ignition timing is correct. |
| 01:41 | In some engines, setting the base ignition timing can also be quite a hassle. |
| 01:45 | Obviously with late model engines with a lot of covers over the spark plugs, the ignition coils et cetera, actually getting our timing light into the engine bay and connected to number one cylinder's ignition coil can be pretty tricky and time consuming. |
| 02:00 | So again a lot of tuners simply overlook it or don't bother at all. |
| 02:05 | Now the upshot of this is that if you don't have your base ignition timing set correctly, the timing that you're seeing on the laptop could be anything compared to what the engine's actually getting. |
| 02:16 | So for example we could be putting into our timing table, our ignition timing table in our ECU what we consider to be a conservative ignition value. |
| 02:25 | Maybe for example 15 degrees under wide open throttle, full load. |
| 02:29 | The engine on the other hand though might be receiving 30 degrees if our ignition timing is incorrect by 15 degrees. |
| 02:36 | So obviously this brings in scope for a lot of engine damage if the timing is over advanced and the engine is suffering from detonation and maybe we're not monitoring that. |
| 02:46 | On the other side of the coin though, if our ignition timing is more retarded than our ignition table suggests, we could end up with a situation where our engine is providing sub par results because we're nowhere near MBT timing. |
| 03:01 | Now of course as usual we will be answering questions at the end of this webinar, so if you've got anything that I talk about that you'd like me to explain in more detail or anything relating to this particular topic, please ask those in the comments and we'll deal with those at the end. |
| 03:16 | Alright so let's talk first of all here about why our base ignition timing may not be correct. |
| 03:23 | So I've already mentioned here, if you've got a car that's come to you that's been tuned by another tuner, the assumption is that they've done their job but of course assumptions are never a safe bet. |
| 03:33 | So they may have done it incorrectly or overlooked it altogether. |
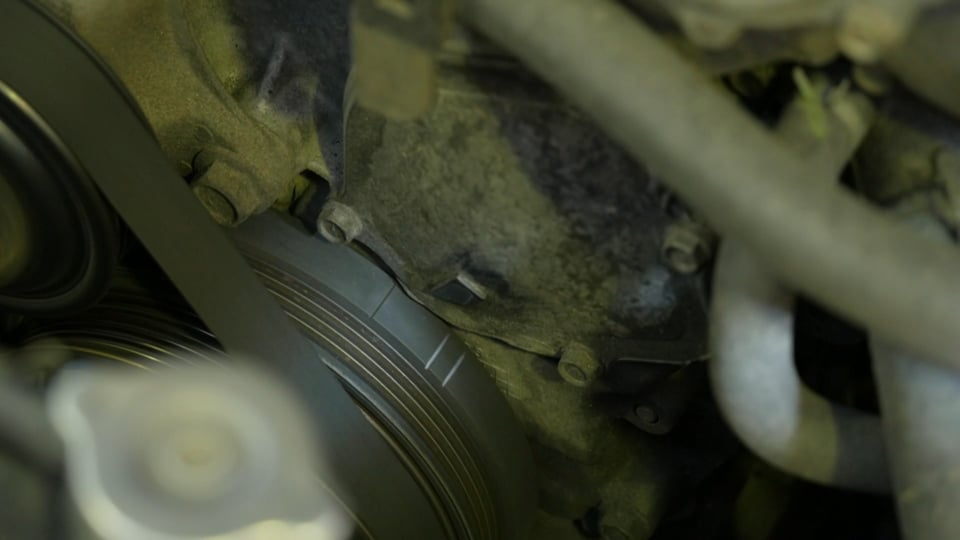
| 03:36 | The other aspects which get a little bit more interesting here are that the markings on our crank pulley or the engine block may actually be inaccurate. |
| 03:46 | Obviously if we're dealing with a relatively standard engine, or a relatively new engine, it's pretty safe to assume that those markings should be accurate. |
| 03:57 | But where we can get into problems is if we've got an engine that has been fitted with an aftermarket crank pulley, or aftermarket harmonic dampener, often these will have timing marks on them but it's not a guarantee that these timing marks will actually match the factory marks. |
| 04:13 | So here we really wanna be quite careful and check and make sure that those timing marks are accurate. |
| 04:19 | The other aspect here is if we've got an engine that's got very high mileage with an old harmonic dampener on it, we can get into a situation where the harmonic dampener will start to fail and basically debond. |
| 04:33 | So we've got a harmonic dampener here and basically these are a two piece item. |
| 04:38 | We've got an inner hub which bolts to the crankshaft, and then we've got the outer hub. |
| 04:43 | Now might be struggling to see this here, let's actually see if I can find them. |
| 04:47 | We've got the timing marks, this is actually a Honda B series crank pulley, we've got the timing marks on the outer edge of this particular harmonic dampener. |
| 04:56 | But between the outer harmonic dampener and the inner, we do have a rubber sleeve. |
| 05:01 | Now when that pulley's all in good condition, everything should be just fine, but in high mileage applications, sometimes these harmonic dampeners are known to fail, and what that can mean is that the outer rotates relative to the inner, and of course when that happens our timing marks on our pulley no longer align correctly with the correct spot on the crankshaft. |
| 05:22 | So these are things that we do need to consider. |
| 05:25 | And in some instances we may be forced to actually make our own timing marks. |
| 05:30 | And this is referred to as finding true top dead centre or TDC for short. |
| 05:34 | So particularly if you do have a aftermarket pulley with unknown timing marks it's a very good idea to start before you even break out the laptop by actually making some timing marks and finding where true TDC is. |
| 05:49 | If you want to learn how to do that, check out our archive, the webinar that we ran last week was covering exactly how you do that through both the engine building process as well as the engine tuning process. |
| 06:02 | It's a relatively quick process but it is really really vital. |
| 06:05 | And the upshot here is you'll also quite often find that the factory timing marks, even on a relatively stock brand new engine, may also still be out by perhaps one or two degrees. |
| 06:18 | OK so next we need to talk about the equipment that we're going to need to do this. |
| 06:25 | So we're going to need a timing light. |
| 06:27 | I can't actually show you our timing light because it's actually already fitted out on a stand pointing at the crank pulley on our 350z so that I'm going to actually be able to show you what happens when we go through the process of setting our base ignition timing. |
| 06:41 | But in essence the timing light simply takes a pulse from our ignition system and then flashes a light so that we can physically see where the timing marks are on our crank pulley. |
| 06:53 | And by aligning this, we can then see what timing the engine is receiving. |
| 06:57 | It's important to mention though that there are a couple of different timing lights and there are pros and cons with both. |
| 07:03 | The timing light that we're using for this demonstration is a Snap-on dial back timing light. |
| 07:09 | And these are available from a range of different manufacturers, not just Snap-on. |
| 07:14 | But the dial back aspect means that there is an ability to adjust the timing on the timing light. |
| 07:20 | Now what this means is that particularly if we've got an engine that only has a single timing mark. |
| 07:27 | Perhaps it's just got a mark at top dead centre. |
| 07:30 | Now while we can use that for setting our base timing, what we're going to find in most instances is that at idle the engine is probably not going to be that happy idling with our ignition timing at zero degrees advance or at TDC. |
| 07:45 | So we're gonna have an engine that's not running that happily while we're trying to set our base ignition timing. |
| 07:50 | With a dial back timing light, what we can do is set any amount of ignition timing in our ECU. |
| 07:56 | So we can choose an ignition timing value that the engine will be happy running at, let's say for argument's sake, 15 or 16 degrees. |
| 08:02 | So we can program that into the ECU, we set the same timing on our dial back timing light, and then we should still see the timing mark sit at TDC. |
| 08:13 | So the important thing with the dial back timing light is understanding that aspect of its operation. |
| 08:20 | Because if you don't understand that interaction, you can get yourself in a lot of trouble. |
| 08:25 | So it's always easy with a dial back timing light, if you're really not too sure, just leave it set at zero, and then it's going to operate predominantly like an inductive basic timing light without that dial back function. |
| 08:38 | The other aspect with the dial back timing light is that it can get confused, if you're trying to set the base ignition timing on a waste spark ignition system. |
| 08:47 | The reason for this is with a waste spark ignition system, the timing light's going to end up getting two pulses, two ignition pulses, per engine cycle instead of one, which is what it's expecting to see. |
| 08:59 | So the cheaper option there is the basic inductive timing light. |
| 09:04 | All it does is wraps around an ignition lead and it will just put out a strobe light pulse every time a spark event occurs. |
| 09:12 | So there's no dial back function, there's no chance of that type of timing light confusing you. |
| 09:18 | So that, coupled with the fact it's cheaper, it's probably the option that I would actually recommend. |
| 09:25 | OK so we've got our timing light, it's already fitted to the engine, but we do need to get a signal to that timing light. |
| 09:31 | So what we're trying to do here when we are setting our base ignition timing, it's all based off number one cylinder. |
| 09:39 | That's the cylinder that we are going to be basing our timing events off. |
| 09:42 | So we need to get an ignition signal from number one cylinder. |
| 09:47 | There are a variety of ways of doing this depending on exactly what the ingition system on our engine is. |
| 09:54 | In the simplest way we're just place the inductive clamp around an ignition lead, so if we're got an ignition system that uses a distributor or coils where there's individual ignition leads going out to the spark plugs, all we're going to do is clip the timing light, or the inductive clamp of the timing light around our ignition lead. |
| 10:13 | That's going to give us a good solid pulse when the spark occurs on number one cylinder. |
| 10:20 | Of course these days with engines that are fitted with direct coil on plug ignition systems, this is getting a little bit trickier. |
| 10:27 | So if we've got a direct coil on plug ignition system, then there are a couple of options. |
| 10:33 | Depending on your timing light and the coils used, you may actually find that you'll still get a good signal if you connect the inductive clamp to the low voltage wiring or signal wiring to the coil. |
| 10:49 | So it's definitely worth trying that and that's definitely a simpler option. |
| 10:53 | The other option though if you're not getting a signal from your coil, you can also remove your ignition coil from the engine. |
| 11:01 | And what you can then do is take a standard ignition lead, much like the one I've got here, and you can connect that to the end of the coil just temporarily. |
| 11:12 | What I'll do generally is place it onto the coil. |
| 11:14 | Sometimes you need to also remove the little rubber boot extension that connects or insulated to the spark plug in order to do this, to make sure you're getting good conductivity between the coil and your ignition lead. |
| 11:27 | And then generally it's a good idea to just temporarily wrap some race tape or electrical tape around this just so it's not gonna come loose while you're setting your base ignition timing. |
| 11:36 | The other end of that ignition lead can then be placed on the end of the spark plug. |
| 11:42 | So this is just being used for the purposes of setting up the base ignition timing. |
| 11:47 | It just allows us something really easy to get our inductive clamp onto. |
| 11:51 | As I've said sort of at the start, this is potentially a time consuming process on some engines which is why a lot of tuners may choose to overlook it but it really is essential. |
| 12:03 | Alright so once we've got in that position we've actually got our signal coming from our ignition coil, we've got our timing light connected, we're in a position where we can actually see the ignition events. |
| 12:13 | Visually we're gonna get that strobe effect so we can see the timing marks on our crank pulley. |
| 12:19 | But there are a couple of other aspects we need to understand as well. |
| 12:23 | The first of those is it's really important to know what the marks on your particular pulley mean. |
| 12:30 | Now these are obviously going to vary from one engine to the next. |
| 12:33 | So there is no standardised approach that all manufacturer's use here. |
| 12:38 | So it's really important to make sure that you're familiar with what the marks on your particular pulley, actually look like. |
| 12:44 | So we'll jump into my laptop screen for a moment, and this is what we've got on our Nissan VQ35. |
| 12:52 | So if you're actually wondering where you find this sort of image as well, these will be in workshop manuals, but these days a quick Google image search is gonna pick up something for your particular engine, provided you're dealing with something that's relatively standard. |
| 13:06 | So in this case we've got the timing marks here on the crank pulley, so we can see that on the VQ35 crank pulley, we have one timing mark at zero degrees or TDC, we've got another timing mark here at 15 degrees, and then finally we've got a third mark at 20 degrees. |
| 13:26 | So the point here is if you've looked at this and made some assumptions that maybe it's zero, 10 and 15 degrees, obviously those other two marks are now gonna be inaccurate, so really really important to make sure you understand those. |
| 13:40 | The other aspect here is that there is a little arrow or alignment mark on the front of the engine that you're going to use align with these marks. |
| 13:53 | So this is what you're going to be looking at, you're going to be basically looking at a line down through your timing indicator on the front of the engine, and you're going to be looking at that in relation to the timing marks on the crank pulley. |
| 14:11 | Let's just have a quick look at what that looks like on our VQ35. |
| 14:16 | And I'm going to show you this here because it's going to be a little bit hard for me to draw on this when we're doing the demonstration live. |
| 14:24 | So this is that little timing indicator that we just looked at in that drawing. |
| 14:30 | So it's just a cast marker on the front of the engine and we're going to be aligning with our mark. |
| 14:37 | So we can see here the three marks that we just looked at on our drawing. |
| 14:40 | So to the left we have our TDC mark, which is just black, and then we've got our 15 and our 20 degree marks which are white. |
| 14:48 | Also I'll just mention that it is worthwhile. |
| 14:59 | Hi guys we're back, sorry about that, we just lost our GoPro, so I wanted to get that back up and running before we continued. |
| 15:05 | Alright so just moving on here. |
| 15:07 | I was mentioning here about our white marks for our 15 and 20 degree marks. |
| 15:11 | And if you are making timing marks on a crank pulley, or even if there are existing timing marks, it's a really good idea to use a twink pen or whiteout pen to just highlight those marks. |
| 15:24 | It's gonna make it much much easier for you to actually see with your timing light when the crank pulley's rotating. |
| 15:30 | Particularly if you're starting with setting your base ignition timing and you've got no idea where it's going to be, you may find that the timing mark is actually around the back side of the pulley and completely invisible so you want something really clear and really obvious that makes it much easier for you to find that base timing mark. |
| 15:48 | Alright so what I'll just point out here on our laptop screen as well is when we are looking at our timing marks, I've kind of mentioned this already but I just wanna reiterate again, we are trying to look directly down in line with the side of our timing indicator. |
| 16:05 | The reason for this is because you can end up suffering from what's referred to as parallax error. |
| 16:12 | And this is where we've got a timing marker and an indicator that are separated by some distance, and depending how we view those two in relation to each other, can actually affect our reading. |
| 16:23 | Now trying to explain that is a little bit tricky so let's just jump across to the laptop screen again, and we've got a little diagram here that's a really really easy way of explaining what parallax error is. |
| 16:38 | So here we've got an object here, doesn't really matter what it is. |
| 16:42 | But the point is that that object is separated by some distance from the background. |
| 16:47 | So in this case let's assume that our object is our timing indicator, and then on the right hand side these are our timing marks. |
| 16:56 | Now if we look at that timing indicator from viewpoint B here, what we're going to find is that it appears that the timing indicator would align with our red mark. |
| 17:09 | If on the other hand we view from viewpoint A, we're gonna find, it will appear that our timing aligns with the blue mark. |
| 17:17 | The reality however is if we make sure that we are looking at our timing indicator in line as we expect to, we're gonna find that we're actually gonna be coming straight through the centre and we're gonna see our white mark. |
| 17:30 | So you can see hopefully that, particularly when we're doing something quite critical such as setting our base ignition timing, we want to do our very best to remove any chance of parallax error creeping in and affecting the accuracy of those marks. |
| 17:46 | Alright so now what we're going to do is go through an actual demonstration of setting our base ignition timing using our Elite 2500 ECU. |
| 17:55 | And what we're going to do is go through the step by step process, we're gonna do this two ways. |
| 18:01 | We're gonna start by assuming we've got an engine that has not run yet. |
| 18:06 | So we're setting up a freshly installed engine, a freshly installed ECU and we've got no idea where our base ignition timing is. |
| 18:13 | So what we're going to do here is jump into our Haltech Elite ESP software. |
| 18:19 | And let's go through to our main setup. |
| 18:23 | Now there's a couple of things we have to do here. |
| 18:25 | So at the moment we can see we're on our engine setup and I'm on our ignition tab. |
| 18:31 | OK if we come down, we've got all of our setup correct here for our VQ35. |
| 18:38 | And what we want to do is go down to our lock mode here. |
| 18:42 | So this is going to override all of the ignition timing values in the ECU, any table values, any compensations, and it's just going to output one fixed ignition angle regardless what the engine is doing. |
| 18:55 | So what we want to do here is go down to our drop down menu, and we want to set that to always on. |
| 19:02 | So it's important to note here when we do that, a little warning box popped up saying, hey you shouldn't be using this for normal engine operation and this is actually another aspect that a few tuners will come unstuck with, is setting an engine in base ignition timing mode, or lock mode as Haltech refer to it, going through the process of setting the base ignition timing, and then forgetting all about the fact that they've done that. |
| 19:25 | So that's going to end up with an engine that doesn't run very well and definitely doesn't respond to ignition timing when you're tuning it, and also obviously it's not gonna make the sort of power you're expecting. |
| 19:35 | Now the next aspect here we've got is our firing angle. |
| 19:39 | So this is where we can choose a fixed ignition angle that's going to be output. |
| 19:43 | So really what we're going to do here, or what we're going to want to do here is choose an angle that A, the engine's going to be happy running at, and B, that we can easily and clearly see on our crank pulley. |
| 19:56 | And I've also already dealt with this, in some instances we may have a pulley where we only have a TDC mark, so without the benefit of a dial back timing light, the only value we're going to be able to put in here is zero. |
| 20:08 | In this case you'll remember that we had timing marks at zero, 15 and 20. |
| 20:12 | Now I know that our VQ35 is going to operate quite happily at 15 degrees both cranking and running, so we're going to set that to 15. |
| 20:22 | And I'm just going to click apply. |
| 20:25 | It's going to set those changes. |
| 20:27 | Now the other thing I'm going to do here is I'm going to come across to our fuel tab and for the purposes of this demonstration here, we're going to disable our injection system. |
| 20:38 | So we're going to disable our fuel injectors, make sure that the engine isn't going to try and start and run. |
| 20:43 | This is going to allow us to crank the engine without any chance of it running and this allows us good amount of time to see what the actual ignition timing is doing. |
| 20:55 | So in this instance we're now going to swap across to our camera that's actually viewing our timing light. |
| 21:03 | So I'm gonna crank the engine for a few seconds and we're going to see exactly what we've got on our timing light. |
| 21:10 | So you may find as well when you first start cranking the engine, it does take a few rotations before we actually see the strobe effect start to come in, so let's just do that now. |
| 21:23 | OK so hopefully there you can see that down the side of our timing indicator, we are sitting pretty much on our timing mark. |
| 21:30 | So this is a pretty good place to start. |
| 21:32 | Our timing is pretty close to that mark. |
| 21:35 | Now it's important to note that if you are setting the base ignition timing using this procedure here, before you've started the engine for the first time, you're still going to need to fine tune this. |
| 21:47 | There's not enough accuracy often in the engine speed information being provided at cranking speed and the engine RPM is quite inconsistent at crank. |
| 21:56 | So you are only gonna be able to get this approximate. |
| 22:00 | So at this point I'm definitely happy with that, that should be enough to get our engine up and running. |
| 22:05 | So what we can do now, let's head back in. |
| 22:07 | We're going to click on disable injectors again, and we're going to apply that change, so that will re enable our injection system. |
| 22:16 | And at this point we should be able to get our engine started, and hopefully it should run. |
| 22:22 | Well we will need to also reboot the ECU before that change will take effect, and now our engine will start and it will run. |
| 22:32 | OK so one thing that is important to note here is that if you are having problems with getting the engine to start up and run after you've gone through that process, you've set your base timing approximately during that step that I've just covered there, we've got it pretty close to our timing marks but then you re enabled your injection system and it's just not firing, there's no sign of any life and it's not trying to fire up and run. |
| 23:02 | Then there's a pretty good chance that your base ignition timing may actually be 360 degrees out. |
| 23:11 | So what we need to understand here is that there are two full revolutions of the crankshaft in one engine cycle. |
| 23:18 | So it's 720 degrees of rotation. |
| 23:20 | So if we've got our timing light shining strobing on our timing marks, but the engine isn't running, it may be that instead of the ignition event occurring as the piston comes up towards top dead centre on the compression stroke, it may actually be doing that on the exhaust stroke. |
| 23:38 | So in that instance, all we need to do is offset our timing setup there by 360 degrees. |
| 23:50 | Aright so we've got our engine up and running here and we've got, if we look again at our camera here, we can actually see that our setup is pretty good but what I'm going to do is just make it a little less good. |
| 24:03 | So let's just apply a change there. |
| 24:05 | Alright so if we're looking at our timing marks now, we can see that, remember we've got our lock timing value set to 15 degrees, but we can actually see that our timing is occurring now somewhere between our TDC and our 15 degree mark. |
| 24:21 | So at the moment we know that our timing isn't correct. |
| 24:24 | So this is where we can adjust this, and we use the TDC offset angle to correct this. |
| 24:31 | So let's jump back into our laptop software. |
| 24:33 | We find our TDC offset angle value on our trigger tab which we can see I'm already on here and that is shown here about a third of the way down our page. |
| 24:46 | So we've got a value of 690 degrees here. |
| 24:48 | So what we want to do is adjust this value until our timing matches exactly what we expect. |
| 24:56 | So let's start for a moment, often you won't know exactly where abouts you are and sometimes you can make some changes that go in the wrong direction. |
| 25:05 | Doesn't really matter, this is a relatively straightforward process and it's pretty easy to get it on the mark. |
| 25:10 | So at the moment we know that our timing is retarded probably by somewhere in the region of about eight or 10 degrees. |
| 25:17 | So what I'm going to do is start by reducing that number there from 690 to let's say 688, so we'll remove two degrees, and we'll apply that change. |
| 25:27 | And what I wanna do is watch the ignition timing light while I press the apply button here and we're going to see our timing jump. |
| 25:38 | OK so we've just moved two degrees, and you can see that as I pressed apply, we move closer to our 15 degree timing mark. |
| 25:46 | So we're moving in the right direction, although obviously that wasn't a big enough change so let's take another guess here, we'll change it to 682 degrees. |
| 25:55 | Now again, haven't made that change, I haven't applied that change yet, so looking at our timing mark where it is now, our timing marks where they are now I should say, I'm gonna press apply, and we can see that we've jumped pretty close to our timing indicator now. |
| 26:09 | So we're quite close, we're probably still a degree or so away. |
| 26:12 | So we can simply go through the process of fine tuning this. |
| 26:15 | Let's try 680, I think we're going to probably be pretty close there. |
| 26:21 | And yeah from that, looks like our timing is now correct. |
| 26:27 | Now with the engine like our VQ35, it does have quite a lot of information on the crank trigger, giving the ECU a lot of information about the engine speed. |
| 26:37 | So for an engine like this, we're currently idling at 800 RPM, we're seeing that the timing is actually really stable, it's not moving around at idle at all. |
| 26:48 | In a lot of engines at low RPM, at low idle speed, you're going to see the timing move around a little bit, it makes it a little bit hard to be really accurate with our base ignition timing. |
| 26:58 | So in that situation what I suggest you do is just raise the idle speed a little bit. |
| 27:03 | You can either do this with your idle speed control settings, or you can simply raise the idle speed using your throttle, and probably somewhere around about 1200 to 1500 RPM, you should be getting enough information that that timing will be nice and stable, it's no longer going to rock around like we can see at maybe 600 or 700 RPM. |
| 27:23 | And that's gonna give us a good place to set our base ignition timing. |
| 27:27 | Now there is one more job before we take our ECU out of our lock timing mode though. |
| 27:33 | What we also want to do is now raise our engine RPM and make sure that our timing doesn't drift as our RPM increases. |
| 27:41 | So let's have a look at our timing marks again, and I'm just going to bring our engine RPM up and we're seeing that our timing does move very slightly. |
| 27:53 | So we're up to about 3000 RPM now, well actually we've just lost it. |
| 27:57 | But that hopefully is going to demonstrate the effect we get there. |
| 28:02 | So what we're going to find is that in most instances, our timing may drift as we go from maybe idle through to 6000 RPM. |
| 28:11 | It's quite possible we will see a drift of perhaps one to two degrees. |
| 28:16 | That's quite normal, it's not necessarily something to get worried about, it's repeatable, it's consistent, and you're essentially going to be correcting that in your base ignition table, your actual ignition tuning table. |
| 28:29 | What's more concerning, and why I want to do this test though, is again if you've got a freshly installed ECU, particularly one where the trigger inputs to the ECU use a reluctor input, It's very very easy to end up with the reluctor input wired in reverse polarity. |
| 28:48 | Now that'll still send a signal through to the ECU, you'll still be able to get your engine up and running, you'll still be able to set your base ignition timing, but the problem with this when the polarity of the reluctor input is around the wrong way, as the engine RPM increases or decreases, you're going to see that timing drift. |
| 29:05 | And we're not talking here about perhaps one to two degrees, we're talking here about a timing drift that may be 15, 20, 30 degrees just basically dependent on the RPM and the amplitude of the signal to the ECU. |
| 29:18 | So really important as a first check once you've got your engine up and running, just to confirm, if you've got the reluctor input trigger system, to make sure that you don't have any timing drift. |
| 29:29 | Alright so once you've got your base ignition timing set, there is one more job to do which is really important and you definitely don't wanna overlook that so let's head back in to the laptop screen. |
| 29:40 | What we're going to do is head back across to our ignition table, our ignition tab I should say. |
| 29:45 | Now the Haltech Elite software actually makes this really straightforward and hard to overlook because you'll see that our ignition tab is highlighted yellow. |
| 29:54 | We've got a little warning triangle on our engine setup tab as well, and then if we come down here we can see that our lock mode always on is also highlighted in yellow. |
| 30:06 | So this makes it really difficult for us to overlook the fact that we have left the ECU set in lock timing mode. |
| 30:13 | So what we're going to do there is just click on our tab again and we're going to disable that and we're going to apply our changes. |
| 30:20 | And now our timing will revert to the numbers in our timing tables plus any compensations. |
| 30:27 | Alright so it is relatively straightforward. |
| 30:29 | It's a pretty simple process, it doesn't necessarily take that long to do on most engines and it really is something that you need to make sure you've got right. |
| 30:40 | We're going to have a look at some questions and answers now, so if you've got anything that you want to ask about today's webinar please ask those in the comments and I'll try my very best to answer them. |
| 30:50 | Let's have a look and see what we've got. |
| 30:52 | Our first question comes from Craig, and he has asked, can you use the stop tool on heads with a side mounted spark plug? So Craig here is referring to finding true TDC. |
| 31:03 | So that's a reference to our last webinar where we talked about doing that, we're using a positive stop tool. |
| 31:10 | So yes, provided that you have got a nice rigid piston stop tool, something that's not going to flex a lot, then yes it can be used on an engine with an angle side mounted spark plug such as a GM LS V8 for example. |
| 31:26 | With that instance, you do wanna be a little bit careful about exactly how much force you apply to the piston because as you apply force to the piston, trying to move it into that positive stop, you do have the risk of ending up damaging or bending the positive stop and that's obviously going to effect the accuracy of your results. |
| 31:49 | Right that looks like that is the only question we had there actually. |
| 31:54 | I think we did have that question maybe as an overrun from our last webinar which might have potentially been why it wasn't quite related to this. |
| 32:05 | So I will give you just a little bit of time, we do have a little bit of latency in our stream here which makes it a little bit hard when I ask for questions, there's probably about 45 seconds before what I'm actually saying goes out live and I was a little bit premature on ending that webinar, didn't really give you guys a call to give me your questions. |
| 32:24 | It is a relatively straightforward topic, but of course there is the chance that there is something else that you guys want me to explain. |
| 32:32 | We do have one here from Freaks89, who's asked, is base timing reading stable on an engine using aggressive cams? So this really depends a little bit on the trigger system and how aggressive the cams are. |
| 32:47 | So what you'll find is that with an engine that uses aggressive cams, with a lot of overlap, it's quite likely that the engine idle speed will be quite lopey, what this means is that the idle speed is changing quite significantly. |
| 33:01 | If you've got a trigger input with a relatively low tooth count then the ECU in between teeth on that input is going to basically be assuming that the engine RPM is remaining constant. |
| 33:13 | In reality it might be changing quite significantly so it can only update the engine position every time it sees a trigger input. |
| 33:19 | So it is quite variable. |
| 33:21 | If you've got a low tooth count, perhaps a six or eight tooth crank trigger wheel, then it's quite possible with an aggressive cam profile, you're going to have quite a lot of movement in the ignition timing at idle speed. |
| 33:35 | As I've mentioned in the webinar though, all you need to do though is bring the idle speed up to perhaps about 1200 to 1500 RPM, and you'll see with the timing light where the ignition timing starts to look like it's pretty stable, it's not floating around. |
| 33:50 | If you're seeing the timing mark move around sort of three to five degrees backwards and forwards at idle, then yeah bring the idle speed up and that will solve your problem there. |
| 34:02 | Aaron has asked, can cars without distributors ever be 180 degrees off, I'm wondering how timing could ever be physically off in a non distributed car? OK so not 180 there, I think you're probably talking 360, which is what I kind of covered there in the webinar. |
| 34:19 | So if you've got a distributorless car, so coil on plug ignition timing, then yes it can be because remember we've got 720 degrees of crankshaft rotation for one full engine cycle. |
| 34:33 | So what we can get into that scenario is where the spark is occurring at what looks like the correct point on the crank pulley but instead of being on the compression stroke on number one cylinder, it's occurring on the exhaust stroke. |
| 34:47 | So this is really a problem that occurs with direct fire coil on plug ignition systems. |
| 34:54 | It's not gonna be something that's going to happen on a distributor style ignition system because the distributor arm physically points to the post where the spark is going so it's pretty straightforward, it's either pointing in the right direction or it's not. |
| 35:07 | Likewise if you've got a waste spark ignition system, what you've got is the two opposing cylinders, so in an inline four cylinder like a 4G63 for example you'll have one, number one and number four cylinders will be at TDC at the same point. |
| 35:23 | So you've got one coil pack with two posts that's providing spark to cylinders one and cylinders four simultaneously. |
| 35:30 | So with that sort of system then it doesn't actually matter, you're going to have the spark occurring at the correct point in the engine cycle regardless what you've done with your timing offset. |
| 35:42 | Craig has asked, what about those Ford TBI systems with the distributor? Not quite sure what you want in way of information there Craig so maybe just elaborate on that and I'll try and give you a little bit more information. |
| 35:56 | With a distributor system, depending, I'll just sort of go into this in a little detail, maybe it will answer your question. |
| 36:02 | With a distributor system, when we are mating that to an aftermarket standalone ECU, we're going to be converting a mechanical distributor to electronic anyway so the advance is still controlled by the ECU. |
| 36:17 | The important point to note is that the base ignition timing will still be controlled by the ECU. |
| 36:23 | But what you will have to do is make sure that the physical timing of the distributor suits, in other words, you want to make sure that you're not going to run off the end of the distributor arm at maximum advance. |
| 36:36 | So between the maximum and minimum advance you're likely to see, you need to make sure that that rotor arm is going to actually be aligned with the correct post. |
| 36:46 | Jules has asked, when I adjust the timing with the distributor, then it stabilises, but when I rev it high like 2500 to 3000 RPM, the timing reading drifts quite far, 10 to 20 degrees, what part should I worry or change? OK it sounds to me there like the problem you've got is that the ECU is not in base timing mode. |
| 37:08 | So obviously I don't have a lot of information about exactly what you're doing there Jules, if you're dealing with a factory ECU then in a lot of cases, there is no potential to put them into base timing mode. |
| 37:20 | Often all of the trigger information is basically programmed into the trigger mode that the ECU is expecting, so there is no base timing mode. |
| 37:28 | And if you're looking at the timing with a timing light as you rev the engine, then the timing will simply advance and retard as you would expect it to do. |
| 37:36 | If you're dealing with an aftermarket standalone ECU then things are different. |
| 37:40 | Then you need to make sure you're in base timing mode like we looked at in our Elite 2500. |
| 37:45 | If you are in a base timing mode or the timing is locked to a fixed value and you're still seeing that drift, then that's definitely a problem. |
| 37:53 | In that instance I would suggest that probably you've got a reluctor pickup with the polarity around the wrong way. |
| 38:03 | Rev Mesh has asked, why is hall effect and optical sensor grouped as one as far as cam and crank sensors go? So really when we're looking at the type of trigger inputs that ECUs use, or engines use, there are two main types. |
| 38:20 | There's a digital type input and there is a variable reluctance input. |
| 38:25 | So this is how they're grouped, they're either magnetic, or variable reluctance as they're also known, or they are a digital style input which is a square wave input. |
| 38:35 | So this falls into the category of a hall sensor as well as an optical sensor. |
| 38:40 | So it's really just setting the ECU up for what it's going to expect in terms of an input signal from your particular trigger system. |
| 38:49 | Craig has asked, this is an update on the Ford TBI system, not sure how far you could push it before it stumbles, I think it can move 10 degrees at the most. |
| 39:00 | OK so I'm not particularly familiar with that Craig. |
| 39:03 | I can't probably give you too much more information there. |
| 39:07 | So I think probably what you're talking about here is if you move the distributor too much, you're going to end up falling off the end of the rotor arm, but yeah as I say, not something I'm familiar with unfortunately. |
| 39:20 | Freaks89 has asked, can overly advanced base ignition timing cause overheating? OK so just to be really clear, the base ignition timing here is never going to be over advanced or under advanced, the base timing is simply going to be correct when the timing we see with the timing light matches whatever's in the laptop screen. |
| 39:40 | So beyond that, yes obviously then you can have your timing either overly advanced or overly retarded. |
| 39:46 | Generally with overly retarded timing, this is where you're going to find problems with the engine running a little hot. |
| 39:53 | As we retard the timing, the combustion process occurs later in the engine cycle, and this creates a lot more heat, particularly in the exhaust system. |
| 40:01 | So it's probably the more dangerous, as we had over advanced the timing, we get into a situation under load where the engine is probably more likely to suffer from detonation. |
| 40:11 | Obviously very damaging and something we need to stay away from. |
| 40:14 | So both overly advanced and overly retarded timing can both be damaging to our engine so we definitely want our timing set correctly. |
| 40:23 | Alfonso has asked, the base timing set recommended is the OEM? OK so just to reiterate here, this is really an aspect with aftermarket standalone engine management systems. |
| 40:38 | So it's not really an OEM aspect here, and I think possible Alfonso is confusing the ignition timing that we're delivering with base ignition timing. |
| 40:47 | So again, base ignition timing is just used to align the timing that the engine is receiving with what we're seeing on our laptop screen. |
| 40:55 | There isn't an over advanced or over retarded, it's either right or it's wrong. |
| 41:00 | Lucas has asked, did you ever configure a two tooth trigger wheel of a Mitsubishi Evo on a Fueltech? I'm afraid to make a mistake setting the base timing on zero. |
| 41:09 | Haven't used a Fueltech on the Mitsubishi Evo. |
| 41:13 | I'm gonna guess you're talking about the late model Evo trigger disc on the Evo 789 engines and while it does appear to be a two tooth trigger disc, it actually is four edges that most ECUs will decode from that trigger input so it's actually looking at the rising and falling edge for both of those teeth. |
| 41:35 | So it's still a relatively low amount of information so quite low resolution and this is a situation where you may see the ignition timing drift around a little bit at idle. |
| 41:46 | The upshot of this is generally once you've passed about 1500 RPM, the timing is gonna be rock solid and that will work quite well, it's gonna give a nice clean signal, it's not gonna confuse any ECU even at very very high RPM. |
| 42:01 | Vince has asked, should low base timing match the high octane low load section in HP Tuners. |
| 42:08 | OK so if you are dealing with HP Tuners, then you are reflashing a factory ECU. |
| 42:14 | Now again with a factory ECU, this is very different, we don't need to set base ignition timing as such in most late model factory ECUs. |
| 42:24 | This is all decoded out of the factory trigger information and we, as long as the trigger wheels are in the factory location then the base timing will be correct. |
| 42:35 | So this really is focussed solely on aftermarket standalone ECUs. |
| 42:42 | Anthony has asked, is spark hook theoretical or actual data? A little off the topic of today's webinar Anthony, this is something we actually run in some of our webinars, we've got some information in our archive on optimising our ignition timing which is what you're referring to here. |
| 43:03 | This happens after we've set our base ignition timing. |
| 43:06 | But a spark hook test where we simply start with very retarded safe ignition timing and we advance the timing throughout the timing range, and register the difference in torque on our dyno, this is something that we actually do with real values, it's not theoretical, we're actually really measuring the effect of ignition timing on engine torque and finding where MBT is. |
| 43:31 | Brody has asked, if I have a trigger sync error comes up for the first time, should I be worried about detonation or does it have a fail safe in the ECU. |
| 43:39 | I have an Elite 2500 on RB30, RB26. |
| 43:45 | OK it depends a little bit on exactly what trigger system you're operating there. |
| 43:50 | Now if you are running the factory 360 degree optical trigger system on the RB then these are notoriously problematic with aftermarket ECUs, particularly if you've got a modified engine. |
| 44:02 | And this can end up bringing up sync errors. |
| 44:06 | The other thing that it can bring up or can create is because the ECU is losing track of the actual engine position and the engine speed, what we'll find is that our ignition and our fuel delivery will not be stable or consistant. |
| 44:21 | So this often shows up when we've got a car on the dyno with quite an erratic shape to the power curve or an engine that is inconsistent from one run to the next. |
| 44:30 | So very very big problem on the RB series. |
| 44:33 | If you wanna get serious about that, there are a couple of fixes. |
| 44:36 | There are a couple of manufacturers that make new trigger systems that go on the camshaft. |
| 44:42 | These revert to a 24 minus one trigger system and use either a reluctor or a hall sensor. |
| 44:51 | So this gives the ECU slightly less information and often this is enough to fix some low level triggering problems on the RBs. |
| 45:00 | If you wanna get a lot more serious than that it's gonna cost you a bit more money but the ideal fix is obviously to go to a crank trigger system where engine RPM information is actually being sourced directly from the crankshaft. |
| 45:15 | Hisham has asked, what's the best ignition timing for a 4AGE 20 valve on stage two with wild cams? OK one more time I'm just going to reiterate that the base ignition timing is the base ignition timing. |
| 45:28 | We're going to set that so that we're seeing the same timing with our timing light that we've got on our laptop screen. |
| 45:35 | So what you're talking about there Hisham is very very different. |
| 45:38 | This is just the actual timing that the engine is going to receive. |
| 45:43 | Also it's completely impossible for me to give you a best ignition timing. |
| 45:47 | The correct ignition timing is going to depend on the engine RPM and load. |
| 45:52 | So we don't have one fixed ignition value that we deliver all of the time. |
| 45:55 | This is why we need a three dimensional table of ignition timing values, based on engine speed as well as engine load. |
| 46:02 | On top of this, there are so many factors here that will affect the ideal ignition timing. |
| 46:08 | The compression ratio of the engine, those cams, probably need a little bit more information, stage two wild cams isn't really that descriptive. |
| 46:17 | You also need to know where these cams are actually degreed in, how much lift they're providing, what duration, and also what octane fuel the engine is running at. |
| 46:27 | All of these aspects will affect the correct timing and this is why we use the dyno to find what is the optimal timing for the particular engine combination that we are tuning. |
| 46:37 | Now I also just have a comment here on the Fueltech question we had earlier which comes from Barry G who's asked, for the Fueltech you need to cut the long edge off the cam sensor trigger wheel on the 4G63. |
| 46:48 | Thanks for adding that information there Barry, as I did mention in that question, the Fueltech isn't an ECU that we've personally had experience with there so thanks for adding that in. |
| 46:59 | Alright guys that has brought us to the end of our questions. |
| 47:02 | So hopefully everyone's now got a slightly better idea of what the process of setting base ignition timing is and what that process actually involves, what that term even means. |
| 47:14 | As usual if you do have other questions that crop up after this webinar has aired, please ask those in the forum and I'll be happy to answer them there. |
| 47:22 | Thanks for joining us everyone, and I look forward to seeing you all next week. |


