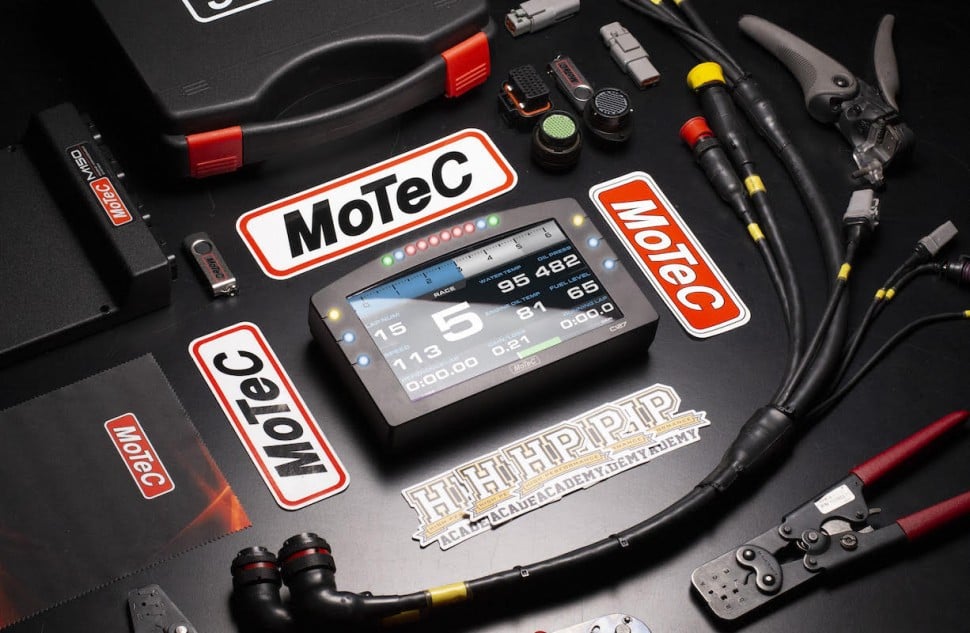
Practical Wiring - Professional Motorsport: Step 7 - Terminal Crimping and Connector Installation
Watch This Course
$299 USD
-OR-
Or
8 easy payments of only $37.38 USD
Instant access. Easy checkout. No fees.
Step 7 - Terminal Crimping and Connector Installation
16.07
| 00:00 | - The seventh step of the HPA 10 step professional motorsport wiring harness construction process is the one where we're going to crimp our terminal pins onto the end of our wire harness sections and install our connector bodies. |
| 00:13 | This process doesn't differ greatly from how we approach it at the club spec wiring harness construction level, except that we are building a completely sealed harness, however in step six we've made sure that we've got all of our booting materials in place where we're not able to get that boot over the connector body, and that's really going to help us out here. |
| 00:33 | We'll go through a couple of examples of connector installation now. |
| 00:36 | One of a Bosch mini timer two pin connector, which is going to make a connection to our engine cooler temperature sensor. |
| 00:43 | And the other of a motorsport circular connector which is going to be the interface connector for our fuel injectors and our fuel pressure sensor. |
| 00:51 | The key difference between these two examples is that the boot we're going to use for sealing our circular connector body to our wire harness sheathing is large enough to fit over the connector body after it's been installed. |
| 01:06 | So we don't have to get that in place before we begin. |
| 01:09 | Behind both connectors we are going to use service looping to give us a little bit of strain relief plus a little bit of extra wire length if a repair needs to be made. |
| 01:18 | We'll start with the mini timer two pin connector here. |
| 01:22 | This is our engine coolant temperature sensor branch. |
| 01:25 | So first thing we're going to have to do, we have covered this process in quite a lot of detail in both the fundamentals course and the practical club level course. |
| 01:33 | We're going to install our wire seals for this connector. |
| 01:36 | We're going to strip back a section of the insulation, crimp on our terminals, make our strain relief and wire seal crimp and then insert this into that connector body. |
| 01:45 | Of course making sure to keep our booting material in place behind that connector as in the last step of the process, we're going to shrink all of this down and seal up this harness, and we want to be absolutely sure that we haven't forgotten to get that in place. |
| 01:58 | I've got my materials prepared here so I'm just gonna grab these wire seals out, which are a good size for a nice snug fit onto our 22 gauge Tefzel wiring here. |
| 02:10 | So we'll get those installed and I'm gonna push them down quite a long way, just to keep them out of the way of the wire strippers that we're going to use to pair back that insulation. |
| 02:22 | Just gonna hold one of these pins up and get a good gauge on how much insulation we're going to have to strip off. |
| 02:30 | I'm not going to use the wire stop on our Ergo Elite wire stripping tool for this application. |
| 02:37 | I've actually got two of those tools. |
| 02:39 | One I keep with the wire stop set for a common 22 size circular milspec connector the required strip length for that application as that's going to be a lot of what we're doing here. |
| 02:52 | So I'll use that tool for all that stripping. |
| 02:54 | The other one I've actually removed the wire stop from and I just use it by eye getting the right strip length for all the other applications on the end of the harness. |
| 03:02 | We'll grab that tool out now and get these bits of insulation stripped off. |
| 03:15 | Excellent that's going to give us a really good strip length there. |
| 03:17 | The tool I'm going to use for crimping these down is our general purpose crimping tool. |
| 03:24 | It is an absolutely excellent tool for this particular application. |
| 03:27 | It gives a really robust and reliable crimp on both of these stages. |
| 03:32 | Both the crimp connection to the copper strands in the wire itself, it give us our electrical conductivity. |
| 03:39 | And to that wire seal. |
| 03:41 | So we'll go ahead and get that crimped down. |
| 03:53 | So we've got a really nice reliable crimp there. |
| 03:55 | Those upper tangs on that open barrel, it's making our electrical connection crimp there really nice and tight. |
| 04:03 | Passed the tug test and we've got a good even circular section crimp on the strain relief stage or the wire seal stage and that's nicely held in place as well. |
| 04:14 | I'll get this other terminal installed. |
| 04:16 | Something you might have noticed is that there's actually quite a bit of wire length here from the end of our sheathing outwards and that's for the reason that we're going to be service looping in behind this connector body. |
| 04:28 | So that's going to give us enough wire length to loop it around, get these pins installed into that connector body and get our boot in place with that harness section the correct length. |
| 04:48 | Got two good reliable crimp connections there. |
| 04:51 | Going to service loop those now and get them installed into our connector body. |
| 04:56 | So I've just got a simple service looping tool here, any sort of pick or anything you've got is actually just as good and will do an excellent job. |
| 05:03 | So I'm just going to wrap those around. |
| 05:05 | With a nice simple connector like this, I can do both at the same time, it makes it really easy. |
| 05:12 | WIth that nicely looped in behind there we can pin these into our connector body. |
| 05:16 | Of course making sure that we're pinning the correct wires into the correct location. |
| 05:21 | So we've got one and two on the back of our mini timer two pin here. |
| 05:25 | And looking at our documentation, pin one is our sensor signal and pin two is our sensor ground. |
| 05:32 | Of course for a cooler temperature sensor like this which is just a variable resister, it's not actually polarity important. |
| 05:37 | But because that's what's in our documentation, it's what we're going to follow, so we'll just get those pinned and installed into the back of that connector body there. |
| 05:50 | Heard that nice click, meaning those pins are well seated in place there. |
| 05:54 | Bit of a tug test again, just making sure nothing's loose. |
| 05:57 | We can see our seals are flush with the back of our connector body there. |
| 06:01 | It's going to be sealing everything up. |
| 06:03 | That further stage of sealing that we're going to be doing of course is shrinking our boot down into place. |
| 06:08 | So what I'm gonna do is actually just slide that boot where it needs to be and just leave it there for the moment, unrecovered just to account for the unlikely situation that we might need to make a change here. |
| 06:21 | So as you can see the process doesn't really differ from how we approach it for a club spec wiring harness. |
| 06:28 | Just keeping in mind that we are building a fully sealed harness here. |
| 06:31 | So that boot is going to be sealing onto our DR25. |
| 06:35 | We'll head onto the next example now which is going to be pinning our fuel injector and engine fuel pressure sensor interface connector onto our harness here. |
| 06:46 | Which is a 1035 circular motorsport connector and it's going to be on this harness branch here. |
| 06:53 | So we'll have a look at some of the differences that apply when you're dealing with the circular motorsport connectors. |
| 06:59 | Particularly when you're pinning them onto a harness section that's actually already been twisted and sheathed. |
| 07:05 | We did look at them in quite a lot of detail when we pinned them onto the bulkhead interface connectors. |
| 07:10 | But that was actually before we twisted and sheathed these sections of harness. |
| 07:15 | The process doesn't differ greatly, we're still going to work from the centre of that connector out, service looping each wire and pinning it into place. |
| 07:22 | It can sometimes be a little bit trickier though as you are having to deal with the rest of the harness being constructed already as well. |
| 07:30 | But a good work setup, I'm going to get my vice set up on the bench here to put that connector in, and you can mitigate a lot of those problems and make it as easy as possible to get a really nice and tidy result. |
| 07:41 | The first part of getting our fuel interface connector here installed onto the harness is actually going to be a couple of splices. |
| 07:48 | We've got our two 20 gauge wires here which are bringing the power supply from our actuator interface connector there through to our fuel injectors. |
| 07:58 | Now one of these wires is for the primary injectors and one is for the secondary injectors so they need to be split out for the primary injectors on each rotor and the secondary injectors on each rotor. |
| 08:11 | We're going to be splicing our single 20 gauge wire here to two 22 gauge wires. |
| 08:16 | That gives us an overall circular mill area of copper there of around about 2400 so we've chosen our blue size motorsport splices here to undertake that operation. |
| 08:26 | The key detail of undertaking these splices is actually going to be their location along the length of the harness. |
| 08:34 | What we're really looking for here is to locate them as close to the end of our sheathing here as possible. |
| 08:40 | Because we want them to be located behind the bulbous section of the boot right behind the connector there. |
| 08:47 | That's going to give us enough space to tidily get everything in place behind that connector, keeping everything as strain relieved as possible. |
| 08:54 | What I'm going to do is trim these two 20 gauge wires off here and I'm then going to crimp on the two 22 gauge wires onto each of those, facing in the other direction so all the wires will be entering the splice from the same direction that is. |
| 09:09 | Seal off the end of that splice with a section of Raychem SCL and then loop those wires back around to get them into our connector body. |
| 09:19 | That's going to take care of our service looping for those four wires as well. |
| 09:48 | We've got our wires crimped into place there now, bringing those out to our four injector power supply wires. |
| 09:55 | I've made a couple of decisions about where we've placed those splices, we'll just have a quick talk about now. |
| 10:00 | I've chosen not to stagger them as we are working with quite a confined space behind our smaller 1035 size connector body here. |
| 10:08 | So by staggering those it would probably give us too much length of uninsulated wire here to really be reliably covered up by the boot that will be shrinking this into place. |
| 10:18 | We've got a little bit more room to work as far as the radial measurement goes, so having those next to one another isn't likely to cause us any issues. |
| 10:25 | The blue size splices that I've used there were actually right on their upper limit for the amount of copper that they could accept for this application. |
| 10:33 | However I did choose to still go with them, although they were actually quite tricky to get into place and get crimped down, because I was looking for the smallest possible splice I could get in behind here. |
| 10:44 | If I'd gone for the yellow ones, everything would just be a little bit larger and that might have caused us issues. |
| 10:50 | What I'm going to do now is trim those wires back to the correct length. |
| 10:54 | I'm going to strip off the right amount of insulation using my preset Ergo Elites there and I'm going to crimp some size 22 Souriau pins onto them for our 1035 connector that we're going to get on this harness section. |
| 11:21 | With those pins crimped into place, I've gone ahead and used my multimeter on the harness here just to continuity check that and determine that these two wires are the power supply wires for our secondary injectors, whereas the other two that I've got bent back the other way are for the primary injectors. |
| 11:38 | That's going to be important as we're now going to pin them into the interface connector body here. |
| 11:43 | The secondary power supply wires go into locations 12 and 13. |
| 11:48 | So to do that I'm simply going to get the harness in place, use our insertion tool here and pin those terminals into our connector body. |
| 12:04 | I've got those injector power supply wires into our interface connector here. |
| 12:08 | And you can see our splices are nice and tight in behind that connector body there, meaning that when this is all booted, we'll be making a good connection to our harness sheathing and our connector body, keeping everything really nicely strain relieved. |
| 12:21 | The process from here on our is to determine what each of these wires at this harness section end here is, get a pin onto them and get them pinned into the correct location in that fuel interface connector. |
| 12:35 | This is going to require a bit of use of the multimeter. |
| 12:38 | It's not going to take too long though, we've got our four fuel injector command wires there and then our three sensor wires for our fuel pressure sensor. |
| 12:48 | In the case of the orange and the green wires there we don't even have to multimeter them, we know our orange wire is going to be our sensor supply, and our green is going to be our sensor ground. |
| 12:58 | The order in which we're going to pin this is going to be continuing on from the connector working outwards in that radial pattern which in this instance means we're actually just going to be going backwards down the numbers. |
| 13:10 | Going to separate out those four fuel injector command wires now, determine which is which and get them pinned into place. |
| 14:01 | We've got the wires heading to our fuel interface connector here all toned out with our multimeter, looped and pinned into the correct locations in that connector now. |
| 14:10 | Looking quite tidy, all wrapped in some Kapton tape giving it that strain relief that it's going to need. |
| 14:15 | The boots that will go onto this connector body is a 202K132 which I have here, and when it's shrunk down onto this lip here, it is going to be long enough to cover up our strain relieved section at the end here. |
| 14:28 | These boots actually lengthen out a wee bit as you recover them. |
| 14:31 | Now we did mention when we were talking about these connector boots in that section of the course, that you can get them with a modification. |
| 14:37 | They've actually got multiple lips along them when they're supplied that interface with this lip on the connector body here. |
| 14:45 | And you can trim them back to another one of those lips, but before you do that, you want to be really sure that you're not going to need that extra space in behind the connector body which is definitely going to be the case here. |
| 14:56 | So I won't be modifying this boot or ordering one that's already had the modification made but I am going to need that extra length to give us our good strain relief and our sealing connection between our harness sheathing and our connector body there. |
| 15:08 | Now with our fuel interface connector here there are actually a couple of pins in this connector that aren't used. |
| 15:13 | Pins four and five are listed as no connection. |
| 15:16 | When you're using a circular motorsport connector like this, and you have any pin locations that aren't used, it's really important that you do actually insert a blank pin into those locations which is what I've done here. |
| 15:30 | The seals inside that connector will actually seal around that blank pin and it'll maintain the sealing integrity of your harness, no grime will actually be able to get into the harness from this direction because that pin will be blocking it. |
| 15:43 | The rest of the process now is simply exactly the same as those two examples we've just shown but on the rest of those harness sections. |
| 15:51 | So we're going to go ahead and get that done off camera now and then we'll come back for step eight of the process which is where we're going to do a continuity test on the harness just to confirm that it has met our design criteria. |