Sale ends todayGet 30% off any course (excluding packages)
Ends in --- --- ---
Keep everyone up to date with how your project is coming along.
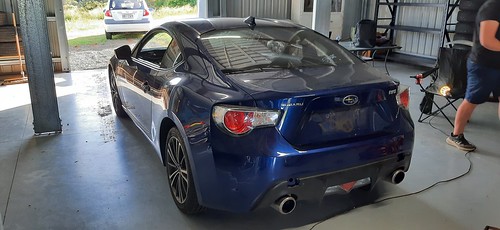
My friend and I decided to embark on a new challenge - we've got the endurance karts up for sale and we are now building a BRZ under class 3E with the plan of doing endurance racing.
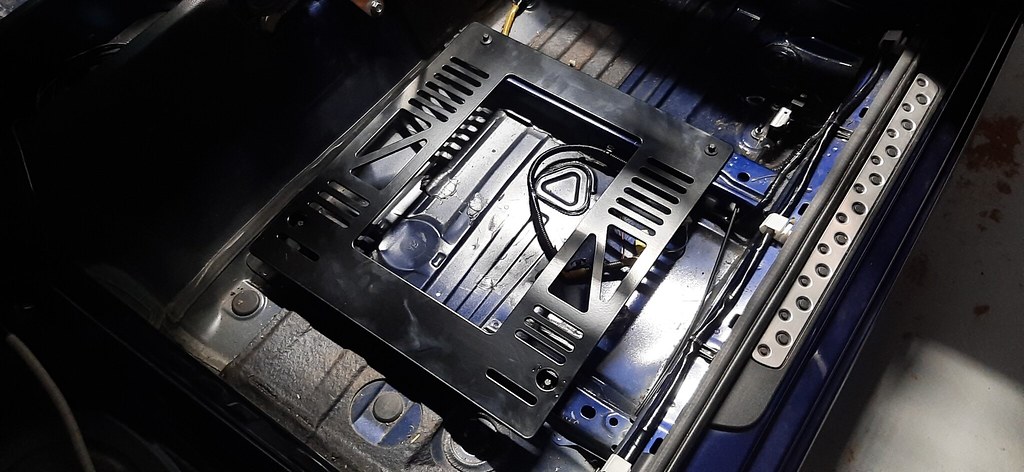
I picked up the BRZ from the salvage auction. The chassis, interor and body were all in great condition however it looks like someone put a water hose up the intake and it's snapped 2 rods. We've removed the engine and have a replacement getting sorted.
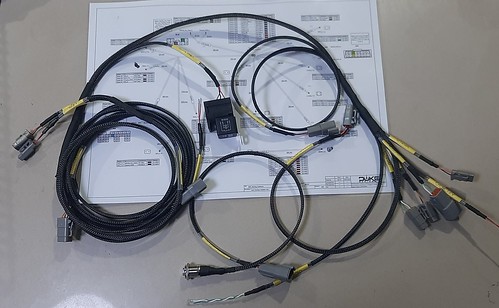
I've stolen some electronic bits that were intended for my GT-Four Time Attack build. That build is still a fair way off so I figured it's a better use of the parts rather than just sitting on the shelf...
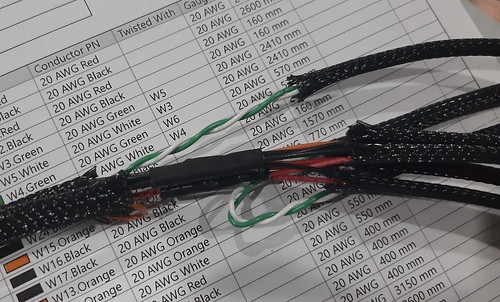
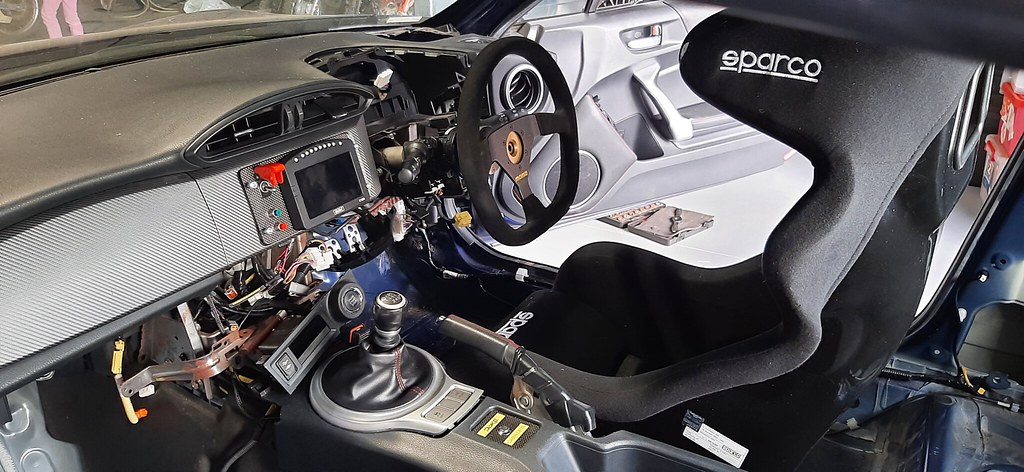
I then set about designing the wiring sub-harness for these bits and constructed it. This is my first go using the skills from the course and I'm pretty happy with how it turned out!
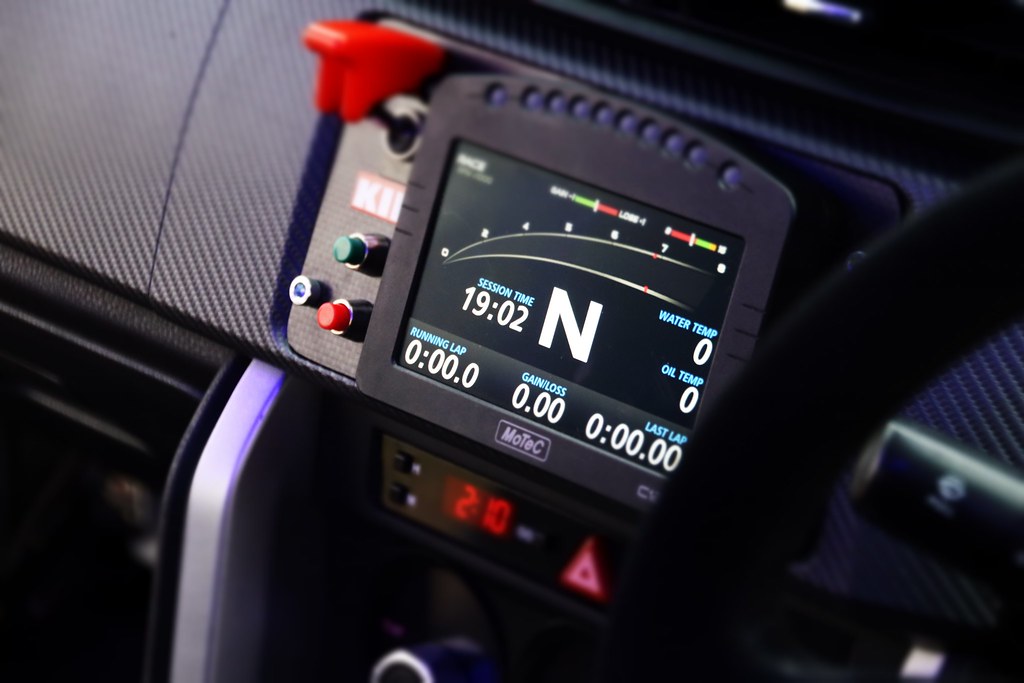
It has an MSEL master relay with provision for 2 external push buttons as well as the internal switch, plus a relay which is switching the IGN enable single to the ECU. Also has a Motec C125 logging dash, a connector with 12V on it for powering up a GoPro charger and finally a latching pushbutton to control another connector with switched 12V for running LEDs. These LEDs will be on the cage, so we can light up the cabin when performing night-time driver changes.
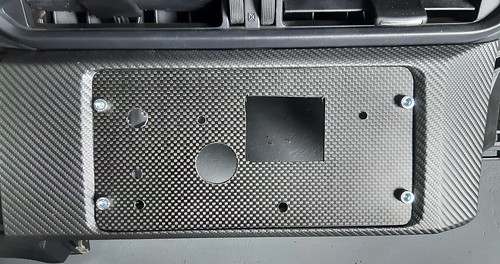
I also made a little panel which fills in the radio void and this is where the dash is mounted. Group 3E rules say we must keep the OEM cluster so figured this location would work and it's still highly visible and the cut out switch is in easy reach.


Great project
Awesome man! If you need a hand or have any questions on the racing side of stuff hit me up.
If you want some extra racing seat time, there's the QLD 86 challenge thing which I think you should be eligible for and you could always race in the prodsport events as a 2F car.
Some small updates with the car, and some photos I thought some in here might like from the battery isolator installation.
Our engine is ready to re-install in the car after being completely rebuilt with donor rods and block, new bearings, rings, gaskets, chains etc. It also has a new Exedy HD clutch.
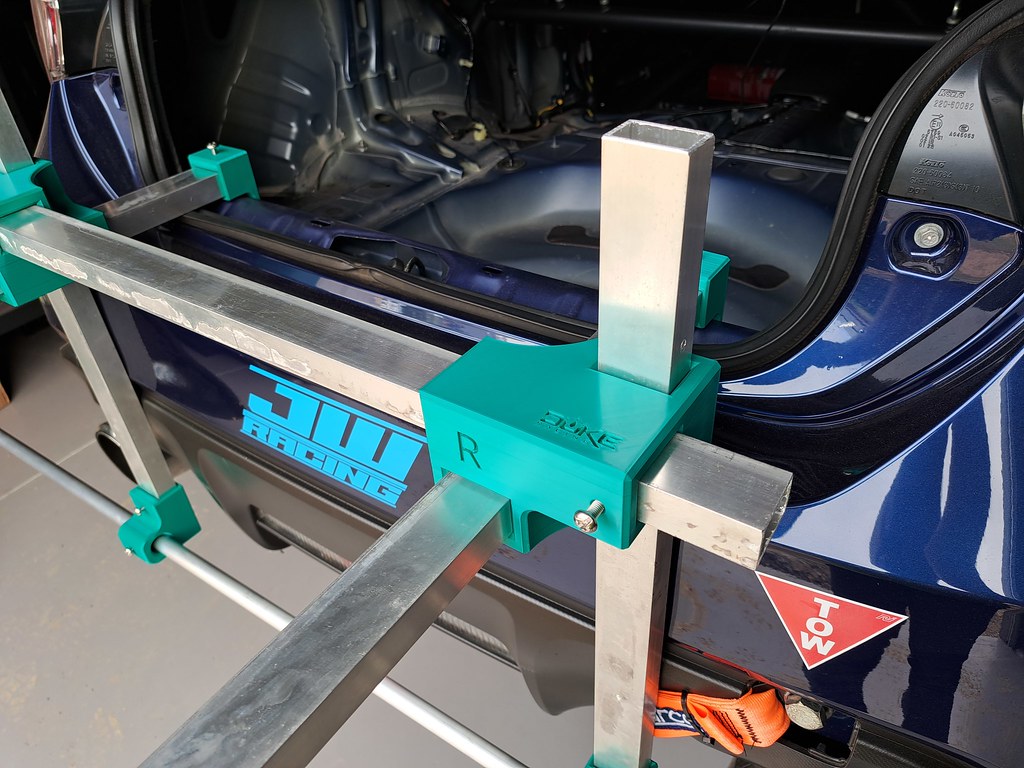
I drew some seat plates up in CAD and had them laser cut. There was a small amount of welding to do on them as the rear holes are recessed, then had the plates powdercoated. The cage is currently being made by AGI, it's their top spec national level cage. We can't put the dash back in properly until the cage gets here as we need to modify it so the cage passes through it.

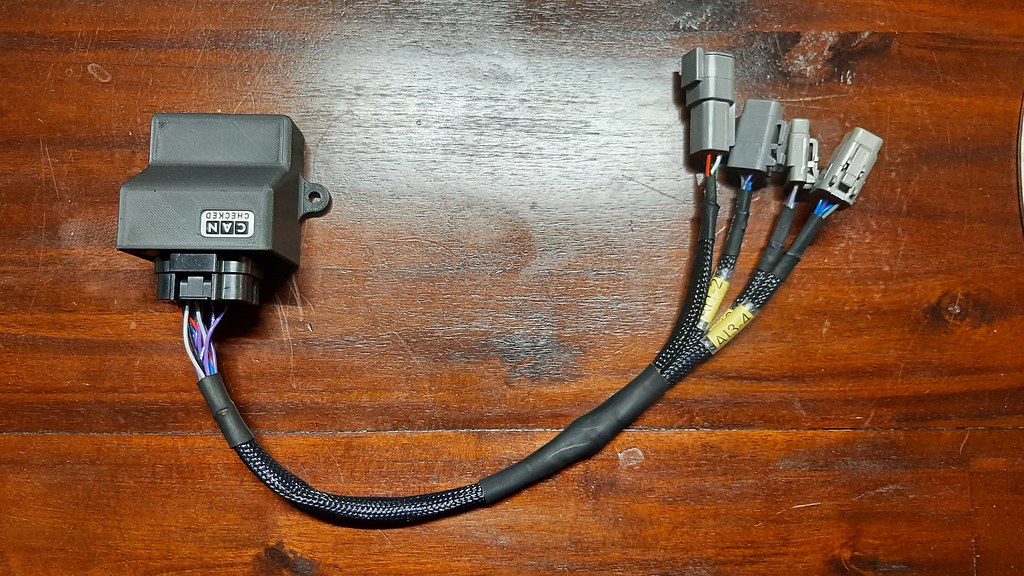
For the wiring, in the harness I made I added a spare CAN connector so I could add an expander. I ended up getting a CAN Checked unit and made a little sub harness. I will wire an oil pressure sensor to one of the DTM connectors and log this in the Motec via CAN. If we want to add more sensors as well later it's really easy (the expander route was more cost effective than paying for the I/O upgrade on the dash).
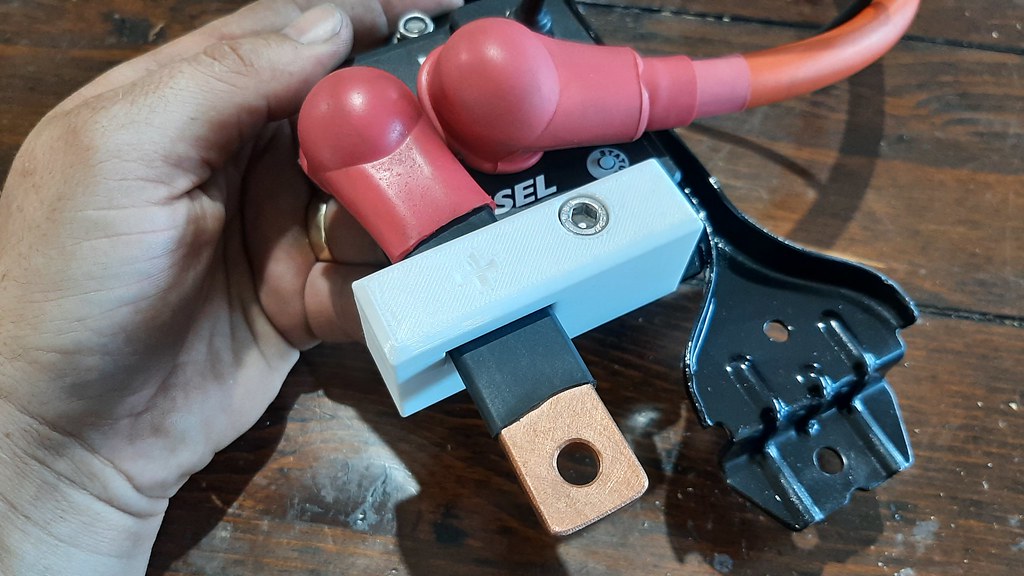
For the battery isolator, I ended up welding a bracket off the battery clamp. The relay bolts to this, and I designed a little support in CAD and 3D printed it. This supports a copper busbar for the load side, which extends out, enabling the existing positive connections to simply unbolt from the battery terminal and instead bolt onto the busbar. The support stops the bar from being able to rotate (which could loosten the connection) and also supports it vertically (to take the weight of the cables on the end of the bar). I just need to find or make a cover to cover the entire positive battery terminal and not just the connection point.


The pushbuttons for the isolator I installed in the wiper cowling (one either side of the car)

That's it for now, hopefully we get all the other bits and pieces and the cage done by early July and we can get the car out for a quick test. We're aiming on getting the car driving and logbooked before we start going down the path of upgrades.
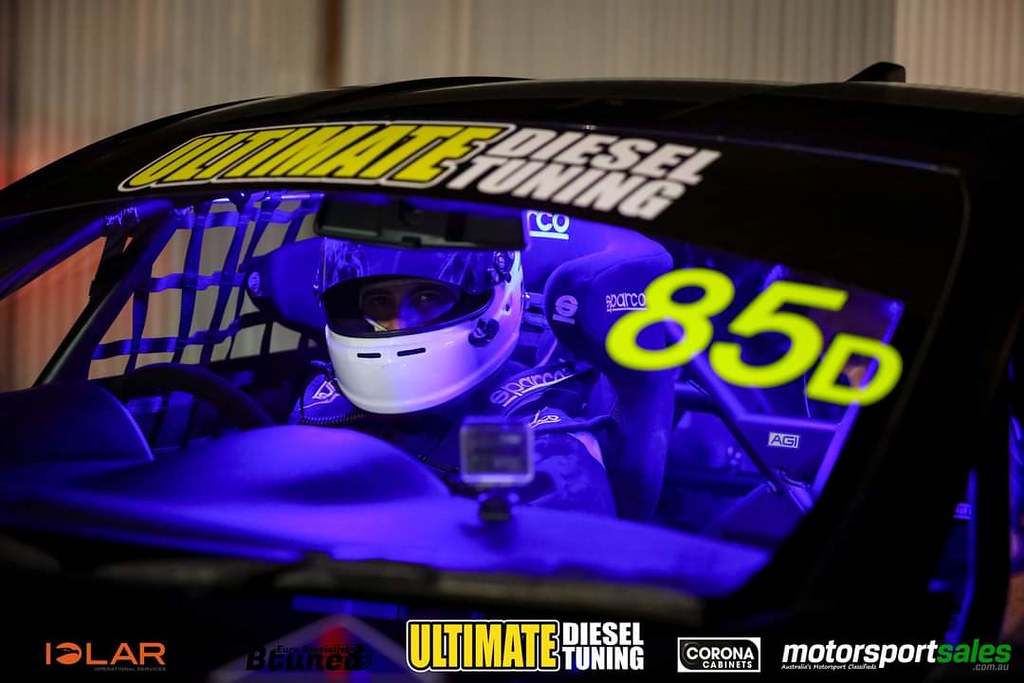
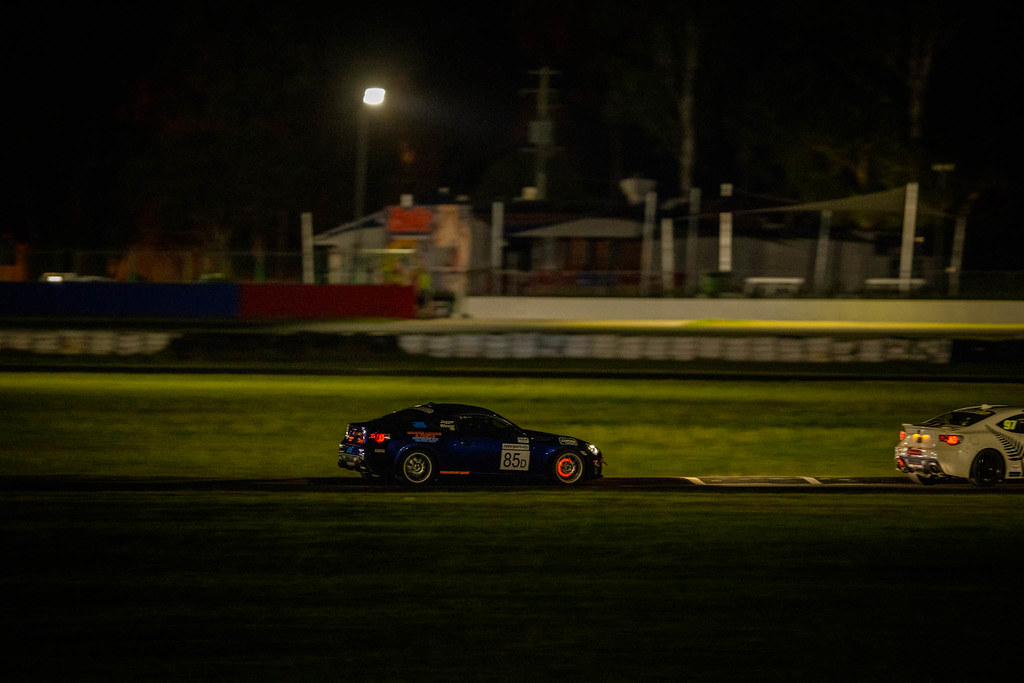
Thought I'd round up the year that was. The car is now logbooked and has done one race meeting. That race meeting was done when the car was still bone stock except for better brakes pads, fluid and tires but I still had a blast and it really motivated me to try and put together some plans to compete in that series full time in 2023. I've also been working away on the car to get it prepped for next year, which included going shopping for a bunch of stuff.
MCA Red Suspension, Brake Ducting Kit, new Circo pads for the front and DBA 4000 series rotors, Harrop Oil Cooler, Ecutek and for the exhaust, a set of SME EL headers, overpipe and non resonated front pipe, with muffler delete.
I also have tried to up my preparation game and have expanded on the tools I have at my disposal - including designing and 3D printing my own wheel alignment setup and now I'm working on my own set of corner weight scales, custom made using an Arduino Nano and 500kg load cells.
Some photos below of how things look now, the stuff I've made and some racing shots.


Nice build! I love how you integrated the Motec display in the dashboard.
Thanks, yeah the rules for 3E meant I needed to retain the OEM cluster so instead of putting it in front, I figured that location would work well.


