098 | Dyno Setup and Operation
Summary
Like any tool, the dyno needs to be understood in order to get the best possible results from it. In this webinar we’ll look at some of the basics of dyno operation using the mainline 4WD1200 rolling road. In particular we’ll focus on vehicle preparation prior to a dyno session and strapping the car to the dyno. We’ll then cover techniques for effective steady state and ramp run testing.
For this webinar we’ll be using our Nissan 350Z.
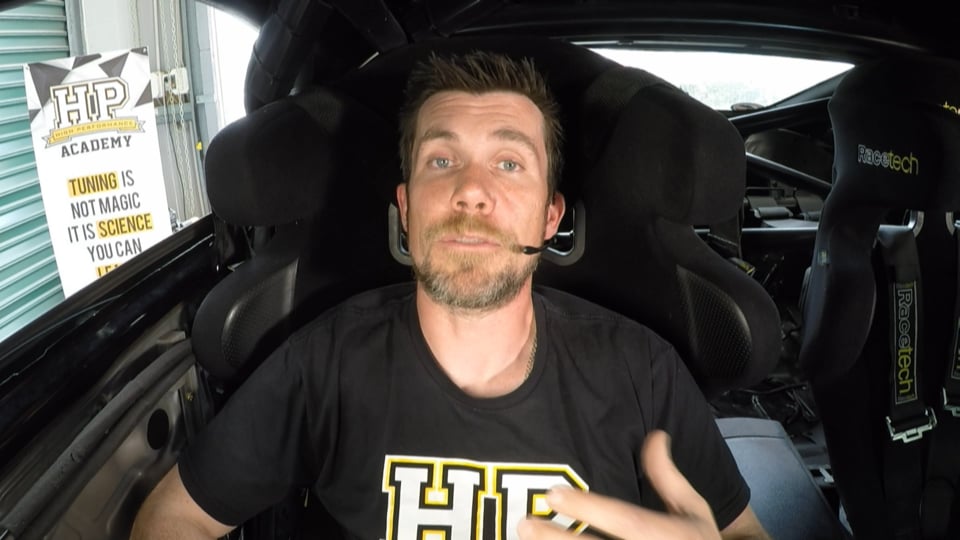
| 00:00 | - Welcome to today's webinar I'm Andre from the High Performance Academy. |
| 00:03 | And in this webinar we're going to discuss some of the basics of dyno operation using our Mainline four wheel drive 1200 dyno. |
| 00:13 | Now dyno operation and dyno tuning or tuning in general, obviously they go hand in hand and while we don't necessarily need to perform all of our tuning on the dyno, the dyno, particularly the chassis dyno is one of those tools that the majority of tuners are going to use and are going to rely on in order to perform their job and get the best results possible. |
| 00:40 | Now dyno setup, dyno configuration and the ways that we go about using the dyno are definitely an area that causes a lot of confusion, even for experienced tuners. |
| 00:53 | And also probably most importantly the way we go about using the dyno can have a dramatic effect on both our results in terms of absolute power and torque values but probably in my opinion, more importantly have a great impact on the repeatability of our results so it's really critical to have a good understanding about how to get the best out of a dyno. |
| 01:21 | Like any tool, that's all the dyno is, it's just another tool that we have in our arsenal and we need to have a thorough understanding of the pros and cons of that tool, its limitations and how best to utilise that for whatever task we're currently doing. |
| 01:40 | So let's start with what we're trying to achieve, I guess I've kind of addressed that slightly already and in my opinion, the repeatability of the dyno is the sole aspect that I rely on. |
| 01:55 | That is the most important thing for a dyno in my opinion. |
| 01:59 | And when I'm talking about repeatability, what I'm talking about here is the ability for the dyno to give us the same result exactly, twice in a row. |
| 02:09 | If we do two runs back to back, we physically haven't made any changes to the engine, and we haven't made any changes to the tuning. |
| 02:18 | Now this is critical and it might sounds like it goes without saying but I can assure you I've used dynos all around the world where I've struggled to do two runs back to back and get consistency or repeatability in the results. |
| 02:35 | Now not only that, we also really would like to think that if we tune the car and it's, let's say it's October now and then we bring the car back in three month's time and in three month's time that car has done no work, it simply at in a shed, we bring the car back, put it on the dyno, run it up in exactly the same way, we would like to also be able to get repeatability from one session to the next. |
| 03:02 | Now again the reason this is so critical, and as I say, it kind of goes without saying but I'm going to cover it off, is we need to know that when we've made a change, either a hard part that we've fitted to the engine, or a software change to our tune more fuel more ignition or whatever changes we've made in there, we want to know that when we run the car up on the dyno and we see a difference in our power and a difference in our torque, we want to know that that difference is a real difference, we want to know that that was a result of whatever change we've just made and not the result of a run to run variation. |
| 03:45 | So we don't want to be chasing our tail on those sorts of problems. |
| 03:51 | Now before I move on I'll also mention, as with all of our webinars, we're going to be having questions and answers at the end of this webinar. |
| 03:59 | I feel like this is going to be a webinar where we are going to get a lot of questions so please fire those into the chat box and Ben will transfer those through to me. |
| 04:07 | Feel free to start doing that as soon as you want so we have all those questions in there by the end of the webinar. |
| 04:15 | Now any time we're talking about dynos, it's impossible to talk dynos without talking about power readings and this is the source of constant arguments on the internet and really there's never going to be an end to this. |
| 04:32 | Now I guess I'm a little bit controversial on my opinion here. |
| 04:36 | Personally I couldn't care less if the dyno was reading in horsepower, kilowatts, megaponies or buckets or sand. |
| 04:46 | It simply doesn't matter what that absolute number that the dyno is punching out is. |
| 04:52 | The issue here is we go and run the same car on the same day on five different dynos in the same city and I can guarantee you that you're going to get five different results. |
| 05:04 | Even if two or three of those dynos happen to be the exact same brand, there's simply going to be differences in how a particular operator sets up and runs the dyno that will influence the power. |
| 05:15 | So when we're using a dyno, it's very very dangerous to chase absolute power numbers and that's my opinion there, I don't believe the absolute number is critical. |
| 05:28 | Of course if you want bragging rights for the internet, that's a different deal but I like to think that most of our HPA members are probably a little step above trying to get just the biggest number possible for bragging rights. |
| 05:44 | Hey maybe I'm wrong but that's my own personal opinion. |
| 05:47 | So really when it comes down to it, as I say it doesn't really matter what numbers, absolute numbers the dyno is producing, what we're looking for is what power number did we have before we started? What did we have when we finished our tune, have we gone forwards, have we gone backwards, what is the magnitude of that change? And when we're looking at it on that basis, it takes the absolute numbers out of the equation and a great example of this is for the absolute numbers is, our Mainline dyno that we're using now is obviously a rolling road chassis dyno. |
| 06:25 | We've got a tyre contact patch and that is, we're going to talk about that in detail during this webinar, that's the source of quite a lot of power loss and my previous dyno was a Dynapack hub dyno. |
| 06:40 | Before we moved out of our workshop and came to set up in Queenstown here for High Performance Academy, we ran our Nissan 350z up on the Dynapack dyno and I believe the number produced was about 183 kW at the wheels and on our Mainline dyno with exactly the same fuel, exactly the same tyres and exactly the same tune, it produces around about 143 or 144 kW at the wheels. |
| 07:12 | So it's a significant difference and that's why I say, if we're chasing absolute numbers, it can get really messy because that is the same car, almost on the same day and yet that's the difference in power that we can see just between two different dynos. |
| 07:27 | So yeah that just covers that off, I really feel that that's important to say. |
| 07:34 | OK so now we know what we're trying to achieve, we're trying to get a repeatable result, what do we need in order to be able to achieve that repeatable result? First of all, it should be pretty obvious, we need a quality dyno that's first of all capable of delivering repeatable results. |
| 07:52 | There are some really low quality dynos out there that will be challenging to get consistent results on. |
| 08:01 | I recall many years ago I was in Australia doing some tuning, I won't name the brand of dyno that I was using, it was a rolling road and I was tuning a 400, 500 kW at the wheels Nissan R32 GTR and I'd done about six or seven runs and we were getting some reasonable gains, I think we'd picked up around about 30 or 40 kW so everything was looking good. |
| 08:24 | Made a really small change with an increase to boost and did another run and promptly lost 15 kW which obviously wasn't what I was expecting to see. |
| 08:35 | And I sort of quizzed the owner of the dyno and he said oh yeah don't worry the dyno's just getting hot, that's what it does, when it gets hot the power falls away. |
| 08:45 | Now I was a little bit mystified about that but we cut short our tuning session. |
| 08:49 | The very next day, ran the car up again and the power we'd lost was regained plus another few kilowatts. |
| 08:56 | So just goes to show how frustrating it can be using a low quality dyno so we need a good quality dyno that's capable of achieving the results we want. |
| 09:07 | The other aspect, particularly when we're talking about a variation from one dyno session to the next is that it's important for the dyno to be monitoring and compensating for atmospheric conditions. |
| 09:20 | Now this is generically referred to as power correction and in my own experience 15 years dyno tuning with a variety of different dynos, while in the perfect world it would be nice to think that power corrections would be infallible and just work perfectly. |
| 09:39 | What I mean by this is if we tune a car, on a sub zero day in the middle of winter and then we wait until a scorching hot day in the middle of summer, run that car again. |
| 09:48 | Theoretically the atmospheric compensation should give us the same result, even though the actual power on the day may vary. |
| 09:57 | That's not quite the case, I've never really found it to work absolutely perfectly however it's important to obviously understand the implications of the power correction and how that's being applied by the dyno. |
| 10:11 | The other thing, and this is probably one of the most, behind a quality dyno, this is probably one of the most important aspects that we're going to talk about, is a consistent approach to putting the car on the dyno. |
| 10:24 | Particularly with rolling road dynos, and this is true of any rolling road brand, the way we actually put the car onto the dyno, how we strap the car down on the dyno and the way we prepare the car for the dyno will have quite a dramatic affect on the amount of power that the car produces or the amount of power I should say that the dyno actually shows us the car is producing. |
| 10:51 | So obviously if that's the case and we can vary the power based on our technique, we want to be very sure that our technique is consistent and repeatable, that's going to give us the best chance of getting good results there. |
| 11:06 | So we'll move on and talk about our vehicle preparation for a start. |
| 11:10 | And I'm going to start with some of the more basic aspects that unfortunately are often overlooked. |
| 11:18 | And that's the mechanical condition of the car. |
| 11:21 | And I always have a check sheet, be that actually a physical check sheet or something mental that I just go through, with every car that I put on the dyno. |
| 11:31 | And if we do this, what we're actually going to find is occasionally there's going to be a car that you refuse to run on the dyno and while at the time that may annoy the customer, if you've got your, you've got good grounds for not running that car in the first place, you feel there's something mechanically wrong with that car, then you've probably made the right choice because the dyno session was probably likely to end poorly and that's going to result in a customer that's much more angry when he has a conrod hanging out the side of the block or something similar. |
| 12:08 | So the basics go with oil level, we want to make sure that there is physically oil in the sump and it's at the right level. |
| 12:15 | Likewise we want to make sure that the water level is OK. |
| 12:19 | Another one to check for is are there any oil or water leaks that are obvious? If I've got a car that rolls into the workshop and it's basically a sprinkler, I'm not going to run that on my dyno. |
| 12:33 | At best it's going to make a hell of a mess of my dyno bay and at worst it's probably not going to end well mechanically for that car. |
| 12:42 | So if you've got problems like that, let's just get those fixed before we even go anywhere near the dyno. |
| 12:47 | Now exhaust condition is another one that's often overlooked. |
| 12:52 | Now if we're going to be monitoring air/fuel ratio with wideband exhaust gas sensor, we want to be very sure that there are no exhaust leaks pre O2 sensor. |
| 13:03 | Now what these can do, particularly under light load is they can actually allow ambient air to enter the exhaust system, that ambient air is going to affect our O2 or lambda reading and that's going to end up giving us a false air/fuel ratio. |
| 13:18 | So we want to make sure that our exhaust system is intact with no leaks and it's in good condition. |
| 13:25 | The other one which comes up with rolling road dynos as opposed to hub dynos, which can be a little easy to overlook is the wheel alignment. |
| 13:35 | This is actually quite important, we want to make sure that our wheel alignment is sound. |
| 13:40 | Just recently we had a Porsche racecar that came in for some dyno work and they'd just put the car back together, hadn't been near the wheel alignment machine yet and it had what looked by eye to be about 15 mm of toe out on one side and about 5 mm of toe on on the other side of the rear of the car. |
| 14:02 | Now that's not going to work too well on a rolling road dyno. |
| 14:05 | Just like driving on the track or the road, this is going to end up affecting the tyre wear, also it's going to affect the way the car wants to drive on the dyno, it's going to pull on the dyno and that's going to make it difficult for us to run. |
| 14:20 | The other thing as well, if you've got a car that's relatively high power that's running a lot of negative camber, that's going to reduce the tyre contact patch that's contacting the rollers on the dyno and this may be a cause of wheel spin. |
| 14:36 | So we want to have a sensible and realistic wheel alignment. |
| 14:40 | Albeit obviously it's not that practical if we're to go about setting the wheel alignment up specifically for the dyno and then have to adjust the wheel alignment again for the road or the track. |
| 14:53 | Tyre condition and tyre pressure are another two really key aspects here. |
| 14:59 | And we wan to make sure on our rolling road dyno that our tyres do have some tread. |
| 15:06 | We don't want anything that's worn through to the belts, this could result in a tyre blowing out on the rolling road dyno, that's not again going to end that well for either the car or our dyno so a little bit of common sense here is important, we want to make sure that our tyres are physically in good condition. |
| 15:25 | And essentially if we're not happy to drive the car on the road or track with the tyres probably shouldn't really consider driving on the dyno either. |
| 15:34 | Now tyre pressure is one of those aspects that can have quite a large influence on the power that the dyno is reading. |
| 15:43 | And generally what I like to do is check the tyre pressures on any car that I'm going to put on the dyno and set them at a fixed tyre pressure. |
| 15:53 | Now for me, I've ended up settling with around about 40 psi as being the sort of tyre pressure I like to run. |
| 16:01 | If we run a tyre pressure that's too low, and this can even happen at normal road going pressures, perhaps 28 to 32 psi, what this is going to allow the tyre to do is deform and particularly the side wall can deform when the engine is producing a lot of torque. |
| 16:22 | And what this does is the tyre deforms, it changes its shape on the roller and this results in a difference in the amount of power being absorbed through the tyre contact patch. |
| 16:34 | So particularly with low tyre pressures on a high powered car, we're likely to see the car showing less power on the dyno than if we pump the tyres up so that's one consideration. |
| 16:46 | The other key here is if we've always got a fixed tyre pressure that we're running. |
| 16:50 | and we're consistent with this, it's going to mean that in that session to session variation, we're less likely to see a problem there because we're always starting from the same tyre pressure. |
| 17:03 | Now I will point out, while we're talking about tyres, the actual tyre that you're using, that alone can show a difference in power. |
| 17:12 | And a good example there is our Toyota 86. |
| 17:16 | When we brought the car down to Queenstown initially, it was still on a road compound tyre, it was a Nitto NT05 tyre, so a high performance tyre but it is a road compound. |
| 17:28 | And I can't specifically remember now but I think it was producing at that point just short of 200 kW at the wheels. |
| 17:37 | Those tyres were just about at the end of their life so when those were dead we swapped to a Nitto NT01 which is a semi slick tyre, exactly the same tyre size, diameter, et cetera, however now we'd swapped to what is a stickier compound. |
| 17:53 | And straight away with exactly the same tune, those tyres showed around about an 8 kW drop in power. |
| 18:00 | That's just as a result of that stickier tyre physically losing more power through that tyre contact patch. |
| 18:06 | So that is a real consideration, particularly if the car that you're tuning has swapped tyres from one dyno session to the next, I wouldn't be surprised if that's going to affect the power that the dyno shows. |
| 18:19 | Now another aspect as well, just to do with that tyre contact, because this is so critical to the power the dyno shows, during a dyno session, the tyres are obviously going to change in temperature and heat up. |
| 18:32 | That's going to affect the rubber and it's also going to affect the tyre pressures. |
| 18:38 | So we're going to talk a little bit more about getting some heat into the entire car before we actually start chasing tuning changes. |
| 18:47 | And that's really accounting for aspects such as this changing tyre pressure and temperature. |
| 18:53 | OK so what we're going to do now is have a look at some strapping techniques and in order to do that, I'm just going to jump out of the car and we'll use a remote camera so I can show you around the aspects that I want to discuss. |
| 19:07 | OK so one of the most important parts when we're strapping the car, and at the moment we're viewing the rear of our Mainline dyno, we've got our 350z strapped down. |
| 19:19 | And we can see that we've got this unit in the middle of the dyno bed and it actually sits between the two rollers. |
| 19:27 | And this is designed to help us properly strap the car down. |
| 19:31 | One of the key mistakes people make when they're strapping cars onto rolling road dynos is that they strap the car back, they actually try and hold the car back and that's not what we want to achieve, what we actually want to do is strap the car down. |
| 19:48 | So what we really want to do is strap the car directly vertically down so it's being strapped into the dyno bed and that's exactly what this achieves. |
| 19:57 | So we can see here, we've got our straps and they run through some rollers and they come up over the lower control arm here. |
| 20:06 | And the key here is you can sort of see the angle of the strap in front of that control arm is vertically down and this unit as I've said does sit between our two rollers so you can see there that front knurled roller, that the car's going to try and climb up onto as we apply power. |
| 20:26 | Now conversely if we'd strapped the car backwards, when the car starts making, the engine starts making more power and starts trying to climb up onto that front knurled roller, strapping the car backwards tends to reduce the amount of traction that we have and that's actually a really good way of resulting in wheel spin. |
| 20:49 | Now moving on, just in the case of do as I say, not as I do. |
| 20:56 | We can see that the tread on the rear of our 350z is pretty marginal at best. |
| 21:03 | So as soon as this webinar's done, we're going to be swapping these tyres out so this is a really good example of exactly what you don't want to see. |
| 21:13 | That's OK, I'll be blaming myself if we have a tyre fail while I'm running this webinar. |
| 21:18 | Let's move on, now we're going to have a look at this rear wheel now from the side. |
| 21:24 | And this is again just demonstrating a couple of things here, one the way we're strapping the car. |
| 21:30 | We can see that we've got this channel that runs between the rollers, that's where that tie down unit that we've just looked at locates. |
| 21:38 | And it can slide between those two rollers so we can see physically we're actually strapping straight down and what that's going to do, as I've mentioned is pull the car down on the dyno rather than backwards. |
| 21:49 | Now the other important aspect of this is as the car produces more and more power and torque, what it's going to do is the car, the wheel will actually move forwards, it'll drive forwards onto this knurled roller and if we're using the tie down mechanism that we've just looked at, as the wheel moves forward up onto this roller, the car will generally tend to lift as it comes up onto that front roller and what that does is it has the effect of tightening the strap down so that that straps actually become tighter as the car moves forward and that gives us more traction. |
| 22:26 | Now while we're also looking at this wheel, I just want to talk as well about the side wall deflection, so this is what I was talking about with our tyre pressures and we want to make sure that we're running sufficient pressure so that this sidewall can't deform as we apply more and more power through the engine, so that again is going to give us that consistency of our results. |
| 22:50 | So keys there, we're trying to strap the car down, we're not trying to strap the car backwards, we want to run high tyre pressures that aren't going to allow the tyres to deform and we want to make sure we're monitoring those tyre pressures so they're consistent. |
| 23:06 | Now we'll move forward and we'll have a look at our chocks which is the last aspect that I want to discuss. |
| 23:11 | So if we come to the front of the car, we can see a couple of aspects here, first of all we have our front dyno bed. |
| 23:19 | Now obviously we're two wheel drive at the moment so we have a plate that's located over that dyno bed, makes it nice and easy to drive the car over the front bed. |
| 23:29 | Now I've played around with this a little bit myself because we've had this dyno as both two wheel drive and four wheel drive. |
| 23:37 | Initially when we had the four wheel drive bed added, I actually had the front wheels located on these trays and it actually upsets the balance of the car. |
| 23:54 | What we end up with is the front of the car quite high, the back of the car's already low because it's sitting down in the rear bed and I was finding that I was seeing a power discrepancy just with that. |
| 24:08 | So what we've done is consulted with Todd and Craig from Mainline. |
| 24:12 | We've tried moving forward and I'm getting much better consistency with this technique so we're actually sitting as you can see, forward of the front bed. |
| 24:22 | And we have these chocks here. |
| 24:25 | These are really one of the keys, particularly with a low powered car we can actually rely solely on the chocks to stop the car moving on the dyno, we'll talk about that a little bit more but what we can see is the chock is sitting in front of the front wheel but it isn't hard against the tyre. |
| 24:43 | We actually have a gap in here and what that's going to allow the car to do, as the car produces power, starts to drive up onto that rear roller, the front of the car or the whole car's going to move forward onto these chocks and what this does is it allows the car to actually transfer all of its weight essentially at the rear, onto that drive roller and that's going to give us the best traction as well as the dyno will show us the most amount of power. |
| 25:15 | Alright that's a quick tour of the installation of our 350z on our Mainline dyno. |
| 25:23 | You guys have all seen this before from the outside of the car anyway. |
| 25:27 | I'll just jump back into the car now and we'll continue. |
| 25:31 | OK so continuing the conversation regarding the strapping and the chocking techniques, and this is one of the areas that I was a little nervous with when we first purchased our rolling road dyno. |
| 25:45 | Obviously coming from a Dynapack background, the car's physically bolted to the dyno, there is no way that that car is getting off the dyno. |
| 25:52 | Now I'm sure everyone's seen YouTube compilations of dyno fails and that was the last thing I wanted, particularly to occur while we were in the middle of a webinar or something like that. |
| 26:05 | So I was obviously always very nervous about the car physically jumping off the dyno. |
| 26:09 | And what that resulted in was I ended up strapping the car down, every car that came in I strapped the car down really tightly. |
| 26:18 | And what we were getting was quite low power readings and I really wasn't 100% sure why that was the case. |
| 26:26 | So it wasn't until again we'd gone through this with Todd at Mainline and looked at the options and essentially, and again this can sound a little scary, if the car's producing less than around about 200, maybe 250 kW at the wheels, it's not actually essential to strap the car at all. |
| 26:46 | And what we can do is simply rely on those chocks in front of the front wheels, allow the car to move up onto that roller and forward onto those chocks and if we do that, that's going to allow all of the power to be transferred into that drive roller and that's going to show us the most power on the dyno. |
| 27:06 | Now I know that can be a little bit daunting and I've done it plenty of times, I've done if for you guys live in webinars, I've done it for public webinars and it does work exceptionally well. |
| 27:17 | If you are a little bit nervous about this and I do understand, the option you have there of course is to just strap lightly and really use those straps there as a safety mechanism in case the worst happens, one of the chocks falls out of the way, as opposed to actually relying on the strapping to hold the car on the dyno. |
| 27:42 | The other aspect that's worth discussing here as well before we move on while we're still talking about strapping is front wheel drive and four wheel drive cars. |
| 27:50 | These are a little bit more challenging, particularly the front wheel drive cars because often you've got so much going on in the front of the car that it can be difficult to actually strap the car down. |
| 28:03 | And just last week I had a Mini Clubman S in for some work and we ended up strapping that car from the bottom arms but that entails, we do end up strapping the car almost very slightly backwards. |
| 28:19 | So again there what you want to do is strap the car, you're more really concentrating on strapping it side to side to stop the car moving and we don't really want to apply too much pressure to those straps so again we're still allowing the car to move up onto that drive, roll onto that knurled roller as the car comes on power. |
| 28:39 | And particularly with a front wheel drive car, if we strap the car too hard, you're going to find problems with wheel spin which was one of the issues I initially fought with the Mini. |
| 28:51 | Now one of the things here is if you're dealing the same or similar cars over and over again which definitely a lot of professional workshops, that's exactly the scenario they're going to be in, this makes your life really easy because you always find, for a certain car, you know exactly where the good points to strap that car from are, it makes it quick and easy to get that car strapped down and ready to go. |
| 29:19 | It's a little bit more challenging when every car you see come through the door is slightly different, there's always a learning curve involved with finding out what particularly works for that model and where your options are on strapping the car. |
| 29:33 | One last point about getting the car physically on the dyno, and this involves, if you've got a rear wheel drive car on a four wheel drive dyno, I know that a lot of operators will physically sit the car down in both the front and the rear beds. |
| 29:50 | And while this will work, what it means is the front wheels sitting in that front bed and being non driven, they aren't going to allow the car to come up, move forward out onto that drive roller at the rear and that's going to cause problems, potentially with wheel spin and definitely it's going to show you less power on the dyno than if you were to allow the car to move forward on the roller while it's running. |
| 30:20 | OK so that's a bit of a description on the key points there and really all of these aspects are all about trying to build some consistency with the way that you install the car on the dyno, physically strap the car down on the dyno and if you get that consistency, that's going to allow you to get better results, better repeatability and that's really as we've discussed, that's the key, that's what we're trying to achieve. |
| 30:47 | That's going to let us do a better job and get better results. |
| 30:51 | Now what we're going to do is actually have a look at the ways we can use the Mainline dyno for our tuning and again, you've probably seen some of these techniques already in some of our webinars, however I'm going to go into a little bit more detail on exactly what I'm doing here. |
| 31:09 | So what I'll do for a start is we'll just get our engine started up and running. |
| 31:13 | And for this demonstration I am going to be using the Link G4 + software although this isn't about the ECU I'm using, this is really simply about us running the dyno. |
| 31:26 | So when we're talking about the dyno operation, we're going to be separating it into two parts, we're looking at steady state tuning and we're looking at ramp runs and I just want to go through a few tips with that now. |
| 31:43 | So the first part I'm going to talk about, and this is one of the most common questions we get, is what gear should I be performing my tuning in? Now there is no one size fits all answer here. |
| 31:58 | In general, what I tend to do is try and choose a gear that's relatively close to 1:1, so in a five speed gearbox, that's probably going to be fourth, a six speed gearbox that might be fourth or fifth. |
| 32:13 | What we're going though is essentially we're trading off road speed for torque at the rear wheels and particularly in a high powered car, as we use a lower gear the torque multiplication through the gearbox and the differential means that we've got more torque being produced at the tyre contact patch and the upshot of that is if we're traction limited, this can result in the car being more likely to wheel spin. |
| 32:42 | If we use a higher gear we're going to end up with a higher road speed and that may exceed the limits of your dyno depending on where exactly those sit. |
| 32:53 | So fourth gear is generally a pretty good place to be. |
| 32:57 | And what I'm going to do is we'll just get our car running here and what I'm going to do is demonstrate how we can use the gearbox to help us with our tuning. |
| 33:09 | So what I'm going to do now, if we can just go to my laptop screen, and I'll just bring us up to 2500 RPM. |
| 33:23 | OK so at the moment I'm in fourth gear and I'm just using the keyboard just to adjust the roller speed on the dyno. |
| 33:33 | Just go down a little bit. |
| 33:35 | So we're sitting at 2500 RPM now. |
| 33:37 | Now if I increase my throttle position. obviously our load increases. |
| 33:46 | If we want to get down into the very light load areas, so I'm talking about these areas right down here. |
| 33:54 | These are the areas that we're going to be accessing when we're just barely touching the throttle and creeping along the road maybe at cruise or even potentially going slightly downhill and just barely touching the throttle. |
| 34:08 | Now what I'm going to do as I'm closing my throttle down, we're down to -65 kPa now and I'm just going to close my throttle a little bit further and you can see what's happened here is our engine speed has actually dropped, instead of 2500, we're now down at 2400 and as I continue to close the throttle, we see that our engine speed decreases. |
| 34:31 | Now this is because we need a certain amount of torque to physically keep the dyno spinning so if we don't have enough torque to keep the dyno spinning, the dyno just allows the engine to slow down. |
| 34:43 | So this makes it really hard to get into these lower load areas of the map that I've got highlighted here in red at the moment. |
| 34:50 | Now obviously we're not going to ever be able to get into all of them, we're not going to be getting down to -100 kPa, that's an absolute vacuum. |
| 34:58 | But there's a really good chance, if we do all of our tuning in fourth gear, that we're going to end up not being able to access some of the cells on the dyno that we likely may get into when we're on the road. |
| 35:12 | So what we can do, if we just bring out road speed back down, what I'm going to do is I'm just going to change down and I'm in second gear now. |
| 35:20 | Now with second gear what happens is we end up with more torque multiplication from our gearbox and you can see now, I'm sitting at 2500 RPM but I've got down into our -70 kPa cell. |
| 35:38 | So I've only managed to get down another 5 kPa but hey that's still a difference. |
| 35:42 | We've got down to a cell that we couldn't previously have tuned. |
| 35:47 | And perhaps if I go down into first gear, we might possibly be able to just nudge down into this -75 kPa site. |
| 35:55 | So that's my first little trick there. |
| 35:58 | If we use the gearbox to our advantage, and we use the lower gears this can let us do a reasonable job of getting down into some of these lower load cells that we otherwise wouldn't be able to tough and this lets us do a more complete job of our tuning on the dyno. |
| 36:16 | Now obviously if we're still in second gear and we then go to wide open throttle, this is going to end up with more torque multiplication as we've already discussed, we're much more likely to end up with wheel spin. |
| 36:27 | So we don't want to be doing out full power tuning still in second gear. |
| 36:32 | That's just a demonstration of why we don't always want to use the same fixed gear, understand how the gearbox works, understand how we can use that to our advantage. |
| 36:43 | Now the other aspect, let's just jump back into fourth gear here. |
| 36:47 | And the other aspect that I want to talk about here is the way the engine RPM versus road speed works. |
| 36:56 | So if we're tuning on a rolling road dyno like this, the dyno's control point, what it's actually trying to control is simply the roller speed, the road speed and it's assuming there that there is a direct correlation between our roller speed or road speed and our engine speed. |
| 37:18 | Now for a manual transmission gearbox, within reason that should be the case, but remember we've talked a little bit here about tyre deformation. |
| 37:28 | And that's a very real problem so what I'm going to do is give you a quick demonstration of that now. |
| 37:34 | So what I've done is I've brought the engine speed, let's just have a look here only at the laptop screen. |
| 37:40 | We've got our engine speed up to 3000 RPM as you can see by the RPM dial here and you can see at the moment I'm at 16% throttle and you can see that we're sort of hovering around this -65 kPa zone. |
| 37:56 | So at the moment we've got 3000 RPM on board. |
| 37:59 | Now if Ben can just quickly show the dyno screen here, we're going to go back to my laptop screen but for the moment we can see that our set point, our speed set point for our dyno is set to 80 km/h and remember this is the part that the dyno is trying to control. |
| 38:17 | OK let's just back to my laptop screen now. |
| 38:19 | So what I want you to do is watch our RPM number, what I'm going to do is smoothly go to wide open throttle. |
| 38:30 | OK so I'm sitting at wide open throttle now and you can see that our RPM has actually increased up to 3150 RPM. |
| 38:39 | So we've got a 150 RPM increase just because we've gone up to full throttle. |
| 38:45 | And that's a results of the tyre deforming on the roller, the car moving forward onto the roller and undoubtedly probably some very minor amount of wheel slip that has crept in there. |
| 38:59 | Now that's not necessarily a problem but also understand that we're dealing with a very low powered car here with our 350z. |
| 39:05 | It's quite easy to see the RPM increase on a turbocharged engine by 200, 300, 400 RPM and that makes it a little bit more difficult to deal with when we are steady state tuning which is what we're doing now. |
| 39:21 | So let's just jump over to our dyno screen and I'll show you a feature that the Mainline has. |
| 39:28 | Now if we, I don't actually have it on this screen, the Mainline dyno currently is getting engine RPM data from the Link ECU via CAN. |
| 39:38 | So it has a valid RPM signal. |
| 39:41 | Now if I press the T key, we can see that our RPM or speed now shows this enunciator here that says tacho trim. |
| 39:50 | So now what the dyno is doing, rather than using road speed as a set point, it's actually using the RPM as the set point and we can see now, we're still seeing 80 km/h being displayed. |
| 40:04 | We can see in yellow we've got 3001 RPM so that's out current set point. |
| 40:09 | I can increase that or decrease that exactly the same way as I could increase or decrease my road speed set point. |
| 40:16 | And in white below this, we're seeing our current engine RPM. |
| 40:20 | So what I'm going to do now is we'll jump back to our laptop screen and we're going to do exactly the same test so again what I want you to do is watch our engine RPM. |
| 40:31 | I'm just going to smoothly go through to wide open throttle and you can see now rather than our last test where we ended up at 3150, we're now sitting right on our set point of 3000 RPM. |
| 40:47 | So that tacho trim feature, if you're doing steady state tuning, is a really really powerful tool and it's going to mean that you don't have to constantly adjust the dyno speed set point as you increase or decrease your throttle input while you're steady state tuning, you're going to be able to stay straight in one of those RPM columns and move up or down that RPM column and the dyno's going to do all of that hard work for you. |
| 41:13 | Now there's a couple of ways of getting that RPM input into the dyno. |
| 41:17 | Obviously as we're using here, I'm getting it via CAN. |
| 41:20 | And that's a really nice easy way of doing that. |
| 41:24 | The other aspect is we do have an RPM or tacho module on our dyno so we can physically hook up straight to an ignition lead or a coil signal wire and get our tacho signal straight from that so there's a few ways of dealing with that. |
| 41:41 | OK so now what I want to talk about is going through and doing some ramp runs. |
| 41:48 | And we can do that by pressing F2 on our Mainline dyno so let's have a look at our dyno setup. |
| 41:56 | And this is our main dyno setup screen. |
| 41:59 | This is the screen we're going to watch during our ramp run. |
| 42:03 | What I'll do is I'll just bring the scaling down to something that's a little bit more realistic for our Nissan 350z. |
| 42:10 | Actually we can probably go down, this would be a pretty good day if it made 200 kW at the wheels. |
| 42:15 | Now a lot of the setup, or most of the setup that we're going to do here can be accessed with the setup button. |
| 42:23 | And part of it's quite nice and easy, what we've got here is our start speed. |
| 42:28 | So again the dyno, everything the Mainline dyno does is defined around roller speed. |
| 42:36 | For our purposes, or at least for my own, the way my own brain works, that's not particularly useful. |
| 42:42 | I really hate looking at dyno plots where the X axis is speed. |
| 42:47 | It means nothing to me, I really need to relate that to our engine RPM. |
| 42:52 | If I'm looking at a dyno plot and I know that the air/fuel ratio is lean at 120 km/h, that is not useful to me how does that relate to RPM 'cause it's the RPM axis that I'm using when I'm making my fuelling or ignition changes. |
| 43:07 | So because we've got a derived RPM input, so this is coming in this case from our ECU via CAN. |
| 43:15 | Any time I adjust our start point, you can see the RPM is straight away adjusted below this and it's showing us here the derived RPM is 23.9 km per thousand RPM. |
| 43:28 | So we're starting our run at 1880 RPM, generally unless I've got a really grumpy engine, that isn't happy running at such low RPM, I'm probably going to start my run somewhere around about 1500 to 1750 RPM. |
| 43:43 | Now I've got my end speed, so this is the end of our run. |
| 43:47 | So in this case I'm going all the way out to our rev limiter at 6500 RPM which is equating to 155 km/h. |
| 43:56 | So those two parts are relatively straightforward, we've got our start speed or RPM, we've got our finish speed and RPM and we're going to basically relate those parameters to what we're trying to achieve with our run. |
| 44:07 | And once we've got our engine tuned, generally as I've said, we're going to try and do a run right through the entire rev range. |
| 44:15 | The other aspect that I get questions about quite frequently is our ramp rate and how do we set this. |
| 44:21 | Now what we can see here is we've got the ability to set a ramp rate in km/h per second. |
| 44:27 | Again, the dyno is showing us that at the moment, with a ramp rate of 10 km/h per second, we're going to be ramping through at 418 RPM per second. |
| 44:38 | Now much like choosing the gear to run the car in, there isn't necessarily a right and a wrong way to do this. |
| 44:46 | What we do need to understand is that the ramp rate we choose is going to affect the power that the dyno displays. |
| 44:54 | You can imagine if we do a very very short ramp run and perhaps we try and ramp from 2000 to 7000 RPM over just a couple of seconds, there's very very little load being placed on the engine so the dyno's not going to show us very much power. |
| 45:09 | Generally what I like to do when I'm doing my ramp runs is try and choose a ramp rate that's relatively realistic to the speed the engine will actually accelerate out on the road or the racetrack. |
| 45:21 | Now generally that's obviously going to depend on how much power the engine makes, it's going to depend on the gearing et cetera. |
| 45:28 | Somewhere in the region of about 400 to 500 RPM per second is a reasonably good compromise there and that's going to give us realistic results. |
| 45:39 | Now again if we're using a consistent ramp rate, it's not going to affect our power reading either so that's not going to matter. |
| 45:47 | But what we want to do is choose a realistic ramp rate so we're applying a reasonable amount of load to the engine and we're going to get realistic results from our testing. |
| 45:58 | What I quite often will do, particularly on an engine that is knock sensitive or is making quite a lot of power and being driven very hard, once I've finished my main tuning with a normal realistic ramp rate, what I will quite often do is do one or two runs with a much longer ramp rate. |
| 46:20 | Now what this is going to do is give the engine a much harder time on the dyno, it's going to load it up much harder, it's going to be under load on the dyno for much longer and what this means is if during that ramp run, this really long ramp run with a high load applied to the engine, we don't end up with the engine suffering from knock for example. |
| 46:41 | I can be relatively sure that when I release that car off the dyno and send it out onto the road or the racetrack I'm going to be confident that under the worse case conditions on the dyno, the engine tune was safe. |
| 46:51 | I'm going to be confident that it's also going to be safe out in the real world. |
| 46:58 | OK so we've talked a little bit here, or a lot here about getting consistency in our results and I want to talk about what we need to keep in mind in order to do that with our ramp runs. |
| 47:11 | Now first of all we want to make sure that our engine, our whole car really is up to operating temperature and that the temperatures that we use at the start of our runs are always the same. |
| 47:28 | So in this example what I'm talking about here is we would like to start our ramp runs with the same inlet air temperature, the same engine coolant temperature and ideally, while we might not be monitoring it, the same gearbox temperature and diff temperature. |
| 47:43 | Now as I say we probably won't be monitoring those but generally after we've done four or five back to back runs, we can assume that probably our gearbox and diff will have reached some sort of equilibrium temperature and from then on we're probably going to see little change. |
| 48:00 | Now in order to do this, what we can do at the start of our dyno session is perform four or five back to back runs before we actually try and make any changes. |
| 48:09 | And generally I'm not going to try and make any tuning changes until I can at least get some consistency run to run. |
| 48:18 | Once I'm seeing, actually I'll move back a step, it's quite common for example when you do your first run on the dyno and everything's cold, the dyno's cold, the gearbox and diff are cold, it's quite common over the first two or three runs to see the power pick up perhaps five or even 10 kW from one run to the next. |
| 48:38 | Once everything settles in, we're going to get that consistency and then we should see the power being relatively repeatable from one run to the next. |
| 48:48 | One other aspect that I often get asked, and we're going to move into some questions and answers shortly so again this is the perfect time to ask those questions if you've got them. |
| 49:03 | Another question I quite often get asked is how can I tell if the car is wheel spinning on the dyno? And that is a very real concern, particularly on a rolling road. |
| 49:16 | Another aspect that you'll quite often come across which is just as important and can be just as tricky to define is if the clutch on a manual transmission car is slipping and both of these are situations we do want to look at and be able to understand. |
| 49:33 | So first of all, let's have a quick look back at my laptop screen and hopefully this datalogger's been going forever, hopefully I will have some data, and I do. |
| 49:45 | Let's have a look at this data here and what I'll do is just get rid of a couple of groups here that we're not really that interested in. |
| 49:53 | And what we can do is have a look at our RPM trace during our ramp run. |
| 50:02 | And remember the dyno is producing or providing a consistent ramp rate in terms of RPM per second and what that should equate to on our datalog is a relatively smooth and flat shape to our RPM trace which is exactly what we can see there. |
| 50:22 | Now if on the other hand we're seeing the RPM start exponentially increasing part way through our ramp run and this is generally, particularly if a clutch is slipping, this is going to happen around about peak torque, same with wheel spin, this is the area where we're most likely to end up overcoming traction. |
| 50:40 | So if we're seeing something that looks a little bit like this, in that case that's indicative that we either have wheel spin or we have a problem with our clutch and we need to address that. |
| 50:52 | Let's just jump back to our dyno screen though and the other way we can define this is here on the Mainline dyno, we've got this graph that we're looking at down here at the bottom which is called, it's a calculated channel called engine RPM to dyno speed. |
| 51:10 | So this is essentially giving us a correlation between our roller speed and our engine RPM, remember the engine RPM is coming in from the ECU via CAN. |
| 51:20 | And what we essentially should be seeing is a relatively straight line which we've got here. |
| 51:27 | You can see that there is a slight angle to that line and there is again some deformation of the tyre. |
| 51:34 | There's undoubtedly some very minor amount of wheel slip occurring there anyway. |
| 51:38 | But what we would expect to see if we're getting wheel spin or clutch slip is a dramatic bump or change in angle on that line so when we've got something like this, this is indicative that we've got good results that we can rely on. |
| 51:53 | OK we're going to move into questions now, again I'll just give a quick recap. |
| 51:57 | Really the key aspects that I've gone over is in order to be able to do our job as well as we can and get the best possible results, what we're really relying on is repeatability and this comes down to both the quality of the equipment we're using, just as importantly it comes down to our techniques of how we're installing the car and how we're running the car on the dyno. |
| 52:19 | And if we understand the implications of how we strap the car on the dyno, aspects such as the way engine intake temperatures, gearbox and diff temperatures are going to affect the way the engine performs and the power we're measuring as well as obviously our tyre pressures, this is going to give us the best possible results. |
| 52:43 | Right we'll have a look and see what questions we've got here. |
| 52:49 | Only a couple at the moment so our first one comes from TDE Champ who's asked, can the strap be too tight and can it possibly damage stock stamped control arms versus the nice round aftermarket arms? Yes actually it can be too tight and that's a really good question I should have covered there. |
| 53:05 | If we've got the straps too tight, it's unlikely that we're going to be damaging or risking damaging the arms and in fact we probably actually need to strap the car a little looser than most people would initially think. |
| 53:20 | What I generally do on a high powered car is I'll strap the car down quite tightly and then I'll actually back the straps off and what this does is it gives the straps and opportunity to settle and normalise. |
| 53:31 | I'll back them off and then I'll just strap them so it's snug and then go one click further and again this gives me some consistency if I've got the same technique I'm applying to every car. |
| 53:43 | Now if we strap the car down too tightly it's not going to necessarily cause any damage although it is going to be applying a lot more load and a lot more stress to the tyres. |
| 53:55 | But what we are going to see is it's going to result in less power being displayed by the dyno. |
| 54:02 | So in some instances, it's a bit of a learning curve with a particular model of car. |
| 54:06 | We want to try some various techniques and see how that affects the power and it's a balance between strapping the car down tight enough that it isn't going to wheel spin and not strapping the car down so tight that it's really choking down the power that the dyno is able to display. |
| 54:25 | Barry G has asked, does the dyno roller size play a role in how much power the dyno can support? Yeah look this is a question I've seen crop up on the internet from time to time. |
| 54:38 | And my guess is yes it will. |
| 54:42 | Our own dyno is rated at around about 1000 horsepower, two wheel drive and this sort of really comes down to about the limit of traction. |
| 54:53 | We haven't got anywhere near that point right now. |
| 54:56 | Depending on the way, the type of engine we're tuning or running on the dyno, will also affect the outright amount of power the dyno can absorb and can control so I mean there is an engine that's got a really aggressive torque curve that jumps up massively over a relatively short period of RPM, that's going to be much much more difficult to control on the dyno. |
| 55:19 | But in terms of our small rollers that are common on these Mainline dynos versus the likes of possibly the large five foot diameter single rollers that we see with some of the Dynajet style inertia dynos, obviously the larger the roller diameter, that's going to affect the tyre contact patch and that in itself will have some impact on how much power we're able to get through that tyre contact patch. |
| 55:46 | So yeah I guess the answer is yes it can have an influence. |
| 55:49 | It's not something in our experience right now we've had issues with. |
| 55:54 | Hopefully we'll be able to put it to the test with one of our test cars in not too distant future. |
| 56:04 | OK Tyler has asked, you already talked about this but how does the ramp rate chosen affect the power output the dyno sees? OK so the way I like to describe this is if we take the worst case scenario where we're actually running the car in steady state. |
| 56:21 | So in this case the engine isn't accelerating, at all, the RPM is fixed so all of the torque being produced by the engine is being concentrated on the tyre contact patch and being fed into the load cell on the dyno and being measured. |
| 56:36 | Now if we take that to the extreme and now we're using a very very fast ramp rate or reasonably fast ramp rate, what's happening now is some of that torque is being used to accelerate the dyno and accelerate the engine so we tend to see a slightly lower power figure as we increase the speed of our ramp rate. |
| 56:59 | So that's generally the correlation I see. |
| 57:01 | As the ramp rate increases, the power that we see being measured by the dyno tends to decrease slightly. |
| 57:11 | Barry's asked, if the final drive is very tall, is it possible to overspeed the dyno and what happens when this condition occurs? Yeah absolutely, most dynos your'e going to find will have a road speed limit. |
| 57:25 | I know that the Mainline does, I cannot recall off the top of my head exactly what that is. |
| 57:32 | In fact I will be able to because while I'm just talking to you, 240 km/h, I just jumped back to the main screen and that's the limit of the speed dial from recollection. |
| 57:44 | So yeah I mean we need to choose a gear that's going to allow us to reach the rev limiter or wherever we want to be within the realms of the dyno's maximum speed rating as well. |
| 57:57 | Believe that if we try and exceed the speed limit of the dyno then the dyno will prevent that happening, obviously to prevent damage to the eddy current power absorber. |
| 58:07 | So that's something we do need to keep in mind. |
| 58:10 | Tyler has asked, if your chassis dyno can only measure wheel speed, do you have to tell the dyno what gear you're in to make sure your road speed matches engine speed? No if we're running a car here on our Mainline dyno and we don't have an RPM input, so obviously we're getting that via CAN but we've also got the option of the direct tacho pickup, if we have neither of those, that's OK, we've still got options. |
| 58:36 | What we can do when we're setting the car up on the dyno is we can run the car at a fixed RPM and then we can go through a setup process and what we do is essentially tell the dyno what the current engine RPM is, obviously the dyno knows what the road speed is, and then it does its own correlation for derived RPM based on those two parameters and that's then going to allow us to display engine speed on the X axis of all our graphs. |
| 59:03 | Now obviously because this is derived solely based on our roller speed, it's not going to allow us to use that tacho trim function that I've demonstrated to you, that's going to require an actual accurate real time input from our engine giving engine RPM. |
| 59:22 | Barry has asked, do you have any safety pointers when operating a dyno besides strapping down the vehicle correctly? Is it safe to apply brakes abruptly during the dyno run? No we definitely don't want to do that. |
| 59:35 | OK so my main points here are the strapping is the key point, making sure that the car is correctly chocked and that's going to make sure that we're not going to end up with a car getting off the dyno. |
| 59:52 | During every dyno run and this really, it's no different, I did exactly this when I was using hub dynos as well, I tend to hover over the clutch pedal the whole time I'm running the car on the dyno. |
| 01:00:06 | Particularly during any full power ramp runs. |
| 01:00:08 | And what this does is it allows me to instantly I'm not happy with anything, maybe there's a mechanical problem with the car on the dyno or perhaps I'm just unhappy with the tune, maybe my air/fuel ratio's just started to move lean or I've heard the engine knock, what I'll do is straight away punch the clutch and back off the throttle and abort the run. |
| 01:00:30 | So that's a really good safety aspect there, that's going to prevent, hopefully prevent any damage and we can correct whatever's going on and go through and do another test. |
| 01:00:40 | Now we can use the brake on the dyno but definitely we want to be a little bit cautious about how much effort we apply on the brake. |
| 01:00:52 | Generally we'll use it when I'm slowing down from a ramp run, I might just slightly apply brake and bring the RPM or the road speed back down a little bit quicker. |
| 01:01:03 | What you tend to do on a rolling road though is build up a bit of a feel for the car on the dyno. |
| 01:01:11 | Now this is obviously difficult for me to express via a webinar but what I mean by this is when we're doing a power run, what we'll actually feel from the driver's seat is we'll feel the car move onto the roller, we'll feel it move up onto the roller and likewise after a ru if we're applying the brakes we'll get a feel for how much brake we can apply before it's actually affecting the way the car operates on the dyno and have a risk of it popping off the dyno or something like that. |
| 01:01:42 | Henry has asked, is it better to do a ramp run in fourth gear with low power cars as well? Look I mean you can try different gears. |
| 01:01:51 | I've really never seen a need to do anything other than fourth gear and again really this comes down to what we might find is that the car shows slightly different power in third gear. |
| 01:02:03 | Even in a low powered car we may end up risking wheel spin if we go as low as second gear but in terms of the power output being different between third and fourth, if we're using the same gear, it really doesn't matter much as long we we're consistent in our tuning. |
| 01:02:19 | But to answer your question, really I would still be using fourth gear and I do even on 80 horsepower cars. |
| 01:02:26 | Sam Performance has asked, if you have an intertia dyno, what do you have, what can you do to have low loads? Well really with an inertia dyno, the load is fixed by the dyno inertia itself, the mass of the roller. |
| 01:02:45 | It's pretty limited, what we can do is influence the torque output of the car by using a different gear and that's going to result in the vehicle accelerating the inertia dyno faster. |
| 01:02:56 | So for example if we run the car on the inertia dyno in third gear versus fourth, that's going to result in a faster acceleration on the dyno because the torque multiplication in third will produce more torque at the tyre contact patch. |
| 01:03:09 | Obviously we get into that same situation where we're balancing wheel spin though so yeah it is a problem with an inertia dyno, we really don't have a lot of control over the acceleration of the dyno. |
| 01:03:23 | OK that's brought us to the end of our questions and quite a few great questions in there. |
| 01:03:27 | I hope this webinar's been a real help to you in highlighting some of the dos and don'ts with getting the best performance out of a rolling road dyno. |
| 01:03:36 | As usual, if you do have any further questions, please ask those in the forum and I'll be happy to answer them in there for you. |
| 01:03:46 | And until next time, hope you enjoyed it and we'll see you all next week. |
Timestamps
0:00 - Introduction
1:40 - Dyno repeatability is key
4:14 - Power reading controversy
7:33 - Achieving repeatability | Quality dyno
9:06 - Achieving repeatability | Atmospheric condition compensation
10:10 - Achieving repeatability | How we put the car on the dyno
11:05 - Checking vehicle's mechanical condition
18:52 - Strapping technique
25:30 - Strapping not necessary below 250 kW
27:40 - FWD/4WD strapping
29:33 - RWD car on 4WD dyno
31:43 - What gear should we tune in?
32:57 - Using the gearbox to help us tune
36:42 - Engine RPM vs road speed
38:20 - Effects of tyre deformation/wheel slip
39:20 - Tacho trim feature
41:41 - Ramp run setup
46:49 - Ramp run consistency
49:04 - How to tell if wheel spin/clutch slip is occurring
51:52 - Recap
52:49 - Questions


