134 | Measuring Piston to Bore Clearance
Summary
Specifying the clearance between the piston skirt and the cylinder wall is one of the most critical aspects of any engine assembling project. In this webinar we will discuss the aspects that influence our decision on the correct piston to bore clearance, as well as seeing how to correctly measure this clearance using a micrometer and bore gauge.
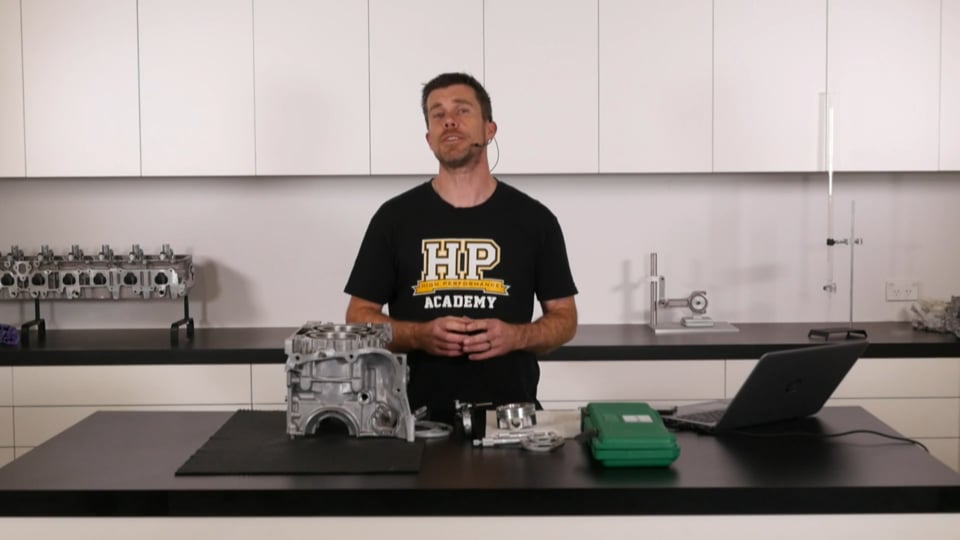
| 00:00 | It's Andre from the High Performance Academy. |
| 00:02 | I'd like to welcome you to this webinar, where we're going to be discussing piston to bore clearance. |
| 00:07 | We're going to find out what exactly the piston to bore clearance is, what it means, and what you need to understand about both measuring and also specifying the correct piston to bore clearance for your application. |
| 00:21 | So the piston to bore clearance, as its name implies, is simply the clearance between the skirt of the piston and the cylinder wall. |
| 00:31 | This is one of the most critical aspects of engine machining. |
| 00:36 | Getting this clearance correct is really critical, and if we get that clearance incorrect, it can either result in excessive oil consumption, excess of blow by, and reduction in the engine power. |
| 00:47 | Or worse still, it can result in engine seizure and the complete destruction of your engine, so, understandably with those sort of odds on the line, we do need to understand exactly what we're talking about here, and know how to get that right. |
| 01:04 | So as I've said, insufficient clearance there is going to end up resulting in our engine seizing. |
| 01:11 | The reason for this is, as we'll find out in a little bit more detail, the reason we need piston to bore clearance when the engine is at cold room temperature is so that when the piston expands as it heats up to operating temperature, we still have some amount of clearance. |
| 01:27 | If the clearance at room temperature was almost nonexistent, this is when we get the situation with the piston expanding and actually nipping up or seizing in the bore. |
| 01:39 | Now on the other hand, while excessive clearance is not necessarily quite as destructive, it's still not something we want in our engine, and in particular, what that's going to result in is excessive noise, particularly when the engine is cold. |
| 01:56 | The reason for that is that the piston will rock in the bore and we audibly hear this as a rattle. |
| 02:02 | As I've mentioned, we also end up with excessive blow by, because the piston is not stabilized in the ring pack as well in the bore as it could. |
| 02:11 | This blow by is our combustion gases essentially escaping past the rings down into the crank case. |
| 02:18 | And of course, with this all comes increased oil consumption. |
| 02:22 | So basically, either end of that spectrum, we're not going to be too happy with the results. |
| 02:28 | So now that we know what it looks like when we get it wrong, I guess we need to discuss what exactly we are trying to achieve when we specify our piston to bore clearance. |
| 02:40 | So what we're really trying to do here is achieve minimal clearance between the piston skirt and the bore under actual normal operating conditions. |
| 02:50 | So what I mean here is when both the engine and the piston are up their normal operating temperatures. |
| 02:58 | So again, the reason is here that the piston as well as the block itself will expand as the engine comes up to operating temperature, affecting the clearances that we're actually going to achieve under those operating conditions. |
| 03:14 | Now if we can achieve minimal clearance under those operating conditions, obviously, we still need sufficient to prevent the piston seizing, but this will stabilize the piston in the bore. |
| 03:25 | It means that the piston is not going to end up rocking side to side as it moves up the bore. |
| 03:32 | Well, it will still do that to a degree, but it minimizes the amount of rock we get. |
| 03:37 | Now what this does, which is often overlooked, is if we stabilize the piston in the bore, this improves the ring seal. |
| 03:45 | So any time we're improving our ring seal, this is going to reduce our blow by and it's also going to improve potentially our horse power, so theses are all good things we obviously want to try and achieve. |
| 03:58 | Now as well as our actual piston to bore clearance, there's some other aspects that we need to consider here. |
| 04:05 | In order for the rings to be able to do the best job possible of sealing on the cylinder walls, we want to try and achieve a perfectly round bore as well as a bore that is perfectly parallel from the top to the bottom. |
| 04:21 | Now it might sound like that would go without saying, but in fact, that's actually quite hard to achieve. |
| 04:28 | And when we start getting into the nitty gritty of measuring our bores, finding out whether they are in fact perfectly round and parallel, you'll be surprised how much variation we do get. |
| 04:41 | One of the techniques that can be used to help ensure that the bores are perfectly, and that our clearance is ideal under real operating conditions is to use a torque plate during the boring and honing process. |
| 04:58 | So the torque plate is thick steel plate that bolts to the deck of our block. |
| 05:03 | We also want to sandwich between the torque plate and the deck of our block the head gasket that we're actually going to be using. |
| 05:11 | We also want to then tighten that torque plate down using the actual fasteners that we're going to be utilizing when the engine is finally assembled. |
| 05:20 | Now the idea behind this is that the torque plate will replicate the distortion that is going to be present in the block when the head is bolted down. |
| 05:34 | So what I mean by this is with our block sitting here right now on the bench, this is an open deck Subaru FA 20 block, they're obviously many many different designs of engine block, but this one is open deck where the cylinder sleeves are essentially free compared to the outside of the block where our bolt holes for our head bolts or head studs locate. |
| 05:58 | So if we machine this engine block with it sitting like this, what's going to happen is that when we torque the cylinder head down, the cylinder head being torqued in place is going to impart some kind of distortion on the top of those sleeves. |
| 06:14 | And this can result in a situation where, with nothing torqued down, with the block sitting bare like it is now, we may end up measuring a perfectly round and perfectly parallel bore. |
| 06:26 | However, an actual operation when the cylinder head is torqued in place, we may find that that distorts somewhat, and this results in a situation where under real operating conditions, the bores are no longer round or no longer parallel, so this is why torque plate honing is a common technique used in performance engines. |
| 06:46 | What we're trying to do here is improve or optimize our ring seal. |
| 06:52 | Really, this is one of the key aspects with any engine project. |
| 06:56 | We want to optimize that ring seal. |
| 06:58 | This is where all of the critical aspects in terms of sealing the combustion gases come in, and this is where our power will come from. |
| 07:07 | Just while I'm talking about torque plates, though, it is important to understand that the effect of the torque plate, or in fact the cylinder head being torqued in place, is quite variable from one engine design to another. |
| 07:21 | And if we can look down on the top surface of this block again, as we can see, the sleeves are completely separate from the outside of the block. |
| 07:32 | And what we want to do is really take note of where the bolt holes for the head bolts are. |
| 07:37 | You can see these are all located on the outside completely separate from the actual sleeves. |
| 07:43 | So for a block like this, because the bolts or studs that hold the head down are not directly connected to the sleeves, we can expect a fairly minor amount of distortion in our sleeves when the head is torqued into place. |
| 08:01 | In other engines though, we may find where the deck surface is a closed deck, where the sleeves are directly attached to the remainder of the block, we may find that the bolt holes are actually cast in a way that they attach to the inside of the cylinder sleeves, and this will results often in more distortion when the head is torqued in place. |
| 08:27 | So, really, it comes down to every engine is different. |
| 08:31 | You do need to understand that. |
| 08:32 | Some will show really large effects from distortion with a torque plate, and others will be much more minor. |
| 08:40 | Okay, so, now that we've discussed the torque plate, and we sort of know what the piston to bore clearance is, we need to really discuss what aspects of our engine operation will affect the amount of clearance that we require. |
| 08:55 | So really what this comes down to is the amount of heat, and this is one of the main factors. |
| 09:01 | The amount of heat being generated inside the combustion chamber. |
| 09:04 | The reason for this is that heat being transferred into the piston that's our key aspect here. |
| 09:11 | As that heat is transferred down into the crown of our piston, that's what's going to result in the piston expanding. |
| 09:20 | So in situations where more heat is being produced in the combustion chamber. |
| 09:24 | There's a variety of reasons for that, which we'll talk about shortly. |
| 09:27 | We're going to find that the piston, all things being equal, is going to expand more, and hence it is going to require additional clearance. |
| 09:35 | So some of these aspects that we need to keep in mind is what is the application for the engine? Is it going to be used as a road engine? In a road application, not withstanding areas where perhaps there is no speed limit, maybe Germany's Autobahns might be a slightly unique situation, but in general, it's relatively difficult to use a road car on a public street and apply heavy load for more than about eight to 10 seconds in a row, if you value your license, so, by it's very nature, this really limits the amount of heat that's going to be produced in the engine and the combustion chambers, and thus in turn affects the amount that our pistons are going to expand. |
| 10:18 | Another example there, though, is if the engine was being built purposely for a race application. |
| 10:25 | Well, now we've got a different situation, where the engine may in fact be under heavy load for maybe 70% of a lap or more, and it may be running for 15-20 minutes, maybe for endurance hours on end, under those conditions. |
| 10:40 | So under those circumstances, it's reasonable to expect that more heat is going to be transferred into the piston, expansion will be higher, hence we need to factor this in with our piston to bore clearance. |
| 10:55 | Another aspect, though as well, is the fuel that we are going to be running the engine on. |
| 11:00 | For example, if you're running on an alcohol based fuel such as methanol or ethanol or an ethanol blend, and these fuels do run cooler than a pump gasoline, so this in turn produces less heat or puts less heat into the crown of the piston. |
| 11:18 | So gasoline, on the other hand, obviously burning hotter, the complete opposite is true. |
| 11:24 | Another factor we do need to consider here is the pistons that we are using in our engines. |
| 11:31 | So a factory piston typically will be cast. |
| 11:34 | In the after market, we're much more likely to be fitting a forged after market piston that is much stronger than a factory cast piston. |
| 11:44 | There are two materials that are typically used in a forged piston. |
| 11:50 | These are referred to as 4032 and 2618. |
| 11:54 | This just refers to the alloy that is used for the manufacturing of the forging. |
| 11:59 | Now, with both of these forged alloys, what we find is the rate of expansion as they're exposed to heat is higher than what we'd expect for a cast piston. |
| 12:11 | So this is why we may find that the factory specification for a cast piston may be somewhere in the region of perhaps 1,000th of an inch. |
| 12:22 | Obviously there's a lot of factors, just a number that I've picked out of the sky. |
| 12:27 | Whereas as we move to a performance 2618 forged piston, that clearance may jump up to four and half or five thou, or that nature. |
| 12:36 | So, that's a large increase, and it's really to do with the fact that particularly 2618 alloy forged pistons will expand at higher rate than a cast piston. |
| 12:49 | And this really comes down to the silicon content of the alloy. |
| 12:54 | So a higher silicon content will expand less. |
| 12:59 | So if you look at the two common alloys for our forged pistons, 4032 has a higher silicon content. |
| 13:06 | 2618 has a much lower silicon content. |
| 13:10 | So 2618 is a stronger material for a forged piston. |
| 13:15 | This is why it's favored in very high performance applications. |
| 13:18 | But the downside of that is the 2618 alloy, due to its low silicon content, is going to expand more, it requires more piston to bore clearance when it's cold, and in turn, this is why forged pistons can be a little bit noisy, produce a little bit of a rattle, particularly when the engine is cold, while it is still warming up. |
| 13:43 | The next aspect that I wanted to discuss as well is the skirt profile of the piston. |
| 13:49 | So here I've got a JE forged piston for our Subaru FA20, and when we're looking at the skirt. |
| 13:58 | So what I'm talking about here is the shape of the piston from the top of the crown through to the base of the skirt. |
| 14:04 | By eye, it looks like it's a relatively consistent diameter, and that's not actually the case. |
| 14:11 | So if we can jump across to my laptop screen for a second, this is just a picture that I actually found on JE Piston's blog, which sort of gives you a very over-the-top expanded idea of what the actual shape of the piston skirt looks like. |
| 14:29 | So you can see, on the left hand side, as I said, it looks at a glance like the skirt is parallel, but in fact, it's not. |
| 14:39 | What we end up with is this barrel shape, so the barrel shape is designed for a few reason. |
| 14:47 | First of all, what we need to consider is how heat is going to affect the piston. |
| 14:53 | So we've got the crown of the piston, which is obviously exposed directly to the combustion heat. |
| 14:59 | And then we've got our skirt, which sits further down the bore, heat is being dissipated out through the oil into the bore as well. |
| 15:08 | So, obviously, under these conditions, it is reasonable to expect that the crown of the piston is going to expand at a higher rate to our skirt. |
| 15:17 | So the diameter at the crown of the piston is quite a lot shallower, a lot narrower than the diameter at the base of the skirt. |
| 15:26 | So this is a really critical aspect to understand, and this is one of the reasons why a lot of people who aren't familiar with engine building will look at a piston sitting in the bore with a freshly built engine when the piston is sitting atop dead center, and one of the most common things we see people do is grab the piston and rock it backwards and forwards in the bore, and if you don't really understand what you're looking at, it seems like the clearance between the side of the piston at the crown and the bore is excessive. |
| 15:55 | And I only need to grab this piston, put it upside down in the bore, and that's the sort of clearance we've got. |
| 16:03 | Just at a glance, it's probably in excess of one millimeter there at the crown. |
| 16:08 | But that is not the important part. |
| 16:10 | When we're measuring our piston to bore clearance, what we need to do is measure at a specific point on the skirt of the piston. |
| 16:19 | The other aspect with the barrel design of the piston skirt is this is designed to optimize the contact patch or loading between the piston skirt and the bore walls, the cylinder walls, once the piston is up to operating temperature. |
| 16:35 | We want to also, the piston manufacturers want to minimize the contact as that produces friction, which affects the amount of power our engine makes. |
| 16:45 | Obviously the barrel skirt design is beyond our sort of input, that is something that the piston manufacturers will define, will use. |
| 16:56 | But it's just important to know that is an aspect we need to take into account. |
| 17:02 | So the upshot of all of this is when we are measuring the piston to bore clearance, we need to be very careful with whereabouts we're going to make that measurement, We need to make sure that we follow the manufacturer's specifications, so what we'll do here is we'll just jump across to my phone camera for a moment. |
| 17:23 | And I just wanted to show you exactly what this looks like. |
| 17:28 | So, this is the spec sheet that comes from JE Pistons with the forged pistons we're putting into our FA20. |
| 17:36 | And we can see here there's a specification, or a gauge point. |
| 17:40 | And the gauge point where we want to measure the piston skirt diameter is seven millimeters from the base of the piston. |
| 17:48 | So it's really important to understand and to take note of. |
| 17:52 | This will also vary from one piston design to another, and from one manufacturer to another. |
| 17:59 | So it's really important to take note of that and understand what that means when it comes to making your measurements. |
| 18:09 | Okay, so what do we actually need in order to measure our piston to bore clearance? Unfortunately, this isn't one of those areas where we can skimp out. |
| 18:20 | In order to do an adequate job of this, we do need some precision measuring equipment. |
| 18:26 | And in particular, the two pieces of equipment we're going to need here are a micrometer and a bore gauge. |
| 18:33 | I'll just go through each of those products one at a time, so, this is a fairly generic micrometer. |
| 18:41 | And it is used for making very precise measurements. |
| 18:45 | This particular micrometer is an imperial micrometer, and it is able to measure down to one 10,000th of an inch, so very very fine. |
| 18:56 | It uses a vernier scale here, so we can be very very precise with our measurements. |
| 19:02 | Now when we are looking at micrometer kits as well, you're going to need a variety of micrometers, and I've just got a selection of three here. |
| 19:11 | We've got a small micrometer that will measure zero to one inch. |
| 19:16 | We've got the next step up, which is one to two inch, and in this case, we are using a piston with an 86 millimeter bore, so for our purposes, we're using a three to four inch micrometer. |
| 19:29 | So these do come in sets. |
| 19:31 | You will need a complete set in order to be able to measure all of the aspects of engine building you're going to require. |
| 19:39 | Obviously these don't just get used for measuring piston skirts. |
| 19:44 | They're also just as useful, probably more commonly used for measuring the diameter of our big end and main journals on crankshafts as well as a variety of other precision measuring tasks, so a really useful tool to have in your workshop anyway. |
| 20:03 | Following on from that, we also need a bore gauge, which is this particular item here. |
| 20:09 | So this is called a dial bore gauge, we have a DTI gauge at the top of the gauge. |
| 20:17 | And inside the kit here as well, if we can just have a look, this gauge can be used to measure diameters from 50 millimeters all the way up to 155 millimeters by virtue of a range of different adapters that can be fitted inside the bore gauge, or to the side of the bore gauge. |
| 20:40 | For finer adjustments as well, there are a range of little washers that can be added just to make very small adjustments to the bore diameter that we're going to be measuring. |
| 20:54 | So the way a bore gauge works is that on its own, it's not that useful. |
| 20:59 | It's not making a specific measurement of the bore diameter. |
| 21:04 | Instead, it's really a differential instrument, so we need to set it or zero it with our micrometer, and then once we have zeroed up our bore gauge with our micrometer, then it will tell us how much bigger or smaller the product we're measuring, in this case our bore, is when compared to the measurement on the micrometer. |
| 21:26 | The other aspect we often use the bore gauge for will be to measure the oil clearances for either con rod or main journal bearings for our crankshaft as well. |
| 21:38 | So again, a tool that is really useful to have if you are going to be doing a lot of engine building and you really want to get the best results possible. |
| 21:46 | Now in terms of what you're going to need to be spending, these tools still aren't crazy expensive. |
| 21:52 | Obviously it depends on the quality of the instrument that you want to buy. |
| 21:56 | But in this case, the bore gauge that we've got here, which is an Insize brand, was in the region of about $200 US. |
| 22:05 | They vary from somewhere in the region of about $100 US to well above 300, but if you're prepared to spend in the one to three hundred US dollar mark, that's going to get you a good quality bore gauge that will serve you well for years and years, as long as you look after it. |
| 22:23 | These can be found on eBay. |
| 22:25 | You do need to be careful. |
| 22:26 | Make sure that you are buying a reasonably good quality brand, though. |
| 22:30 | Some of the cheaper ones really don't have the repeatability that you need for this sort of measurement. |
| 22:37 | Likewise, the micrometer set's probably much the same sort of price-wise, and again, make sure that you are looking at buying a complete set, so you're set up to measure the entire range of measurements that you're likely to come across. |
| 22:54 | That's going to depend a little bit on the sort of engines that you're working with. |
| 22:59 | Okay, so now that we have talked about the specific tools that you need, we will go through a full demonstration of this shortly. |
| 23:08 | But what I'll just do is talk through the process. |
| 23:12 | What we want to do is then use our micrometer to measure the skirt diameter of the piston. |
| 23:20 | So here I've already looked at our gauge point. |
| 23:23 | We've already discussed that. |
| 23:24 | And a really good way of doing this is to actually measure our gauge point. |
| 23:30 | In this case I've got a steel rule, and we know that that was seven millimeters up from the skirt, and what I've done is I've just used a vivid to place a mark on both sides of the skirt. |
| 23:41 | And we are measuring the skirt. |
| 23:43 | In this case, it's relatively easy because it's a forged side relief piston. |
| 23:47 | But we are measuring perpendicular to the line of the wrist pin, so we're looking at the thrust face of the piston when we are making that measurement. |
| 23:59 | Once we know where we're making our measurement, we can use our micrometer to make that measurement. |
| 24:03 | Another aspect that is worth keeping in mind depending on your location in the world and your climate is that, the recommendations for piston to bore clearance will be at a specific temperature. |
| 24:16 | Obviously aluminum expands and contracts a reasonable amount with heat. |
| 24:21 | So in this case, the specifications from JE are at a room temperature of 20 degrees centigrade. |
| 24:29 | So if you're seeing dramatically outside that specification, it would be worth making sure that you warm or cool the room to approximately that temperature to get the best possible results. |
| 24:43 | Once we've measured the skirt diameter, the other thing that's always a good idea to do is to make sure that that matches whatever the manufacturer's specification is for the piston skirt diameter. |
| 24:58 | So this is just a sanity check to make sure that our measurement with our micrometer is correct, can also indicate that there may be some damage to the piston if our measurement doesn't match that of the manufacturer. |
| 25:10 | And again, if we just jump across to my cell phone camera for a moment, every manufacturer does this in a different way. |
| 25:18 | In this case, JE rates specify the finished bore diameter. |
| 25:24 | So in this case, the machinist should be machining the bore diameter to a finished diameter of 3.405 inches or 86.49 millimeters. |
| 25:34 | So that's not actually the piston diameter, but if I just move the piston out of the way, if we move across, it does specify a piston to bore clearance of 0.004 inches, which is four thousandths of an inch, or 0.1016 millimeters. |
| 25:51 | So we can subtract that and, just working back in inches, this gives us a piston skirt diameter of 3.401 inches. |
| 26:02 | So our measurement should match that. |
| 26:05 | If it doesn't, then we do need to go back and double check and find out why that's the case. |
| 26:12 | Okay, so once we've got the measurement on our micrometer, we've locked the micrometer, what we're going to do is use the micrometer to zero out our bore gauge. |
| 26:22 | Remember, I mentioned, the bore gauge is a differential measurement tool, so we need to zero that. |
| 26:27 | This can be a little bit tricky, we'll look at it shortly. |
| 26:31 | Because you need to rock the bore gauge back and forth through the micrometer, and what we're trying to do here is take note of where the zero point is. |
| 26:40 | At the tightest point as we move through the two anvils on the micrometer. |
| 26:46 | We just need to adjust to dial gauge until we achieve that zero point. |
| 26:50 | Once we've done this, we can then insert our bore gauge into the bore, and we want to do though is actually measure several locations in the bore. |
| 26:58 | What we're going to be doing is measuring three locations vertically. |
| 27:02 | So what we want to do is measure the other top of the bore. |
| 27:05 | We don't want to be right at the very top of the bore. |
| 27:08 | We want to make that top measurement probably somewhere in the region of about an inch down from the top of the bore. |
| 27:15 | Then we also want to measure near the middle, and of course, near the bottom. |
| 27:19 | So this is going to give us some indication of whether the bore is parallel. |
| 27:24 | We're looking here for any taper or any belling in the bore, which would indicate problems during the boring and honing process. |
| 27:34 | Once we've done that, we want to rotate the bore gauge 90 degrees, and we're going to do exactly the same in the other orientation, so what we're doing here is we're looking at in line with the wrist pin and then perpendicular to the wrist pin in the thrust face location for our piston. |
| 27:52 | Okay, so we're going to move on and have a look at those steps being applied now, but I will be coming back for some questions and answers after I've done that. |
| 28:04 | So if you do have any questions that you would like me to cover off, please ask those in the chat, and Colin can transfer those through to me. |
| 28:13 | All right, so, let's look at the process here. |
| 28:16 | I've obviously already seen that I have marked our gauge point on our piston skirt, and I've actually gone ahead and I've already set, used our micrometer here to measure that gauge point. |
| 28:30 | Now what we want to do is just slip our micrometer down over our piston. |
| 28:38 | Just back this off a little bit. |
| 28:40 | And we want to get it right on that gauge point. |
| 28:43 | And using a micrometer does take a little bit of feel. |
| 28:47 | What we want to do is get it on the gauge point and we want to rock the micrometer backwards and forwards through, so that we are making sure that we're measuring the widest point. |
| 28:57 | We don't want to have the micrometer sort of skewed sideways. |
| 29:02 | I'm obviously exaggerating this. |
| 29:04 | Skewed sideways on the piston. |
| 29:05 | That's going to affect our measurement. |
| 29:07 | So by gently rocking the micrometer backwards and forwards that's going to find our narrowest point there, and that's going to give us our measurement. |
| 29:17 | So we also want to make sure, at the same time, that we are measuring across the widest part of the piston. |
| 29:23 | Obviously anything there that we are doing that's going to affect the actual measurement is going to be detrimental to our final results. |
| 29:32 | Now once we've made that measurement, we can lock the micrometer up, and that's going to just make sure that it can't move. |
| 29:40 | Obviously we can check our micrometer reading there with our specification and ensure that that is correct. |
| 29:48 | Now I've already selected the correct attachment for our bore gauge. |
| 29:54 | What we find is if we turn the bore gauge over, there is a small protrusion, and this is what does the actual measuring. |
| 30:01 | So, this end of the bore gauge just simply slides against the surface wall of the cylinder. |
| 30:07 | And the opposite end will be pushed in by the bore walls. |
| 30:12 | So we only have a relatively small range of movement for that. |
| 30:17 | We want to make sure that we are within that range, so this can be achieved coarsely by selecting the extension and then as I noted, we also have a range of small washers that can be placed behind the extension in order to get us within the correct range of measurement. |
| 30:38 | So what we've got here is our dial gauge at the top of the bore gauge. |
| 30:43 | This can be unlocked so we can rotate it around, and we want to be able to do that so that we can clearly view the bore gauge while we are making our measurements. |
| 30:54 | You'll notice also that the bore gauge has a plastic holding location, or holder where we actually can hold and use the bore gauge. |
| 31:05 | Now this is a subtle aspect, but one of the points here is that this actually insulates the body of the bore gauge from the heat from our hand. |
| 31:15 | It might sound like we're starting to get down to being very nit picky, but by touching the actual bore gauge, what this can do is actually affect the accuracy of our reading, so that's why bore gauges have a plastic insulator for us to actually hold the gauge. |
| 31:35 | So what we want to do here is adjust our bore gauge until our needle is just going through the zero point while we've got it in our micrometer. |
| 31:45 | So I'm just going to do that now, and admittedly, this is pretty awkward process. |
| 31:49 | It's pretty difficult to achieve. |
| 31:52 | What we want to do is hold our micrometer, and we want to insert the bore gauge into our micrometer. |
| 31:58 | I'm just trying to get this arranged first. |
| 32:00 | And then what we want to do, it's going to fall out multiple times while we are zeroing this, but let me just try and get that back in there. |
| 32:10 | And what we want to do is keep it in there, while we rotate backwards and forwards across the two anvils, and we're trying to just zero the dial gauge, now hopefully there, you'll be able to see the dial gauge. |
| 32:26 | What we want to do, as I move closer to the zero point, you can see the dial gauge moves towards zero. |
| 32:33 | Now, while it doesn't appear that I'm quite getting to zero, I do assure you that prior to coming on live for this webinar, I have gone through and thoroughly zeroed this. |
| 32:45 | It is tricky because what you need to do is essentially move the two points of the bore gauge through the narrowest point on our micrometer. |
| 32:55 | So we need to spend a bit of time and get a bit of a feel for this. |
| 32:59 | It's obviously much easier to do when you're not trying to present it to camera. |
| 33:03 | And if the gauge, if the dial gauge is not touching zero, what we can simply do is release the little locking screw here. |
| 33:13 | And we can adjust or move the bezel. |
| 33:15 | So we want to take our time and make sure that at the narrowest point between the two anvils of our micrometer, we are reaching that zero point. |
| 33:26 | Once we've done that, we can move over to our block, and we can locate the bore gauge inside the bore. |
| 33:34 | So what I've done here is I'm just going to locate the actual measurement side of the bore gauge down the bore a little bit, and then I can just compress it and move it into the bore. |
| 33:45 | Now just to make things a little bit more complicated here, we are using two different measurement techniques, because, or measurement scales, I should say. |
| 33:55 | Our micrometers are a imperial micrometer, and our bore gauge is metric, and that's something I should've actually mentioned. |
| 34:03 | When you are shopping for these piece of equipment, they are available in either metric or imperial. |
| 34:10 | Generally, we would choose to go with one set measurement range scale, whether that's imperial or metric, it's really up to you. |
| 34:20 | In this case, we've kind of mixed things up. |
| 34:23 | Because we do want to be able to present in both metric and imperial. |
| 34:26 | It doesn't really matter, and this is one of the skills of engine building, is that often you will need to work in imperial and metric, so really, regardless whether you are more familiar with the imperial measurement system, you will still at times probably need to work in metric and vice versa. |
| 34:45 | Really easy to convert if you just remember that there are 25.4 millimeters in one inch. |
| 34:50 | This will make it really easy to convert. |
| 34:54 | Okay, so what I'll do now is we'll just jump across to. |
| 34:58 | I'll just actually unplug this so I've got enough movement. |
| 35:01 | We'll just jump across to our phone camera here, and what I'll do is I'll try and show you this measurement. |
| 35:10 | So what we're going here, at the moment I'm still coming up on the measurement. |
| 35:14 | The specification here is 0.1016 millimeters. |
| 35:19 | So in this case, you've got to understand that the bore gauge actually works both ways, so you'll notice that I'm actually coming up on 90. |
| 35:30 | That's actually 0.9. |
| 35:32 | But going the other way from zero, you'll notice that there's also a 10, so in other words, this is also 0.1. |
| 35:40 | So as we come up to that mark, and what you can see is, as I swing the bore gauge through, it comes up, and then it expands again. |
| 35:49 | So that's as I'm rocking it through the narrowest point. |
| 35:52 | And you see that we're actually just about hitting 0.11, just a little bit under 0.11, so this is my measurement here at the top of the bore. |
| 36:03 | And what I'll do is I'll just slip down the bore, so I'll just have a look. |
| 36:06 | So you can see at the moment, I'm around about halfway down the bore there. |
| 36:10 | Come up and have another look here. |
| 36:13 | And we'll do exactly the same process. |
| 36:17 | Okay, so essentially our measurement there at the center of the bore is identical. |
| 36:22 | So this is what we want, obviously that means that our bore is parallel. |
| 36:26 | We'll just move down again to the base of the bore. |
| 36:29 | And we want to be careful here. |
| 36:31 | We want to make sure that our measurements are being made in an area that the piston is actually likely to run in. |
| 36:38 | So there's no point going right down below the point that the piston's going to run in. |
| 36:43 | Want to make sure that our measurements are being made in a realistic place in the bore. |
| 36:47 | Let's have a look at the measurement at our base. |
| 36:50 | We're just going to rock back through that narrowest point. |
| 36:53 | We can see that this time we actually do have a slightly wider reading. |
| 36:58 | We're just over 0.11 millimeters there. |
| 37:02 | All right, so that's the process there. |
| 37:05 | Of course, we'd repeat this now by turning the bore gauge 90 degrees. |
| 37:09 | I'm not going to go through that process. |
| 37:11 | It's essentially a repeat of what we've just looked at. |
| 37:15 | Now, while obviously I've discussed the fact that in the perfect world, we want perfectly round bores. |
| 37:23 | And we also want our bores to be absolutely taper free. |
| 37:28 | In other words, perfectly parallel from top to bottom. |
| 37:31 | In the real world, this probably isn't 100% likely. |
| 37:35 | It's possibly not quite as achievable as we'd like to expect. |
| 37:39 | A lot of it's going to come down to the quality of the machinist that you're choosing to use. |
| 37:44 | I should've mentioned right back at the start. |
| 37:46 | As home engine builders, enthusiast engine builders, we're not expecting that you're going to be actually making these changes, machining the blocks to achieve the correct piston to bore clearance, that's obviously a requirement for the engine machinist. |
| 38:03 | But it's always a good idea to check on the quality of their workmanship. |
| 38:08 | You'll find that in most factory engine overhaul manuals, you're going to have a specification for the maximum out of round as well as the maximum amount of taper that is acceptable. |
| 38:20 | Generally, if we're looking at metric values, that would be somewhere in the region of about 100th of a millimeter would be an acceptable tolerance there. |
| 38:30 | Obviously the least we can achieve, the tighter we can get that, closest to zero, the closest to perfect, the better our results. |
| 38:38 | And while I've talked about torque plate honing, another aspect that is often used in some high end engine builds is to also do what's called hot honing, and hot honing is where engine coolant is passed through the block. |
| 38:53 | Or sorry, I should say, coolant is passed through the block to heat it up to a normal operating temperature. |
| 39:00 | Probably somewhere in the region of 80 to 90 degrees centigrade. |
| 39:03 | And there again, it's just going one step further than the torque plate to try and achieve the correct clearances under the actual operating conditions. |
| 39:14 | So just like the head will bring some distortion into play, so will the engine's coolant, once the block is actually heated up to its normal operating temperature. |
| 39:26 | So that's just a case of trying to account for that and trying to do the best job possible of getting the bores to be as perfect as they can be under those real world conditions. |
| 39:39 | Now before we move on to questions and answers, one other aspect I just wanted to talk about here is the recommendations from the manufacturers. |
| 39:48 | All of our forged pistons as well as factory pistons for that matter, will have a specification, so this is the manufacturer's recommended specification for a piston to bore clearance. |
| 40:00 | Understandably, this is a pretty good place to start and generally you're not going to go too far wrong if you follow the manufacturer specification. |
| 40:10 | However, there is some room for making minor adjustments to this, however it also needs to be done very very carefully, and with a very thorough understanding of what exactly it is you're trying to do, or what exactly your operating conditions will do to the piston. |
| 40:28 | What we find is that often the piston to bore clearance from the manufacturer tends to be a little bit on the large side, although that's not always the case. |
| 40:41 | Obviously the piston manufacturer is really keen for your pistons to not seize in operation. |
| 40:48 | So it's always safest to have a little bit of additional clearance. |
| 40:53 | Now as we've already discussed, this does come with some downside, so if you are in a situation where you're trying to really optimize your engine performance, and you are looking for every last horse power, you can get some minor improvements by tightening that piston to bore clearance, albeit, obviously if you go too far, you're going to be in for some serious problems. |
| 41:16 | This is something, as I've said, that needs to be approached with a lot care. |
| 41:20 | Firstly, what I would do is recommend talking to the piston manufacturer in detail about your specific application. |
| 41:27 | And get their feedback on your intentions before you go ahead. |
| 41:34 | Likewise, your engine machinist will also probably be able to advise. |
| 41:38 | They've built probably thousands of engines, and tend to see a lot more of the results of given piston to bore clearances. |
| 41:48 | This is an aspect that I did apply when I was building a lot of Mitsubishi 4G 63 drag engines. |
| 41:55 | We were running on a methanol fuel, and despite the fact that some of these engines were producing very high specific power levels, some in the region of 1,000-plus wheel horse power and very high boost levels, 50-60 PSI. |
| 42:09 | Because we were running on a methanol fuel, the fuel, as I've mentioned earlier, does tend to run quite cool, and this produces a little bit less heat in the combustion chamber, and conversely the piston than what we could expect on a gasoline-based fuel. |
| 42:24 | So for that reason, what I actually did over the course of three or four different engine builds, I actually tightened up the clearances from JE's recommendation. |
| 42:34 | In that case I think, off the top of my head, it was about five and a half thou piston to bore clearance. |
| 42:39 | And we ended up going down to about four and a half thou. |
| 42:43 | Now, this was an iterative change. |
| 42:46 | We didn't just decide to take one full thou out of the piston to bore clearance in one go. |
| 42:51 | What we were doing is we started with the manufacturer's recommendations, then when we stripped down the engine to rebuild it or assess it, we could see the sort of condition of the piston skirts, and the wear patterns on the piston skirt will guide you as to whether the clearance is too tight or too loose. |
| 43:11 | When the clearance is too loose, generally what we find is that the piston will tend to rock in the bore more. |
| 43:18 | And we see wear patterns that tend to be around the base of the skirt as well as above the top ring. |
| 43:25 | When the clearance is starting to get too tight, we do start to see pick up or gauling on the skirt of the piston, and it means you definitely gone too far. |
| 43:35 | When we get everything right, what we tend to get is very minimal signs of any wear at all. |
| 43:41 | If anything, generally a slight polishing to the piston skirt, round about the center of the skirt. |
| 43:47 | So we can use that help guide us, but as I've said, I really must reiterate this, it is essential to do this very carefully, because if you do go too tight, you're going to end up with a catastrophic engine failure, and no one wants to be on the receiving end of that. |
| 44:02 | Okay, let's move on to some questions now. |
| 44:05 | Barry G has asked is a head gasket absolutely needed when using a torque plate? I wouldn't torque the head gasket down. |
| 44:14 | Wouldn't torquing the head gasket down kill the spring action of the gasket, or is it normal to buy two gaskets when building for such builds? Pretty valid question. |
| 44:24 | Okay, I know a lot of machine shops will torque plate the block with no head gasket. |
| 44:30 | The thing you need to understand is, what we're trying to do is replicate the conditions the engine block is going to be exposed to under operating conditions. |
| 44:40 | And obviously the head gasket is installed under operating conditions. |
| 44:44 | Why this can be important is generally, there will be a bead or fire ring around the sleeve or the top of the bore that can impart some distortion of its own. |
| 44:57 | So this is why torque plating with the head gasket between the block and the torque plate is the recommended and preferred method. |
| 45:06 | With modern multi-layer steel head gaskets, these are still reusable. |
| 45:11 | Obviously you want to be careful here about any debris getting onto the head gasket. |
| 45:17 | You might want to be very very clean in your assembly there. |
| 45:21 | Or this is probably going to be more an aspect that the machinist is going through, but if that's done correctly, there is no reason why you can't reuse the multi-layer steel head gasket. |
| 45:31 | I do know of many engine builders that will actually reuse a multi-layer steel head gasket that has come off a running engine. |
| 45:39 | I'm not quite that brave, but certainly I'd have no qualms with using the same head gasket that was used for the torque plating process. |
| 45:49 | TDEchamp has asked, how much change can you see with the torque plate on versus off? Okay, really as I mentioned, it is quite specific to the engine that you're working on and the design of that engine. |
| 46:04 | In particular, whether the head studs, or head bolts, are connected to the bores or they're not. |
| 46:11 | I believe, although it's not an engine that I deal with very often, that the old small block Chevys were particularly bad for distortion in the blocks. |
| 46:23 | In our Subaru FA20, we're seeing around about 100th of a mil distortion between measuring the bores with the torque plate off and measuring the bores with a torque plate on. |
| 46:35 | And I should mention here, this block has been torque plate honed, so my particular results there probably aren't very realistic as just an indication to show you it's easier to do that with the torque plate off, obviously, through the actual assembly process, we would be checking the piston to bore clearance with that torque plate installed. |
| 46:56 | It's a really key point there to mention that if your machinist has torque plate bored and honed your block, then you're absolutely achieving nothing measuring the piston to bore clearance with that torque plate removed. |
| 47:10 | You're just not going to get realistic results. |
| 47:14 | Just giving you some numbers there, as Tyler has asked for as well, I mentioned this particular engine was around 100th of a millimeter. |
| 47:23 | When we went through the machining process with our machinist, this is a machinist that I've been using through my old business for probably the better part of 10 or 12 years. |
| 47:34 | So I know them very very well. |
| 47:35 | We did have a discussion about this exact point, and they machined a V8, I can't remember the exact engine, for a customer, and it was torque plate honed, they sent everything out, and the customer rang back and said that the piston to bore clearance was too tight. |
| 47:53 | It was a thou tighter than he had asked for. |
| 47:57 | So the machine shop said, hey look, bring everything back in. |
| 48:00 | If we've mucked that up, then we will fix it. |
| 48:03 | They brought it back in, he had measured it without the torque plate installed. |
| 48:07 | They installed the torque plate, and the clearance was exactly where he had requested. |
| 48:13 | In that particular engine, there was a thou distortion just through fitting that torque plate. |
| 48:23 | Barry has asked, have you noticed that the bore gauge leaves vertical lines on the block where you make the measurements? And is there any way to avoid that? Really good question here, and this is something we kind of ended up getting accidentally, but probably a good thing to mention here. |
| 48:39 | The bore gauge that we are using, both ends of the bore gauge actually have a little Teflon ball. |
| 48:45 | Most of the bore gauges I've used prior to this one, the tips of the measurement points on the bore gauge were steel, and yes, that can leave small scratch marks in your bore. |
| 48:56 | While they do look a little bit ugly, they're not actually going to cause you any problems. |
| 49:02 | But in this case, with the Teflon balls fitted to this bore gauge, it actually doesn't leave any marks in the bore, so that's a nice side effect there. |
| 49:11 | We do still see, just because the bearing surfaces are much softer, we do still see the bore gauge leave some marks on the bearing surfaces, if you're using the bore gauge to measure oil clearances though. |
| 49:26 | Although we can clean those up prior to final assembly of the engine. |
| 49:34 | Barry's also asked, from your experience, how much cylinder taper is acceptable? So again, here, really, the less taper or belling that we have in the bores, the better our results. |
| 49:48 | Again, my general sort of stop-go point would be 100th of a millimeter. |
| 49:53 | I don't really want to see anything more than that. |
| 49:55 | So that's really the upper level of what I would like to be seeing. |
| 50:03 | Andy has asked, is there any sort of reasonable way to determine that the bores are straight with the crank center line? Not probably for us, in terms of being a home workshop or semi-professional workshop. |
| 50:20 | That's something that requires probably much more precise measuring equipment than what we really have access to. |
| 50:27 | This is starting to get into aspects of engine blueprinting where we're trying to ensure that the bores are all completely perpendicular to the crankshaft center line and also aligned from front to back of the block with the crankshaft center line. |
| 50:46 | But certainly it's not something we're going to be able to easily measure ourselves unfortunately. |
| 50:52 | Andy's also asked, does oil rating get involved with this? 0W30, 2050, et cetera? We found EPA rated oil in two-strokes will not keep the skirts off the cylinder walls at 8,000 RPM. |
| 51:04 | Racing oils are the only thing that works at high RPM. |
| 51:08 | Look, I am aware of some problems with two-stroke engines in terms of the oils, that's probably a little outside of my own personal experience. |
| 51:19 | It's not really a consideration I've ever run into with automotive four-stroke engines, though. |
| 51:26 | When we're looking at the oil viscosity or oil weight, probably the more pressing issue is aspects such as the oil clearances for the big end, connecting rod bearings, and the main journal bearings. |
| 51:40 | The clearances that we run there will affect our oil pressure, and we need to sort of be selecting these in conjunction with the weight of oil that we intend to run. |
| 51:50 | But yeah, two-strokes, definitely outside of my experience. |
| 51:54 | But I personally have never made an adjustment to a piston to bore clearance based on the oil that I've been running. |
| 52:03 | All right, looks like that's taken us to the end of our questions there, so hopefully everyone's enjoyed that webinar and learned just a little bit more about checking piston to bore clearance, and what that means. |
| 52:14 | Of course, if you want a more thorough understanding of this topic, as well as all of the other topics to do with engine building, check out our practical engine building course, where we go through this in more detail. |
| 52:27 | Thanks for joining us. |
| 52:28 | If you do have any more questions on today's webinar, please ask those in the forum, and I'll be happy to answer them there. |
| 52:35 | See you all next week. |


