259 | Cold Start Tuning - Adaptronic
Summary
Getting good cold start performance in your tuning is one of the factors that really makes a difference in a daily driven vehicle. In this webinar we’ll be investigating the cold start tuning process on the Adaptronic Modular ECU, using our Mazda FD RX7.
| 00:00 | - It's Andre from High Performance Academy here, welcome along to another one of our webinars. |
| 00:04 | This week we're going to be having a look at the cold start tuning options on the Adaptronic modular series ECU. |
| 00:12 | And this is something that I know a lot of tuners struggle with and in my opinion, particularly on a street driven car, this is an essential part of the tuning process that we need to focus on and we need to get right because what we're trying to do here is replicate the sort of drivability and operation that we could expect with a factory showroom stock car. |
| 00:34 | And what I mean by this is that essentially regardless what the temperature is outside, whether it's 45°C in the middle of summer or it's sub zero and we've got snow and ice on the ground, we want to be able to reach through the window, turn the key and have the engine start and idle smoothly, maintaining a good air/fuel ratio. |
| 00:52 | We want to maintain that air/fuel ratio accurately because if it's too lean, the engine isn't going to run nicely and it's going to want to stall. |
| 00:59 | Conversely if it's too rich, we do risk the problem or real risk of fouling the spark plugs over repeated cold starts. |
| 01:08 | So there is a relatively narrow window we need to get ourselves into here. |
| 01:11 | And this is something as a professional tuner, I saw time and time again, cars brought to me to be retuned that had been tuned previously by other tuners around the country and it was hard to get the car to start, it wouldn't idle properly once it had started and basically it just ruins in my opinion the experience of getting, driving a car out on the street. |
| 01:34 | Now possibly if you are dealing with a dedicated racecar, then yeah maybe we're going to be a little bit more tolerant in dealing with some of these sort of issues where the idle control maybe isn't quite right or the engine won't run properly until it's up to temperature. |
| 01:48 | But for the most part, if we've got the ability to do the job properly, then why not do it anyway and particularly if you are tuning professionally for customers, this is one of those subtle things that you'll find actually really does set you apart and your customers are 100% going to appreciate it. |
| 02:05 | As an upside, it's also going to mean that you've got less customers bringing cars back to you because the cold start performance sucks and they're not happy with it and that's going to free up your time 'cause it's pretty hard to recharge a customer for work like this that should have probably been done properly the first time around. |
| 02:24 | Alright so why do we need cold start enrichment? Why do we need to make adjustments to any of our tuning parameters when the engine is cold? Well there's a few aspects to consider here. |
| 02:35 | One of them is that when the engine is cold, when we inject fuel and this is very prominent with a port injected engine, 'cause of the cold port walls, the intake valves if we're talking about a piston engine, etc, what we find is that a lot of the fuel that we inject will actually end up wetting out on the port wall so this means that the fuel doesn't actually enter the cylinder or the rotor for a combustion chamber for example in an easy to combust format so if we don't do anything compared to our hot start performance or hot start tune, we're going to find that the engine is going to run incredibly lean. |
| 03:13 | So that's one thing, we're going to need more fuel and this is during cranking, this is during post start and it's during the warm up procedure so generally depending on the ECU and how they deal with it, there can be multiple maps to deal with those different strategies. |
| 03:27 | On top of this, we are probably also going to need to make some adjustments to our idle speed control parameters, to match the additional fuel that we're going to want to deliver generally we're going to need to step up the idle control opening, be it that an idle solenoid or a drive by wire in our case to bypass additional air. |
| 03:46 | This can normally be or will normally be added to with a slightly higher target idle speed as well so that's the main things that are going on there. |
| 03:56 | There is often also the ability to modify our ignition timing based on our cold start enrichments or cold start performance as well. |
| 04:05 | This isn't something I personally generally do but I know that there are a lot of tuners who will advance the timing during cold start. |
| 04:15 | One of the advantages with this around idle as well is that if we are under hot start conditions or hot operating conditions, setting our target idle ignition timing purposefully retarded from MBT, by advancing the timing towards MBT during cold start, this will actually improve engine torque and it can help make the engine idle a little bit better and a little bit higher so there are some pros there but if we've got everything else right, I generally just don't see that it is necessary. |
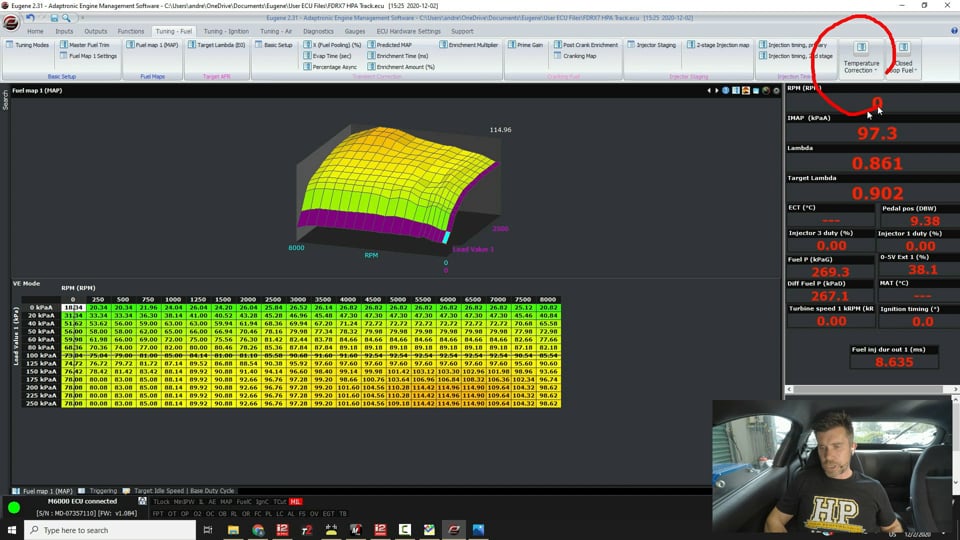
| 04:47 | Right so one of the first things we need to understand are the settings that we have available so what we're going to do at the moment is we'll head across to my laptop screen and we'll have a quick look through the Eugene software and see what those specific settings are, there's a few of them and we're going to come back to these as we go and look at some of the specifics. |
| 05:07 | One of the first things we want to understand is the temperature correction options 'cause this is going to play a big part in how we deal with our cold start operation so if we come over here, at the moment we are on our tuning/fuel tab. |
| 05:22 | If we come over here to our temperature correction, we can see if we click on this, we've got two tables here, we've got manifold heat soak percentage, we'll go to that one and then we've also got our charge temperature correction. |
| 05:36 | So at the moment the ECU is set up on charge temperature estimate. |
| 05:40 | There's another way we can set this up but before we go through that, let's just explain what charge temperature estimate actually is. |
| 05:47 | So we'll go back to our manifold heat soak percentage table. |
| 05:50 | So we've got a graphical representation which on its own isn't really much use but if we dive over here to the table, basically what we've got here is a 3D table, inlet manifold pressure vs our engine RPM and a number in that table, 0-100. |
| 06:07 | So we can see down here in the idle area, we've got a number of 70% whereas if we look at high load, high boost pressure, we've got a number of 15% so what this is doing is biasing the calculated charge temperature, which is the output of this table essentially, between the engine coolant temperature sensor value or the inlet manifold or manifold air temperature sensor value. |
| 06:32 | So why this is important is that what we're trying to do here, ultimately is we're trying to estimate the charge temperature as it goes past the inlet valve or into the rotor housing in the case of a rotary engine. |
| 06:44 | That is the key part because it's the air density inside the combustion chamber, inside the cylinder or inside the rotor housing that we are really interested in. |
| 06:54 | And the problem is that this can be a little bit tricky, even with a charge temperature estimate, to get right. |
| 07:01 | Reason for this is, well if we actually look I should say, how a conventional ECU used to do this, charge temperature estimate's now pretty commonplace but back a little way ago, it was much more common that what we would have the is the temperature would just be based off our inlet air temperature sensor or manifold air temperature sensor. |
| 07:19 | On face value that might sound like a pretty sensible way to go and yes it does work but the issue with this is that if we look at what's happening at high RPM and high load we've got a lot of airflow through the manifold and we've got a lot of airflow going past the sensor and that air's going very quick. |
| 07:39 | So there isn't a lot of capacity or time available for that air to absorb additional temperature from the inlet manifold, the throttle body, the inlet ports, the valve etc before it enters the cylinder so under those conditions, yes the manifold air temperature or inlet air temperature sensor does do a reasonably standup job of giving us a realistic estimate of charge temperature. |
| 08:04 | Where it does fail a little bit though is that if we are at idle and the engine is hot, we've not got a lot more time because the air speed is really low, the airflow volume is also relatively low, got a lot more time for that air to actually pick up additional heat from the inlet manifold walls, the port runner walls, the inlet port walls, intake valve etc so what this can mean, if we had a way of easily measuring it which sadly we don't, we could find, or will find that the charge temperature, which remember that's the part we're interested in, is actually significantly hotter than what we've measured with the air temperature. |
| 08:43 | So why does this matter? Well the problem is that as the air density changes, if we want to maintain a consistent air/fuel ratio, we also need to vary the mass of fuel being delivered. |
| 08:55 | It's not the volume of air in the cylinder that matters, it's the mass of air so the mass of air for a given volume varies with air density. |
| 09:03 | If you're starting to get a little bit lost, really simple to understand the effect of density if we consider that we have two containers that are the same size. |
| 09:11 | So those contain the same volume of whatever substance we've got. |
| 09:16 | Let's say to make it really simple, we fill one of those containers absolutely packed to the brim with feathers and we fill the other container right packed to the brim with sand. |
| 09:27 | That is the effect of density, the feathers are much lighter, they're much less dense than sand, understandably for that same volume, let's say it's an icecream container, you could pretty easily understand that the container that's filled with sand is going to be much heavier. |
| 09:41 | So that's the same situation we have with our air density and if we don't model the air density properly we're going to get variations in our air/fuel ratio as the air temperature changes so what we're trying to do is model this or accurately track this so that the ECU doesn't need to have any other background compensations going on in order to get a consistent air/fuel ratio. |
| 10:04 | So that's what charge temperature estimate is trying to do. |
| 10:07 | Let's jump back to this table. |
| 10:08 | Basically the numbers in this table, a number of 100% would mean that the output of the charge temperature estimate is the same as the engine coolant temperature. |
| 10:18 | On the other hand a number of zero, that would bias us completely towards the air temperature sensor which would mean that the air temperature sensor value would be the same as our charge temperature estimate so that's why we see numbers that are larger, biasing more towards the engine coolant temperature sensor at low speed, low RPM and then as we move to higher speed, higher RPM, we bias more towards the air temperature sensor. |
| 10:41 | I'm not going to go too much further into this because learning how to set this table up is in and of itself a complete webinar subject which we will also broach. |
| 10:50 | So that's the first thing but this table is going to get us close and as I mentioned, there's a bit that goes into programming that table, calibrating that table correctly but if we come back up to our temperature correction options, we also have a charge temperature correction. |
| 11:09 | So this is kind of a fudge table that we have at our discretion here if required and the axes here, we've got load or inlet manifold pressure on the vertical axis and we've got our calculated charge temperature so that's important. |
| 11:23 | So this is the output essentially that the ECU's calculated for our charge temperature on the horizontal axis. |
| 11:28 | So ideally, if everything's working, we should at least start with this table set to zero. |
| 11:33 | But we may find under certain calculated charge temperature values and certain loads that the system is either over compensating or under compensating and we can make corrections inside of this table. |
| 11:46 | So that's the strategy there. |
| 11:49 | Now if we are using charge temperature, this actually really accounts for a lot of our warmup enrichment anyway because obviously engine coolant temperature does play a part in that calculated charge temperature. |
| 12:02 | And basically the output of this goes straight into the main fuel model and calculates corrections that are required to our fuelling which should, if everything is working correctly, give us a pretty solid result and maintain a target air/fuel ratio as engine coolant temperature, air temperature and load all fluctuate so a bit complex but hopefully you can get your head around it. |
| 12:24 | As I've mentioned, this is a newer, it's definitely not cutting edge, it's been around for years now but it's a newer strategy to deal with this and it's not the only way. |
| 12:34 | So if we come back to our basic setup here under fuel and we click on tuning modes, we can see this is where we can select our correction option. |
| 12:45 | So we can see temp correction mode here, at the moment I've got manifold heat soak percent and if we click on this, we can set this up a little bit more conventionally which is with a separate coolant and air temperature correction map. |
| 12:59 | Now on face value, didn't look like that really did anything. |
| 13:02 | If we come back over to our temperature correction here, now we have two tables here that are a little different. |
| 13:07 | Got our coolant temperature correction table. |
| 13:09 | So this is what we would use for our warmup enrichment and we've also got a charge temperature correction. |
| 13:17 | So this time you'll see that the horizontal axis there is simply taken directly from our manifold air temperature sensor. |
| 13:27 | Alright so this is, as I've mentioned, probably the more conventional way of doing it, there's no right or wrong, you need to understand the implications of both options, pick a way of tuning and go with that. |
| 13:39 | If you are going to be using manifold air temperature as your axis, while we are really talking here about the warm up enrichment which is more focused on engine coolant temperature, it's worth focusing on this table a little bit because this is a table that I know most tuners have no clue how to set up. |
| 13:58 | And if we actually understand the physics of what's going on, it's really not that tricky. |
| 14:02 | What this table is there to do is to help make background corrections to our fuelling based on the air temperature. |
| 14:11 | So what we can do with this is we can basically look at what the ideal, what the air density is doing as the temperature changes and we can use this to sort of calculate the type of temperature change that we are going to need. |
| 14:26 | So this depends on the type of ECU that you are dealing with. |
| 14:30 | With a injection time based ECU, generally the corrections are over and above the main fuel model so basically what I mean here is air temperature corrections aren't automatically compensated for and we need to set this table up. |
| 14:45 | With a volumetric efficiency based ECU model, more commonly the air temperature correction is actually done automatically inside of the fuel model which is what happens here. |
| 14:55 | So conventionally we would start with this table set to zero and then make adjustments if required. |
| 15:00 | Now I just want to show how this works though if you do need to set up these tables yourself as opposed to having them occur automatically so let me just find my spot here. |
| 15:11 | So this is the calculation for our air density so basically what we want to do is take the air pressure, we've got the gas constant which is the value R and then we've got our air temperature there. |
| 15:27 | So basically by keeping the air pressure constant for the sake of our calculation we can look at the result which is basically this little graph that I've drawn here. |
| 15:36 | So we've got air density in kilograms per cubic metre on the vertical axis and our air temperature in °C on our horizontal axis. |
| 15:44 | So we actually see we've got a slight curvature to that. |
| 15:46 | However for simplicity if we just put a line of best fit through this, basically what we find is that our air density changes by around about 3%, 3.5% per 10°C change. |
| 16:02 | So what we'd want to do there is basically replicate this inside of our air correction table, come back to Eugene here and basically we'd choose a point, normally I choose 20° and make that our zero point. |
| 16:16 | So 21° we can always go and modify those break points as we see fit and basically what we want to do then is make changes to that table, as the air temperature increases from 20°C, every 10° we increase the air temperature, we would reduce the fuelling by about 3-3.5%. |
| 16:36 | I actually find that the true calculation tends to be a little bit overbearing so I normally go somewhere around about 2.5-3%. |
| 16:43 | On the other hand, as our air temperature drops below 20°C, we're going to increase the fuelling. |
| 16:48 | So the idea there is that that table will give us a consistent air/fuel ratio as our air temperature changes. |
| 16:56 | It's not rock solid though. |
| 16:57 | As I've mentioned, in this particular instance, the air correction is done automatically in the background and this table is there if we need to make any corrections. |
| 17:07 | So quite often for example we'll find that at high air temperatures, when the engine is heat soaked, so maybe we're operating up in this region here, at idle, we'll find that the VE correction, the automatic correction in the background tends to be a little bit overbearing and we find the engine runs a little bit lean. |
| 17:23 | So what we can do is jump in here and we can highlight the cells in that area and maybe we can add 3-5% of whatever we require to get our fuelling back where it needs to be. |
| 17:33 | So long winded discussion about that but it is really important to understand those implications there and how they work because you do need to really make a decision on how you want to run these temperature compensations inside the Adaptronic very early on in your tuning because if you change this later on near the end, it's going to have a significant impact on the rest of your tuning. |
| 17:57 | so I'm just going to come back to our tuning modes here. |
| 18:00 | And because we have tuned on manifold heat soak percentage I'm just going to swap back to that. |
| 18:06 | Alright so that's the first discussion that we need to have here. |
| 18:10 | The second one here is around out target air/fuel ratio. |
| 18:13 | So let's have a quick look at this. |
| 18:15 | And again different ECUs work differently here. |
| 18:18 | With the Adaptronic Modular we only have one target lambda table. |
| 18:25 | Well we can have two target lambda tables if we are running flex fuel for example but generally for a fixed petrol tune we're going to have one fixed table like this and what this means is that we don't easily have a way of changing our target air/fuel ratio with this table during cold start. |
| 18:47 | In other ECUs we will have modifiers for our target lambda during cold start operation for example so we can actually target a richer mixture. |
| 18:55 | We can't do this directly here with our target lambda table so this just needs to be set once and for all to our desired target air/fuel ratios when the engine is at normal operating conditions. |
| 19:09 | We'll now have a quick look at our target, our idle speed control so to get to that, we come across to our tuning/air tab and we can come over to our target, our idle settings. |
| 19:22 | So we've got a bunch of these settings here. |
| 19:24 | Let's start with our target idle speed and this actually brings up idle speed plus base duty. |
| 19:29 | So it's really important that these are both tuned properly and we'll go through a tuning strategy at the end of this so you've got a bit of a step by step process to go through. |
| 19:37 | First one is to make sure that our target idle speed is set sensibly. |
| 19:41 | As you can see, this is a 2D table versus our engine coolant temperature. |
| 19:46 | We can see that down in the colder regions here between -20 and about 20°C, I'm targeting a 1300 RPM idle. |
| 19:54 | Once we're up above 70 which is about where I'd consider the engine to be at normal operating temperature, we've got values of 1000 there so we just need to set sensible idle speeds here that we know the engine is going to be comfortable idling at. |
| 20:09 | One of the problems I quite often see is where someone has taken an engine that has an existing tune in it for a stock cam or a stock camshaft, obviously not a rotary in this example, and they they've swapped in a really large aggressive cam with a lot more overlap and they haven't actually thought through the fact that the larger cam with more overlap is actually also going to require higher idle speed for the engine to idle properly. |
| 20:36 | So this can get you into problems where you're really trying to make the engine do something that it's not comfortable doing so make sure that those are set sensibly to start with. |
| 20:46 | And at the same time we do have our base duty cycle table here so what we want to do is make sure that under open loop control conditions, that we are actually able to track our target idle speed and we're able to maintain that really accurately. |
| 21:01 | And as a little bit of an example here, the fact that between -20 and 30°C, I'm up at 90 to 100% duty cycle, what this actually indicates in this case is we could probably do with a little bit more range in our idle speed control system because we're maxed out so that's not really where we want to be. |
| 21:23 | Just looking at where this 100% value comes from, in our case we are drive by wire so we'll just come over to our e-throttle tab here, I'm not going to dive into this in too much detail but we have this value here, this parameter which is idle authority, which in this case you can see is 6% so if we come back across to our idle speed base duty, what that means is that a value of 100% in our base duty table, represents 6% of our drive by wire opening so what we want to do there is have a idle authority percentage that's going to easily allow us to maintain our target idle speeds without pegging at the maximum which is exactly what we've got here, so do as I say not as I do. |
| 22:08 | But if we have that number too great, basically we reduce resolution or we lose resolution in the idle control system so there is a bit of a range there we need to go through to make sure that we've got that set up properly. |
| 22:21 | Now with our idle speed control as well we do also have another parameter here which is relevant for our startup which is our post crank idle table. |
| 22:30 | So what this is here, we can see we've got 3D table, we've got our engine coolant temperature on the vertical axis and we've got this parameter here time since start on the horizontal axis. |
| 22:42 | And what this does is it allows us to add a little bit of duty to our idle speed control strategy just after a startup. |
| 22:51 | And this just needs to be tuned there to make sure that we drop down to our target idle speed nice and smoothly. |
| 22:58 | So we can see in this case we're not really doing much with this table, after about five seconds of operation, we're basically at or where we want to be. |
| 23:05 | Remembering this is still interactive as well with two other aspects, closed loop idle speed control as well as our idle ignition control so it's important to separate those things out and again I'm not going to give too much further into our idle speed control aspect of this, we'll deal with that in a separate webinar but it's important to understand the interactions that we do have here. |
| 23:26 | Now just while I have mentioned here the time since start parameter, so that's on this post crank idle, we'll just come back across to our tuning/fuel. |
| 23:34 | And what we're really looking at here is these three parameters here which is our prime gain, our post crank enrichment and our cranking map. |
| 23:44 | That post crank enrichment, which is going to be a really key part of what we're doing here, that has that same parameter here, time since start in seconds so that just allows us to set up a increase in our enrichment while the engine is warming up. |
| 24:01 | So it's called post crank enrichment here, every ECU manufacturer has their own sort of naming structure. |
| 24:08 | I would probably more refer to this as a warm up enrichment. |
| 24:13 | The reason for this is post crank enrichment with most ECUs is a really brief thing that only happens for maybe 5-10 seconds as we can see, depending how you want to set this table up, we're out to 240, 300 seconds so that's pretty significant. |
| 24:27 | Of course it totally depends how you tune this but this is more in my mind a warmup enrichment table. |
| 24:34 | There are two other tables here that I've mentioned, we start with our prime gain. |
| 24:36 | So basically this is a priming amount, we can see that this table is actually set up essentially for flex fuel here so it's dependent on our ethanol content, we're on pump gas here so we are at 0% ethanol. |
| 24:49 | But this is an initial prime pulse that is delivered as soon as the ECU basically sees any RPM activity from the cam angle sensor. |
| 25:00 | So this is asynchronous, it's not in line with the inlet valve opening or the port opening and closing and it is one single pulse. |
| 25:08 | The idea there is to wet out the port walls quickly to allow the fuel from the subsequent injection events to easily make its way into the cylinders without a lean condition. |
| 25:17 | So that's the first thing and then we have our cranking map which we'll come over to here. |
| 25:23 | Which is volumetric efficiency vs the engine coolant temperature at cranking. |
| 25:28 | So again there's base values in the tables that I've actually found at least for our application have been pretty good to get the engine running. |
| 25:38 | So the cranking map here, so this is used when the engine is in cranking mode. |
| 25:43 | I'll get into that in a second. |
| 25:45 | The prime gain is actually a multiplier over and above this, they kind of work together. |
| 25:49 | How to we go, actually before we jump into that, let's just go back to our inputs and our triggering so we'll see where that cranking RPM comes from. |
| 25:59 | So if we click on triggering, we can see that we have the parameter here for our cranking RPM which is set to 270 RPM. |
| 26:08 | So it's really important for all of this to work properly that the cranking RPM is set realistically. |
| 26:14 | What we want to do is simply crank the engine and see what the engine RPM is during cranking, make sure that this cranking RPM setting is somewhere higher than that, otherwise the engine's going to basically, or the ECU's going to move into run mode while we are still trying to crank the engine so in our case I think from memory, this engine cranks over at about 200, 220 RPM so we've got something that works pretty well there. |
| 26:41 | Alright we're going to get into the tuning process and we'll actually have a look at a startup and see how good or bad our RX7 is in a second. |
| 26:48 | Just a good time to remind you that if you do have any questions, we will be moving into those pretty shortly so probably a good time to start asking them. |
| 26:56 | So tuning process and tuning strategy, what do we want to do and what order should we go in? So the first thing, as I've already mentioned is we want to decide on our correction, our temperature correction strategy, which of those you prefer, totally up to you and stick with that. |
| 27:15 | So that's one of the first things we're going to go through and this is really basically part of the main tuning process, setting up our base tables which we cover in the HPA 10 step process. |
| 27:24 | We then want to tune those tables to suit and again the default values, at least I've found, for the charge temperature estimate table, they actually worked out pretty well and we should be at least starting with the correction table set to zero. |
| 27:39 | We then want to also tune our idle settings which we've looked at, making sure that our target idle is sensible and realistic and get our base idle settings dialled in so that there is good idle speed control without the reliance on closed loop strategy to come in and fix that up. |
| 27:59 | The next part, and this is the one that's so often overlooked, if we can come back into our tuning fuel and fuel map one, we need to spend our time and get this little guy here sorted our first and foremost, our main VE table, our main fuel table. |
| 28:12 | So this is one of the problems with tuning cold start, it cannot be done in one go. |
| 28:18 | Problem is that the cold start enrichment really needs to be dealt with after the main VE table has been tuned. |
| 28:25 | We saw that we have settings for cranking VE but that's fine for cranking, once the engine's up and running, the modifiers that we looked at, our post crank enrichment table, that works over and above our main VE table. |
| 28:39 | So if our main VE table is incorrect, understandably we don't really have a hope in hell of getting our post crank enrichment table set up so we need to make sure our VE table is set up correctly and not only that, that our VE table is also actually accurately tracking our target lamba table. |
| 28:55 | So that's our first job and this needs to be done at normal operating temperature so there's not real way of shortcutting this, there's no real way of substituting doing the job properly. |
| 29:07 | Once we've confident that our main VE table is tuned accurately, then the next time consuming process is that we need to allow the engine to cool down and this isn't a case of an hour or two of letting it cool. |
| 29:21 | We really need to let the engine completely cool and ideally this would be an overnight process so this is why when I was tuning professionally for a living, when someone dropped off a car to us, it was always a two day process. |
| 29:34 | On the first day we'd do all of the dyno tuning and the road tuning at normal operating temperature, that got our fuel table or VE table dialled in accurately. |
| 29:43 | Then we'd allow the engine to cool down overnight, the next day then we could set up the cold start parameters and get that dialled in. |
| 29:51 | It's also worth mentioning there that even here, that's not always going to be bullet proof and rock solid. |
| 29:59 | Particularly in a climate where we see massive variations in temperature from summer to winter, there may still be a requirement to actually revisit the calibration. |
| 30:08 | An example I'll give you here is if we are here in Queenstown for example where in the middle of Summer we can easily see temperatures in the 20-30°C vicinity and even in the morning we're probably still seeing our air temperatures or coolant temperatures sitting between maybe 10-15°C, then we move to winter where we do get snow at ground level, we can easily see the coolant temperatures sitting at -5 or even -10° on a very cold day. |
| 30:38 | So the problem here is if we are tuning the car in the heat of summer, there's no way of accurately mapping the cold start requirements down to -5 or -10°C. |
| 30:50 | Yes we can take an educated guess and extrapolate the results we've got during summer down to those regions but it's only a guess at the end of the day, albeit an educated guess and we may be wrong. |
| 31:01 | So it's really important again, more so if you're doing this commercially, just to basically educate your customers and explain that hey look if you find that if the cold start performance suffers in the middle of winter in a few month's time then this is why and by all means please let me know, bring the car back and I'll be happy to address that. |
| 31:21 | Again doesn't take very long but this at least sets your customer up for an expectation and it also means that they're not going to be surprised if this does happen and they're not going to tell all their mates that you suck as a tuner because you couldn't make their car start six months from when you tuned it so those are the sort of things you do need to consider. |
| 31:39 | Alright so we've got our VE table tuned, we've got our fuel table dialled in and everything's ready to go and our engine is nice and cold. |
| 31:48 | Now this is the tricky part because we only really get one crack at doing this, or at best a couple and we've got a couple of tasks that we're trying to do simultaneously here so it is a balancing act and we're trying to do two things at the same time very quickly before the engine heats up. |
| 32:03 | Fortunately the engines don't heat up super fast so we do have a few minutes at our disposal but it does require us to move pretty quickly. |
| 32:12 | So if we come back to the available maps here we're looking at our cranking map, our prime gain and then our post start enrichment. |
| 32:21 | So generally I'm going to start with our cranking map here because our prime gain is instantaneous, we're going to leave those for the default values at the moment. |
| 32:31 | The cranking map here, what we're trying to do is adjust this to get quick crisp starting and we can do this at a variety of different temperatures. |
| 32:39 | Generally we're going to be starting maybe down here between zero and 20°C on a cold day and we can also as we go through our tuning process, we'll probably be able to revisit a couple of the areas at higher temperatures as well, maybe 60 to 80°C and what we're looking for, we generally can't look at our air/fuel ratio because we're not necessarily getting complete combustion when the engine isn't running or hasn't run, started. |
| 33:03 | So it's kind of more of a bit of a by feel thing. |
| 33:07 | What we'll find is that if the cranking map, the VE numbers are too low, we're going to find that the engine will crank excessively and it won't start. |
| 33:16 | As we increase the VE numbers we're going to find that the engine will start to start up crisply and quickly which is obviously what we are aiming for. |
| 33:25 | If we go too far we do risk a problem where we'll find that once the engine starts it might struggle to start and once it does start we'll see our measured air/fuel ratio initially dip very very rich or we may get into a situation where we actually need to use a little bit of throttle to help get the engine to start. |
| 33:42 | So I always like to start with our cranking map with smaller numbers and build up on it. |
| 33:47 | The problem is if we have numbers in here that are too large, while the starting performance is going to be lethargic we also put ourselves at greater risk of fouling the spark plugs. |
| 33:58 | So this is something that we only get one crack at, basically once the engine's started, we've moved on and we're onto our post crank enrichment table. |
| 34:07 | Again here starting with default values from the FD RX7 base map, I actually found to be reasonably good although a little bit high. |
| 34:15 | Basically what we've got here is our time since start on the horizontal axis as I've already mentioned and we've got our engine coolant temperature on the vertical axis. |
| 34:26 | So again it's nice to have a chance to do a true cold start, maybe a mid temperature start once we've allowed the engine to cool a little bit and then one from normal operating temperature and we can see that if we're up at 80°C for example, we're not doing a hell of a lot here, 7.5% additional enrichment and that's sort of cycled away to nothing by the time the engine's been running for 60 seconds. |
| 34:50 | So I'm going to go though this process now and I have had the engine running prior to this webinar so we aren't completely cold in the case of the engine coolant tempeature, we're at 23, 24°C, our manifold temperature, sitting at 18°C. |
| 35:06 | So what we're going to do is we're going to crank the engine, it should start up pretty quickly. |
| 35:12 | While I'm doing this I also want to be taking note of what our engine RPM is. |
| 35:15 | So we might have to cycle backwards and forwards, I won't for this example, but we might have to cycle backwards and forwards realistically between our post crank enrichment table and our idle settings to get our idle settings dialled in. |
| 35:29 | So in this case, let's start the engine and we'll see how our performance is, what we want to do is make sure as well that our lambda is online so our wideband lambda is actually reading so we're not waiting for 20, 30 seconds for our wideband to come online where we can't see any data. |
| 35:45 | So let's get our engine running and we'll just track what our lambda does and see how closely it tracks our target. |
| 35:51 | OK so first thing, really nice crisp startup but we can actually see that we immediately drop pretty rich there down to about 0.75, 0.72. |
| 35:59 | So that actually could be indicative there that our cranking was a little bit rich or a little bit high. |
| 36:06 | We can see now though we're actually idling pretty nicely. |
| 36:09 | Now you can see we're at a target of 0.918, let's call it 0.92 lambda and we're sitting at 0.88, as we're talking here we're moving through the 30 second start up phase here. |
| 36:22 | Now I'm not worried about this. |
| 36:24 | Because during a cold start I'll generally be tracking a little bit richer than my hot running target and we can see that's exactly what's happening now. |
| 36:34 | So we're using this table here to just basically modify our lambda from our target because as I mentioned, in the case of the Adaptronic we don't have the ability to modify the lambda target table based on our engine coolant temperature. |
| 36:48 | But in this case, we've got a slight rich spot there straight after startup so that could possibly be a result of these values here but in this case more likely because it cleared so quickly, that it would be our cranking VE down at those temperatures there, 160%, I'd probably try reducing that down a little bit. |
| 37:09 | At the same time, while I've been talking, our idle speed control has been really nicely tracking there. |
| 37:15 | We can see 1200 RPM, remember we started at 1300, it's starting to drop away towards our warmer operating temperature and while I've been talking, our engine coolant temperature is still continuing to warm up. |
| 37:27 | So 38°C we can see that we are still a little bit richer than our target. |
| 37:32 | And again it's just important to monitor that because if we are running the engine excessively rich we do risk problems with fouling the plugs after particularly repeated cold starts. |
| 37:46 | And you might not think that's an issue but particularly with project cars that don't get driven regularly, quite often we go through a process or the owners will go through a process where the car's started up from cold, it's moved maybe in the workshop or the garage, wherever it's being stored and isn't allowed to come up to proper operating temperature then it's shut down and if we are running too rich during this process, and it's done repeatedly, that's where we do start to see problems with plugs becoming fouled and no one really likes that. |
| 38:14 | Alright so from here we will move into our questions and if you do have any more questions, please ask those. |
| 38:25 | Bjorn has asked, how do Injectors and the correct Injector data affect cold start? Also if there's no injector data for a particular set of injectors yet knowing it's CC per minute, is there a way to dial them in to suit? Probably a little bit off target for this particular webinar but yes the injector design itself can have some impact on the cold start performance. |
| 38:48 | We don't normally have a lot of control over this, let's be honest in the aftermarket we're at the whim of aftermarket injector suppliers so we don't get the benefit of being able to choose maybe four different spray patterns for our injectors, it kind of is what it is and we deal with it in the aftermarket. |
| 39:06 | So particularly with a larger injector we may find that the spray pattern is less ideal compared to the stock injector and we may find that there's more port wetting etc which can have a bigger impact on the cold start performance than if it was properly targeted and this may mean that all things being equal we need a larger percentage change in our cold start enrichment. |
| 39:30 | The process though sort of irrespective of the injector kind of follows the same trend of just seeing how the engine's responding, how it starts, what our measured lambda is and then making adjustments as required. |
| 39:43 | Data for a set of injectors that's unknown, that is a bit of a problem, particularly with these volumetric efficiency based ECUs we really do need quality injector data, otherwise we're going to be baking in all sorts of errors with our VE table. |
| 39:58 | CC per minute and a rated pressure is an important aspect but the injector dead time data is also really valuable or really important if you want the best quality tune. |
| 40:10 | Now is it absolutely essential? Well no of course it isn't, we can tune the engine with incorrect dead time values but you're going to end up with some compromises in your tune so that's why I am a big advocate when you're looking at a project car and you're looking at a potential build, it's always best to start with a quality set of injectors where you can get that data. |
| 40:34 | Bjorn's also asked, looking at the VE table, seeing the values at 0 kPa, -20 kPa being very much lower than above 20 kPa how does that affect idle keeping in mind the neighbouring cells are affected by the values of those around them, re the AFR being that richer may be easier to idle versus leaner. |
| 40:51 | OK so what we want to do, obviously we can't tune the VE table at 0 kPa, in some instances we may not being able to get to -20 kPa and you're absolutely right, we may end up interpolating into those cells depending exactly where we are. |
| 41:06 | The idea here is what we want to do is essentially extrapolate the sort of trends we are already seeing at a given RPM column in our fuel VE table down into those lower load zones. |
| 41:19 | So generally with very few exceptions we don't see dramatic changes in the trend at a specific RPM as our load changes. |
| 41:27 | It's generally pretty smooth. |
| 41:29 | So by extrapolating that trend we might not be exactly right but we're going to be there or thereabouts in terms of our VE at those lower load zones. |
| 41:37 | And if I'm idling bang smack in the middle of two cells, because idle is such an important part of the tuning process, typically what I would do is actually add another break point so I'm actually completely right in the centre of a cell, no interpolation at idle point, that gives me absolute control over the fuelling. |
| 41:56 | Tyler's asked, how do you set the VE table values in the cranking region? Do you just follow the trend of the VE table and modify cranking fuel correction tables until the engine starts reliably? So yeah first of all Tyler, yes that's exactly the same as what I was just talking about to Bjorn's question there. |
| 42:14 | We extrapolate the trends we see in the VE table down into the cranking area. |
| 42:17 | However with the specific example here of Adaptronic, during cranking it actually uses that cranking table so that's that 2D table vs engine coolant temperature with the VE number coming from that. |
| 42:31 | So it's not actually that important to be absolutely pinpoint accurate in the cranking areas of our main VE table. |
| 42:39 | Bjorn's asked, with regard to the post start enrichment seeing the reference is that it's like warmup enrichment. |
| 42:48 | There may be options to lock ignition angle to a certain degree with a restore rate. |
| 42:52 | What would the benefit be of being able to lock the ignition angle at startup for a certain period of time? OK so I mean as I mentioned, I would really consider the post crank enrichments not post start enrichment to be like warmup enrichment but it is temperature and post start time related so there are a few subtle differences there and again it comes down to every ECU manufacturer has their own take on the best way of going about getting a specific solution. |
| 43:21 | Some do a better job than others but I don't know if I could say there is a right and a wrong way of doing this. |
| 43:26 | Benefits of locking the timing at a fixed angle. |
| 43:29 | Well first of all that would be unusual. |
| 43:31 | Yes it can probably be done in some ECUs, I'm not actually sure that the Adaptronic gives that option but probably the only advantage I see of that is if the ignition timing is locked, it takes one variable out of the operating process and means that the torque vs RPM and load is not going to be changing based on ignition timing. |
| 43:55 | Personally though I don't see why we'd want to do that, the idle ignition control is a really powerful way of helping with our idle speed control anyway so that's what I would prefer to do. |
| 44:09 | Next question comes from Mahdi who's asked, difference in cold start tune for E85 vs normal petrol? Good question there and first of all we need to be a little bit mindful of what we can reasonably expect from E85. |
| 44:25 | E85 or ethanol in general, is much lower in volatility compared to pump gasoline and this does make it harder to cold start. |
| 44:34 | So for example if we are running on E85, we'll generally find, depending on the engine, once we get down below about 5°C, maybe 0°C, getting really crisp good starting performance on pure E85 or true E85 can be borderline impossible. |
| 44:53 | So as the temperature decreases we actually see the pump gasoline, pump E85, in cold areas of the world, they actually have winter and summer blends and I think off the top of my head, the legislation for E85 actually allows them to reduce the ethanol content down to I think it's about 56%. |
| 45:12 | Which they do, they add more gasoline or gasoline based component into that to pump up the volatility and make it easier to cold start. |
| 45:21 | So anyway getting back to the fact that we first of all need to be realistic about what we can achieve, what we will find is that during both cranking and post start on E85, we will need additional fuel being delivered. |
| 45:33 | That can be a magnitude of 50% more fuel initially, it's quite dramatic. |
| 45:39 | So that's why we saw that there was the table I highlighted there that had ethanol content as a vertical axis. |
| 45:49 | Knock Limited has asked, how do you select the target idle speed for different engine combinations? Yeah that's a good question, a lot of this really comes down to experience and I know that sounds like a bit of a hollow answer because if you don't have experience then what are you going to do? So understanding what is going to be sort of expected, that's a good place to start. |
| 46:10 | So for a factory engine, all we need to do is look at what the factory idle speed targets are, should obviously be no reason why we can't reach exactly those same idle speed targets so that's the first place to start. |
| 46:22 | If you're wondering about this, stuff like factory target idle speed is normally listed in the factory service manual so this information is not very difficult to get. |
| 46:29 | Obviously if you've got experience with the factory car before fitting an aftermarket ECU, well you know what that target idle speed will be. |
| 46:37 | The other aspect though is if you are modifying the engine, and the example I gave during the webinar is what if you've swapped in a really big aggressive cam? Well we could expect rightly that the idle speed is likely going to need to jump up by maybe 200-300 RPM. |
| 46:53 | In some instances much more than that, my old Mitsubishi Evo drag car wouldn't idle below about 1400, 1500 RPM. |
| 47:00 | So it's really just a magnitude dependent on the cam profile so having an understanding of what we can expect based on how aggressive the cam is, for a mild cam we might need to go 50 to 100 RPM, for a really aggressive cam, maybe 200 or 300 RPM or maybe greater for a full race cam. |
| 47:18 | So that gives us a bit of a guideline and from there it's a case of testing, you'll get an idea pretty quickly if you're trying to push an engine to do something it's not comfortable with. |
| 47:29 | The engine's not going to idle happily, it's going to probably oscillate in engine RPM and it's going to stall frequently. |
| 47:37 | If I'm in that sort of situation, I'll try chucking another 50 or 100 RPM at the idle speed and see if that sorts it out and stabilises things 'cause if we've got good control over our fuel and ignition timing and the engine still isn't idling happily then that's indicative that we need a bit more idle speed. |
| 47:51 | Alright that's brought us to the end of our questions there, remember if you are watching this in our archive, if you've got any future questions, further questions, then please ask those in the forum and I'll be happy to answer them there. |
| 48:01 | Thanks for joining us and hopefully we will see you again next week. |
Timestamps
0:00 - Introduction
2:20 - What do we need to adjust and why?
4:45 - Temperature compensation options
10:55 - Charge temperature correction
15:00 - Manual table setup
18:10 - Target lamb19:05 - Idle speed target
22:20 - Post crank
24:30 - Prime
25:15 - Cranking
26:40 - Tuning process
27:00 - Choose temp correction settings
27:40 - Tune idle settings
27:55 - Tune VE table at normal operating temperature
29:05 - Allow engine to cool down
32:10 - Tune cranking table
34:00 - Tune post start
34:50 - Demonstration
38:20 - Questions


