Do you have coilover suspension in your car? You’ve possibly installed it incorrectly. It’s not your fault though...
The process described here is different to what many aftermarket brands suggest for their products. It’s important to know that many manufacturers have incorrect instructions and installing suspension that way can lead to a harsh ride, damaged components, cut tyres or “hopping” and topping out over bumps. Thankfully, it's fairly easy to do it properly.
In this article: Whay are there two adjusters? | Is preload important? | How to set the body length of your coilovers | How to set your ride height | Final Thoughts
Why Do Coilovers Have Two Kinds of Height Adjustment?
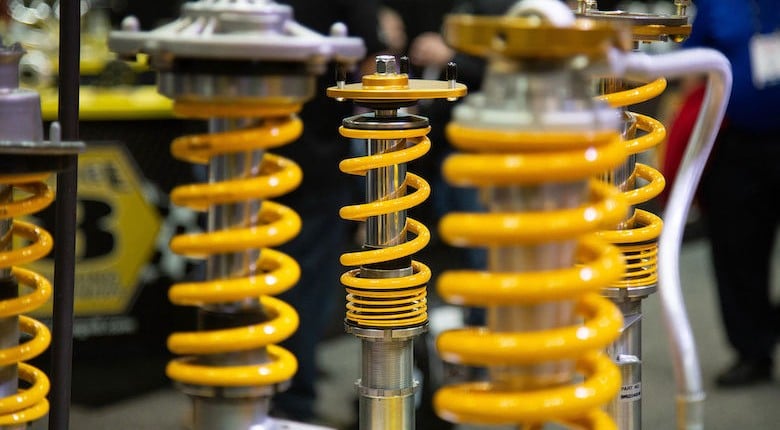
On most modern coilovers, there are two separate adjustment collars – the spring perch and the lower mount – and there’s a lot of confusion about what each adjuster is for.
Lower Mount
The lower mount is often mis-labeled as the ride height adjuster. It should be called “body length adjustment”, and it’s critical to set this correctly when setting up your coilovers for the first time.
Winding-out the lower mount extends your shock length and means the bump stops will engage earlier, winding it in does the opposite and means the suspension must compress further to reach the bump stop.
Setting this length too short can cause your wheels to hit the inner guard, or worse - your suspension could bind before reaching the bump stop. Going too long means the bump stops will engage early and you will miss out on compression travel.

Spring Perch
The other set of collars is your spring perch. These support the weight of the car and sets the length and tension on the spring at ride height. This collar is often mis-labeled as “preload” (even though car springs often run zero preload). When you adjust the perch, you are simultaneously setting the ride height, and also setting where the shock sits in its compression/extension range.
The spring perch is where you should be making your regular ride height adjustments when tuning a car’s handling at the race track, or setting a car up on corner weight scales.
It’s worth mentioning that most high-end motorsport suspension like KW Suspension, Nitron and MCA Gold are only adjustable at the spring perch. This is because an engineer has pre-determined the correct shock body length, and means an adjustable lower mount isn’t needed. It also means the shock body and damper rod can be longer, allowing for extra rebound travel and extra oil capacity for applications like rallying.

What About Preload?
What is preload? Does it exist? Will it change your spring rate?
If tension is wound into a spring when there is no weight on it, it is preloaded. Setting up suspension with preload changes the initial breakaway force needed before the spring starts working, and will sit the shock absorber higher in its range (closer to topping out).

People make comments on our Facebook posts every week that claim "moving the spring perch changes the stiffness of your springs" and it is simply not true, so for those who need to hear it:
CHANGING PRELOAD WILL NOT CHANGE YOUR SPRING RATE.
Here's why: The resistive force of a linear rate spring (as found on most coilovers) will remain constant throughout the full length of its travel.
If you take a spring with a rate of ~10kg/mm, it will compress by 1mm for every 10kg of force that is loaded onto it. If you continue loading more weight onto the spring, it will continue to compress at the same rate until the spring binds at the end of its travel. To put that in numbers: 100kg of weight = 10mm of compression, 300kg of weight = 30mm, 500kg = 50mm and so on.

Looking at this from another angle, if you preload 30mm of tension onto your spring, it will take 300kg of force to overcome that initial breakaway pressure before the spring starts to compress. As more load is applied, it will continue to compress at the same rate of 1mm for every 10kg of force.
I believe this is where the “stiffness” misinformation comes from. If you wind 50mm of preload into a 10kg/mm spring and your car has less than 500kg of weight per corner, the spring will act like a rock until more than 500kg is applied. This means your suspension will top out violently over every dip or bump, and you will have zero droop travel. The car will feel stiff, but it’s due to incorrect setup rather than a change in spring stiffness.
For most road and race cars, it’s more common to see the opposite scenario. The springs will often be slack to reach your desired ride height, while maintaining adequate droop travel. That’s where helper/keeper springs come in - these springs compress fully once the car’s weight is applied to them, and they exist to keep the main spring located as it travels from droop to compression.

Steps to Install and Adjust Your Coilovers
Here is a simple process you can follow when installing your coilover suspension for the first time. The same steps can be followed if you make a change to your tyre size, wheel offset / width, or if you are concerned that your suspension arms are close to binding:
1. Install the coilover with no spring

Coilover installed with no spring, sitting in the full droop position.
Step one is to remove the spring and bump stop from the coilover and re-fit the top hat, then install the suspension into your car. This allows you to run the suspension through its full sweep by jacking up that corner and visually inspecting the components at different points in their travel.

Suspension cycled to full compression with spring and bump stop removed.
If you want to get this millimetre perfect, use a plastic spacer to simulate the compressed length of your bump stop.
2. Check for wheel clearance and bump stop engagement
With the coilover installed, fit your wheel and use a jack to fully compress the suspension. Once the suspension is compressed all the way, give it a spin and see if it rubs on anything. Turn the wheel to full lock in both directions and repeat the process. If the wheel won’t turn or you can hear it rubbing, you will need to adjust your body length.

If the wheel spins freely, great! Now check if there is any extra space above the wheel. The ideal setting is for the tyre to be very close to the body at full compression. Allowing the wheel to get as close as possible to the wheel tub without touching means you are making the most of your up-travel.
3. Adjust the lower mount of your suspension
Now that you know where your suspension is sitting in the range, you can adjust the length of your shock body using the lower mount.
Remove the wheel and adjust the lower thread to where you think it will be right.
Reinstall the wheel and repeat step two. It might take a few repetitions to get this perfect. Stick with it! The results will be worth it.

Pro tip: loosen the lower mount and use your C spanner on the locked spring perch. This will turn the whole shock body and is easier than trying to turn it by hand.
Once you are happy with the clearance at full compression, lock off the lower mount and remove the coilover from the car. Use a steel ruler or tape measure to match the length of the coilover from the other side of the car (you want both sides to be the same length), then repeat the process on the other side to double check for clearance. Some cars have slight differences in the inner tub from side-to-side, so it’s worth double checking.
Before you put the springs back in the car, add a piece of tape to the body with a mark on it. Now compress the suspension fully and measure the distance between the tape mark and the bottom of the wheel rim, then repeat that measurement with the wheel at full droop. Write both measurements on a piece of paper as they will be useful when setting your ride height.

To be clear: this is how you find the shortest possible length for your shock body, which is ideal for race cars and low street cars. There is no point going any shorter than this length! All you will achieve is stopping your bump stops from engaging and minimising your droop travel (both bad things).
4. Set your ride height
Reinstall your springs and bump stops with the spring just captive on the perch.
Put the wheels on the car and lower it onto the ground. If you have slip plates, use them, otherwise roll the car backwards and forwards a few times to let the suspension settle.
Now you can use the spring perch to set the ride height of the car. You should be targeting around 1/3 droop travel as a minimum - more than 1/3 is fine too, Thomas from KW Suspension recommended of 45% bump, 55% droop travel (for a non-aero heavy car) on this episode of the Tuned In Podcast. Use the wheel travel measurements you took earlier to know if you are in the window.

Once you have set your ride height, the spring might become uncaptive. If this happens, it’s best to fit keeper/helper springs and reset your ride height. Helper springs will keep the spring in line with the top hat and will prevent the springs from rattling around at full extension.
If the spring requires some preload to reach the correct height, that’s OK too (this will only happen with very soft springs). If you’ve followed the steps above and have an acceptable compression/droop ratio, you are good to go!

Final Thoughts
Now that you have your coilovers installed and set up correctly, you can lock-off the lower mount and forget it exists. If you need to make ride height adjustments for handling or comfort, do it from the spring perch.
The only reason to unlock the lower collars again is if you change wheel/tyre size, or if you make modifications to the chassis to allow for more clearance. Otherwise you can rest easy in the knowledge that you have your coilovers set up better than 90% of other performance car people.
This article only scratches the surface of what’s possible. If you want to learn more about setting up and tuning suspension, check out the Suspension Tuning and Optimization and Motorsport Wheel Alignment courses.