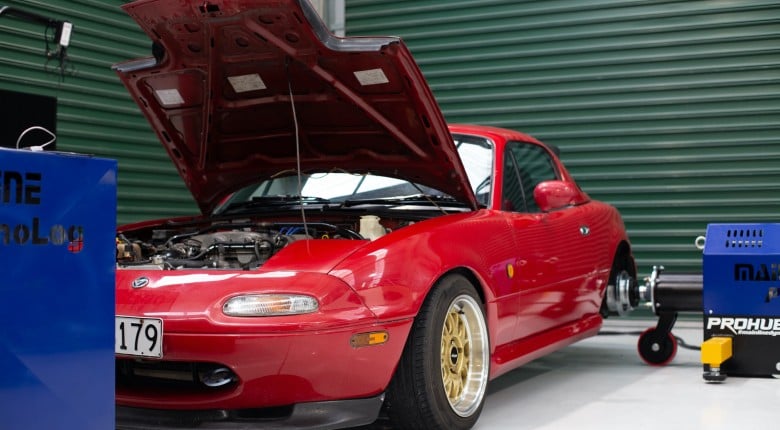
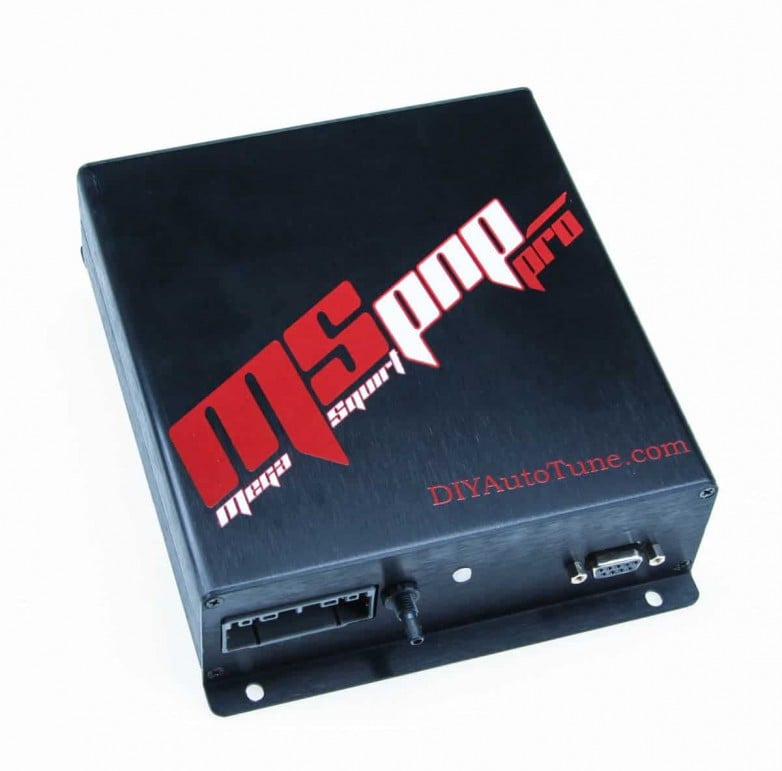
Firstly, let’s get into a bit of history of the MS3 Pro. In its initial form, it was a DIY based kit-set that a home enthusiast could assemble themselves. It came with open source code which allowed you to modify the ECU’s operation. This ECU has now progressed into an off the shelf product that, in our case with the Mazda MX-5/Miata test car, is a plug and play replacement for the factory ECU.
Now, if any of you are thinking that a DIY style ECU doesn’t really sound like it could compete with the modern standard, let us stop you there. Nothing could be further from the truth. Whether you’re looking for simple or complex, the MS3 Pro is feature rich and up to the task with the other best of them in this bracket.
The goal for this brief article is to give you a little bit of insight into our experience getting started with the MS3Pro and TunerStudio platforms to help you decide if it's going to be a good fit for you, or to help you get started with your own project. There is also a full worked example showing how to tune using this platform in our paid course material (lifetime access).
In this article: Software | Setup & Settings | Navigating the software & Making Tuning Changes | Auto Tune Feature | Conclusion
What Software Do You Need?
In order to get started tuning with the MS3 Pro, you’re going to need a software package. Here, you’re spoilt for choice with a few options available, depending on your budget and requirements. The product being used here is called Tuner Studio, by EFI Analytics and within this product, there are three variants.
If you’re looking for the budget option, MS Lite is free to download. Moving up from this is Tuner Studio MS which comes with the purchase of the ECU. At the top of the food chain is MS Ultra, which is being run in our MS3 Pro. Before you start to think you might miss out by not having the MS Ultra package, know that there are other options that will still get the job done, the MS Ultra package does however give you the advantage of being able to do all your data analysis within one piece of software.
Tuner Studio software works in well with the MegaLogViewer HD Software, also from EFI Analytics, which can analyse data from almost any ECU and is something you may have seen us use on other projects due to its versatility in this respect compared to many other data analysis options.
Setup & Settings
Before we get into making tuning changes on the MS3 Pro, let’s look at how to set the ECU up. We’ll start with our general settings. If you click on basic/load settings followed by general settings, you will see all those configurable as follows:
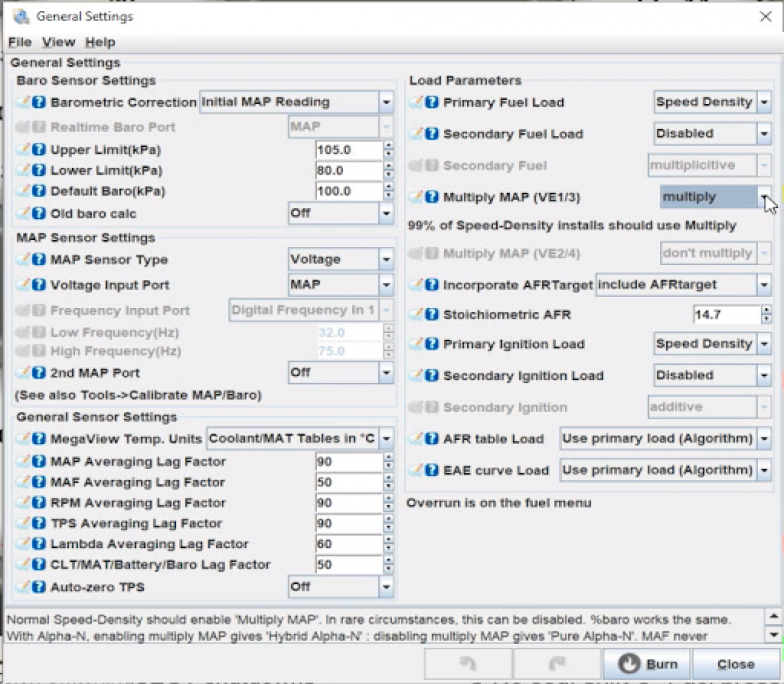
- Primary fuel load - This is linked to the control algorithm mentioned below.
- Multiply MAP - As stated, 99% of the time, you want this on multiply. This is a background calculation based on manifold pressure. If manifold pressure is doubled, so too is fuelling but air fuel ratio is kept the same.
- Incorporate air fuel ratio target - If this is set up, the ECU is working as a volumetric efficiency based ECU. With this active, you will also need to include your stoichiometric air fuel ratio.
Now onto engine and sequential settings which again, can be found in the basic/load settings. You will be able to adjust the following parameters:
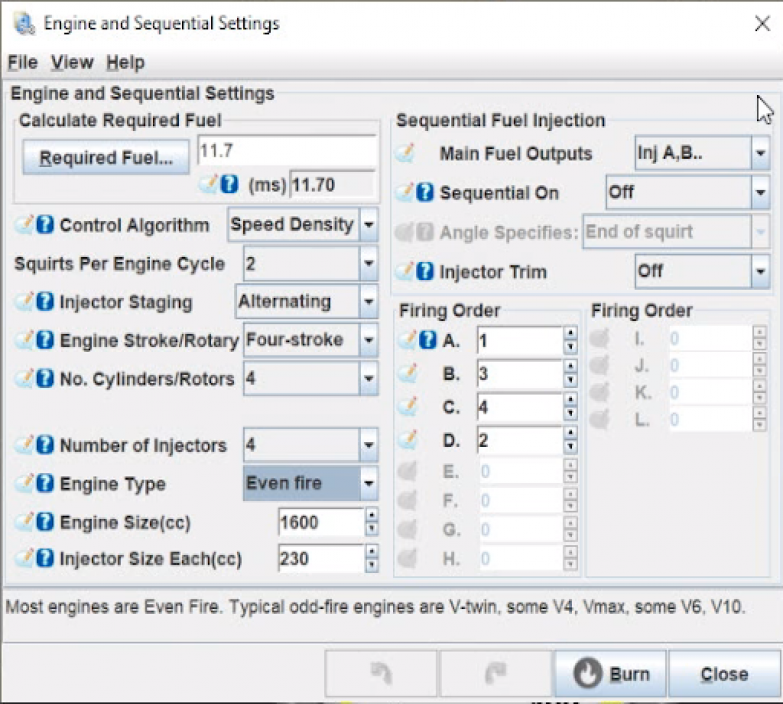
- Control Algorithm - How the ECU is operating
- Speed density mode
- Percent Baro - Speed density with barometric air pressure correction
- Alpha N - A TPS based load axis
- MAF - If you are using a mass air flow system
- ITB - Individual throttle body
- Engine related settings - e.g. engine stroke, number of cylinders and injectors, engine type, engine and injector size. Note here that if you have an off fire engine, you can define individual TDCs for each cylinder.
- Main fuel outputs
- Sequential selection
- Firing order
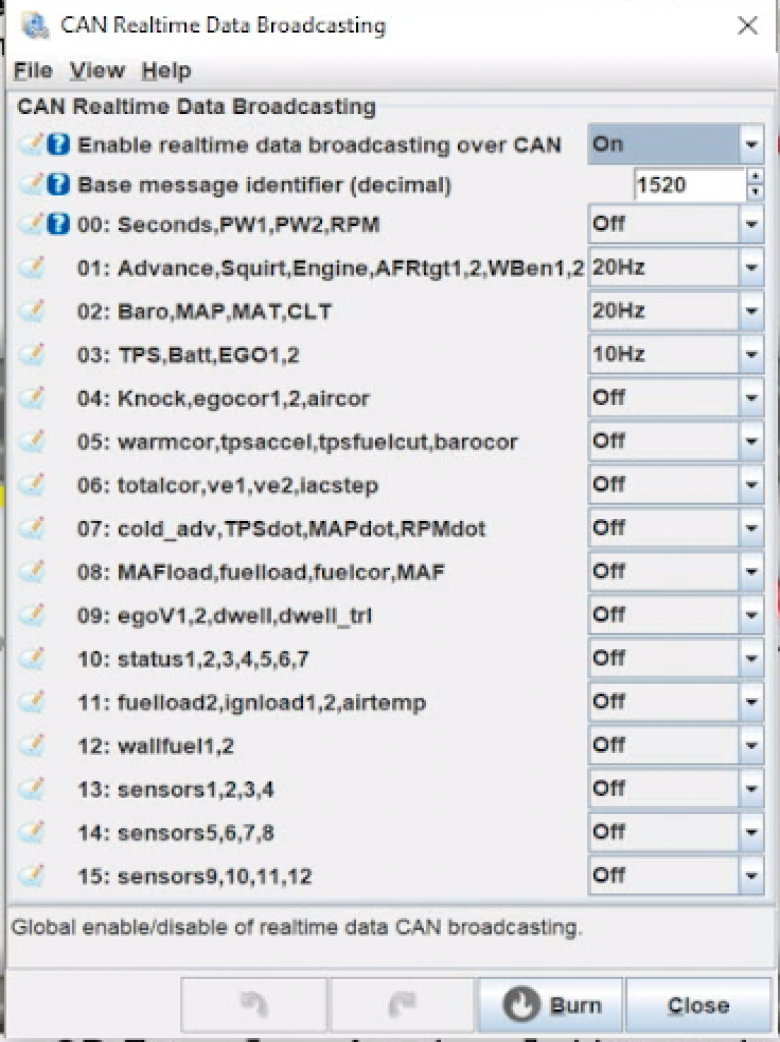
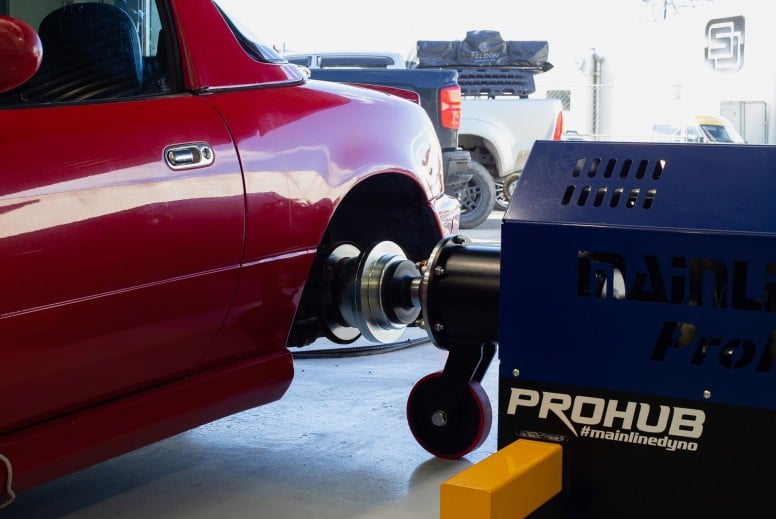
Heading back out now, if you click on the CAN-bus/testmodes tab on the top right and then on CAN real time data broadcasting you will see all the settings you can change relating to this. In our case, this is used to communicate data from the MS3 Pro to our Mainline hub dyno. More commonly however, you might use it to communicate to an aftermarket dash logger. As you can see below, real time data broadcasting is turned on and is using a base message address of 1520 decimal for the data to be sent out on. Next you can choose which data is going to be sent and the speed at which this will be done. With data such as RPM, this changes quickly and as such, you will want to send it out quickly. Coolant temperature on the other hand, moves slower and can be sent at a lower speed. 
Navigating the software & Making Tuning Changes
Before we get into the nitty gritty of the software, it is important to make note of two important details. Firstly, the need to burn changes. Whenever a change is made, be it to a setting or a tuning change, a “burn” button will become clickable. Failure to do this will mean that any changes made will be lost. Potentially very frustrating, not to mention time wasting! Secondly, it is important to note that with any of the tuning changes you make to a cell, you need to be as close to the centre of that cell as possible. When the cell turns red, you are close enough to the centre to make tuning changes.
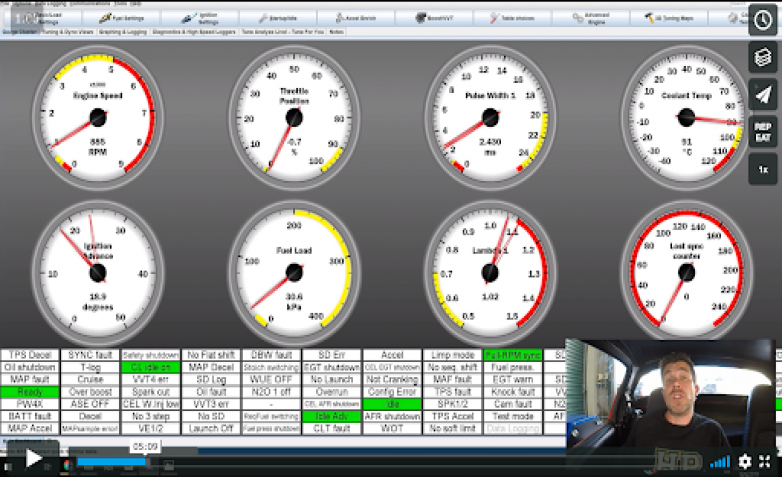
Moving onto the layout of the software. Shown in the below image is the gauge screen. This can be configured to show whatever gauges you require, depending on the task being undertaken. This is a great feature that lets you focus on exactly what you need, without any other unnecessary noise.
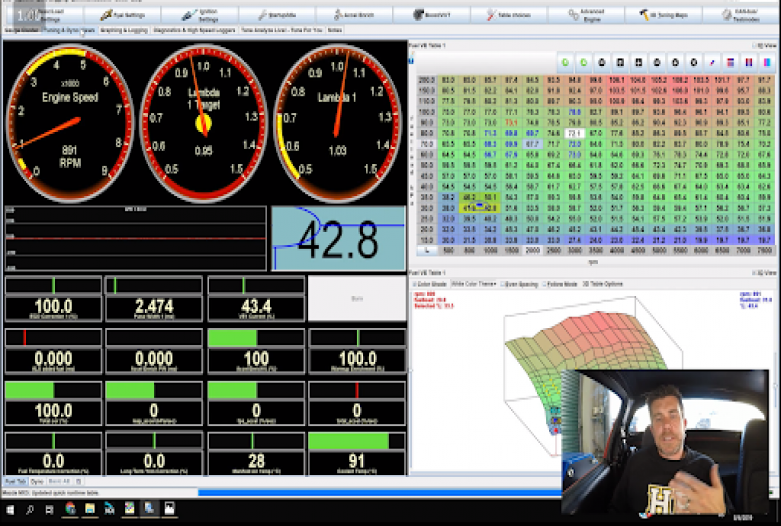
Another tab that comes with the MS Ultra version of the software is the tuning and dyno views tab, which basically gives you more in depth information. Over on the right hand side, you can see the fuel table which you’ll be tuning. Below this is a 3D view of that. The information you choose to have displayed over on the left will depend on the individual. However, let us draw your attention to a few that you see displayed in the below image:
- Measured air fuel ratio
- Target air fuel ratio
- Air fuel ratio error - This is a measured over desired equation which gives you a correction factor to be applied.
- Coolant temperature - Something that can easily creep up whilst you are focussed on tuning your fuel table. This changes colour as the temperature increases in order to grab your attention.
- Manifold air temperature
- Pulse width
- Exhaust gas oxygen correction
- Acceleration enrichment
- Warm up enrichment
Moving over, you have the graphing and logging tab. Another feature available in the MS Ultra package. In this, you are able to view your ramp runs. If you look at the image below, you will see your RPM in purple, your target lambda in yellow and measured lambda in blue. The handy thing with this is that if you click on any point in the log file, you can see a trace of where you are in the VE table. As you can imagine, this makes it incredibly easy to pinpoint exactly where you need to make tuning changes.
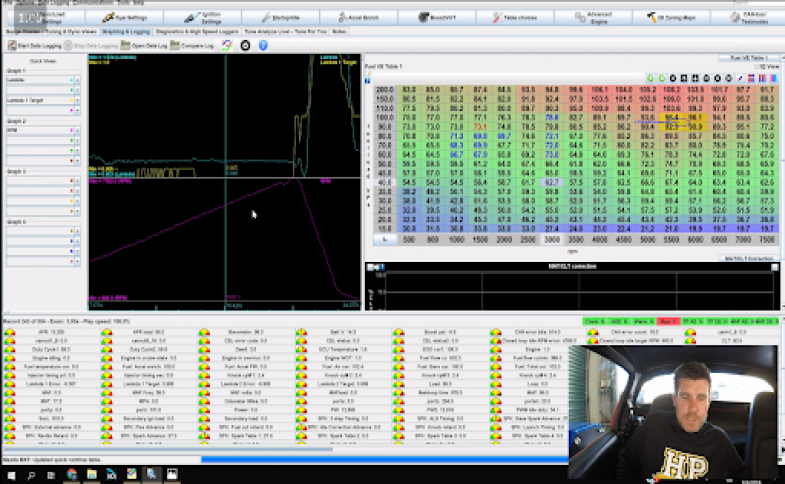
Next, let’s have a look at how to make tuning changes. Click on the fuel settings tab up the top of your screen and then on fuel. As you can see from the image below, manifold pressure is on the vertical axis and engine RPM is on the horizontal axis. The cursor indicates where in the table you are accessing. In our case, we are running slightly lean and need to add fuel. There are a number of ways to do this and we’ll go over them here. After highlighting the cells you need to change, changes can be made in the following ways:
- Increment/decrement - If you’re close to your target, pressing the full stop or comma key will change the numbers by 0.1. If you are farther away and require a coarser change, holding the control key and pressing the comma or full stop will make a change of 0.5.
- Percentage change - Pressing the shift and asterisk key brings up a box in which you can enter your change. For example, entering 1.05 will add 5% fuel and entering 0.95 will subtract 5%.
- Direct change - Pressing the equals key will allow you to input an exact number.
- Interpolating - This is a great way to save time by quickly smoothing your data if you aren’t so worried about accuracy. This can be done by using the forward slash key.
As you can see, you have all of the usual ways you would expect to be able to manipulate the data. If at any point you aren’t sure of the key shortcut, simply right click and it will bring up a list.
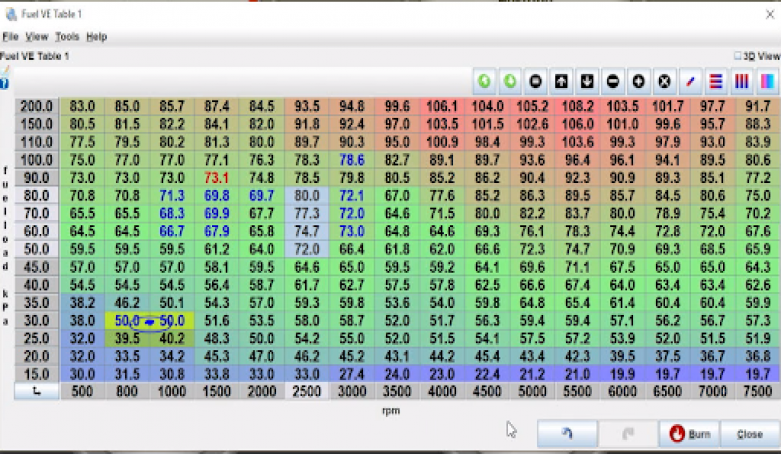
Another feature of the fuel VE table is that you can change the break points on either of your axes. You can do this by clicking on the button where the axes intersect which will bring up the below table. You may be thinking, do I have to then recalibrate my entire VE table? The answer is no. If you click on the “apply new X&Y values, interpolate Z”, the software will do this for you.

Although the above table is great and gives a lot of information, sometimes it can be hard to quickly notice outliers which could cause drivability problems, or even damage your engine. If you click on “3D view” on the top right of the fuel VE table box, you get the below view. Using this, you will quickly be able to tell if there are any issues.

In the same way that you were able to make changes to the VE table, you can also make changes to your ignition table, again via the ignition settings tab.
Moving onto making changes in your air fuel ratio table. This can be located in the fuel settings tab. You will need to start by setting up some realistic air fuel ratio targets or in other words, what you want the air fuel ratio target to be for a specific combination of load and RPM. For those of you who aren’t familiar with a VE based ECU, our VE table is telling us how completely the cylinders are able to be filled with air at any particular combination of load and RPM. If the ECU knows how much air is entering the cylinders along with the amount of fuel that will be delivered for a given pulse width, then the ECU can easily calculate the pulse width required to get a specific air fuel ratio. Once you have your air fuel ratio targets set to where you want them to be, you can then tune your VE table so they get you right on your air fuel ratio target. The idea is that once the VE table numbers have been optimised, you don’t need to touch that table again. Instead you change your air fuel ratio table numbers.
Auto Tune Feature
One of the really cool features of the MS3 Pro is Tune Analyze Live. What this does is look at our measured air fuel ratio and our target air fuel ratio and automatically make adjustments to the VE numbers to get us onto our target.
To start the auto tune, click on the “start auto tune” button on the top right hand side. You can tell that changes are being made as the “correcting table” button beside this will start flashing red. Once the measured air fuel ratio reaches your target, the cell will turn green in the cell weighting box on the top right.

Tune Analyser gets even more clever still. It tunes ahead by interpolating out to the right and above in terms of load. This is helpful because as you increase the load point and move into an untuned area, you will already be close to your target.
The most important point to remember here is that this is not a bandaid fix for not being able to tune properly. For example, if you tune when the engine is heat soaked, in warm up enrichment or if you use erratic throttle movements, you will not get good results. Also, just like when you were manually tuning, it is important to be as close to the centre of a cell as you can.

Lastly with the auto tune feature, there are some advanced settings you can change. You are able to dictate when the auto tune will occur by filtering for minimum/maximum RPM, load and coolant temperature. You can even make custom filters. Perhaps you want to stop changes being made when acceleration enrichment is active for example.
Conclusion
That brings us to the end of our introductory overview of the MegaSquirt MS3 Pro. All in all a great ECU with a lot of functionality. If you want to get started on learning how to tune this or another platform, come along to a free lesson. No squeaky whiteboard, no stuttering sweaty man talking to you over zoom, just a quality introduction to fuel and ignition tuning using a standalone ECU like the MS3 we discussed today. Claim your spot.
