Whether you're thinking about printing flexible gaskets or rigid aero parts, SLA or stereolithography (an umbrella term for resin printing) is a tool you need to know and understand.
Compared to FDM or FFF, SLA is relatively similar in accessibility, with many affordable consumer-grade printers and materials available. However, resin is usually more expensive than filament, and while SLA and FDM have some crossover in use cases, the material properties are different enough that they generally suit different applications, meaning that SLA can achieve things that aren't possible with FDM and vice versa. More importantly, the fundamentals that drive print success are different and orientation strategies that work perfectly in FDM can cause complete failures in SLA.
Should your 3D prints be flat or tilted? Chemical bonding vs. layer adhesion. Why do decisions around these factors and more determine whether your SLA print succeeds or fails? Let's dive into the article and figure it all out.
In this article: What Is SLA? | How Resin Printing Works | Printer Types | The Metrics That Matter | SLA Workflow | Best Print Settings | Orientation and Supports | Resins Options

What Is SLA?
SLA resin printing sits under the additive manufacturing category known as 'vat photopolymerisation'. This means that when exposed to light, a chemical reaction occurs and the resin cures, hardening and solidifying. Because of this, resin needs to be kept out of sunlight to remain in liquid form.
SLA resins are thermosetting materials. The chemical bonds formed during curing can provide strong mechanical properties and good heat resistance, but if cured resin is exposed to excessive heat, it can degrade and become brittle.
Compared to FDM prints, SLA parts are more isotropic in their mechanical properties because the chemical bonding between layers reduces issues associated with layer adhesion. However, SLA parts tend to be more brittle.
How SLA Resin Printing Works
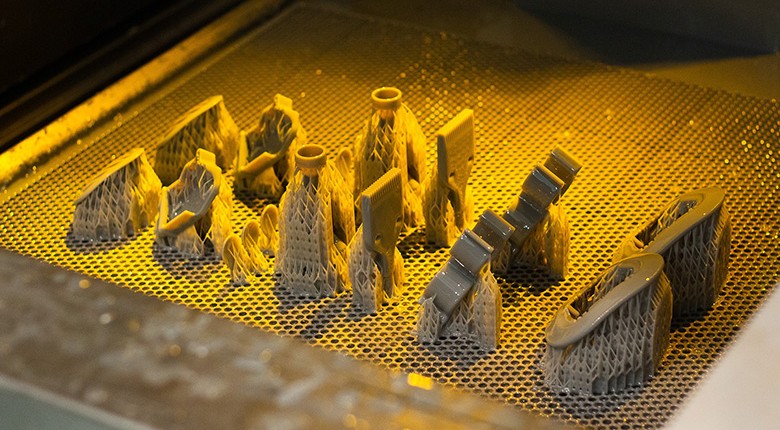
Most consumer resin printers use an inverted SLA approach, meaning the build platform is effectively upside down and moves upwards during printing. This layout allows for smaller consumer printers compared to the original right-side-up machines.
The process begins with the build platform lowered into a pool of liquid resin called the vat. A light source beneath the vat cures the cross-section of a thin slice of the part on the build platform. The platform then moves up, and the next slice is cured, building the part layer by layer until complete.
A key part of the system is the flexible release film at the bottom of the vat, commonly called the FEP film. The top layer of resin sticks to this film during curing, and as the build platform moves, the layer must release. The film’s low surface tension helps minimise release force, improving reliability and helping achieve a smooth surface finish.

SLA Printer Types
There are three common forms of SLA resin printing: laser-powered SLA, MSLA, and DLP. The fundamentals are similar across all three, but the print engine under the vat is the key area of difference:
- Traditional laser-based SLA uses a laser to cure each layer. These systems can achieve very accurate results and excellent surface finish, but are generally slower.
- DLP uses a projector reflected through an array of micromirrors on a semiconductor chip. Each micromirror effectively represents a pixel in the projected image used to cure each layer. Because DLP can project the entire cross-section of a layer in one instant, it's a much faster approach than laser-based systems.
- MSLA uses an array of light sources, usually LEDs, and masks sections of the light so only the desired cross-section cures each layer. The term LCD is commonly used interchangeably with MSLA because most consumer resin printers use an LCD screen as the mask.
SLA Performance Metrics That Matter
Like any CNC machine, resin printers span a wide range of costs. Many consumer and hobbyist printers sit in the few hundred to around 1000 USD range and are capable of producing very usable results. Professional equipment can range into the thousands or tens of thousands, and industrial units can cost far more. It's also possible to access high-end machines through printing services rather than owning them.
One of the key ongoing costs is resin, which is typically two to four times the cost of most FDM filaments at around 100 USD per kilogram. Even if the machines themselves are similarly priced, resin printing is usually more expensive in consumables.
Resolution and surface finish are major reasons people choose resin printing, and exactly why we have an SLA printer at High Performance Academy.
Surface finish is heavily influenced by the core process and the chemical bonding between layers, but the printer, resin choice, and resolution also matter.
Laser-based systems can create very smooth curved edges due to the round dot of the laser, while DLP and LCD systems project through pixels. Historically, this could create stepping (which is probably what most people picture a 3D-printed part looking like), but modern high-resolution screens and projectors have reduced the effect significantly.
Manufacturers may describe LCD resolution as 4k, 6k, 8k, or even 12k, but this doesn't account for screen size.
A larger screen with the same pixel count will have worse resolution per area, so what matters more is 'XY resolution'. For DLP and LCD, this relates to pixel or micromirror size and the smallest reproducible feature on a layer. Z resolution is determined by the minimum printable layer height, and a smaller layer height increases detail and surface finish, but also increases print time and the chance of errors.
Build volume is another key metric. Unlike FDM, where volume is often expressed as a cube, MSLA printers are usually specified in three separate dimensions, such as 218 x 123 x 235 mm, representing X width, Y depth, and Z height.
Most printers suitable for our needs here at HPA (and probably yours too) are typically under 300 mm in each dimension. As always, a bigger build volume is only beneficial if you actually need it and have space for the machine.
Printable materials also differ between printers. Many manufacturers sell their own resins calibrated for their machines, which usually provides better results. Some printers allow third-party resins through open platforms, which can be useful but may compromise properties in some cases. Before purchasing a printer, we highly recommend reviewing the spec sheet and confirming it supports the resin types you want to use.
SLA Workflow
The workflow from a 3D model to a printed SLA part first involves mesh files and slicing software. The slicer creates images for each layer that'll be cured rather than generating a toolpath. The slicer also controls printing parameters and support requirements.
After slicing, files can often be exported as a CTB file containing the layer cross-section images. This can be loaded onto a USB stick and used by the printer. After printing, the part and supports are removed from the build platform.
The printed part then needs to be cleaned to remove excess uncured resin. Cleaning can be done in water, although isopropyl alcohol is usually recommended to help dissolve uncured resin. Dedicated cleaning stations can agitate cleaning fluid to improve efficiency, and parts are typically post-cured under UV light to ensure they reach their final properties.
If you'd like to learn how to create 3D models in CAD, check out the 3D Modelling & CAD for Motorsport course.

SLA Print Settings That Control Quality
Print settings in SLA can have a significant impact on results.
Compared to something like FDM, settings are generally simpler with fewer variables, especially around temperature. Instead, exposure time is a primary control. This is the time each layer is exposed to light, directly affecting curing.
A balance is required because underexposure and overexposure are both possible. The first layers are typically exposed for longer to create a strong foundation that adheres to the build platform.
For the rest of the print, layers may be slightly underexposed so the next layer can form a chemical bond. At this stage, the part is solid but not fully hardened, known as the green state, where polymerisation is not yet fully complete. Post-curing under UV light is required to achieve the final properties.
Layer height affects detail and surface finish, with smaller layer heights improving detail but increasing print time and risk of errors, so they're best reserved for highly detailed parts.
Lifting speed is how quickly the build platform moves between layers. Faster lifting reduces print time but increases force on the release film, shortening its life and increasing the risk of print failure or surface finish issues.
SLA Printing Orientation and Supports
Print orientation is one of the most important topics in SLA because it strongly affects print success, surface finish, and dimensional accuracy. Since resin parts form chemical bonds between layers, orientation has less impact on strength compared to something like FDM.
A core goal is to minimise the release force on the film. This is largely achieved by reducing the cross-sectional area of each layer and avoiding shapes that act like suction cups. Large flat surfaces facing down towards the film are best avoided, particularly when surface finish matters.
Supports must also be considered. Supports hold the part stable during printing, but when removed, they leave witness marks. Support settings such as density, tip size, and placement can be adjusted, and supports can often be moved away from important features.

SLA Printing Resins Options
Resin material options may initially seem limited compared to what we see with FDM filaments, but there's a wide range available for different applications, and the simplest way to understand resin selection is by the marketed resin type and intended properties.
For our automotive focus, general-purpose and engineering resins are most relevant. There are plenty of variations within these two categories, all with different attributes to suit your use case. Here are some examples:
- Water-washable resin is similar to standard resin but can be cleaned with water rather than isopropyl alcohol, typically at a higher price point.
- Precision resins are designed for low shrinkage during curing, improving accuracy.
- Rapid resins prioritise print speed and efficiency over surface finish.
- Flexible resins replicate rubber-like flexibility, useful for shock absorption parts or handle grips.
- Elastic resins are softer and return faster, but are less strong.
- Silicone resins are soft and pliable, durable, and have good heat resistance, suitable for boots, gaskets, o-rings, and seals.
- Rigid resins are often glass-filled or glass fibre reinforced, making them extremely stiff, which can suit parts like aero components.
- Tough and polyurethane resins allow more elongation and impact resistance and are often marketed as ABS-like or Nylon-like.
- High-temperature resins can be suitable for engine bay parts.
SLA is ideal when surface finish and detail are priorities, but very small features can still lose definition, so 'design for manufacturing' or 'DFM' is very important. Typical feature guidance includes unsupported walls at least 1 mm thick and supported walls as thin as 0.5 mm. Minimum hole sizes can be as small as 0.5 mm, and fine detail is often good at 0.5 mm, sometimes down to 0.2 mm.
SLA can include finer threaded features due to its resolution, but thread strength is not high, so nut pockets are typically preferred for demanding fixtures. For hollow parts, escape or relief holes should target a minimum diameter of 4 mm to allow resin to drain easily.
Design choices and orientation can help reduce warpage. Maintaining a consistent cross-sectional area helps minimise internal stresses from curing. Avoiding large overhangs and unsupported structures also helps, and adding bracing can improve stiffness and reduce deformation.
Summary
SLA resin 3D printing cures liquid photopolymer resin layer by layer using a light source to create parts with high detail and excellent surface finish. Compared to something like FDM, SLA parts are more isotropic due to chemical bonding between layers, but they tend to be more brittle, and resin is typically more expensive than FDM filament.
Printer performance is influenced by the print engine type, build volume, print speed, and resolution, with XY and Z resolution being more meaningful than screen pixel count alone. Workflow involves slicing into layer images, printing with supports as needed, washing to remove uncured resin, and post-curing under UV light to reach final properties.
Print results depend heavily on exposure time, layer height, lifting speed, and thoughtful orientation and support strategies that minimise release film forces and protect surface finish. Resin selection and design for manufacturing considerations round out the process, ensuring parts suit the application and print reliably with minimal rework.


