Even the pros can't weld around poor preparation or fit-up, which is why a few simple steps can transform your TIG welding results.
In this article: Why Preparation Matters | Cleaning Raw and Existing Material | Using Acetone Correctly | Internal Tube Cleaning and Fit Up | Cutting and Material Preparation | Summary
Why Preparation Matters
The single biggest influence on the quality and appearance of your finished weld is the preparation of your workpiece. Every material you weld must be clean and free of dirt, oxidation, rust, oils, mill scale, paint, zinc, galvanising, or chrome. TIG welding is especially sensitive to contamination, and even small impurities will affect arc stability, bead consistency, and weld strength.
This is why professionals often spend more time preparing parts than actually welding them. Thorough preparation ensures clean, perfectly fitted material that makes the welding process smoother and produces stronger, more reliable results. It's easy to get impatient and skip ahead to laying down the weld itself, but the time invested here pays off every time you strike an arc.
Here at HPA, even if our material looks clean unless we know we personally just did that prep, we always give it a quick going over as there are all sorts of coatings or contaminations that won't show until you start.

Cleaning Fresh and Existing Material
If you're working with raw material, it'll typically arrive oiled or wrapped to protect it during transport and storage. This protection is beneficial if you plan to store your materials for longer periods, as it reduces oxidation and contamination from the environment, but once you're ready to work with the material, this coating needs to be removed.
Existing components present their own challenges. Parts already fitted to a vehicle may be painted, plated, or anodised, and ferrous materials may show surface rust. All coatings must be removed to expose clean base metal, at HPA, we always remove any coating at least 25 mm to 50 mm past the weld zone.
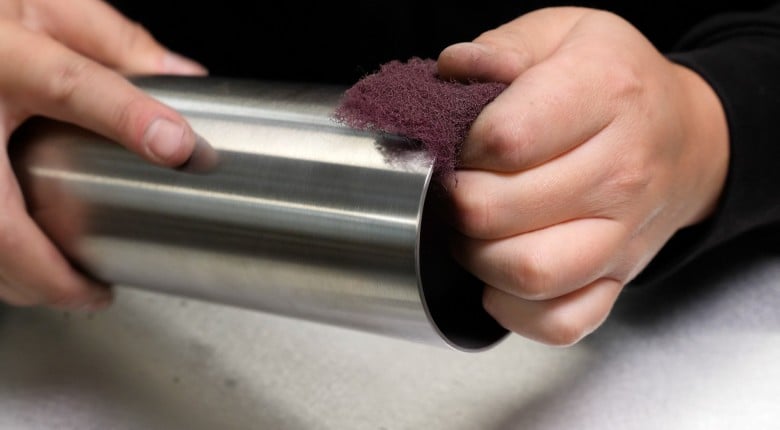
Painted or plated steels can be cleaned using a belt sander, linisher, or a flap disk. Uncoated mild steel or chromoly can be prepared with a handheld Scotchbrite pad to remove the outer layer and expose fresh metal. Even with clean raw materials, it's important to wipe them down with acetone before handling or cutting, preventing oils from being carried into the metal during the cutting process.

Using Acetone Correctly
Acetone is the preferred cleaning agent in fabrication because it removes oils completely and evaporates without leaving residue. This ensures your material is contamination-free before you weld. Degreaser or brake cleaner shouldn't be used because they leave residues that negatively affect weldability and can contaminate the weld.
Some brake cleaners in particular also have highly toxic chemicals that you don't want to breathe in, ever, so note this is not about trying to wrap you in cotton wool, it is simply a pointless risk that we hope you're smart enough to not take.
Also remember that acetone is highly flammable, so once you've wiped the part clean, move the bottle and rag well away from the welding bench. It sounds obvious, but a lot of workshop fires have started from a rag catching fire in the blind spot of someone's welding mask, as it's so easy to just pop them aside and forget.

Internal Tube Cleaning and Fit Up
If you're welding tubing, the inside surfaces matter just as much as the outside. Oils or contaminants inside the tube will burn off, affect weld quality and create smoke, which is particularly problematic when working in confined spaces like vehicle interiors. Deburring, followed by a quick wipe with acetone, removes these contaminants and reduces risk.
Proper fit-up is another critical factor. Unlike MIG, TIG doesn't allow you to bridge large gaps. A tight, precise fit requires less heat, produces a cleaner bead, and results in a stronger weld. We find that this is especially important with chromoly, which is sensitive to heat and can become brittle in the heat-affected zone if excessive heat is applied.
Rushing this stage is a common mistake for beginners. Complex joints can be fiddly, but this isn't where you should save time. Patience and accuracy will always show in the final weld. If you want more guidance on creating perfect fit-ups, the Fabrication Fundamentals course is an excellent resource.

Cutting and Material Preparation
The way material is cut affects weld quality more than many beginners realise. Tools like angle grinders or drop saws with abrasive cut-off wheels embed particles into the metal, and if these aren't removed with a hand file, they can contaminate your weld, weaken the joint, and make the process unnecessarily difficult.
At HPA, we always use a band saw or a slow-speed cold saw as the preferred cutting method. Cutting lubricants are commonly used with these tools, but they can also introduce contaminants, so we recommend using a cutting wax because it doesn't contain the oils found in liquid lubricants. Even so, any wax residue still needs to be cleaned with acetone before welding.
If you're notching roll cage tubing with a hole saw, cutting wax is also recommended because it significantly extends tool life. Wityh that said, lubricants can be a matter of personal preference. Our band saw, for example, has been used without lubricant for over a year at HPA with no noticeable wear.
Summary
Taking the time to properly prepare and clean your material, ensuring accurate fit-up up and using the correct cutting techniques, removes the majority of problems before welding even begins. Every minute spent here makes the following steps easier and improves the strength, consistency, and appearance of your welds.
A clean, well-prepared workpiece is the foundation for every quality TIG weld. Put in the time at this stage, and the results will speak for themselves when you pick up the torch.
If you'd like to master TIG welding, make sure you check out the Practical TIG Welding course.


